Chapter 10
Getting Productive with Kindle Fire HD
In This Chapter
![]() Understanding how Kindle Fire HD treats documents
Understanding how Kindle Fire HD treats documents
![]() Working with Calendar
Working with Calendar
![]() Viewing images in Photos
Viewing images in Photos
Kindle Fire HD isn’t just about watching movies and playing music. You have several ways to use the device to get your work done and share documents and images with others.
In this chapter, we help you explore how Kindle Fire HD helps you view and share documents. The new, pre-installed Calendar app, which we cover in this chapter, is useful for keeping on schedule. Also, the Photos app lets you view or edit photos for work or play, as explained in this chapter.
Understanding Kindle Docs
One of the items you see across the top of your Kindle Fire HD Home screen is the Docs library. This is where you can view your personal documents (see Figure 10-1). You can also save docs to Favorites on the Home screen, or upload docs from your computer to the Amazon Cloud.
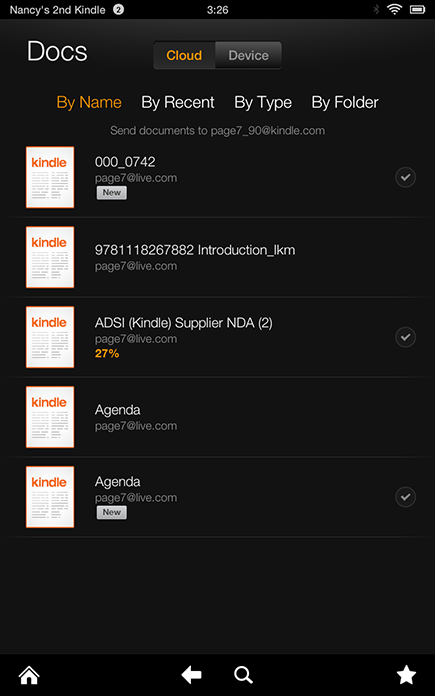
Figure 10-1: Tap Docs from the Home screen to open the Docs library.
In the following sections, you see how docs get onto your Kindle Fire HD and how you can view and share them. We also provide some advice about using productivity software on Kindle Fire HD to get your work done.
Getting docs onto the Kindle Fire HD
To get a doc onto your Kindle Fire HD, you can transfer it from your PC or Mac by using the included micro-USB connector, or you can send it to your device at your Kindle e-mail address. (Locate this address by opening your Docs library; it’s listed under the sort options near the top of the screen.)
Documents come in different formats. Kindle Fire HD supports a variety of document formats, including TXT, Microsoft Word DOCX, HTML, RTF, and PDF, as well as Amazon’s MOBI or ASW formats.
If you send a document to your Kindle e-mail address, the file appears in your Docs library automatically. Kindle formats (MOBI and AZW) are also supported, and some documents will be converted to this format automatically. Kindle Fire HD even supports compressed (ZIP) file formats and automatically unzips them when they’re transferred to your device via e-mail.
Although you can view these documents, as shown in Figure 10-2, you can’t edit them on your Kindle Fire HD without downloading an app such as OfficeSuite Pro.

Figure 10-2: A PDF document displayed on the Kindle Fire HD.
To transfer docs to your Kindle Fire HD, grab the micro-USB cable that came with Kindle Fire HD and follow these steps:
1. Attach the micro-USB end of the cable to your Kindle Fire HD.
2. Attach the USB end of the cable to your computer.
Your Kindle Fire HD appears as a drive labeled “Kindle” in Windows Explorer (Windows) or Finder (Mac).
3. Click the Kindle drive to open and view files on the drive (see Figure 10-3).
4. Double-click the Internal Storage folder and then click and drag files from your hard drive to the Docs folder in the Kindle Fire HD window.
Drag documents to the Documents folder, pictures to the Photos folder, audio files to the Music folder, and so on.
5. Tap the Disconnect button on your Kindle Fire HD to safely eject the Kindle Fire HD from your computer.
You can now unplug the micro-USB cord from your Kindle Fire HD and computer.
 After you’ve sent personal documents to your device using your Send-to-Kindle e-mail address, your documents are automatically stored in the Amazon Cloud, where you can download them to any other Kindle device you may have.
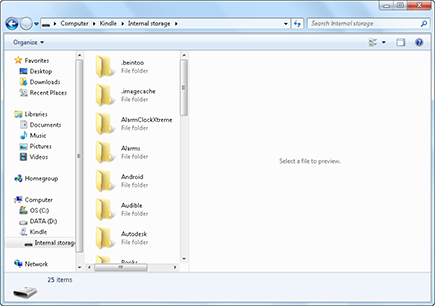
Figure 10-3: Your Kindle Fire HD appears like an external drive on your computer when attached using a micro-USB cable.
Opening docs
After you put a doc onto your Kindle Fire HD by either transferring it from a computer or receiving it through Kindle e-mail, you can view the document by following these steps:
1. Tap Docs on the Kindle Fire HD Home screen to open the Docs library.
2. When the library opens (see Figure 10-4), tap a sort option, if desired, to change the order of the displayed documents.
You can sort by these options: By Name, By Recent, or By Type. If you are looking at docs in your Cloud account, you can also choose By Folder; you can create folders from the Amazon Cloud site.
3. When you find the document you want to view, tap the arrow to the right of it to open it.
At this point, all you can do is view a document, not edit it — although with documents using Microsoft Word format, you can add notes and highlights. However, you can’t edit a document at all without a third-party app.
E-mailing docs
When you have a doc on your Kindle Fire HD, you can view it and also share it with others as an e-mail attachment. Follow these steps to attach a doc to an e-mail message:
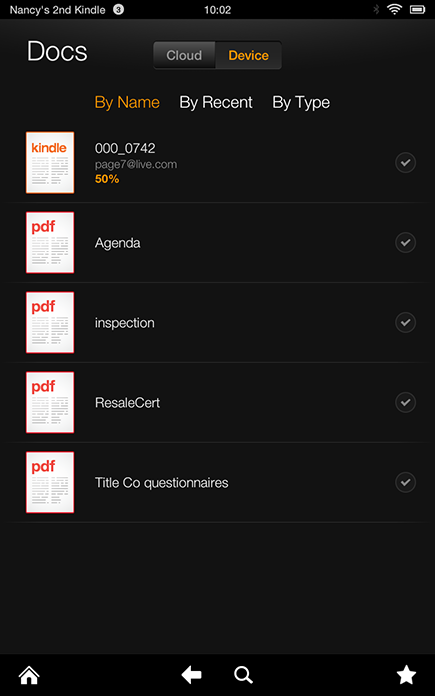
Figure 10-4: The Docs library with sort options.
1. Tap the Favorites button on the Home screen and tap the E-mail app.
The E-mail app opens.
2. Tap your Inbox and then tap the New button.
A blank e-mail form appears.
3. Enter a name in the To field, a subject, and a message.
4. Tap Options and then tap the Attach button.
In the menu that appears (see Figure 10-5), choose to attach an item from OfficeSuite or from your personal Photos or Videos. If you choose OfficeSuite you can then tap the My Documents folder to access all the documents in your Docs app. You can also choose Internal Storage, which will include folders for various libraries, including Music, Books, and Docs.
5. Tap Send.
Your document goes on its way, attached to your e-mail.
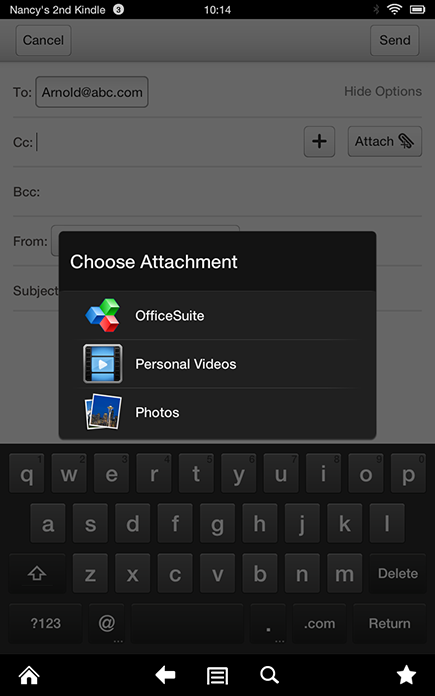
Figure 10-5: Attaching a doc to an e-mail message.
Taking documents further
If you want to edit documents on your Kindle Fire HD, consider OfficeSuite Pro (see Figure 10-6). This app will cost you $14.99, but it lets you both view and edit Microsoft Word and Excel documents as well as view Microsoft PowerPoint files.
If you open the OfficeSuite app that comes with your Kindle Fire HD, you can tap the Upgrade to OfficeSuite Pro icon in the lower-left corner to get the more robust app.

Figure 10-6: OfficeSuite Pro offers common office productivity tools.
Staying on Time with Calendar
The pre-installed Calendar app is new with Kindle Fire HD. The simple calendar interface allows you to sync with calendars from your e-mail account, view and edit events, and create new events.
Calendar views
Before you can use many of Calendar’s features, you have to sync it with a calendar account, typically through your e-mail provider. When you first open Calendar, you see the blank calendar shown in Figure 10-7.
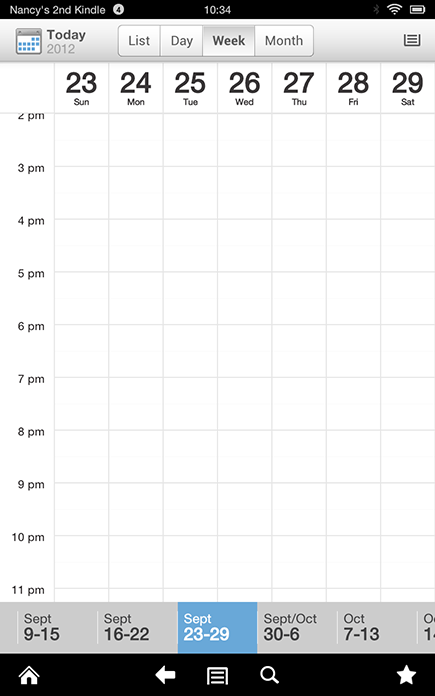
Figure 10-7: The Calendar app is a welcome addition to the Kindle Fire HD.
Tap a tab to display the calendar by Day, Week, or Month, or to display a List of events. Note that if you tap a date in the Month view, that date opens in Day view.
To move to other dates, use the buttons along the bottom of the screen. In Day view, these will be dates just before and after the currently displayed day; the buttons work similarly for Week and Month views.
Syncing with a calendar account
You can’t add a new event until you sync with a calendar in an online account. To do so, tap the Menu button in the top-right corner, tap the New Event button, and follow these steps:
1. Tap the Add Account button.
2. Tap an account in the list, such as AOL, Exchange, or Hotmail, or tap Other Provider for any other type of account.
3. On the screen shown in Figure 10-8, enter your account information and tap Next.
You may see a message about how POP access is required to get Plus features, if they’re available for your account. Tap OK to proceed.
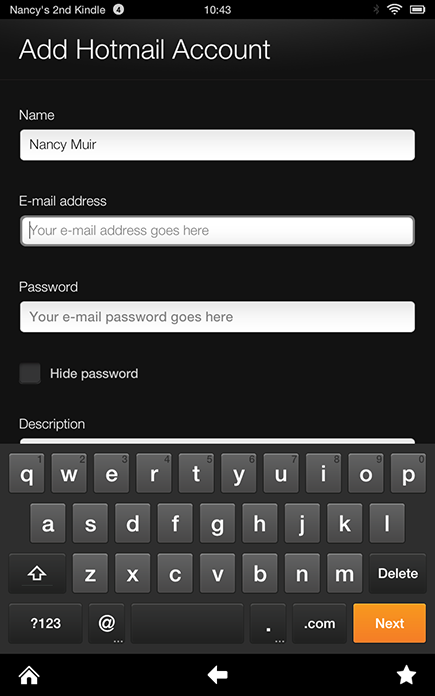
Figure 10-8: Enter information about the account you want to sync with Calendar.
Kindle Fire HD may take a few seconds to sync with your account. You return to Calendar and can now add and edit events.
Creating a new Calendar event
Events are brought over from the calendar you sync with, but you can also add new events. With either Day or Week view displayed, follow these steps to add an event:
1. Tap a date or time in the calendar. Tap the Menu icon in the top-right corner of the screen and then tap the New Event option.
2. The New Event form, shown in Figure 10-9, appears.
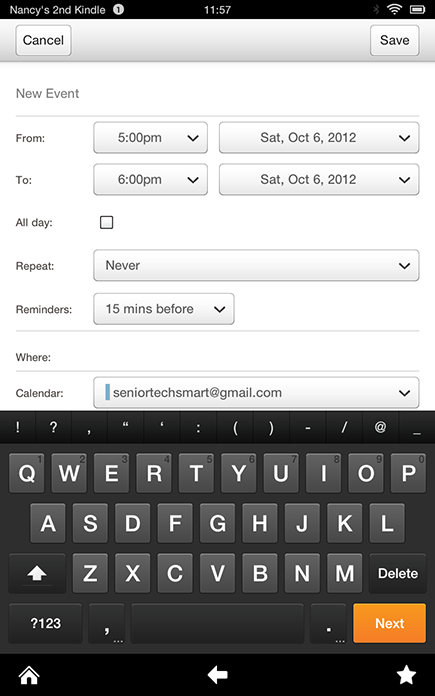
Figure 10-9: Fill out this screen to add a new event to your calendar.
3. Tap the words New Event and enter a title for the event.
4. Tap in the From time and date fields to choose a start time; do likewise with the To time and date fields.
If the event runs all day, skip the From and To field settings and simply tap the All Day check box.
5. Tap the Repeat field if you want an event to repeat at a regular interval.
6. You can tap the Reminders field to choose to get an alert on your Kindle Fire HD at a certain interval before the event commences.
7. If you want to invite a person you’ve saved as a contact, tap the + (plus sign) button in the Invite field.
8. If you want, you can make entries in the Where and Notes fields.
9. Tap Save.
The event appears in your calendar.
To edit an event, simply tap to open it and then tap the Edit button.
Viewing Photos
Kindle Fire HD has a pre-installed Photos app for photography lovers, although its features are pretty basic. Still, Photos allows you to view your photos on the device’s bright screen.
Getting photos onto Kindle Fire HD
The Kindle Fire HD’s camera can’t capture photos, so you have to get photos onto the device by saving images from the Internet using your Silk browser or copying them from your computer by using your micro-USB cable (see the section “Getting docs onto the Kindle Fire HD,” earlier in this chapter). Using this procedure, you can drag and drop photos into the Pictures folder on your Kindle Fire HD.
Viewing photos
After you load photos into your Pictures library and disconnect the micro-USB cable, you can tap the Photos app on the Home screen. Doing so displays an album that represents the folder you copied to your Kindle Fire HD (see Figure 10-10) and other albums that you may have created from downloads of photos (from e-mail or the web) and screenshots. If you copy another folder of photos, it will come over as a separate album. Photos in albums are organized chronologically by the date you placed them on your Kindle Fire HD.
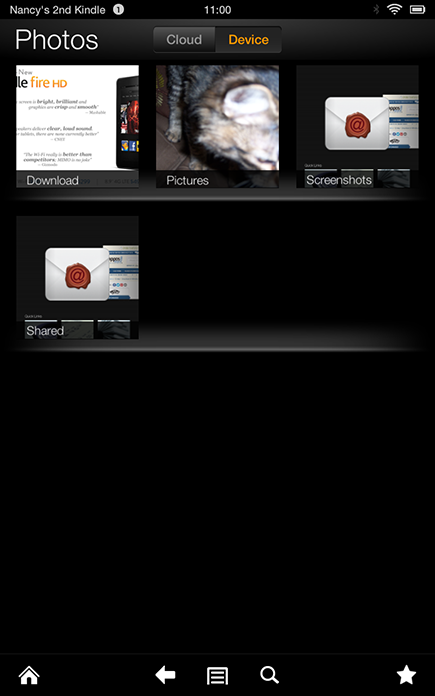
Photos used by permission of Ashley Ernstberger Photography
Figure 10-10: Photo albums in the Gallery.
You have the choice of three main actions to take to view pictures:
 Tap an album to open it and view the pictures within it.
Tap a picture to make it appear full screen.
Swipe left or right to move through pictures in an album.
You can also tap the E-mail button in the Options bar while in Photos to e-mail the displayed photo. Another method of sharing via e-mail is to tap the Options bar, tap Share, and then tap Send with Email. In the e-mail message that appears with the photo already attached, enter an address, subject, and message and then tap the Send button.
Managing photos in Cloud Drive
Another way to get your photos onto your Kindle Fire HD is to upload photos from your computer to Amazon’s Cloud Drive. Cloud Drive provides up to 5GB of free storage of photos and easily transfers those photos to your Kindle Fire HD.
You have to install a free desktop app on your computer to use Cloud Drive. To do so, go to Amazon.com, tap Your Account, and then tap or click Your Cloud Drive on the list that appears. Then follow the onscreen instructions to install.
You can manage your Cloud Drive photos in two ways: Move photos from one album to another, and rename photos or photo albums:
Moving photos: To move a photo, you need to go to the Amazon Cloud Drive using a browser (go to Amazon.com, tap Your Account, and then tap or click Your Cloud Drive on the list that appears). Use the More Actions drop-down list and choose Move X Items to (where X is the number of items you’ve selected) and then choose the folder on your Cloud Drive to move the item(s) to.
Rename: You can rename a picture or albums from within Cloud Drive by tapping or clicking the More Actions button and then choosing Rename. You can also rename an album from your Kindle Fire HD by long-pressing the album (press and hold for a few seconds) and choosing Rename from the menu that appears.
Rotate Left: Tap this tool to rotate the image 180 degrees to the left.
Rotate Right: Tap this tool to rotate the image 180 degrees to the right.
Note that you can also enlarge or reduce a photo by pinching and unpinching with your fingers on the touchscreen.
To delete a photo, simply tap the Trash button on the Options bar.
 You can’t retrieve an item after you’ve deleted it from your device, so do so with care! (If you transferred the item from your computer or from Cloud Drive, you can always retransfer it, of course.)