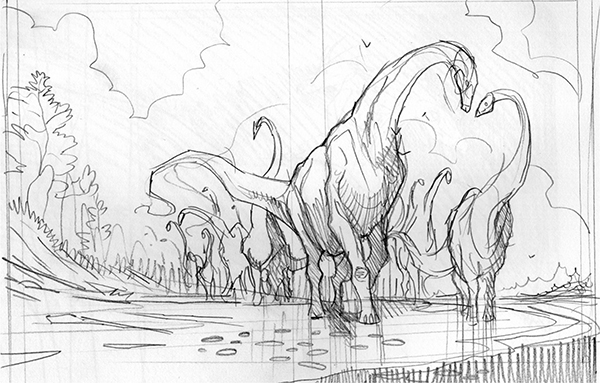
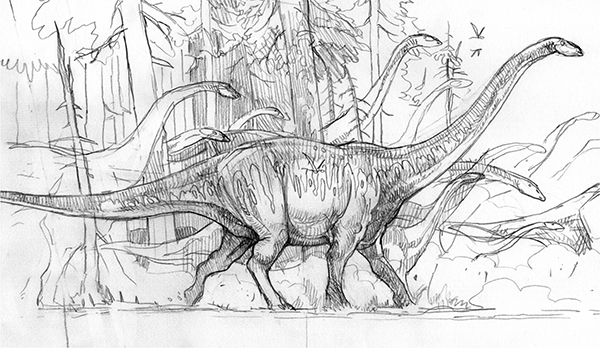
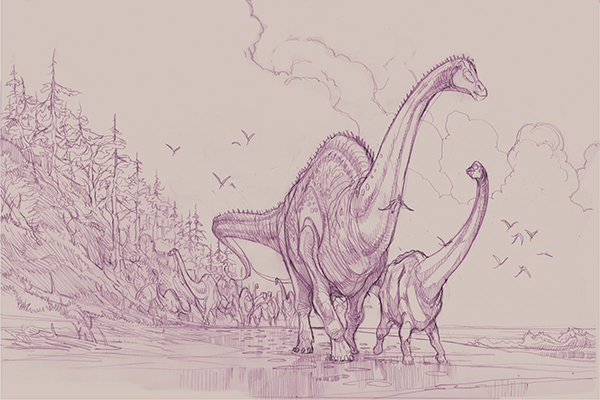
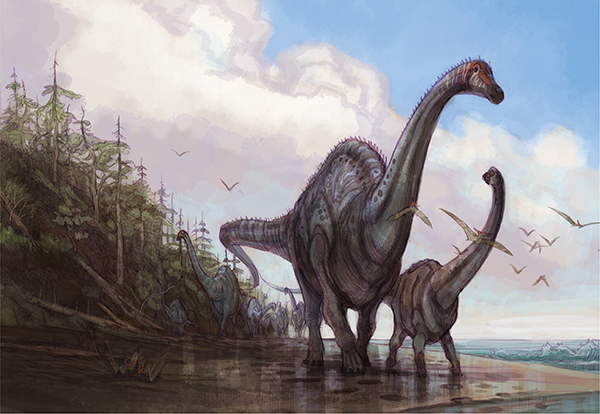
My first thought for depicting the apatosaurus was to show its massive size and its herding behavior. Many sauropod prints have been fossilized in the mud along water so I felt this a good place to start.
Some paleontologists over the years have suggested that sauropods were semiaquatic in order to buoy their massive weight. Although this is an interesting idea, and although sauropods like apatosaurus would indeed have spent some time in the water to cool off (much like elephants), the need to consume massive amounts of vegetation would have likely kept them perpetually moving. Dense forests would be impractical and dry deserts would not provide enough food for a whole herd. Following along the shore of the Panthalassic ocean was probably the safest route for these titanic herds as they migrated from winter to summer feeding and breeding grounds throughout Pangaea. The wet packed sand of the beach would be as solid as concrete under their immense weight. Seaweed along with scrub pine and cycads would provide enough food, while the seaside would provide a safe haven for the herd’s young so they could not be attacked by predators.
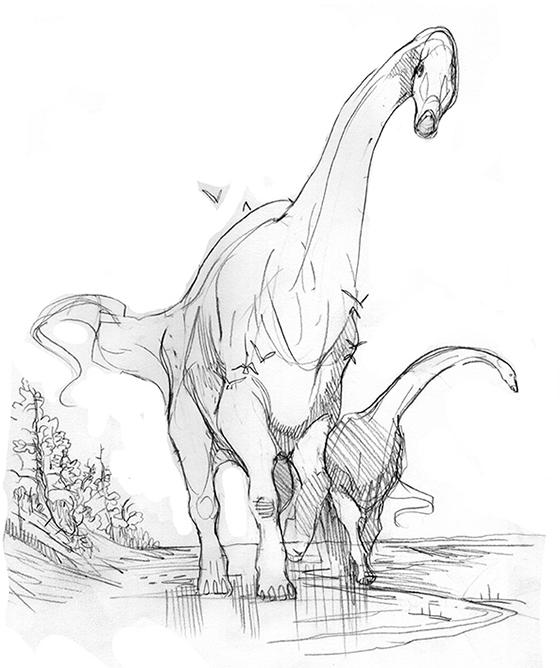
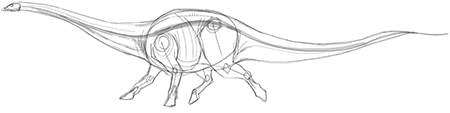
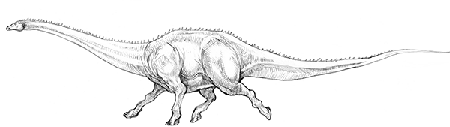
Before starting the final painting, visualize the composition by working out a few sketches. For an apatosaurus, it is best to start with the spine. The long fluid backbone of the sauropod is central to its design. Next flesh out the muscle masses, then add details such as flesh, back-spines, wrinkles and markings to complete the animal.
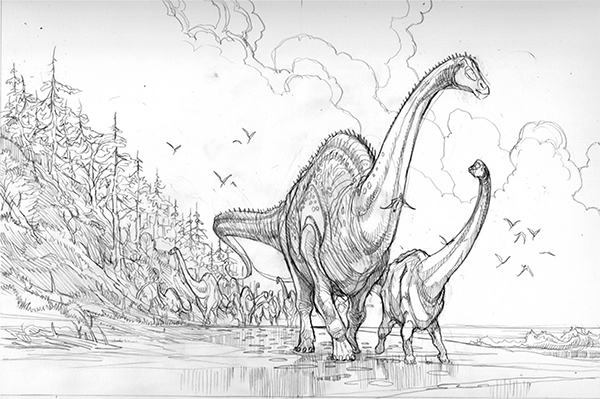
The most important aspect of drawing an apatosaurus is scale so they look truly massive. Since there were no cars or people in the Mesozoic Era, I’ve placed some pterosaurs pecking for shellfish in the foreground, and an eroded bank of pine trees in the background to help the viewer judge the size and scale of the dinosaurs.
I like to use a 11" × 17" (28cm × 43cm) flatbed scanner set to 300dpi grayscale to import my drawings. The advantage of a flatbed scanner is that if your drawing is bigger than the scanning bed you can scan it in several pieces then stitch it together in photo editing software. For really large drawings or paintings you can also use a digital camera to photograph your work. Some smartphones and tablet cameras also work for this application.
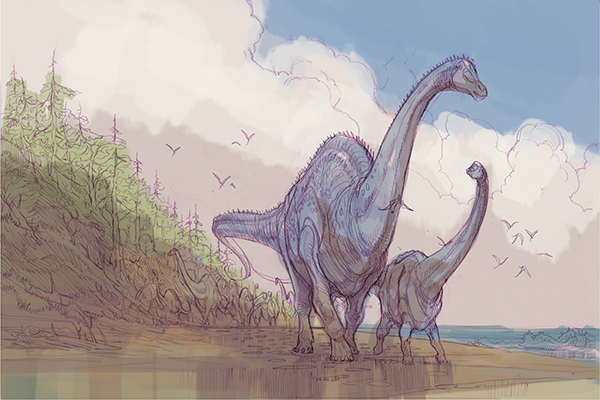
Using the color palette, establish broad shapes of color and shadow. It’s at this stage that I envision the heads of the apatosaurus rising out of the shadows of the dune and into the low sunshine.
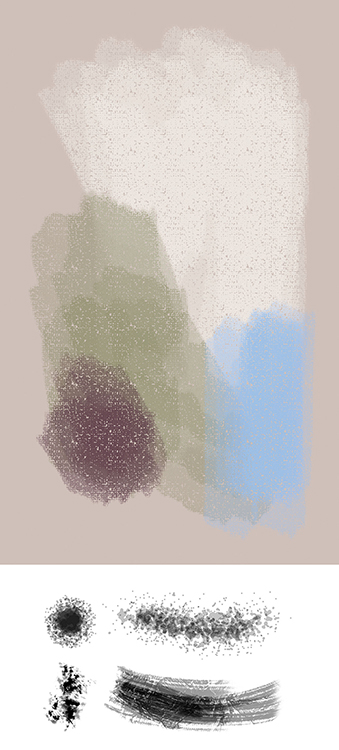
Color Palette and Key Brushes
Refine the sky, clouds, trees and water to establish the background. Deepen the shadows throughout and reflect a bit of the sky tones on the sand to indicate that the beach is wet.
The most important design element of the apatosaurus is the spinal column. The center line sweeps gracefully from the head to the tail like the arch of a suspension bridge. Rough in the rib cage, pelvic joints and muscles around the central column then add the details of skin.

1
2
3
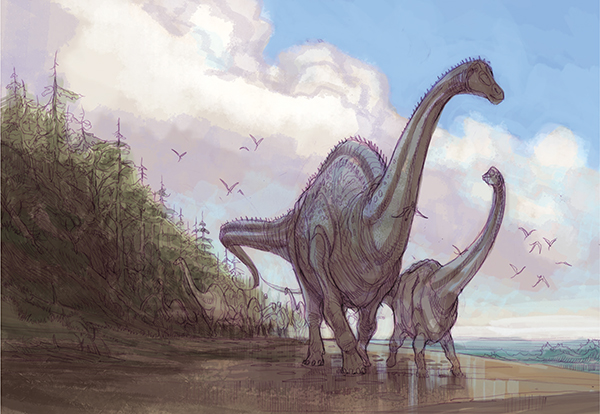
Reference the three elements guideline and review your painting. Once the underpainting and background have been established, complete the middle ground and subject. Here I added the apatosaurus skin patterns, wrinkles and colored facial markings.

Detail of the tree line with the underpainting applied using texture brushes. At this stage, you can still see the sketch beneath.
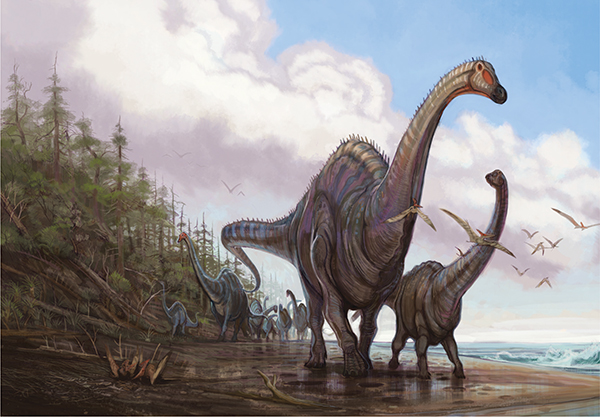
Add final details to help frame the image. The log in the foreground, the tidal pool and the small pterosaurs help the image appear more dimensional.