![]()
Chapter 12: Inventory, Receiving, and Storage
RECEIVING
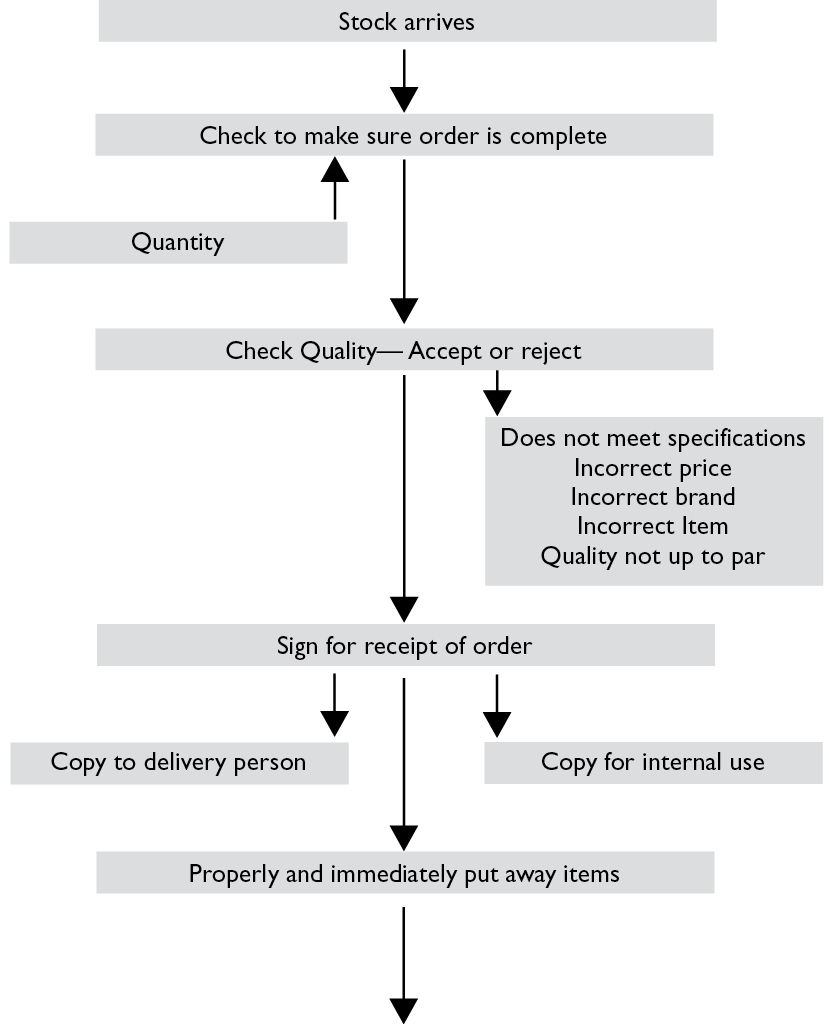
Receiving means checking your purchases to ensure the correct items have been sent. This task can be performed by the manager or delegated to a staff member. Even if you have a competent and well-trained staff member to receive your items, a supervisor needs to oversee the task because of quality and financial control issues. Also be aware that fewer deliveries help to control labor costs. The next page has a simple flow chart showing how the receiving process works.
Specific information must be checked when items are received into your inventory. Receipt practices should be kept simple while still maintaining complete records and accountability for your vendors. Basic equipment needs to be close at hand when deliveries are received, including scales, thermometers, dollies, conveyor belts, lift trucks or pallet jacks, and a laser gun scanner if you scan your PC labels.
Do you have a designated receiving clerk for your facility? When designating your receiving person, it is best to have another person serve as the storage and receiving clerk. It is helpful to have double checks in these areas and to involve different people in various stages of the process. For optimum benefit, your receiving person should not move items to storage but only verify the items, quantities, quality, and that the proper items were ordered and received.
Your receiving person should be intelligent, alert, and capable of checking the quantity and quality by doing necessary calculations and compiling reports. The person must understand the importance of doing the job properly. The receiver also needs to handle deliveries quickly while maintaining control over each step of the process. The delivery driver is on a tight schedule and delays in receiving can cause problems for the driver and your vendor.
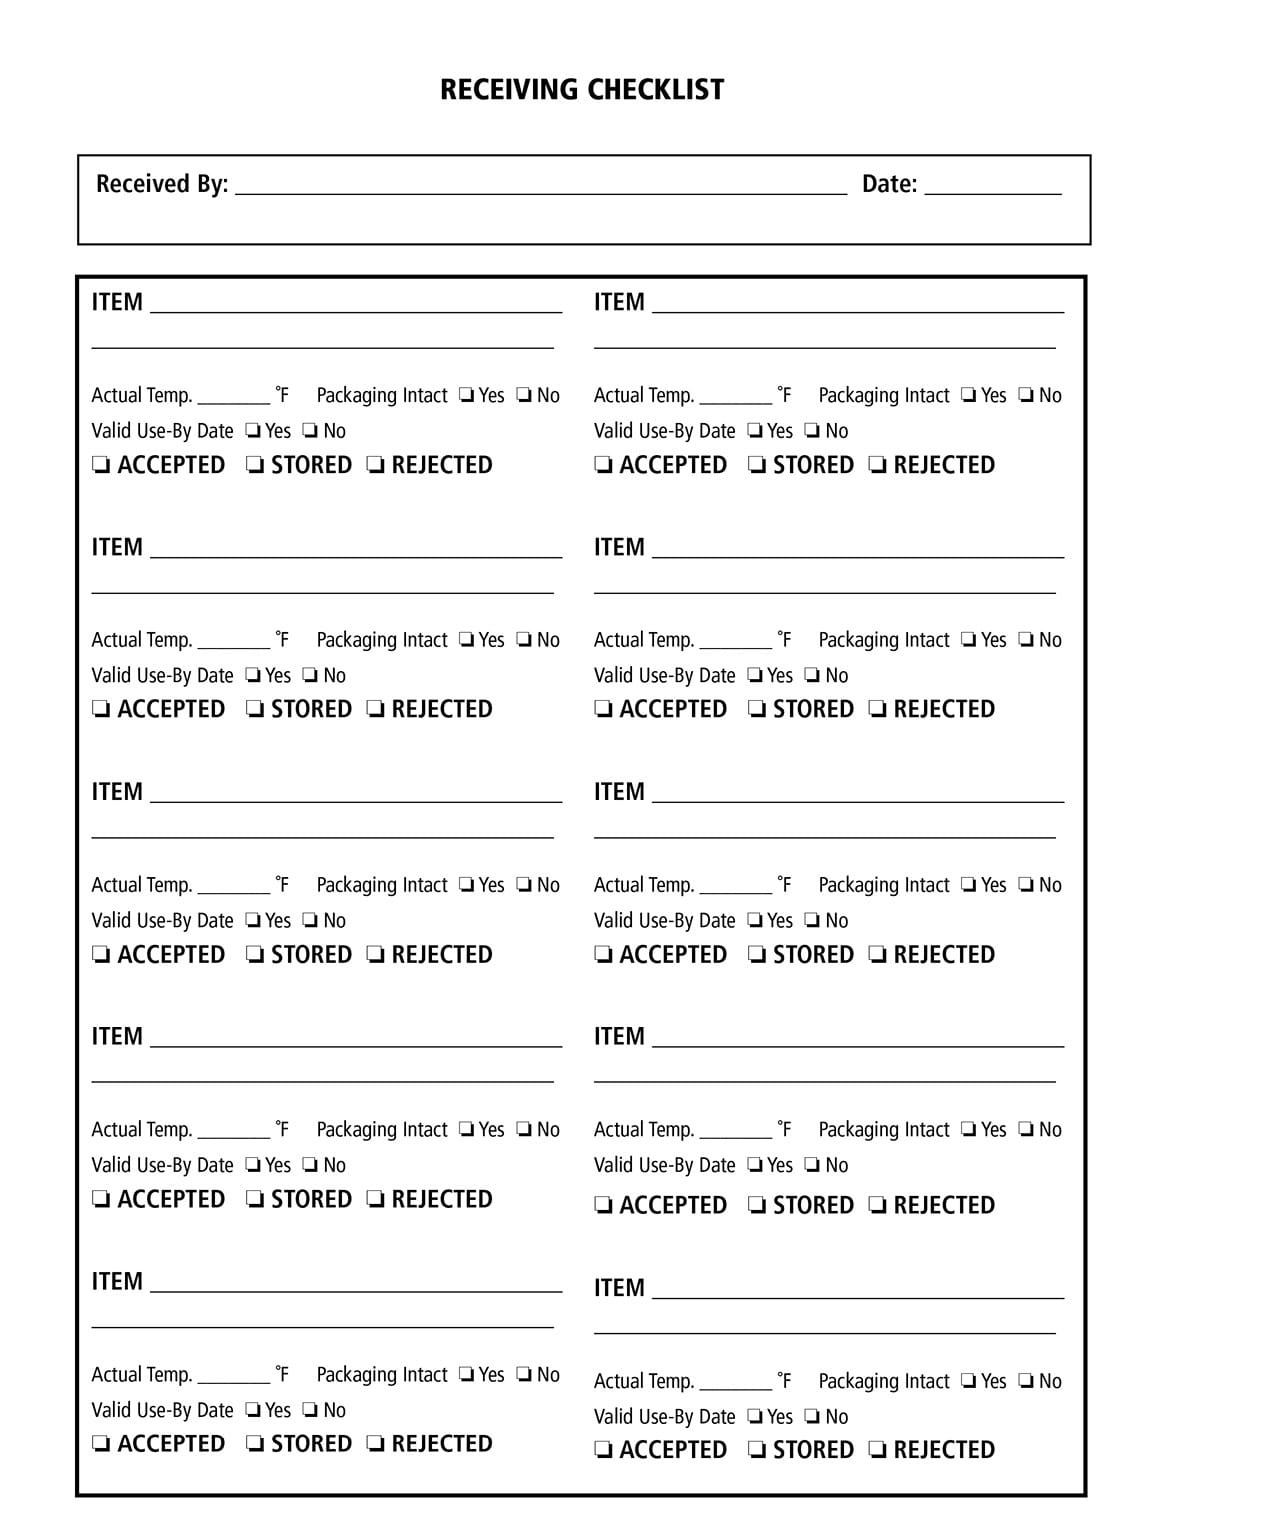
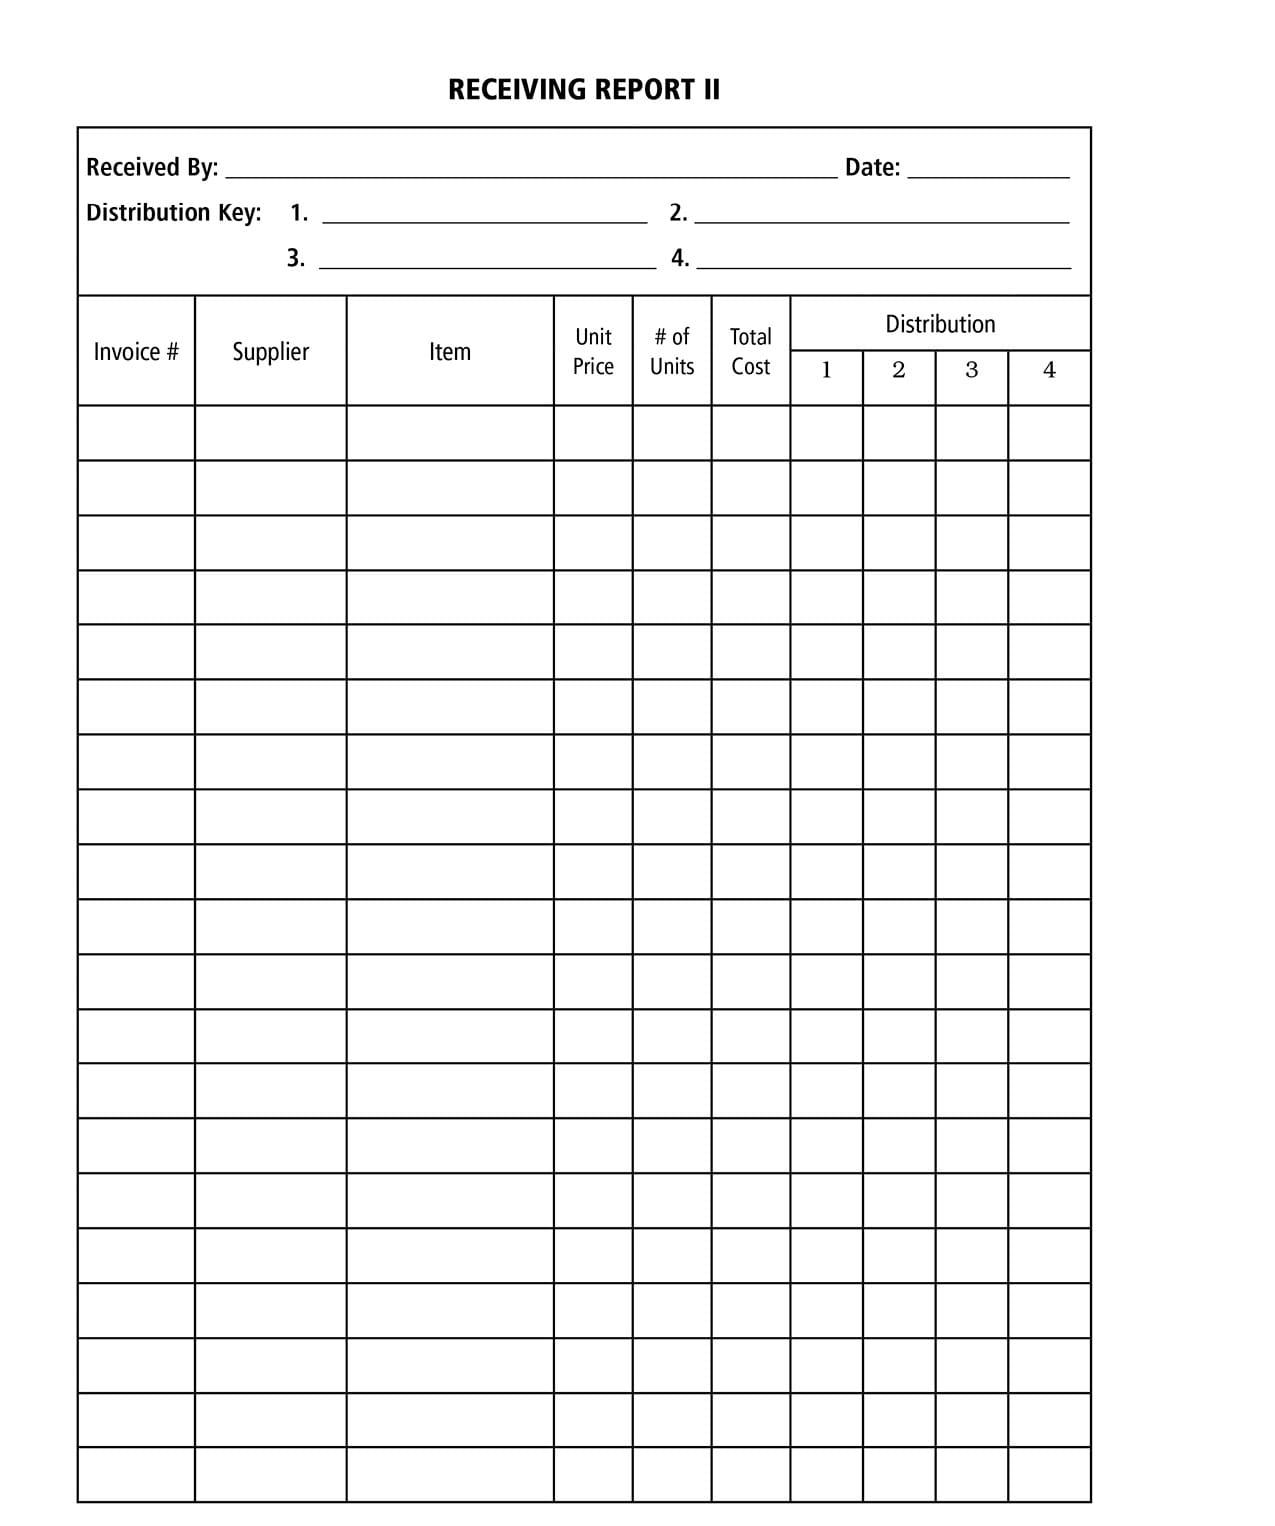
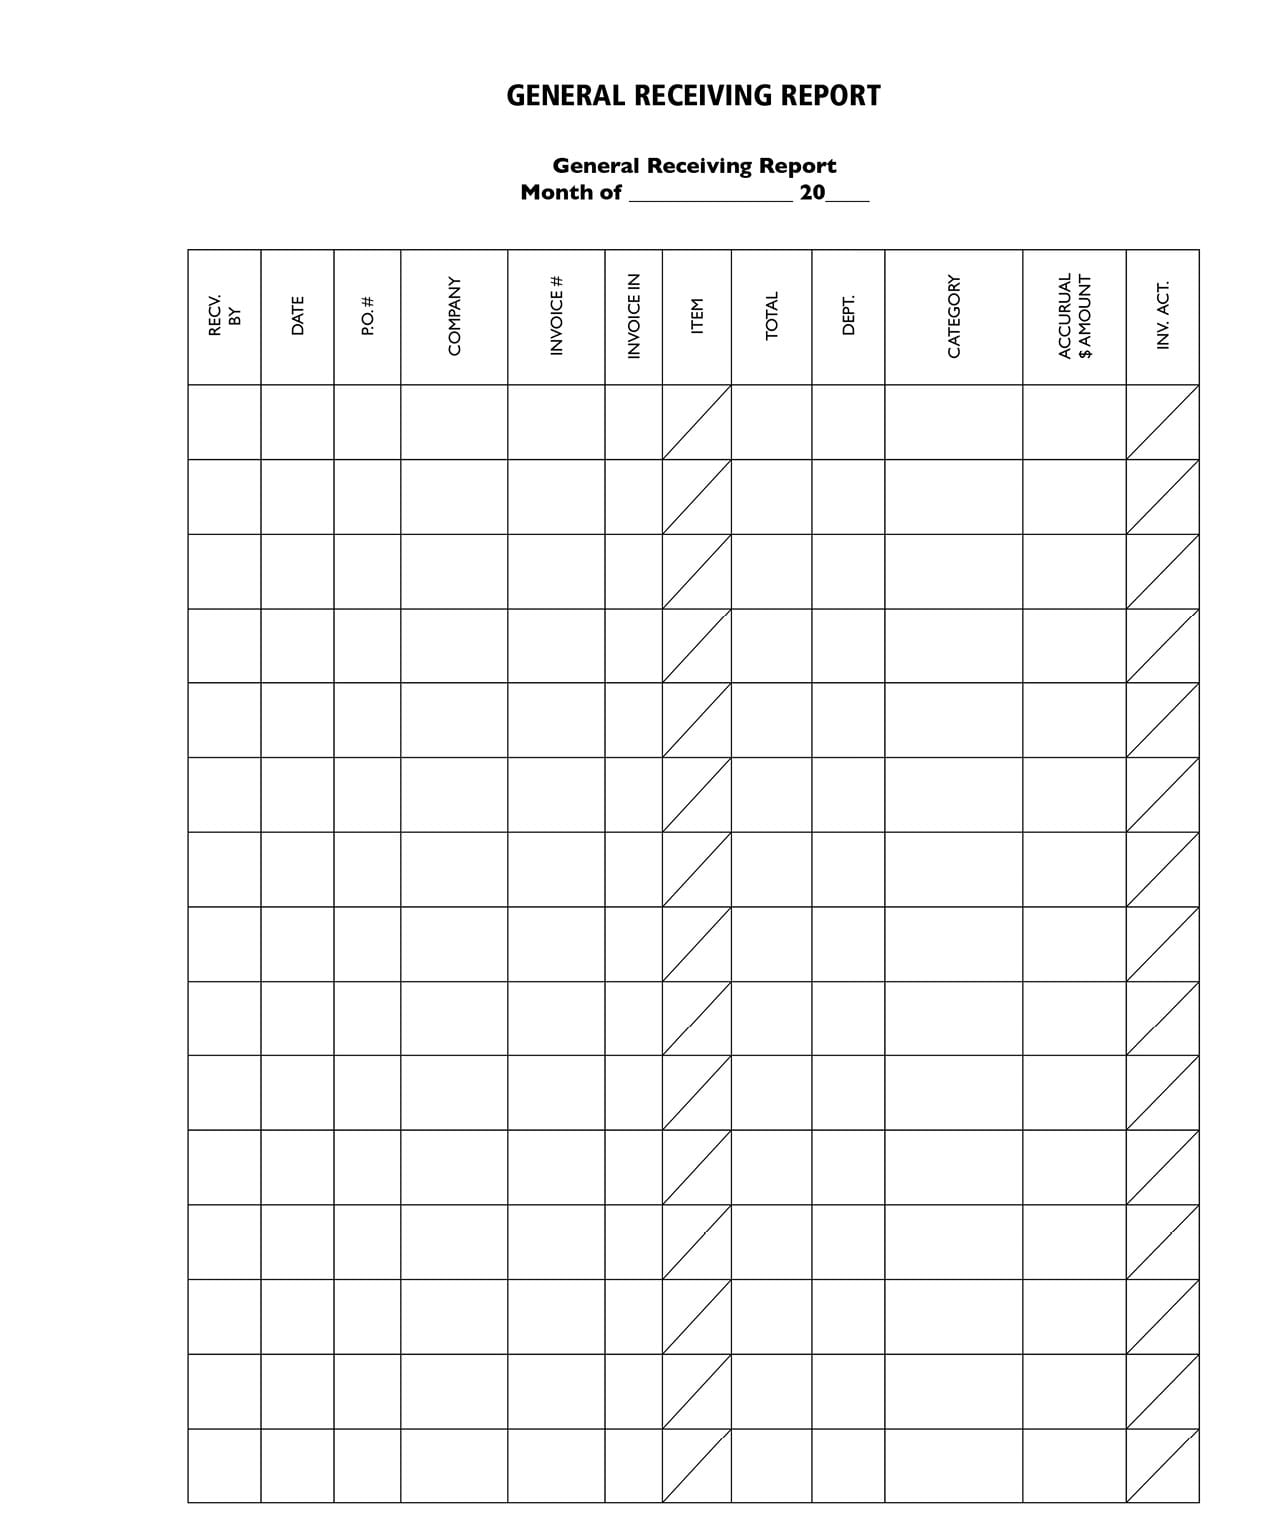
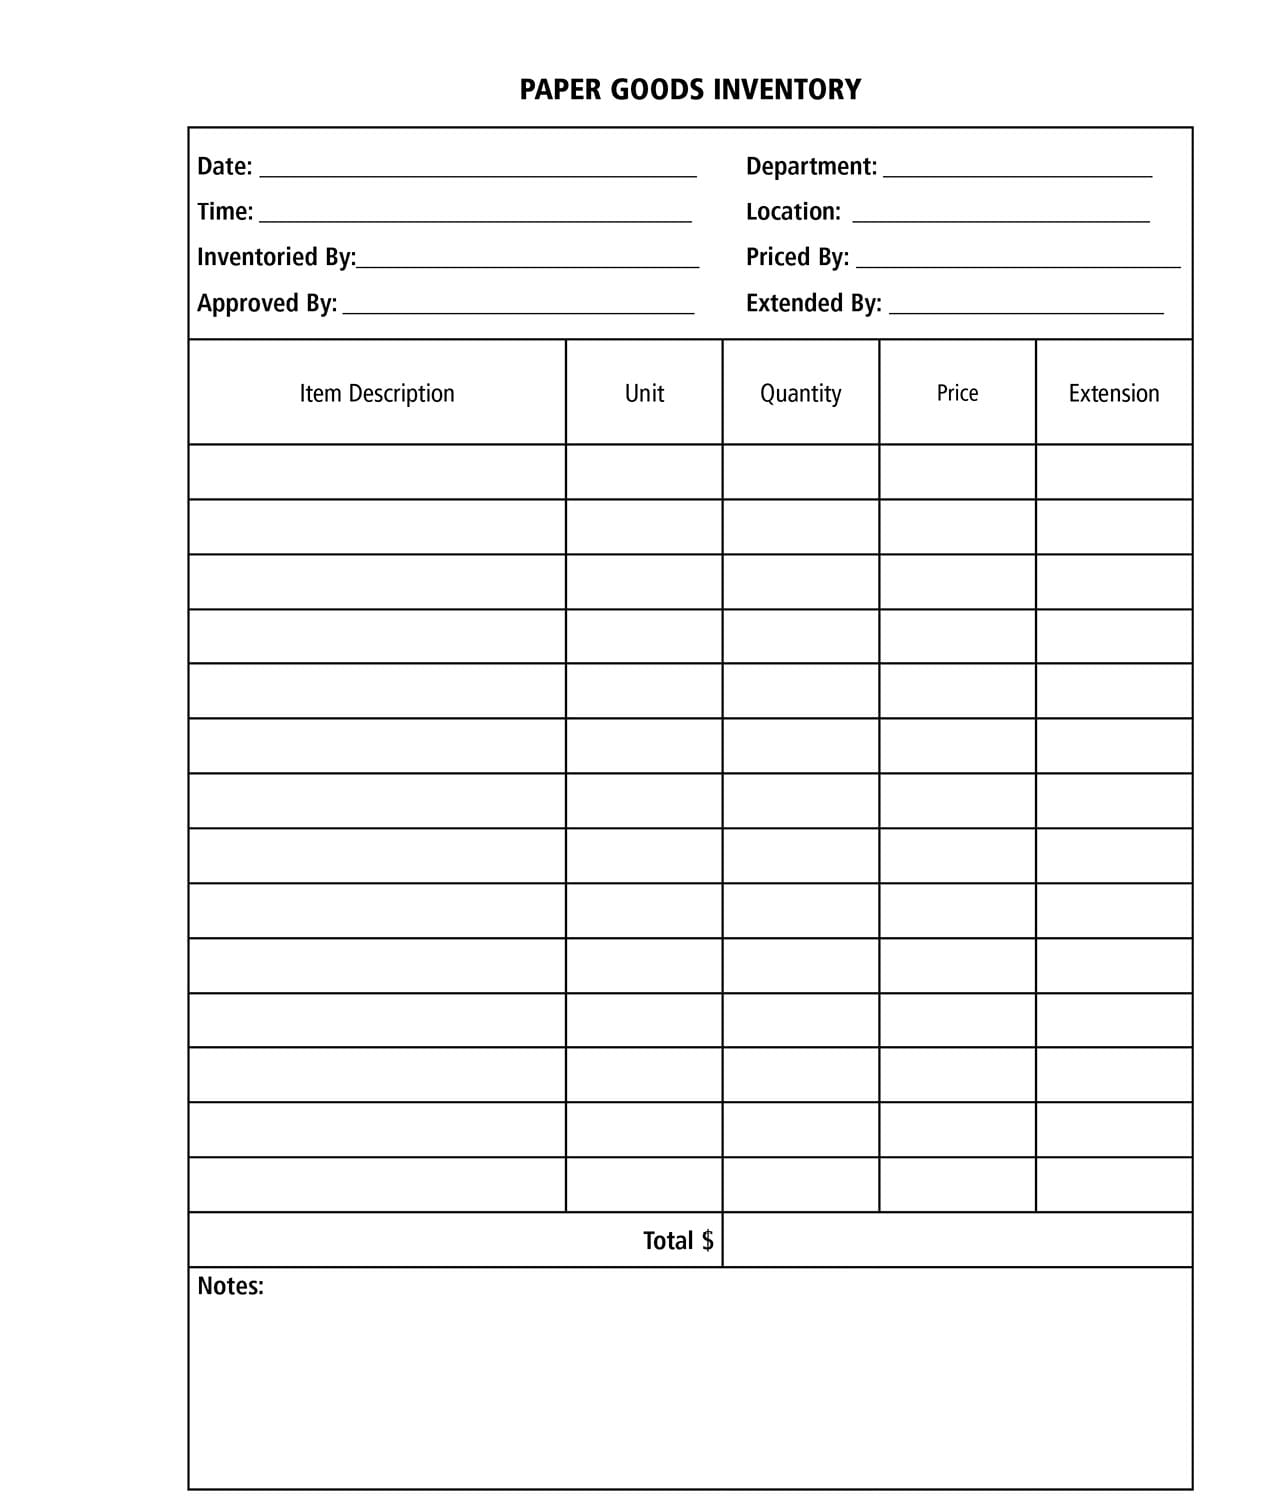
There are a wide variety of receiving checklists and reports that are helpful for your receiving person. You can find a Receiving Checklist and Receiving Report at the end of this chapter.
|
RECEIVING SYSTEM |
|
|
|
|
|
Tag Number: Date of Receipt: Weight Cost: ____ x ____ = ______ No. of #s Price Cost Name of Supplier: Date of Issue: |
Tag Number: Date Received: Weight: Price: Cost: Supplier: Date Issued: |
EFFECTIVE RECEIVING
As soon as the items are received, they need to be transferred to the proper storage facilities. There are three important elements of receiving: preparing to receive your order, inspecting the food when it arrives, and then verifying that you received everything you ordered. Your receiving person needs to be sure you are not being overcharged and that you are getting consistent quality. Here are some tips:
• Your bookkeeper should never pay for an invoice not signed by an employee. If no one feels confident signing for the delivery, you should not pay the bill. The bookkeeper should watch for unsigned invoices each day, giving you a chance to question on-duty staff members while the details are still fresh in their minds.
• All employees need to understand they are responsible for any items on that invoice once they sign the paperwork. If you discover a shortage in any of the delivered items, the employee who signed the invoice must explain the discrepancy.
• Put the items away at once. The longer the items are left out, the greater the chance of losing something or having it spoil. Try to schedule deliveries at a time when employees are available to receive the order and move it into storage.
• The delivery person must sign for any missing or damaged items before he or she leaves your facility. You will find it much harder to get credit if you contact someone later. Handle these problems immediately.
RECEIVING AND STORING SUPPLIES
Usually your deliveries will arrive at times that you have designated, between lunch and dinner. The manager should be responsible for receiving and storing your orders. When another person places the order, they should verify the right items were delivered.
Proper receiving and storage are critical. Anyone involved with these practices must be thoroughly trained because mistakes can be costly. These are the steps to process your orders:
1. Double check the delivery against the original order sheet.
2. Verify the quantity that was received.
3. Check the invoice to be sure the order you placed matches the items you received.
4. Verify the prices, totals, date, company name, and signatures on the invoice.
5. Weigh any items to confirm your order is correct.
6. When food items are received, date the containers, put the new items in back of older items, and store in the correct place right away.
7. Mark any discrepancies on the invoice. Call or fax to inform the vendor immediately of any overage or shortage. If the order was COD (cash on delivery), you need to take into account mistakes in your order before paying.
Many facilities have a box in the kitchen where all invoices and packing slips are placed during the day. At the end of the shift these are taken to the manager’s office and filed in the designated place. Remember that any missing or incomplete invoices will make the bookkeeper’s job difficult.
You can implement a receiving policy. It is easy to misplace products in the facility if no one is assigned to check in the orders. Sometimes, when someone moves things aside, the items cannot be located later to check the order.
RECEIVING TIPS
Here are important guidelines to follow as you prepare to receive your order.
• Calibrate your scales and thermometers and store them in the right places. Large scales should be near your delivery entrance. Smaller scales are placed in the work areas. Each cold or heated storage area should have thermometers. A large walk-in freezer should have more than one thermometer to ensure consistent temperatures.
• Any carts you use to move food items should be sanitary.
• Clear sufficient storage area in the refrigerator and freezer before the order arrives.
• All items need to be dated when they are received.
• The receiving and delivery area should be clean and well lighted.
• As the order is moved to storage facilities, clear all empty containers and dispose of trash as soon as possible.
• The floor needs to be cleared of food particles and debris.
• Make it clear to the delivery personnel that you will verify your order before she leaves your facility.
• Do a quick inspection of the delivery truck when it arrives. If you see conditions that concern you, take time to look closer.
• Check the food immediately.
• Verify expiration dates for all perishable items.
• All frozen foods must be in airtight, moisture-proof containers.
• Any thawed or refrozen foods must be rejected. Signs to look for are large crystals, solid areas of ice, or excessive ice on or in containers.
• Any swollen cans or cans that have flawed seals and seams, dents, or rust should be rejected right away.
• Verify the temperature of any refrigerated or frozen foods – especially critical with eggs, dairy products, fresh meat, fish, and poultry.
• Keep your eyes open for damage or pest infestations.
• All dairy products delivered in dirty flats or crates need to be rejected.
• Meat, fish, and items shipped by the pound need to be weighed and marked. Ensure all items are counted, weighed, and date stamped. This is not a suggestion; it is a necessity. Do not skip this step.
• Double check your invoice for accuracy, including price, damage, brands, grades, quality, and quantity. When items are incorrect, you need to make a notation and return these items to the driver. It is important that the driver sign the invoice to reflect any returns or corrections.
• Delivery people should not enter storage areas.
• Remove any frozen items from ice before weighing them.
• Check fish and poultry for ice.
• Items can be placed on the shelves in the order they are inventoried, making inventory easier.
• Not all employees need access to your storage areas.
• Clear trash bags can be used as a way to discourage theft.
• The delivery entrance should be locked and well lighted. It is also good to have an alarm on that door. A small peep hole is advisable to allow the employee who is receiving your delivery to verify who is outside before opening the door.
• Keep storage specifications in a handy place for your employees.
• Note correct storage temperatures in convenient places.
• Are your staff members trained in your stock rotation policies?
• Any items that have questionable expiration dates should be refused or sent back on the truck.
• Calibrate your scales regularly to make sure they are accurate. This should be done once a week and more often if needed.
• Are your scales adequate to weigh the items being shipped? If not, you should consider buying bigger scales. You can visit Scale World at www.scaleworld.com or Scale Man at www.scaleman.com.
Invoices are also an important part of the receiving process. The invoice will include:
• Company name and address
• Quantity to be delivered
• Quality of product to be delivered
• Price of each item
• Total price of each item shipped
• Total for each invoice
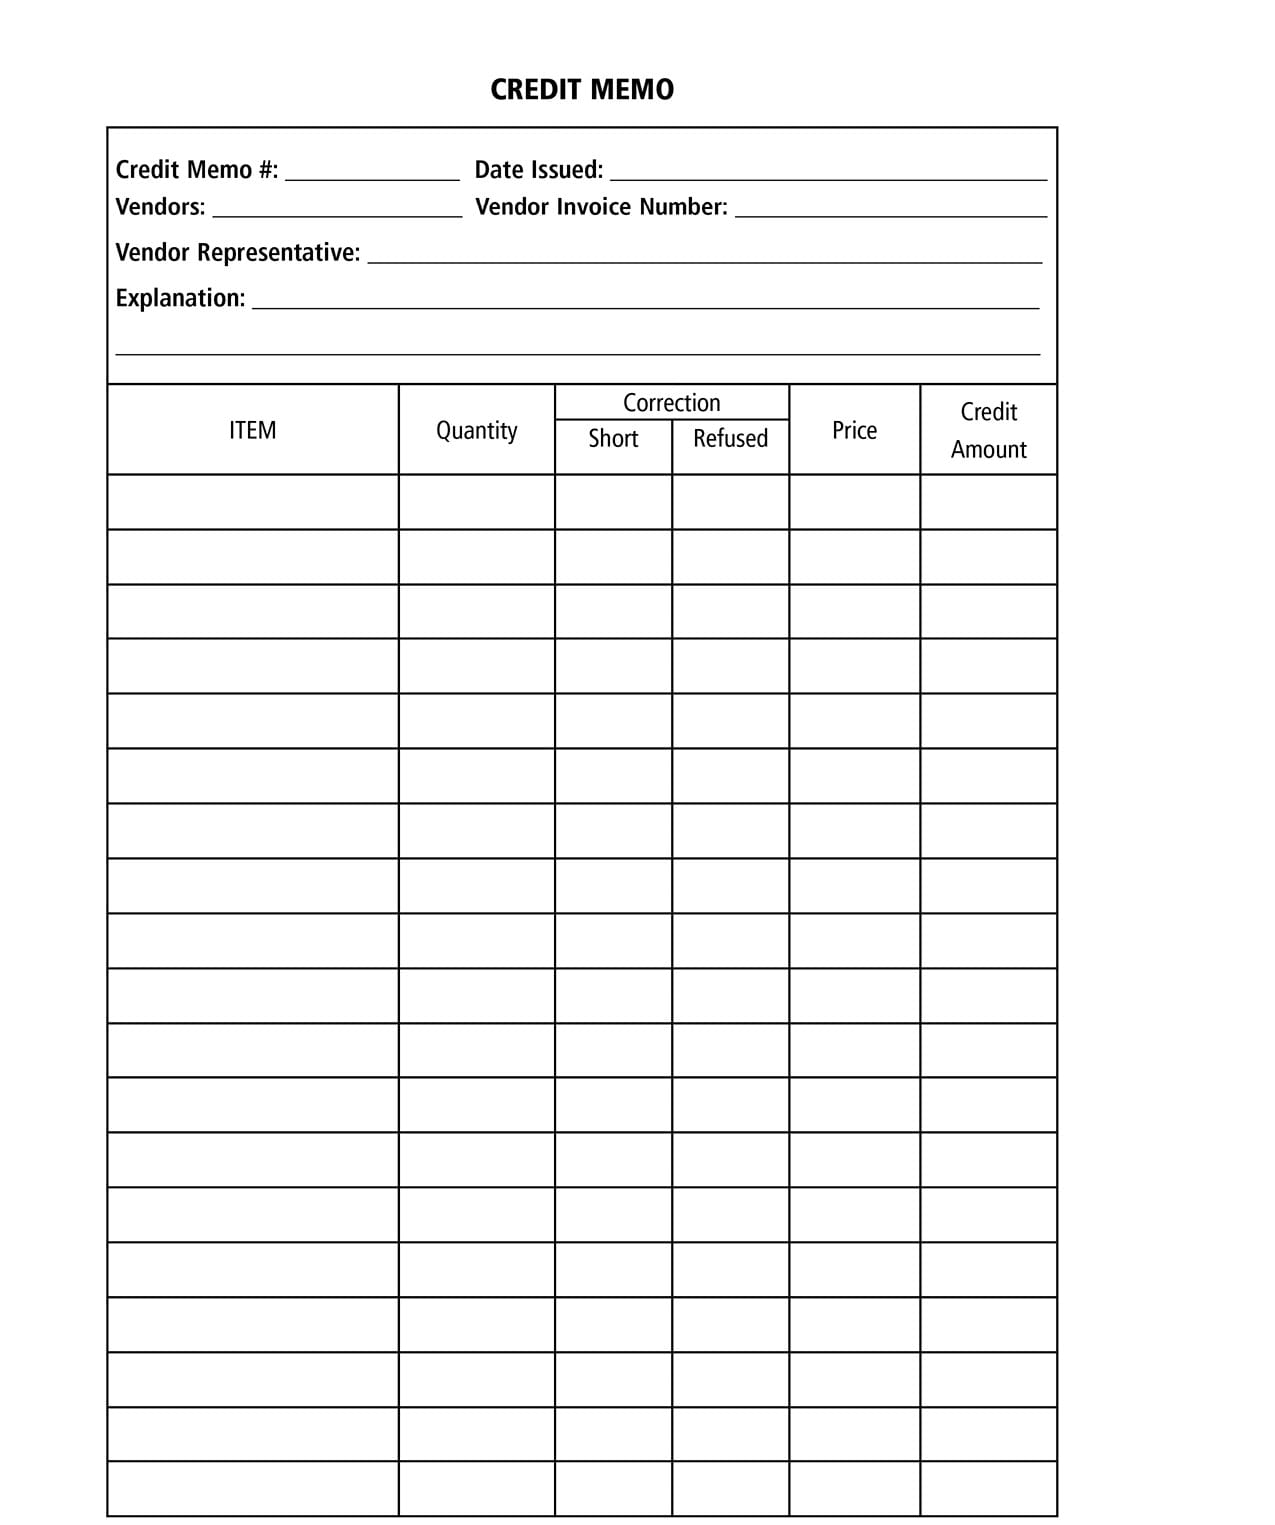
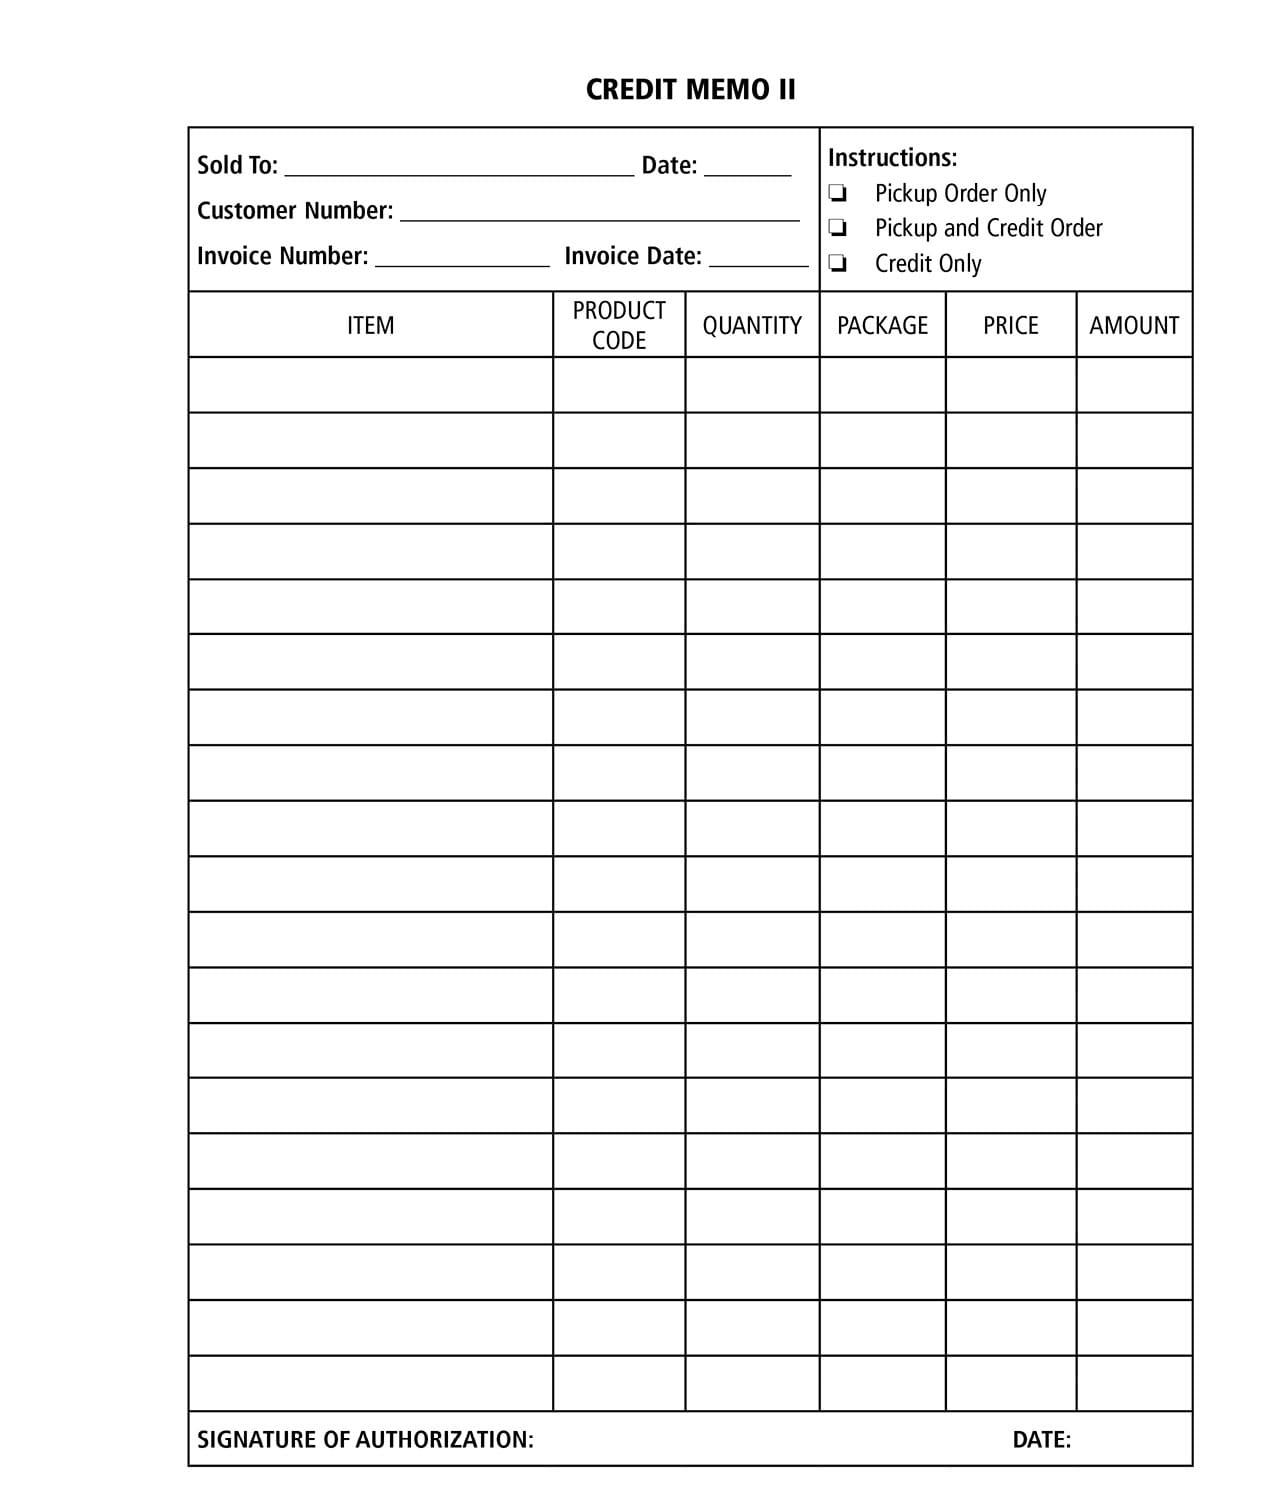
Your invoice is a written confirmation of what was ordered and shipped. The person who receives the order is responsible for confirming that your facility actually received all items listed on your invoice. The documentation should also show any back order, out of stock, or cancelled items. These items should be noted on the invoice and any discrepancies in your order should be mentioned to the driver immediately. The receiving person and driver should both sign and acknowledge any problems with the order. You can also use a discrepancy report or slip that may also be called the credit memo or a credit slip. Include all information identifying the problems in your deliveries. Your facility may also use a variety of general receiving reports. When you discover shortages on your order, complete a credit memo. Examples are the end of this chapter.
RECEIVING PROCEDURES
All your orders may not be received the same way. Here are some examples of different ways to receive products. The method that is right for someone else might not be right for your facility. You can gather thoughts from other restaurant managers, but make your decision based on the needs of your facility and staff.
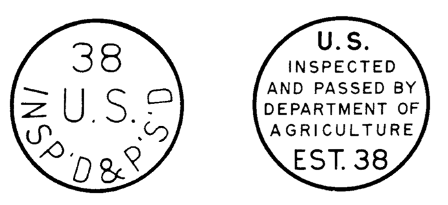
Certified or Accepted Buying – Government agencies, large companies, or public schools may use certified or accepted buying. With this method, items are certified by an outside agent to guarantee quality and quantity. With accepted buying, federal inspectors have copies of your buying specifications and verify these requirements are met. After items are inspected, packages will be sealed and stamped to indicate approval. Below is an example of one of these stamps. Keep in mind there is a cost involved for these inspections to be paid by either the buyer or the seller. You need to know these details before deciding to use this method.
Blind Receiving – Some invoices are printed with the prices and quantity on black areas so they cannot be read by the receiver. With these invoices, each item must be checked for count, weight, or other measuring unit. These amounts are recorded on the invoice and receiving sheet. Prices are blanked out to keep them confidential.
No Inspection – In some situations the buyer and seller may agree not to inspect the quality or quantity when items are delivered. With this method the items are delivered, the invoices are signed, and the driver leaves. This method is normally used only when there is strong trust between the buyer and seller. It is advantageous to the seller and expedites faster delivery service. It could also be beneficial to the buyer since the items can be inspected later in a more accurate manner. However, when this method is used the seller agrees to accept any problems the buyer finds without question.
Night Drop Deliveries – Some vendors find it necessary to have their delivery trucks arrive during hours when your facility is not open. Night deliveries can be done quickly with less traffic on the roads, reducing labor costs. In this instance the delivery person may have a key to get into your facility and will leave the items. Obviously, this method requires strong trust between the vendor and the facility. When deliveries are made overnight or after hours, they are received and verified the following morning. Night deliveries require that refrigerated or frozen items be left in your freezer. Whenever this delivery is done, it is a good idea to arrive early to verify the delivery before starting the day’s task.
Back Orders – Your invoice may indicate that an item is no longer available or is back ordered. These discrepancies need to be noted on the invoice which is attached to discrepancy reports to ensure proper credit for missing items.
After reports are properly received, the delivery area needs to be cleaned. In some instances the receiving area may need to be hosed down or swept. All delivery debris and trash should be disposed of. Each invoice should be placed in the assigned area of the kitchen or taken to the accounting office after all notations are complete.
FOOD STORAGE
There are several goals when storing food. These include maintaining safety and responsibility for the quality of the product. Any food or supply items in storage should be removed by authorized personnel. Securely organizing storage can discourage employee theft. When you enact controls over items, an effective manager can quickly detect theft.
I have already discussed how purchasing is affected by your inventory. The methods used to store your products have a bearing on your inventory practices and effectiveness. A disorganized storage area can make an accurate inventory nearly impossible. The other factor is maintaining the quality of your products while they are in storage.
TYPES OF STORAGE
There are four ways to store food safely. Dry storage is used for holding less perishable items liked canned goods. Refrigeration is short-term storage for perishable items like eggs, cheese, and milk. Deep chilling is for short-term storage. Freezers are used for long-term storage of perishable foods. There are specific safety and sanitation requirements for each type of storage.
DRY STORAGE
Many items can be stored in a sanitary storeroom. Dry storage areas must be kept clean and pest-free to avoid sanitary and safety concerns. Some of the items you can store there include baking supplies (salt, sugar, flour), canned goods, and grain items (rice or cereal).
Some fruits should be ripened at room temperature such as bananas, pears, and avocados. Vegetables such as onions, potatoes, and tomatoes should be stored in a dry place that is kept clean and organized. Ventilation, temperature, and humidity control are important in limiting mold and bacteria. Here are some tips to remember:
• Chemical Contamination. Cleaning supplies and chemicals should be stored in a separate room from food to avoid accidental contamination. Store all chemicals in a safe container that is labeled to avoid confusion.
• Common storage. This area is set aside for flour, sugar, canned items, shortening, and oils.
• First In, First Out. A simple way to ensure the freshness of your products is to use the first in, first out method. In an earlier chapter I discussed dating each product when it is received.
• High Temperatures. If the temperature in your storage area reaches 100 degrees Fahrenheit, the storage life of these items is cut in half.
• Pest Control. When you clean up all messes promptly, you can avoid pest infestations and contamination.
• Raised Storage. Supplies should never be stored on the floor including paper products. Your bottom shelf needs to be at least six inches off the floor.
• Temperature. Maximum shelf life requires 50 degrees Fahrenheit, but 60 to 70 degrees Fahreneheit is sufficient for most items.
• Thermometers. A wall thermometer will help you check the temperature to ensure the safest conditions. Atlantic Publishing at www.atlantic-pub.com offers a ThermaTwin Thermometer (Item TTT-03) and the Hanging Thermometer for your refrigerator or freezer (Item HTM-04).
REFRIGERATED STORAGE
Commercial refrigerators and walk-in units are usually equipped with mounted or built-in thermometers to let you see the interior temperature from outside the unit. Never trust just one thermometer. Keep at least one free standing thermometer inside the unit and two in a larger unit. If you have more than one, they need to be placed in different areas of the refrigerator to assure you that the unit is working properly and that the food is kept at the right temperature. Record the temperature each day on a chart kept on the outside of the unit. Keep in mind:
• Circulation. Keep a reasonable space between items in your refrigeration unit to allow air to circulate and keep foods uniformly cool.
• Colder the better. Cooler temperatures will slow bacterial growth.
• Containers. All containers need to be clean, non-absorbent, and covered.
• Cross contamination. Raw foods need to be separated from cooked and prepared foods.
• Dates. All items need to be dated and sealed properly.
• Dairy products. These foods must be stored away from food with strong odors such as onions, cabbage, and seafood.
• Fresh items. Fresh meat, poultry, dairy products, seafood, fruits and vegetables, and hot leftovers need to be stored below 40 degrees Fahrenheit.
• Fresh fruits and vegetables. Fresh vegetables should not be packed when they are put in storage. They need oxygen or they will turn dark and rot. Humidity around 75 to 85 percent is recommended to prevent dehydration. Some facilities moisten the items with a hose to keep them cool and moist. Be careful with this practice because some vegetables get too wet and rot. There is also the concern about a wet, slippery floor. It is a good practice to keep a close eye on fresh fruits and especially berries since they last only a few days.
• Perishable items. Perishable items must be kept below 40 degrees Fahrenheit to prevent food-borne illnesses. It is also important to remember that opening and closing the refrigerator door often can change your temperature so these items should be stored inside away from the door.
• Raw Meats. Fluids from raw meat, fish, and poultry must not touch other foods.
• Ready to Eat. Store these items above raw foods – never below.
• Root Cellar Storage. Some root vegetables can be stored in humidity below 60 to 70 percent. Items like potatoes need to be kept below 60 degrees Fahrenheit. Circulation is important for these items also, but sacks of potatoes can be stacked.
• Shelves. Refrigeration units need open slotted shelves to allow cool circulation around the food. Shelves should not be lined with foil or paper.
• Stock Tags. Fresh shellfish will arrive with a stocking tag. Keep this information on file for at least 90 days.
U.S. Cooler manufactures premium walk-in coolers, freezers, and combination units that are available at competitive prices. They are used for all types of cold storage. They also offer separate shelving, great for your walk-in freezer or storage room. Many accessories are available. For more information, visit www.uscooler.com or call 800-521-2665.
Required Refrigerator Space
Your refrigerator space can be loosely determined by the number of meals you serve each day not counting beverages or frozen food.
|
Meals Served Daily AND CAPACITY |
|
|
Meals Served Daily |
Recommended Capacity |
|
75-150 |
20 Cubic Feet |
|
150-250 |
45 Cubic Feet |
|
250-350 |
60 Cubic Feet |
|
350-500 |
90 Cubic Feet |
If you will be serving more than 350 meals a day, it would be best to have a walk-in cooler. It is also advisable to have a reach-in refrigerator for small, frequently used items. Note that these capacity suggestions are minimums.
DEEP CHILLING
Temperatures between 26 and 32 degrees Fahrenheit are considered deep chilling. These temperatures decrease bacterial growth and extend shelf life of some fresh foods, such as meat, poultry, seafood, and other protein products. Lower temperatures will not compromise their quality. You can use a special unit or lower your refrigerator temperature for this storage.
FROZEN STORAGE
Frozen meat, poultry, seafood, fruits, vegetables, and certain dairy items (ice cream) should be stored at 0 degrees Fahrenheit. The lower temperature will keep items fresher and maintain flavor and texture for a longer period. It is best to store foods to be frozen as soon as they arrive. Freezing perishable foods that have been refrigerated can diminish their quality.
Frozen foods should be put in the freezer immediately upon arrival at your facility. They can only be stored in a freezer for a limited time. When left in the freezer for too long, the chance of contamination and spoilage increases. When you store food in a freezer, you need to allow room for air to circulate around it. Follow these tips:
• Cold Loss. Freezer doors should be opened only when necessary; otherwise, the temperature will drop. A “cold curtain” seems like a nuisance, but it will help keep the temperature colder.
• Moisture-Proof Containers. Frozen foods need to be stored in moisture-proof containers to keep food from losing flavor and color and to avoid their drying out and absorbing odors from nearby foods.
• Monitor Temperature. Record the temperature each day and use more than one thermometer for a large freezer.
• Frozen Food Storage Periods. Here is the criteria for the length of time that some items can be frozen:
|
Food Storage Life |
|
|
Sausage, ground meat, and fish |
1 – 3 months |
|
Fresh pork (not ground) |
3 – 6 months |
|
Lamb and veal |
6 – 9 months |
|
Beef, poultry, and eggs |
6 – 12 months |
|
Fruits and vegetables |
One growing season to the next |
For a comprehensive list of frozen storage life and semi-perishable foods, see the following list.
|
FROZEN Storage LIFE |
|
|
Beef |
Lasts the best |
|
Cured or Smoked Meats |
1-3 months |
|
Ground Meat |
3 months |
|
Lamb |
Lasts the best |
|
Pork |
Not as well, fat becomes rancid |
|
Veal |
Lasts well |
CLEANING PRODUCTS
Government requirements state that cleaning items and any hazardous materials must be stored separately from food items. Hazardous materials include poisons, pesticides, bleach, and strong chemicals. You may choose to store these items in a locked cabinet or in a separate section of your storeroom.
All chemicals need to be labeled properly. When a chemical is removed from its original container it must have a label and be stored in an appropriate container. Glass is usually your best option as many chemicals will eat through plastic. The label should include the chemical name and any mixing instructions, along with safety and emergency information. You may choose a storage area with hot and cold running water to mix the chemicals or for easy clean up.
ORGANIZE YOUR STORAGE AREAS
Each storage area needs to be organized with a place for each item. All items used often should be placed near the door. The door should be locked. You may consider having a separate unit to store more expensive items like cooking wine or exotic mushrooms, for example.
• Aisles. Each aisle in your storage areas needs to allow easy access to the items.
• Five Gallon Bucket. Dry goods like flour and sugar may be shipped in five-gallon buckets – wonderful storage containers that can be reused as they are designed for the best possible food protection. When they are empty, clean and re-label them, avoiding scraping the inside as bacteria will collect in the nicks.
• Ice. Some containers are specially designed for ice to avoid the risk of cross contamination if you are not careful. Saf-T-Ice Totes are a great way to handle this safety concern. They offer a stainless steel bucket that makes carrying and emptying easy. They meet Health Department standards and they can be cleaned in the dishwasher. Saf-T-Ice Totes (Item #SI-6000, $79.95 for two) are available from Atlantic Publishing at www.atlantic-pub.com or call 800-814-1132.
• Labels. Each shelf should be labeled, making identification easier.
• Shelving. The best shelving units give you the option of adjusting the shelf height to save wasted space and make it simpler to find items you need.
• Space. Leave enough space for the quantity of the item that you plan to stock.
• Stacking . If you stack containers on top of each other, spills, breakage, and accidents are more likely. When you must stack containers, stack them in a way to make them easier to handle.
STORAGE SPOILAGE PREVENTION
Thorough records of all food spoilage are a must and should include date of spoilage, item description, and the reason for disposing of it. Make a note about whether too much was ordered or if there were equipment, cooling, or other storage problems. The information makes inventory adjustments easier.
At the correct temperatures, spices and sauces can be stored for a long time. Keep in mind the ingredients are in these sauces. If there is an ingredient that spoils easily, you can divide the sauces into small containers and freeze. When you need to use the items, defrost and serve.
Color codes, labels, and dates need to be on all food items. The first in, first out practice will ensure you use the older food before the newer food. This practice alone will help minimize waste from spoilage. Noting the arrival date will help employees know how long the item has been in storage. Water-dissolvable labels are the best option. Daymark Safety Systems offers a variety of biodegradable labels that dissolve in less than 30 seconds with no residue. They are FDA approved and are available at www.daymarksafety.com or call 800-847-0101.
• Eggs. If they are to be used in a few hours, they should sit at room temperature to prevent yoke breakage and cracking to cut down on waste. It is best to check with the local health department for their regulations about eggs, keeping in mind that eggs are perishable.
• Refreezing. If foods thaw, do not refreeze them because doing so affects the taste. It is better to keep foods refrigerated and use as soon as possible.
• Spoilage Rate. There are many variables in spoilage. Different qualities and brands of food spoil at different rates. Keep this in mind when you change suppliers or brands and watch the items for any variation in the spoilage rate. If there is a noticeable difference in spoilage rate, make a note on your inventory list for future reference.
• Walk-Ins, Freezers. Keep an eye on the temperature of your refrigerated units. You can also talk to your alarm company about a program that monitors your freezer and walk-in temperatures. One possibility is Food Watch at www.foodwatch.com/foodwatch.htm. These units accurately monitor the temperature and efficiency of your food cases, refrigerators, and walk-ins. They also offer a patent pending Compressor Watch sensor that attaches to the outside of the compressor motor and tracks how long it runs. Another interesting feature is that it monitors how long the walk-in door is open, an important feature to help save on electricity and maintain the quality of your food.
SAFE STORAGE
It is a good idea to create a periodic cleaning schedule for simple cleaning and for sanitizing to remove mold, bacteria, and any other microorganisms.
INVENTORY
There are various types of inventory providing varying degrees of protection and accountability. The types of inventory are periodic physical inventory and perpetual inventory. This is a simple formula to use to determine your inventory amounts.
Beginning Inventory + Deliveries = Food on Hand
Food on Hand – Final Inventory = Food Used
No matter how well your employees portion food and how well you keep records, there will be discrepancies in your inventory records resulting from food spoilage or theft. Physical inventories must be done from time to time. The frequency is determined by the number of problems the facility has. Do not allow the fact that you have few employees available prevent physical inventories from being done. The more organized your facility is, the easier a physical inventory is, and it also becomes easier with practice.
PERIODIC INVENTORY COUNT
A periodic physical inventory is the oldest form of inventory. At one time, people did a physical inventory at the end of the month or the quarter when they did all the other paperwork. However, many facilities want inventory details on a more regular basis. If there is a problem with inventory or usage, it is difficult to identify the cause of these problems weeks or months later.
There are several different rules of thumb about how often inventory should be done — weekly, monthly, or at the close of business each day. At one time, I had an assistant manager who was drastically overusing certain items. We walked through an abbreviated inventory at the end of his shifts. This is rarely done, but I needed to prove when the shortages were happening. The proof was indisputable after we did this for several days.
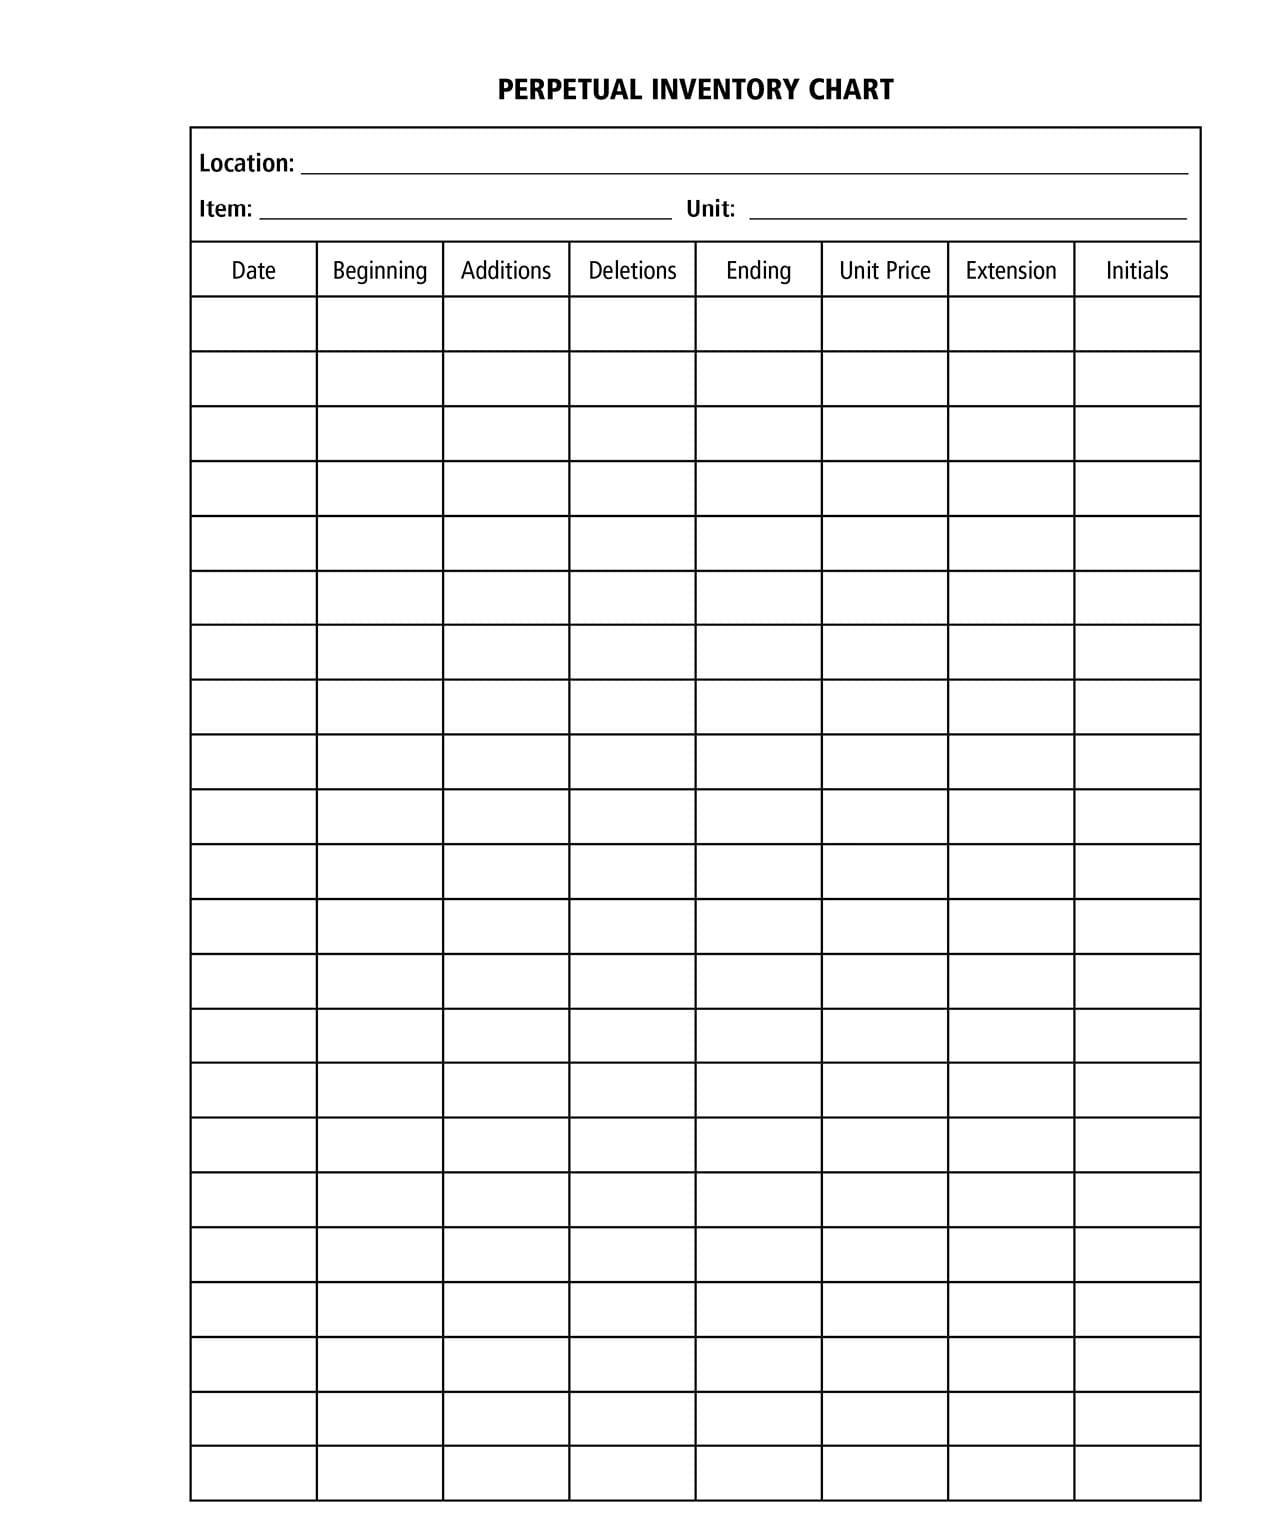
PERPETUAL INVENTORY
Perpetual inventory means checking your daily food and supply usage. It is important to track expensive items. An accurate perpetual inventory can guarantee that items are not being overused or stolen.
PERPETUAL ORDER FORM
All food items are listed on the Sign Out Sheet and Yield Form. The “Size” column includes the unit size used. The cook signs out food from the freezer or walk-in, noting the unit size and number of items. Each day of the month is listed across the top of the page. At the end of the day, enter the number of items remaining. This number must be subtracted from the “Amount Ordered.” It is possible for an employee to hide a theft by removing items from a box and then re-sealing it, delaying discovery of the loss and making it difficult to determine the date of the theft.
How should you handle the situation if you discover theft? When you suspect theft, your first priority is to make a list of all employees who worked during the time items went missing. If you have additional theft, check to see which employees worked each of these shifts. Placing a note on the bulletin board that you are investigating suspected theft might be all you need. Include a statement that any employee who is caught stealing will be terminated.
DETERMINE INVENTORY LEVELS
When you prepare a food order, you must know the amount of food and supplies on hand. You can do this manually with an inventory sheet or use a computer program.
Take the printed sheet and work your way through the storage area marking how much of each item is “on hand” in that column. Remember to use the same unit of measure as your standard for inventory. The unit of measure should be on the inventory sheet to avoid confusion.
You need to find the “Build to Amount” or “Order Amount” (different worksheets will use different terms). To find the amount to be ordered, you need the time for scheduled deliveries and amounts needed between deliveries. It is good to add 15 percent to the amount you figure in case a delivery is late, you need more than usual, or an item is backordered. Try not to cut your order short.
It is good for your staff to know the following information. Place the buying schedule details on a bulletin board with easy access for staff members.
• When each order must be placed.
• When deliveries are scheduled to arrive.
• Which vendors deliver which items.
• Each sales representative’s phone number and the company they represent.
• The quoted price for all items. You may prefer to keep the pricing information in your desk or a notebook in your office.
You can place a “Want Sheet” on a clipboard for staff members to list any items they need, including equipment, food, and supply items that are running low or used up. This sheet works well with items used infrequently. Simply train your staff to make a note on the “Want Sheet” when they use the last item or open the last box.
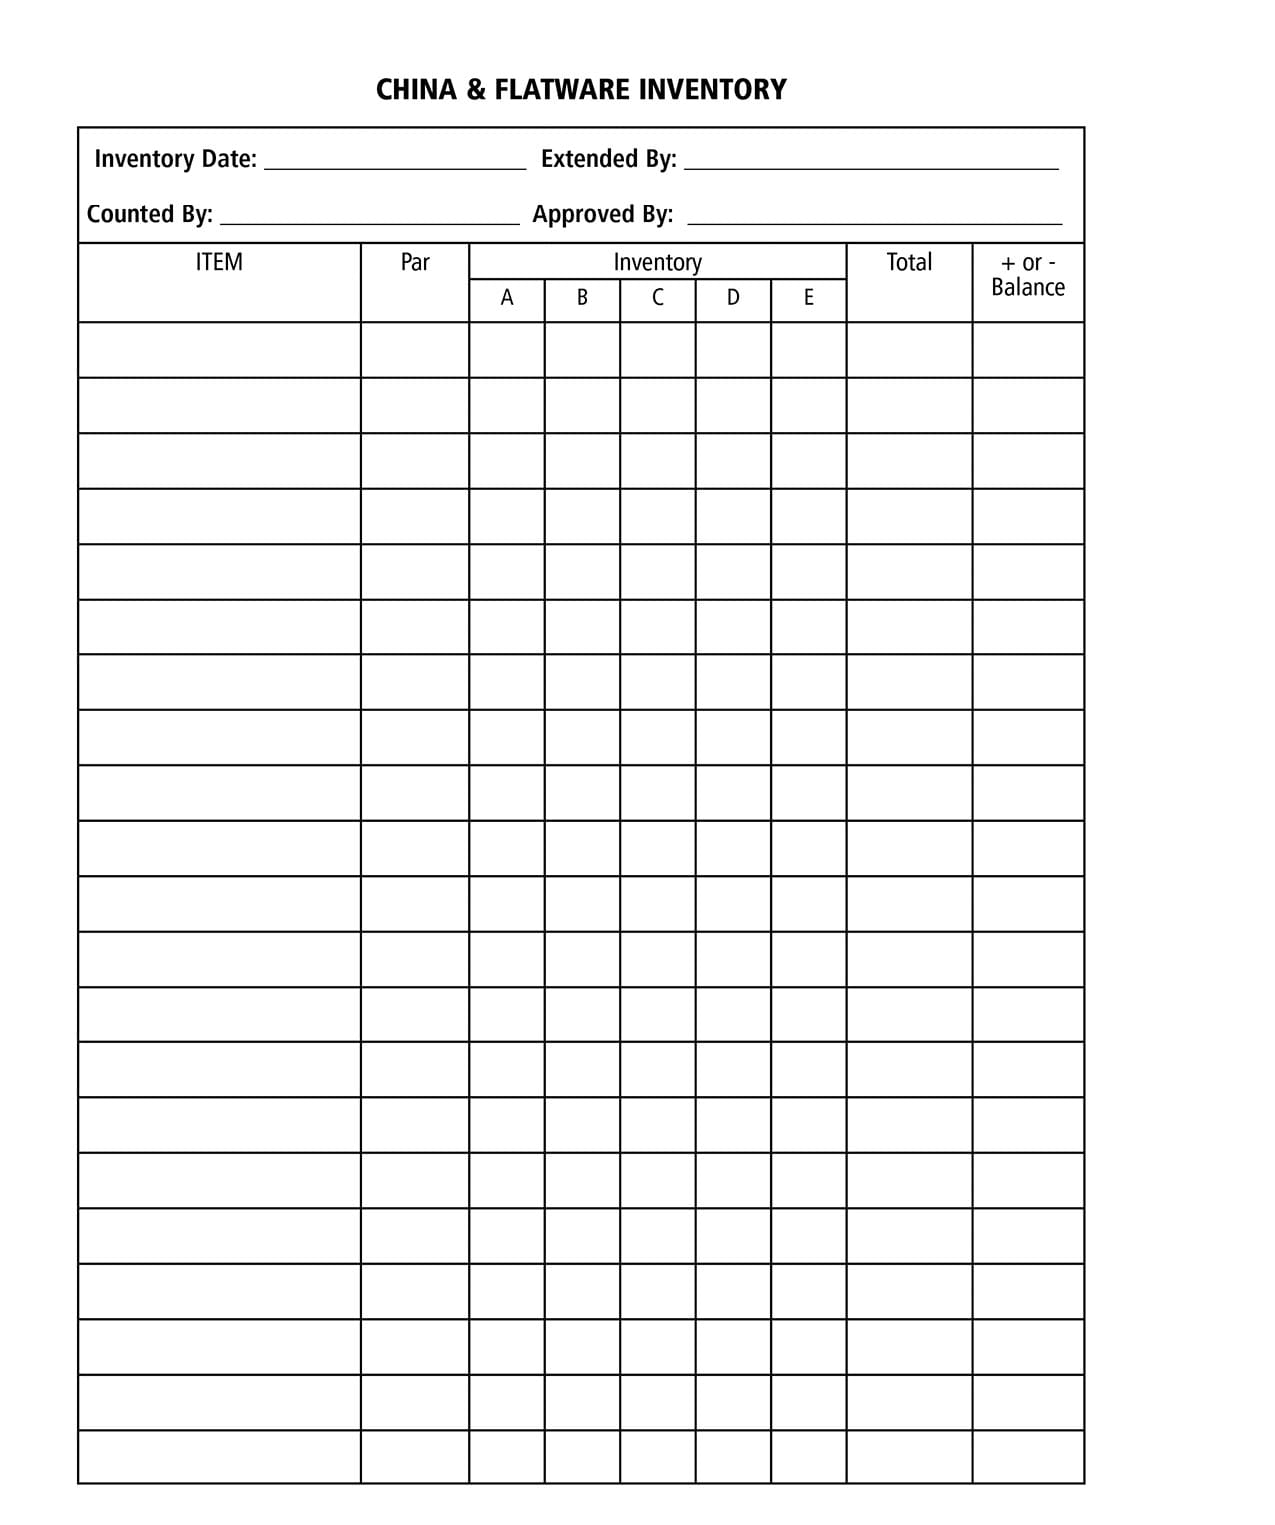
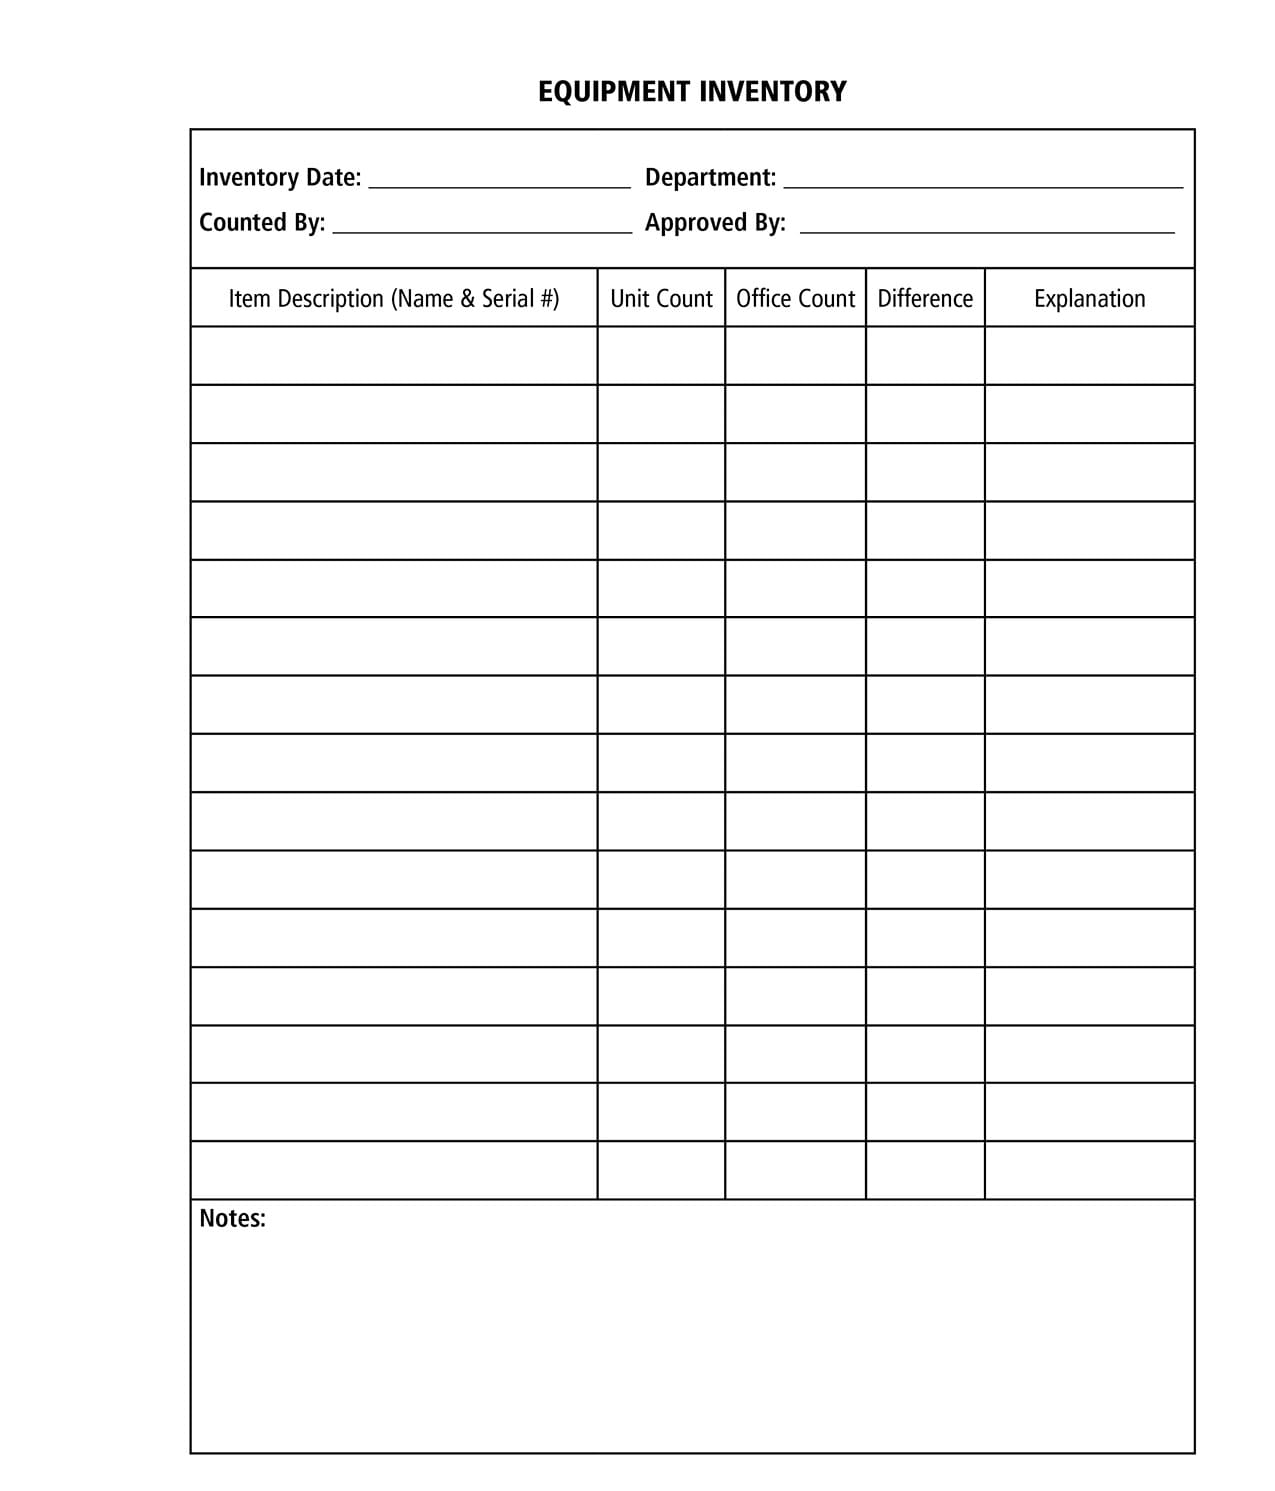
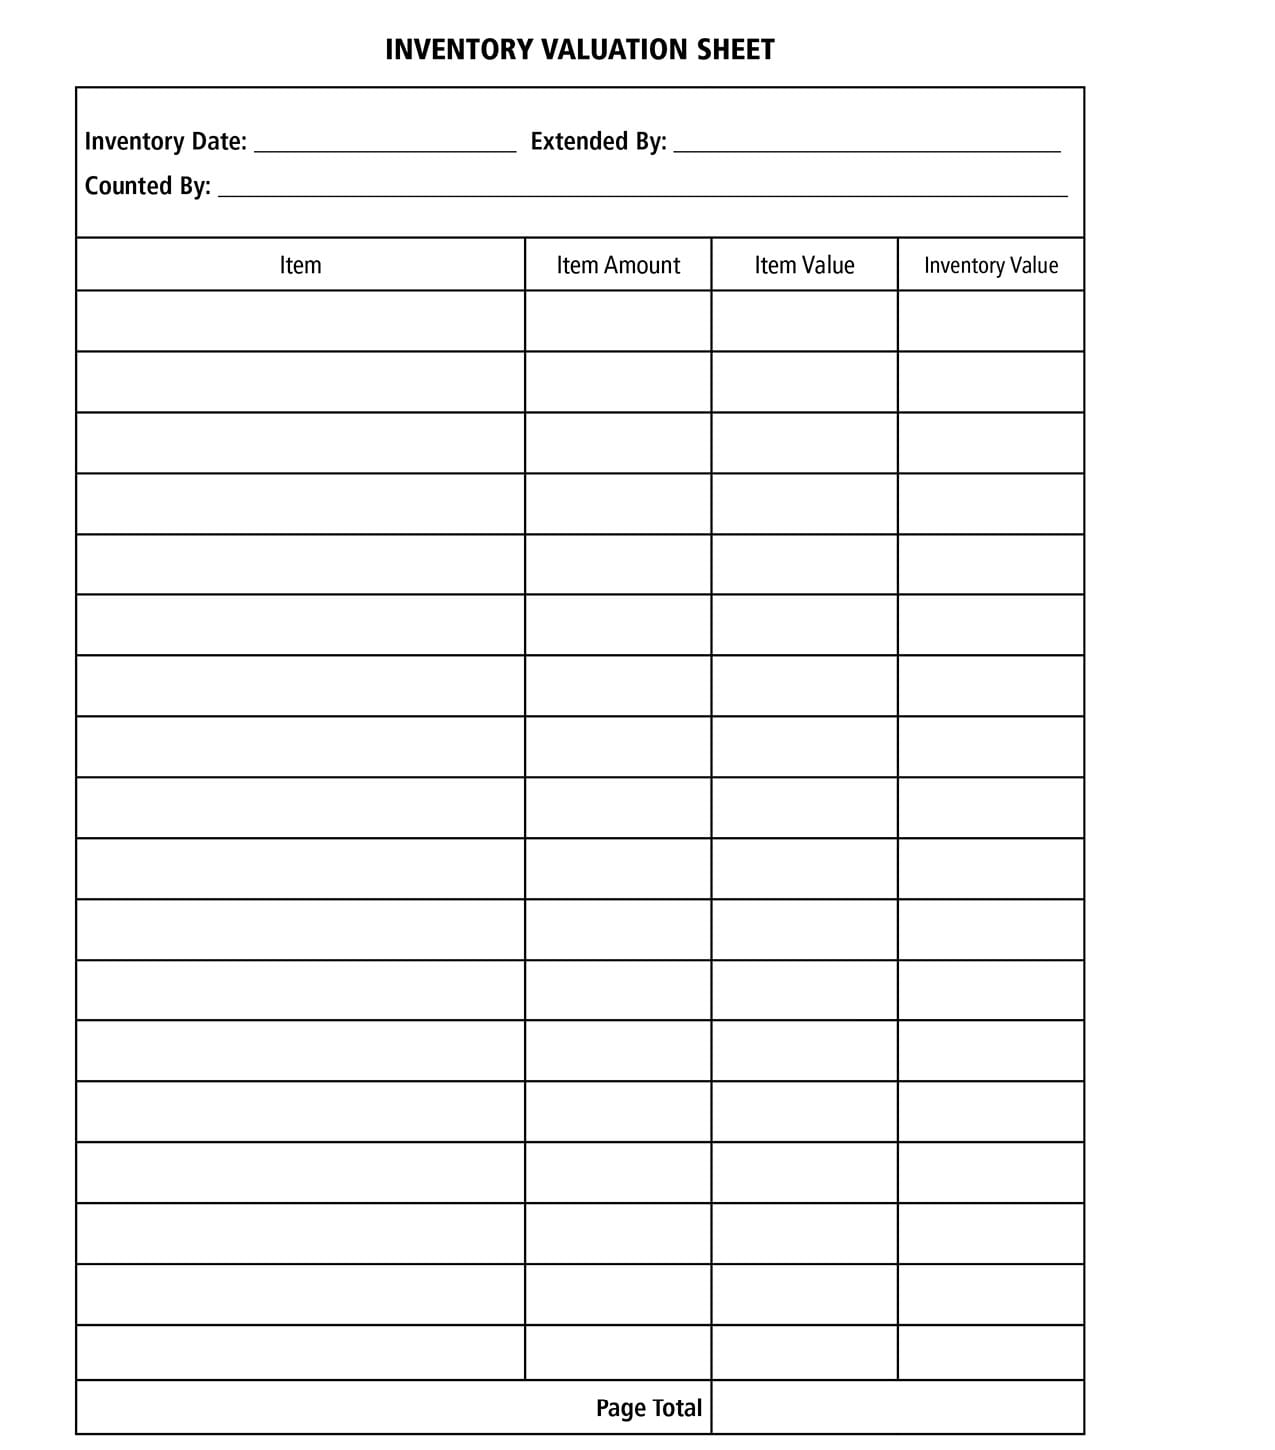
INVENTORY FORMS
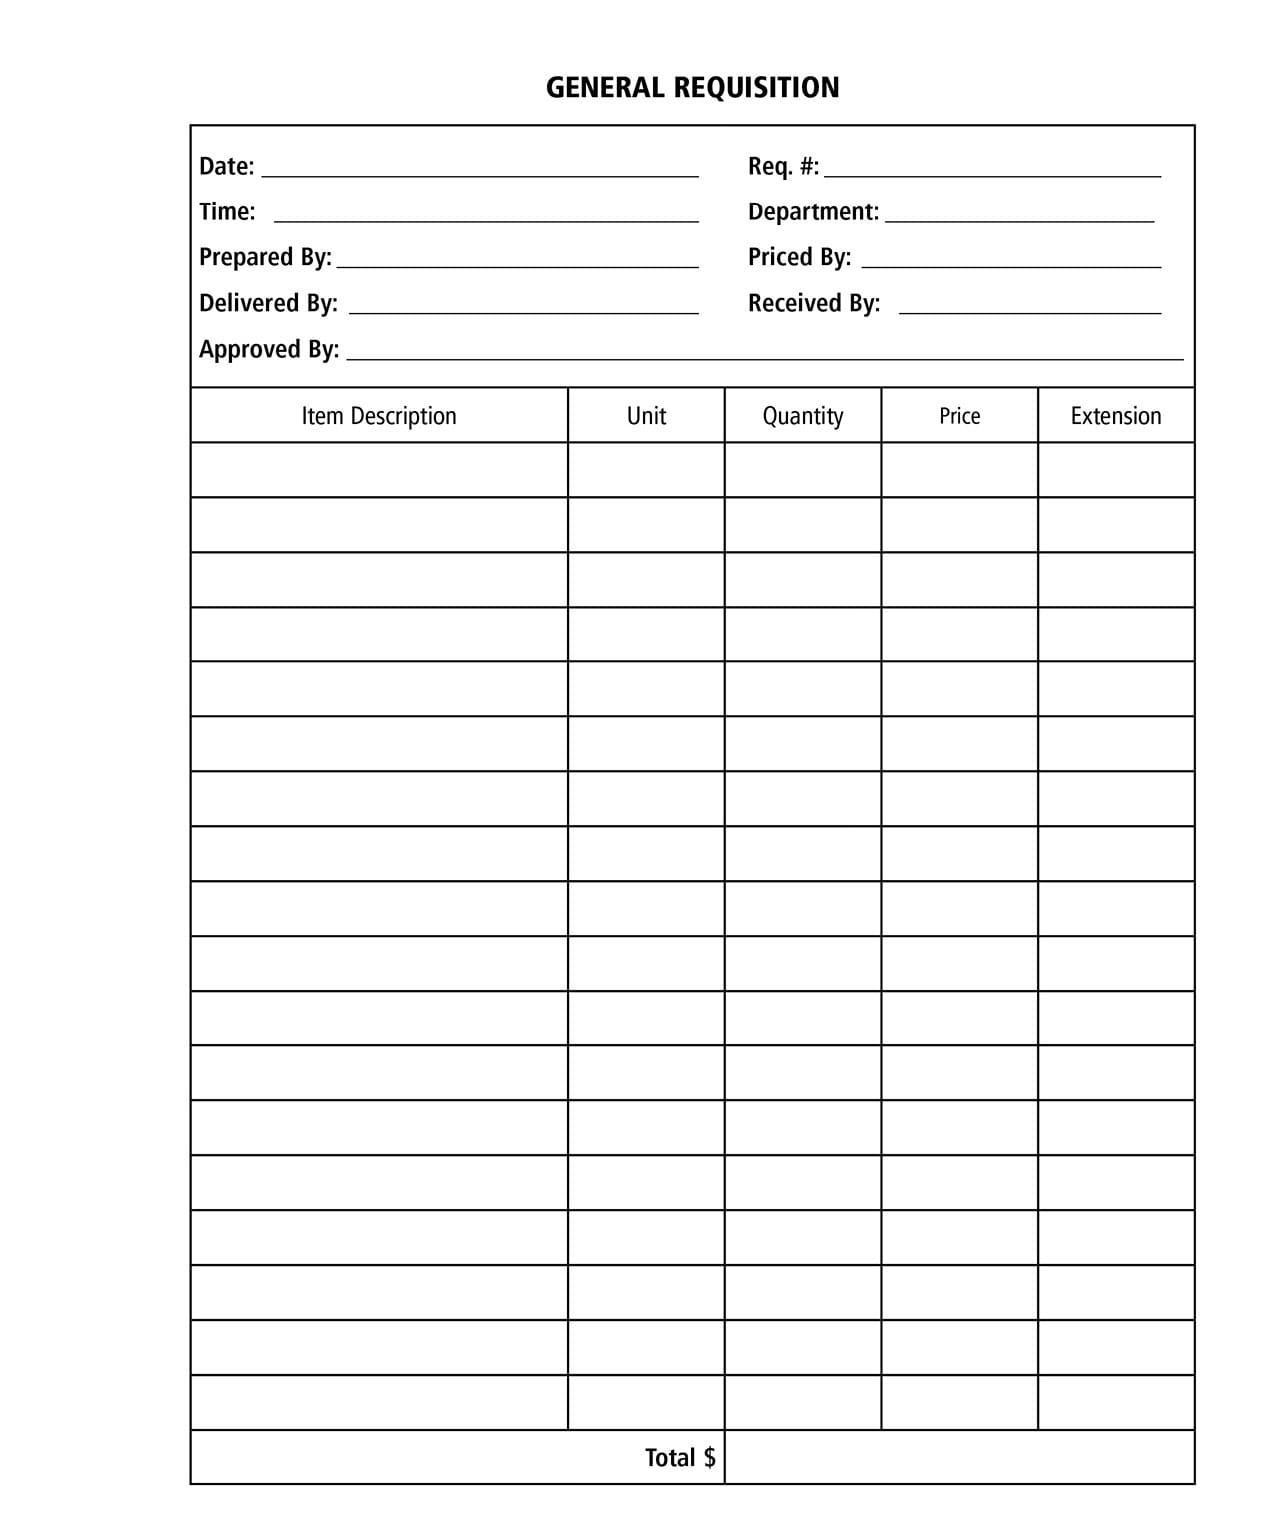
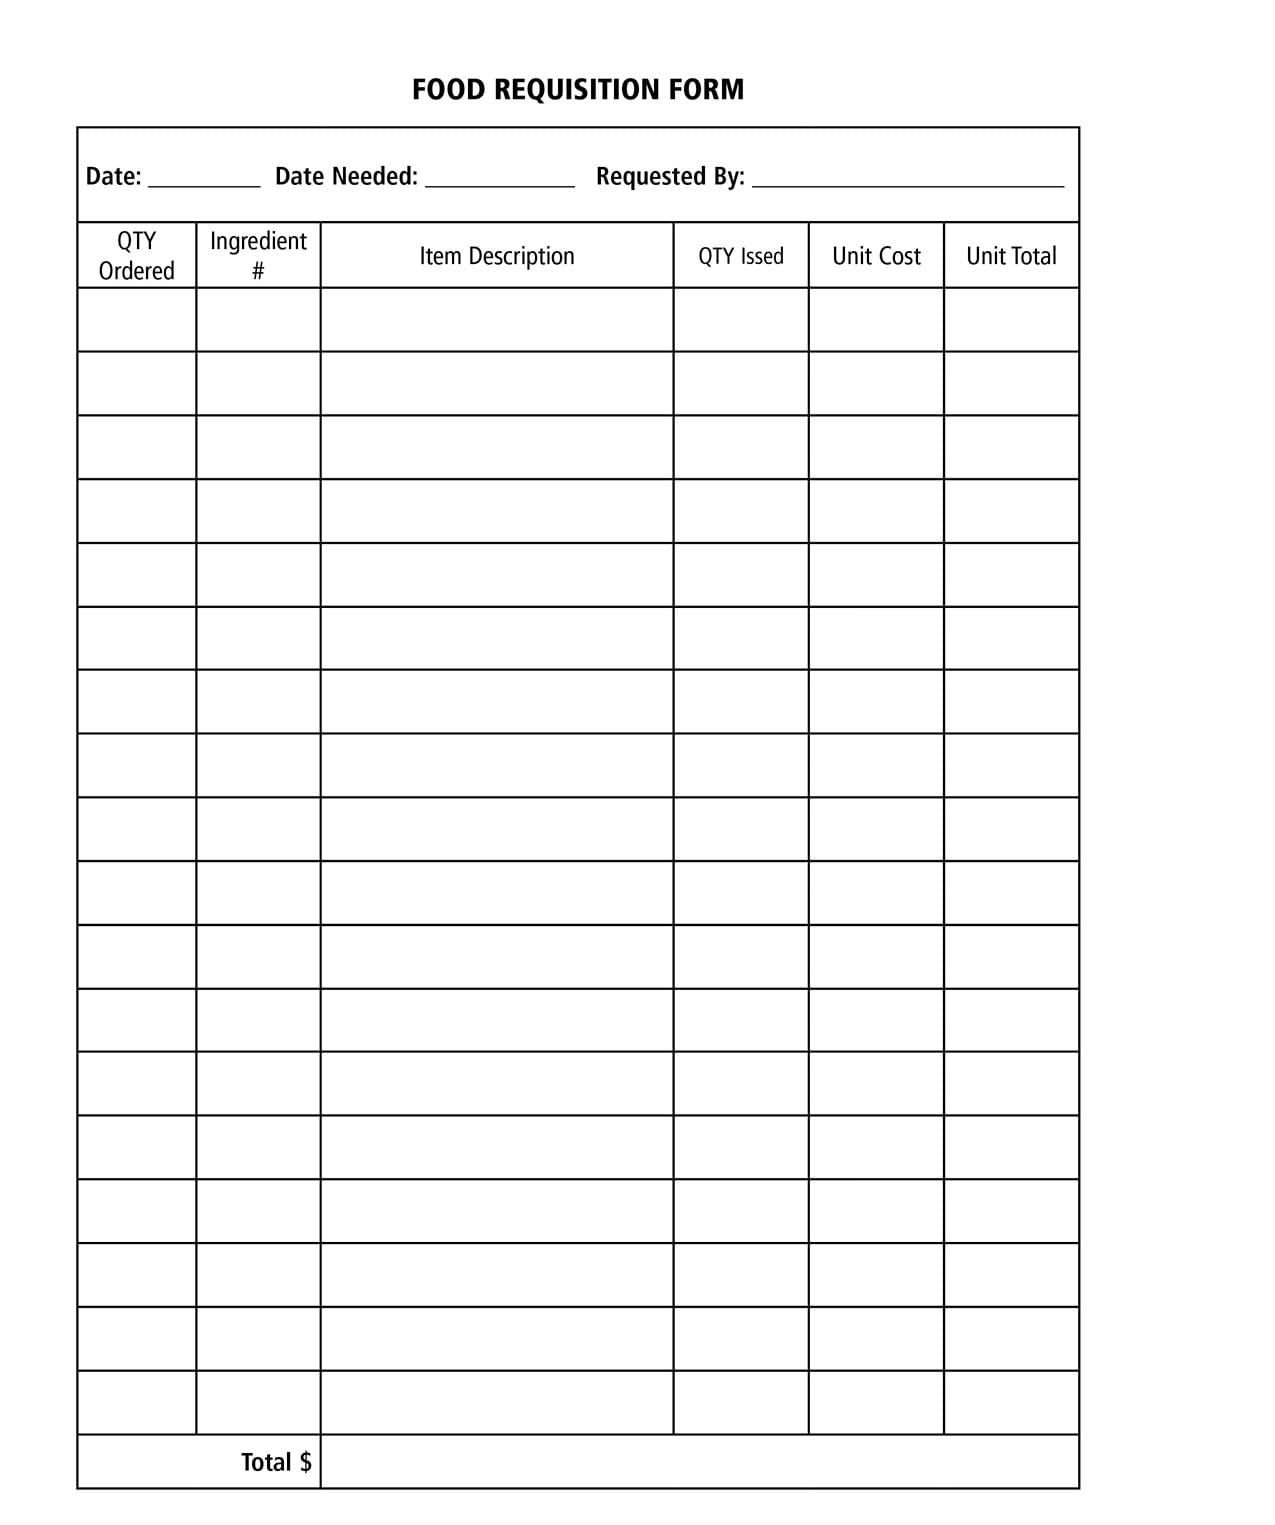
There are many types of inventory forms. You will find a variety at the end of this chapter.
WEEKLY OR MONTHLY INVENTORY
It is good to assign teams of two people to work on inventory counts. One person should count the items while the other records the amounts. It works best when the recorder listens and records the numbers. No conversation is needed. Each team needs a list of the items in their area. It is best to list these items in the order they are assigned in the storeroom.
Inventory sheets should include a slot to write any items received or issued. Inventories should be conducted at a time of limited activity and no deliveries. It is important to recognize items when they are in different packaging.
ISSUING
Usage of any food or supply items is a critical part of the inventory and cost control process. Removing food from storage to use is called issuing. Below are some suggestions for issuing and using a sign out sheet.
• Raw Food Items. Issue these items on a daily basis. They include meat, fish, and poultry.
• Signing Out. When you remove bulk items from the walk-in or freezer.
• Issuing. Managers or kitchen managers should be the only ones to remove food from storage although in some facilities other people may be involved. It depends on the facility policies and the control that the manager has over the staff members.
The Sign Out sheet shows when each item was taken from storage to be used in the facility. Your daily usage for each menu item is determined using this information. It is also simple to verify whether food items are being over-used and to determine which items are not being controlled properly. An effective sign-out procedure can help eliminate theft.