MinGW is a port of GCC to Windows. It is the compiler we recommend for this book.
You can obtain MinGW from http://www.mingw.org/. Find the download link on that page and download and run the MinGW Installation Manager (mingw-get).
The MinGW Installation Manager is a GUI tool for installing MinGW. It's shown in the following screenshot:

Click Install. Then, click Continue. Wait while some files download, and then click Continue once again.
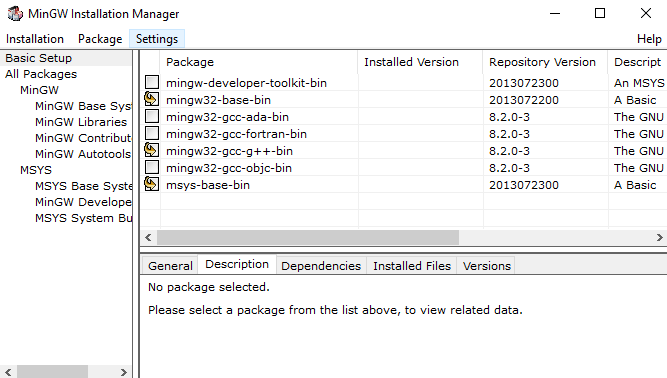
At this point, the tool will give you a list of packages that you can install. You need to mark mingw32-base-bin, msys-base-bin, and mingw32-gcc-g++-bin for installation. This is shown in the following screenshot:

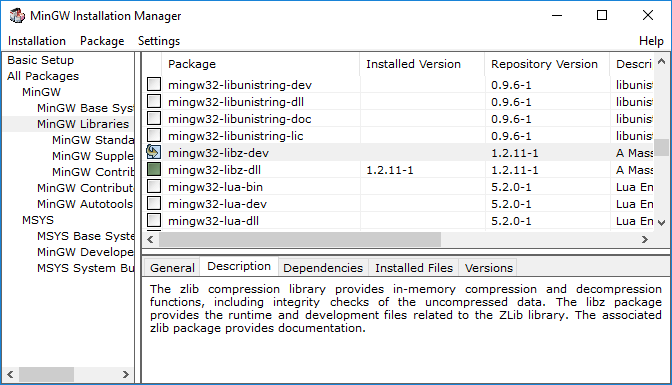
You will also want to select the mingw32-libz-dev package. It is listed under the MinGW Libraries section. The following screenshot shows this selection:

The g++ and libz packages we've selected are required for building libssh later.
When you're ready to proceed, click Installation from the menu and select Apply Changes.
A new dialog will show the changes to be made. The following screenshot shows what this dialog may look like:

Click the Apply button to download and install the packages. Once the installation is complete, you can close the MinGW Installation Manager.
To be able to use MinGW from the command line easily, you will need to add MinGW to your PATH.
The steps for adding MinGW to your PATH are as follows:
- Open the System control panel (Windows key + Pause/Break).
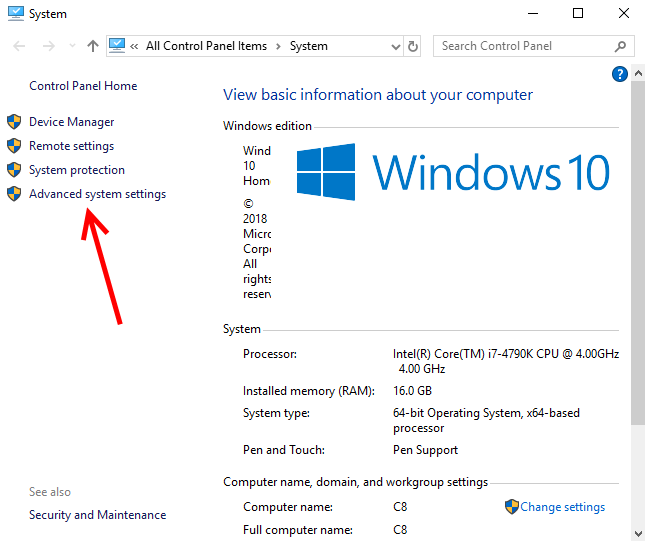
- Select Advanced system settings:

- From the System Properties window, navigate to the Advanced tab and click the Environment Variables... button:

- From this screen, find the PATH variable under System variables. Select it and press Edit....
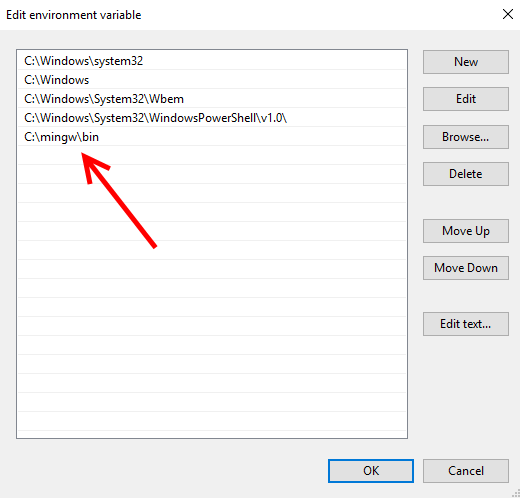
- Click New and type in the MinGW path—C:\mingw\bin, as shown in the following screenshot:

- Click OK to save your changes.
Once MinGW has been added to your PATH, you can open a new command window and enter gcc --version to ensure that gcc has been installed correctly. This is shown in the following screenshot:
