c)
Azure VM cannot connect to the internet
1. Step 1: Check whether the network adapter is in a failed state. Follow these steps to check the state of the NIC:
- Log in to the Resource Explorer portal.
- In the left pane, select Subscriptions.
- In the left pane, select the resource group that the affected network adapter or VM belongs to.
- Go to the Microsoft Network.
- Select the Network Interfaces option.
- Select the affected network interface.
- Select the Read/Write option at the top of the portal.
- Select the Edit option.
- NIC1
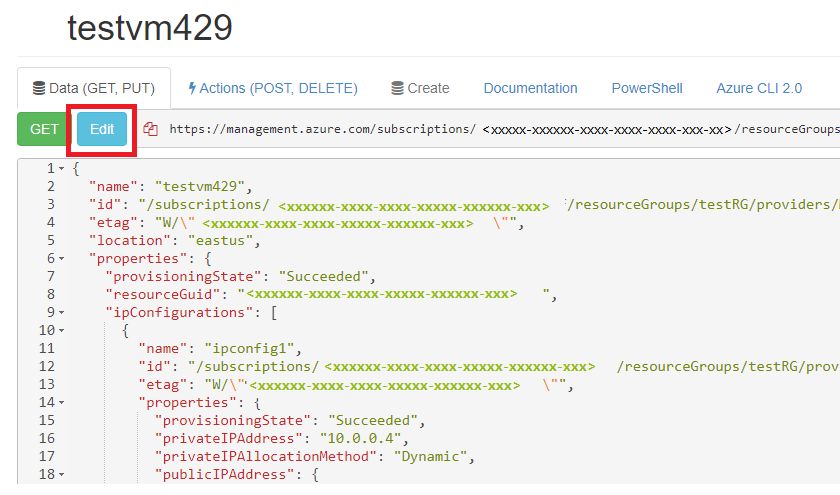
- After you select the Edit
option, the “Get” option changes to a Put
option.
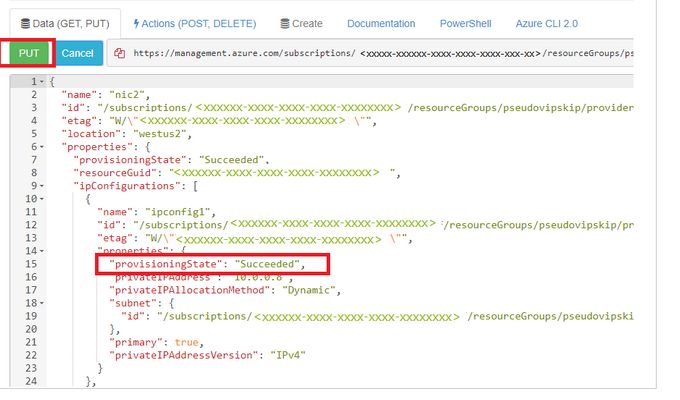
- Select the affected network interface, and then select the Put option. After
you make this selection, the ProvisioningState is displayed as Updating. The same result is shown on the regular Azure Resource Manager portal. If the operation is completed successfully, the ProvisioningState value changes to Succeeded, as shown. Refresh your portal. The network adapter should be in a success state.
2. Step 2: Follow previous section to run a connectivity check and follow the steps to resolve the issues. The steps explained in https://docs.microsoft.com/en-us/azure/virtual-network/troubleshoot-vm-connectivity#azure-vm-cannot-connect-to-the-internet