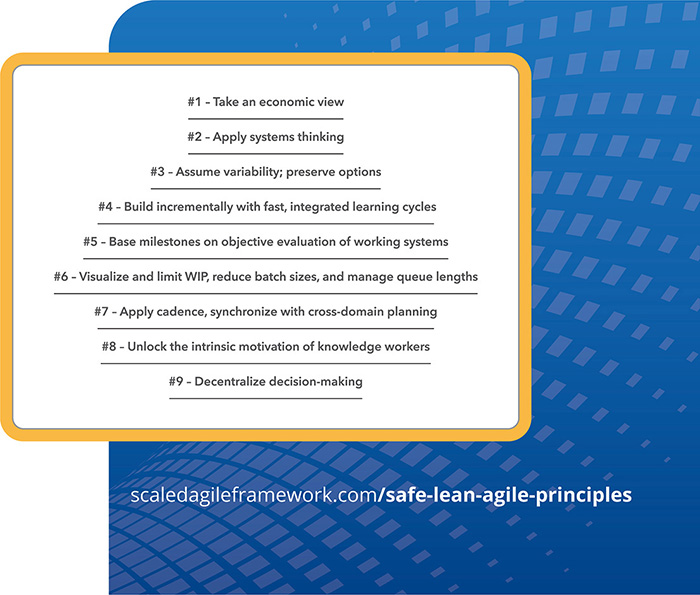
Part 3
The SAFe Principles