
In this chapter, you’ll learn the basics for making your journal distinctly yours. You’ll create stamps that have your marks all over them and find a variety of ways to incorporate your favorite washi tape, giving your journal style and flare.
Tons of commercial rubber stamps are available; however, creating your own gives your journal your personality and unique signature. I love the way they are not polished but a little rough around the edges like an old-fashioned woodcut. I like to use my own handwriting as well so the stamp is just an extension of my own script.
Speedball Speedy-Cut carving blocks
craft knife
scrap paper
tracing paper
pencil
permanent marker
burnishing tool
Speedball linoleum cutters, thin and thick
ink pad
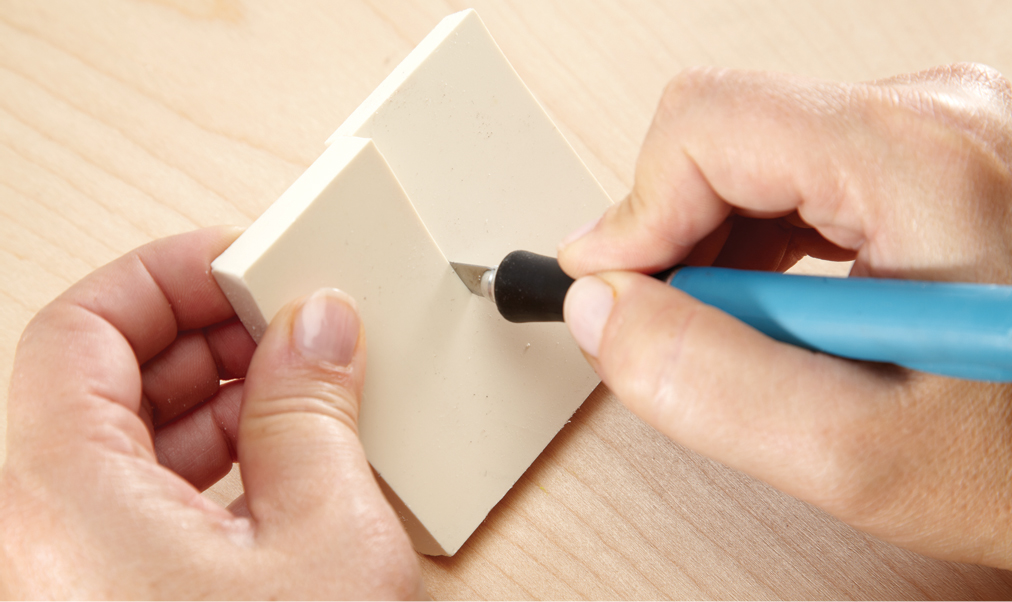
STEP 1: Cut the carving block to the desired size. Remember to consider the size of the journal you’re working in when designing your stamps.

STEP 2: Outline the stamp size on a blank piece of paper.

STEP 3: Inside the outline, write or draw the design that you wish to create.

STEP 4: Place a piece of tracing paper over the design and heavily trace the design using a pencil.

STEP 5: Flip the tracing paper over so the pencil lead is touching the carving block. Burnish the traced design onto the carving block.

STEP 6: Remove the tracing paper to reveal the reversed image of your design.
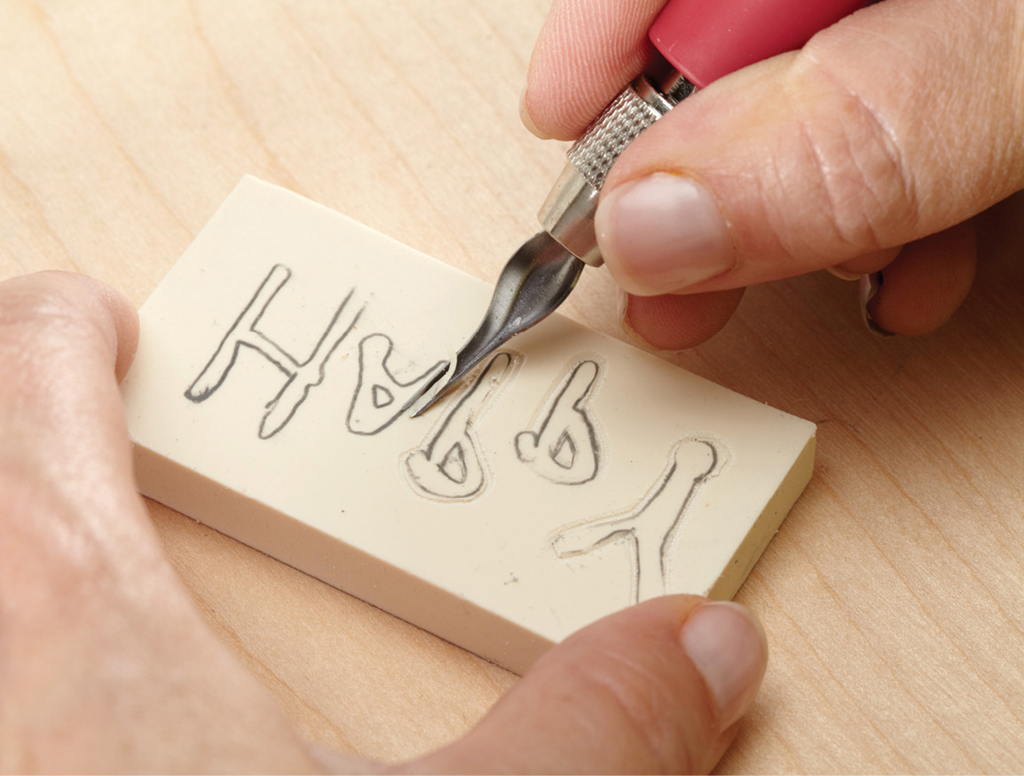
STEP 7: Use the thin linoleum cutter to carve a line around each letter or line of the design. Don’t carve on the traced line, but around it.

STEP 8: Switch to the larger linoleum cutter to remove the large areas around the design. Follow the initial, small carved lines.

STEP 9: Use the craft knife to cut off the excess chunks of the carving block around the design.
Don’t dig down with the carving tool; you’ll break the stamp. Instead, skim the surface and be sure to move the stamp, not your hand, with the carving tool.


STEP 10: Ink the design to see what areas need more carving or trimming.

STEP 11: Test the stamp on a scrap of paper. If you like the woodcut look, your design might not need any further carving.

STEP 12: If there is an inked spot you want to remove, use the thin linoleum cutter to remove the extraneous bits on the stamp.
Weather
Days of the week
Numbers
Lined journal boxes
Inspirational words

