Ever since Qt 5.6, Qt Quick Controls 2 has been released to replace version 1, which is known to have performance issues and technical problems, which led to its deprecation. With Qt Quick Controls 2, everything has been rebuilt from scratch with performance in mind. Qt Quick Controls 2 not only run smoothly on PC, but also mobile and embedded devices.
To use Qt Quick Controls 2 in your project, perform the following steps:
- Add the following module to your QML file:
import QtQuick.Controls 2.12
- If you somehow need to use Qt Quick Control 2 in your C++ code, you must first add the quickcontrols2 module to your qmake project file:
QT += quickcontrols2
- After that, you may include the QtQuickControls2 header in your C++ source code:
#include <QtQuickControls2>
Following are some of the QML Types available under Qt Quick Control 2:
- Button – A push button allows the user to click or press on it and trigger an event.
- CheckBox – A checkbox can be toggled on or off to represent enabling or disabling an option.
- ComboBox – A combobox is a selection box that lists down options for the user to pick from.
- TextField – A text field is the simplest text input that allows the user to key in a single line of text.
- TextArea – Unlike the text field, the text area is a multi-line text input field that also supports text decoration.
- MenuBar – A menu bar is an array of drop-down menus located along the edge of the application window.
- RoundButton – The round button is identical to the button, except it supports rounded corners.
- Slider – Sliders allow user to manipulate a value by moving a handle along a track.
- SpinBox – A spin box is an integer selection box with up and down indicator buttons for manipulating the integer value.
There are many more than the ones listed here. For the full list of QML types, visit https://doc.qt.io/archives/qt-5.11/qtquick-controls2-qmlmodule.html.
Let's look at some example code applying Qt Quick Control 2 in our application:
import QtQuick 2.13
import QtQuick.Window 2.13
import QtQuick.Controls 2.12

ApplicationWindow {
    visible: true
    width: 200
    height: 200
    title: qsTr("Hello World")

    Button {
        text: "Push Me"
        anchors.centerIn: parent
    }
}
In the preceding code, we imported the QtQuick.Controls module to our QML file then created a Button object with the label Push Me. The result looks like the following:
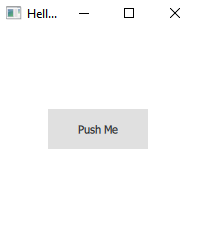
Qt Quick Control 2 comes with Default Style, which mainly consists of gray and black colors, as shown in the preceding screenshot.
There are several other styles that you can choose for making your application match the operating system you're running. Some other options are as follows:
- Fusion style: Fusion Style is a style that looks very similar to the native widgets of a desktop operating system and is suitable to use for a desktop application.
- Imagine style: Imagine Style relies on image assets to display the widgets, which are suitable for applications that required a more customized look and feel.
- Material style: Material Style is specifically designed to make your application look like a native android application as it follows the official Google Material Design Guidelines entirely.
- Universal style: Universal Style makes your application look like a native Universal Windows Platform application as it follows the Microsoft Universal Design Guidelines.
For more information regarding all of the styles listed here, check out https://doc.qt.io/archives/qt-5.11/qtquickcontrols2-styles.html.
To apply the style to your application, you need to perform a few steps:
- You need to create a file called qtquickcontrols2.conf and add it to your project resource. Then, add the following code to the file:
[Controls]
Style=Material

[Material]
Theme=Light
Accent=Teal
Primary=BlueGrey
- Under [Controls], we set our Qt Quick Control 2 style as Material.
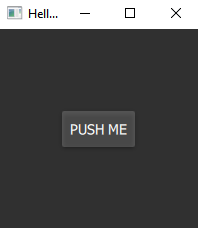
- After that, under [Material], we set the colors of our material style. If we run our program again, you should see the button has changed:

Our application now looks like it's running on the Android operating system! Each style has its own distinctive configuration so you'll have to check out respective documentation to learn more it.
- For Fusion Style, check out https://doc.qt.io/archives/qt-5.11/qtquickcontrols2-fusion.html.
- For Imagine Style, check out https://doc.qt.io/archives/qt-5.11/qtquickcontrols2-imagine.html.
- For Material Style, check out https://doc.qt.io/archives/qt-5.11/qtquickcontrols2-material.html.
- Finally, check out https://doc.qt.io/archives/qt-5.11/qtquickcontrols2-universal.html for Universal Style.
Other than setting the colors in the qtquickcontrols2.conf file, you can also override it in the QML file. This is really helpful if you want a particular QML file to carry a different style than others. The following code shows this:
ApplicationWindow {
    visible: true
    width: 200
    height: 200
    title: qsTr("Hello World")

    Material.theme: Material.Dark
    Material.accent: Material.Green

    Button {
        text: "Push Me"
        anchors.centerIn: parent
    }
}
The preceding code produces the following result:
You can also override the style of each individual QML object, shown as follows:
ApplicationWindow {
    visible: true
    width: 200
    height: 200
    title: qsTr("Hello World")

    Material.theme: Material.Dark
    Material.accent: Material.Green

    Button {
        text: "Push Me"
        anchors.centerIn: parent
        highlighted: true
        Material.accent: Material.Blue
        Material.background: Material.Orange
        Material.foreground: Material.Pink
    }
}
Since the button now has its own Material.accent property, it will override the one we set at the top. The code produces the following result:

Lastly, Qt also provides you with a C++ method to change the Qt Quick Control 2 style through the QQuickStyle class. You can call the setStyle function under QQuickStyle to change the style:
QQuickStyle::setStyle("Material");
We have gone through some of the features of Qt Quick Control 2 and how to change its appearance. In the next section, we will look into the new graphical editor for SCXML and how we can create a simple state machine using it.