
Pan Prep
I have a system of prepping pans from which I do not stray. I regret it when I do. At first, this might seem over the top or too much work. But I’ll show you how I do it and I’ll tell you why, and once you get the hang of it, it will be like second nature to you.
The first thing I do, before dealing with the pans, is preheat the oven per the recipe instructions. Then, I take out my pans. Usually two 8-inch/20.5 cm pans. I take a little knob of unsalted butter and smear it in a light coat along the bottom of the pan. This method might appeal to you if you aren’t all too confident about being able to contain nonstick spray to just the bottom of the pan. It’s pretty easy to accidently get the nonstick stuff along the sides. The reason I avoid greasing the sides of the pan is that I want to keep the cake from shrinking too much from its intended size. An 8-inch/20.5 cm cake can become a 7½-inch/19 cm cake when the sides are too liberally sprayed, as the batter never adheres to the confines of the pan and just shrinks as it grows up. This is also the reason I choose “stick” pans and not nonstick pans. I can always run a paring knife or small offset spatula along the sides of the pan to release it, but I can’t make the cake magically grow once it’s out of the oven.
A MESSAGE FROM THE
 Cake Lady
YOU’VE GOT THIS
Hey, you! Yeah, you. The little cutie pie opening that box of cake mix. I’ve heard you say that you don’t have the time to make a cake from scratch. I’ve heard you say you always screw up scratch cake recipes. I’ve heard you say that you’re not a real baker. But did you go to the grocery store for an already-made cake? No, you didn’t. Why? Because deep down you know you’re a real-deal baker. You have an irrepressible urge to mix up batter and watch it transform in the oven. You just want to avoid the part where it craters in the middle or crumbles into blocks of sawdust when you drive a fork into it. But have no fear, the Cake Lady is here, and I’m going to hold your hand and lead you to the land of real cake and make you the baker you were meant to be.
I then cut a piece of parchment to fit the bottom of the pan and gently brush the top of the parchment with more butter. You can also spray the bottom, and only the bottom, of the pan. Not the sides, just the bottom. But we know why that’s tricky.
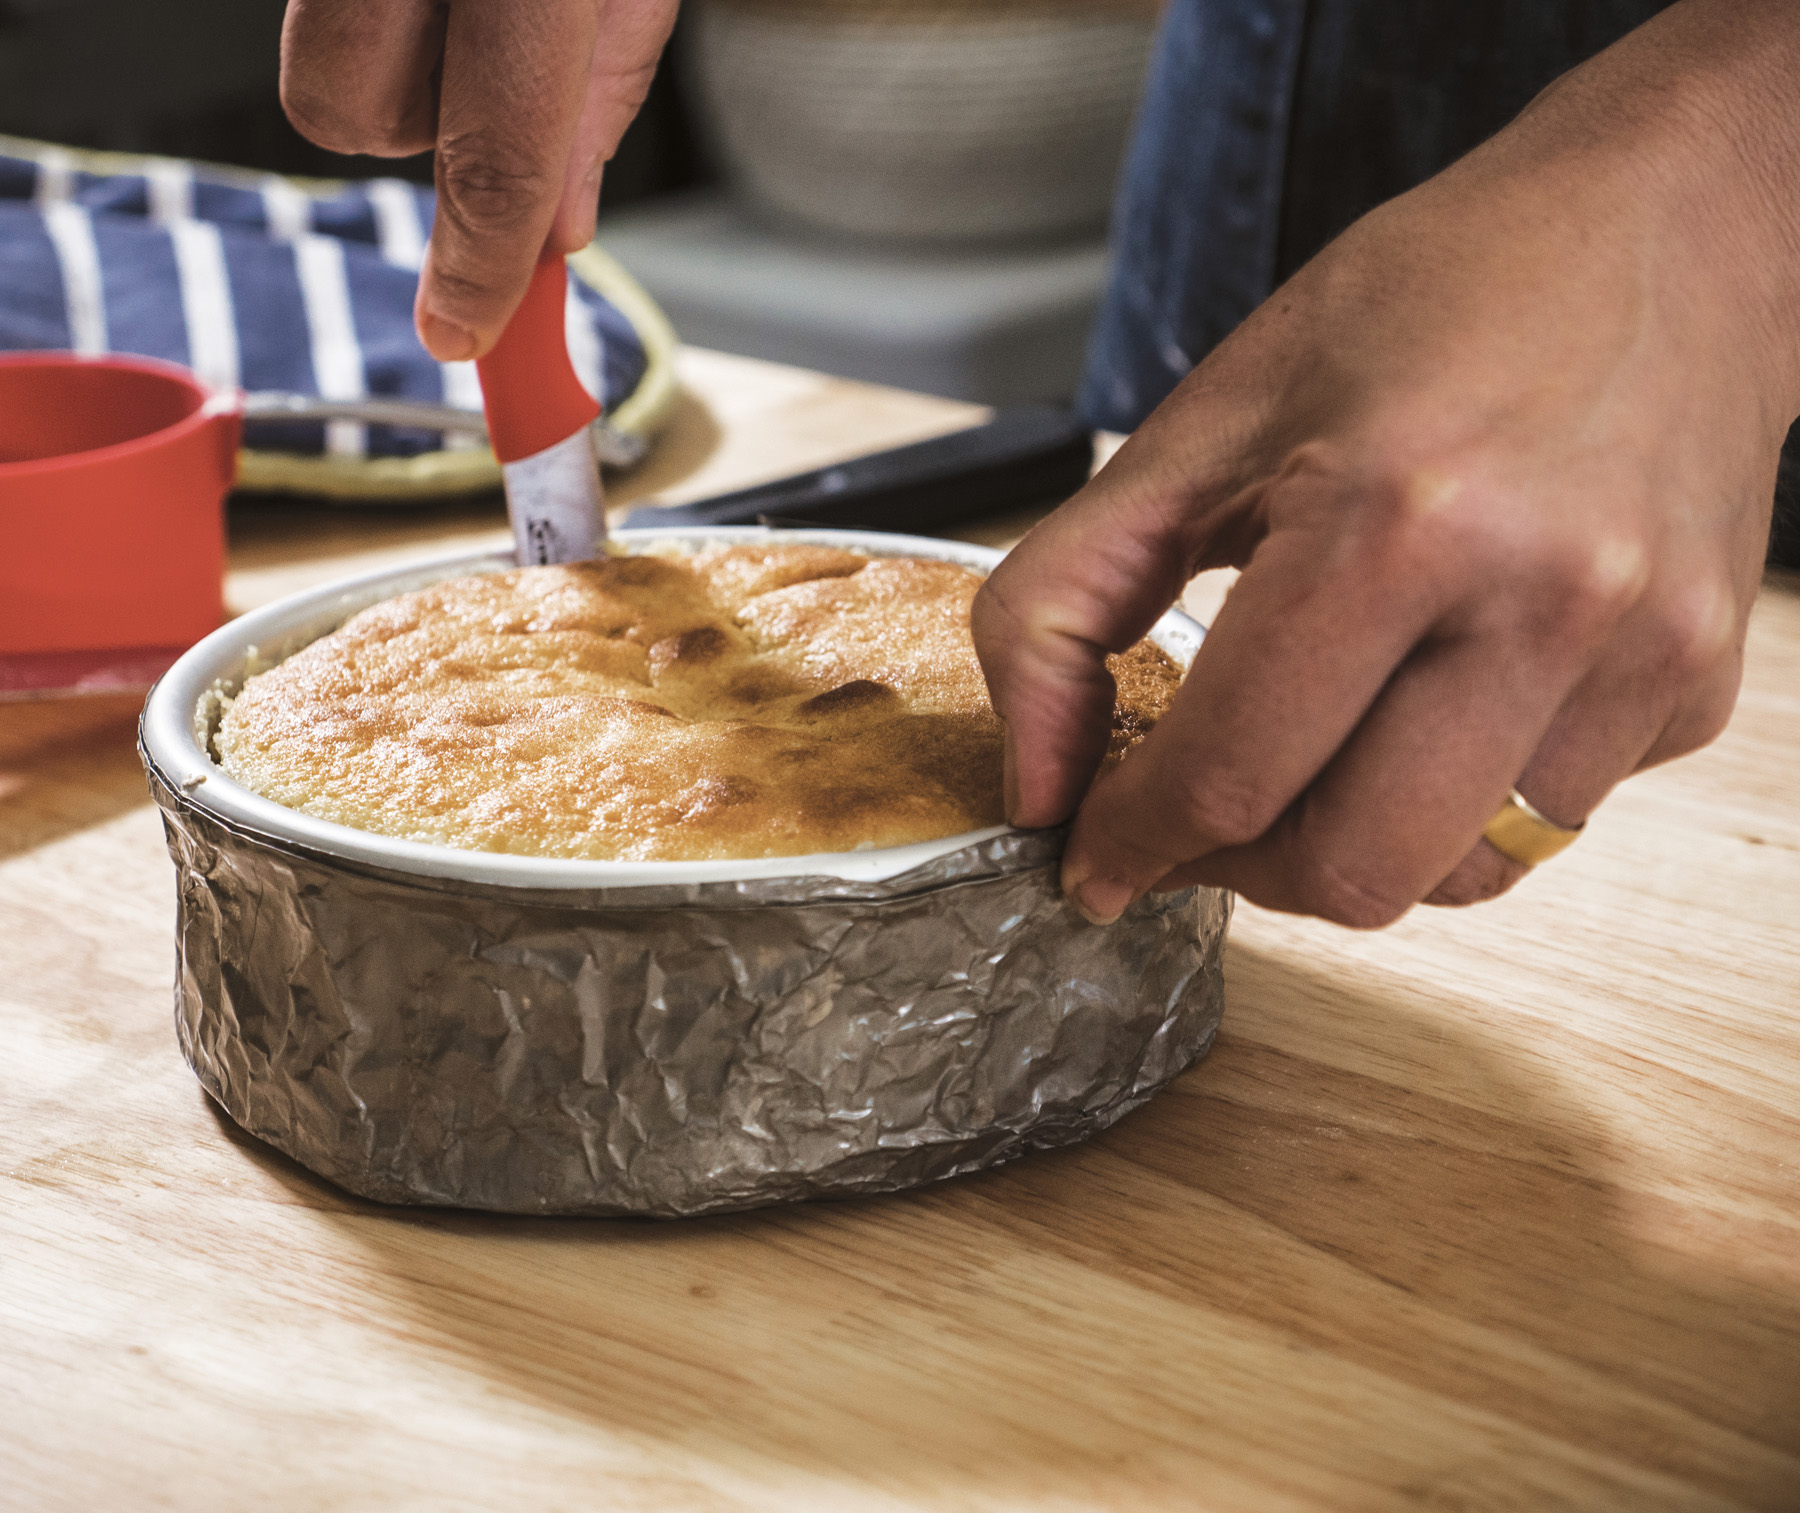
But I don’t stop at just prepping the inside of the pan. I prep the outside of the pan.
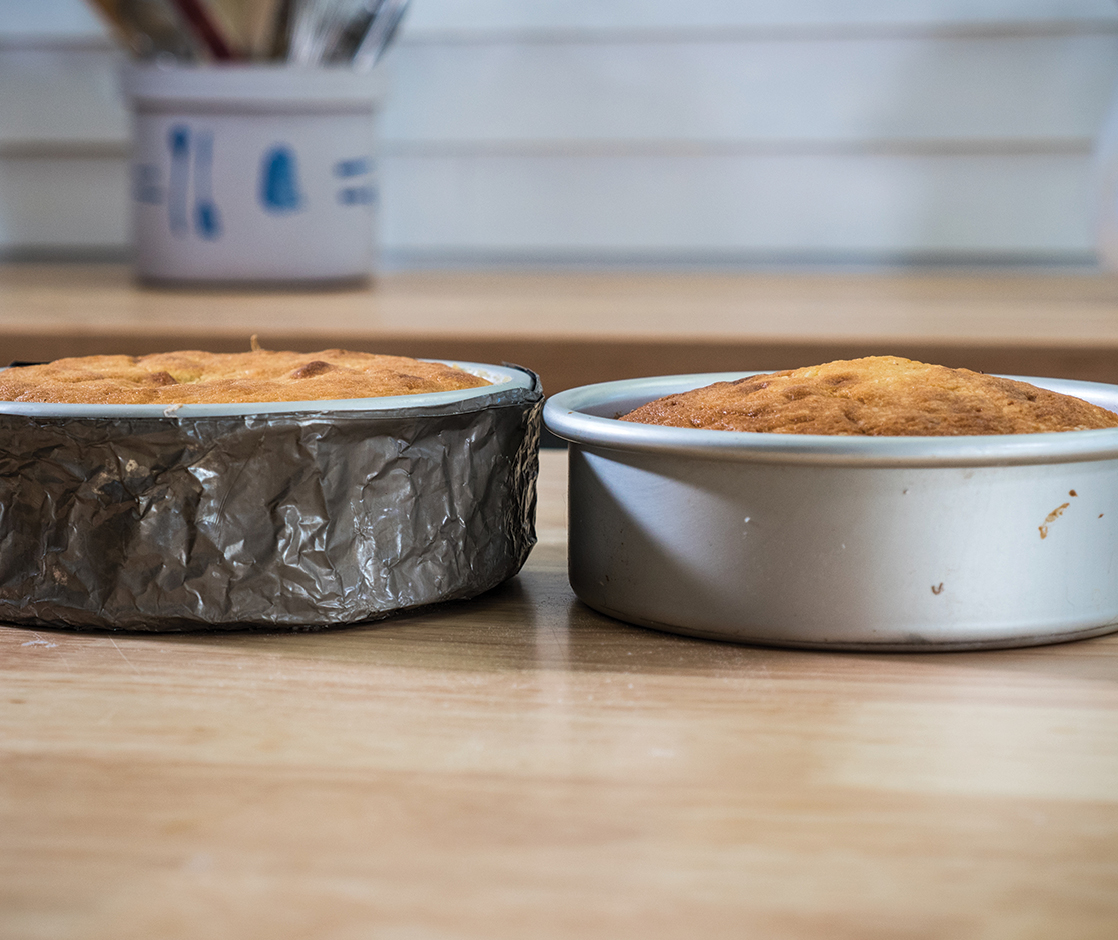
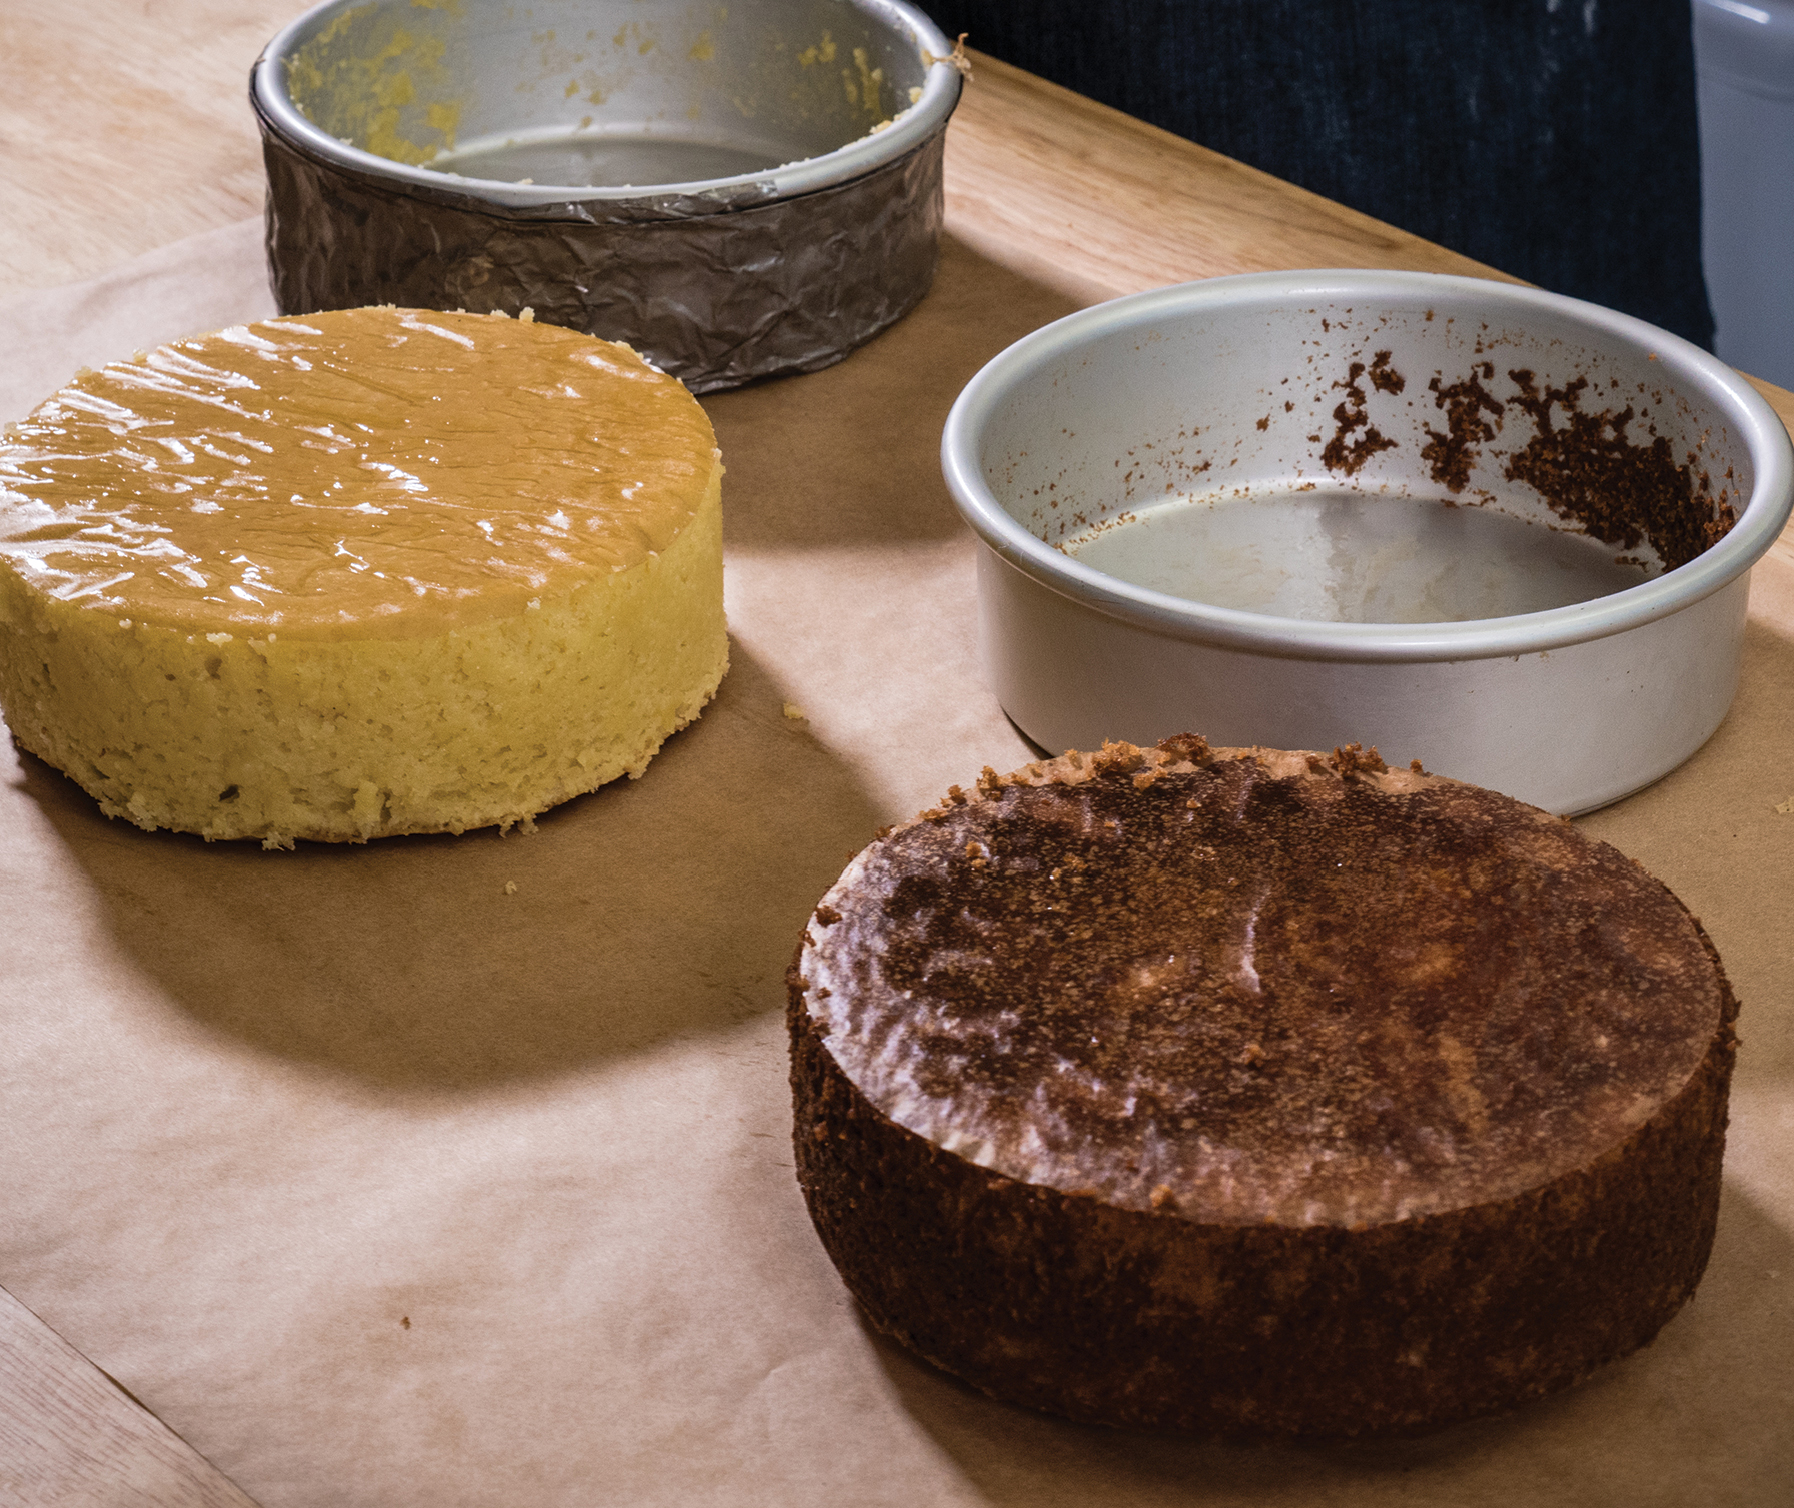
You might have noticed in baking supply shops that things called “cake strips” are being hawked as the fix to cake doming (doming is when the cake rises higher in the middle than on the sides). They do actually work, by creating something of a steam environment that regulates the temperature of the cake batter—keeping the sides from setting too quickly, and then having the batter settle all in the middle dome. Unfortunately, I find the commercial strips tend to work too well and can steam some cakes to the point where they have a gummy texture. But there’s a happy medium and that’s making homemade cake strips with things you likely already have at home.
I cut a few lengths of an old, but clean, terry cloth towel. I make the strips about 2½ inches/6.5 cm tall and I make sure the length is at least as long as the circumference of my biggest baking pan. I usually need two strips for this and it’s okay if they overlap a bit when wrapped around the pan. I wet the pieces and then, using safety pins, I secure the strips snugly around the outer sides of my cake pan. To create an insulated environment, I wrap aluminum foil around the pan to cover the strips, keeping them from drying out too quickly.

Another tool I use is waterproofing repair tape that has a reflective, metal outer surface and a very sticky contact surface, just like a regular piece of tape. I use a small piece to keep aluminum strips together. It’s heat-safe because the outside is faced in metal, but make sure to only use just enough tape to secure the aluminum, as the sticky side can melt a bit onto the pan or the oven rack. It’s easy enough to scrape off once cooled. Using cake strips not only stops doming, which gives you an even layer of cake that is easily torted, but also keeps the edges of the cake from overbrowning.
Cake Pan Size and Batter Amounts
Most of the cake recipes here are developed for two 8- or 9-inch/20.5 or 23 cm layers, either round or square, unless otherwise stated. However, there will be a time when you want to make a 6-inch/15 cm cake or a 10- or 12-inch/25.5 or 30.5 cm cake. Traditionally, for an 8-inch cake, the standard amount of batter for two pans is 6 cups/1.4 L (3 cups/710 ml of batter in each pan). That’s give or take ½ to 1 cup/120 to 235 ml. For a 10-inch cake, 12 cups/2.8 L are standard (6 cups/1.4 L per pan), and then for a 12-inch, 14 to 15 cups/3.3 to 3.5 L (7 to 7 ½ cups/1.65–1.75 L per pan). And then, of course, there’s the 6-inch/15 cm cake, which requires 4 cups/950 ml (2 cups/475 ml per pan). When it comes to 6-inch cakes, I usually have three pans available or I bake off all the cake batter in a half sheet pan and use a cake ring to stamp out 6-inch rounds.
A MESSAGE FROM THE
Cake Lady
POKE IT. DON’T STAB IT.
Many a cake recipe will recommend that to check for a cake’s “doneness” you should stab the poor thing with a toothpick. In the event it comes away with wet batter on it, it’s not done. If it appears from within the depths of cake either clean or subtly speckled with moist crumbs, it’s done. The thing is, it might not be done. There’s a slight chance that the cake hasn’t completely set and taking it out of the oven will cause the middle to fall a bit. That’s not fair to either you or the cake.
That’s why I recommend gently poking the cake to see whether it springs back. If it does spring back, it’s done. If the cake feels set, not at all goopy, but while poking you leave a small indentation that doesn’t leave, the cake’s not yet ready and needs about five more minutes. Another indication of doneness, if you prepare the pan as I recommend with fat spread on the bottom of the pan and not on the sides of the pan, is you’ll often see the sides of the cake just starting to pull away from the pan. With cakes made from the foam method, sponge cakes, the cake will often “tell” you when you poke it that it’s not ready. You’ll hear a crackling noise, a message from the sweet beyond that the cake needs a few more minutes to set before it leaves the warmth of the oven. If you are especially persnickety, you can also use an instant-read thermometer, which means you have to stab your cake. When the temperature reads between 200° and 210°F/90° and 100°C, the cake is baked through. All this said, if I had to make a choice, I’d rather my cake be slightly underdone than overdone. I’ll take an ultra-moist cake over a dry cake any day.
You will have to make more than one batch of batter if you wish to make a larger cake than 8 to 9 inches/20.5 to 23 cm, and then the timing changes, doesn’t it? In general, for every 2 inches/5 cm larger the cake gets I add fifteen to twenty minutes more to the baking time, but please start checking after ten minutes past the original baking time for an 8-inch cake. A 6-inch/15 cm cake will be about ten minutes less than the 8-inch batter equivalent. But here’s the thing, and you are likely going to hate this: baking times are never exact. Every oven is different and most are liars. You have to start checking for visual cues in all your baking, even if you’re using exactly the pan that’s called for. I give the oven a little hip check, a very slight one, just enough to see whether the cake is jiggly through the oven door. If you knock the oven too hard, you could make the cake fall. If the cake has set, you can open the door and give the cake a poke. If it springs back when gently prodded, it’s done. If it feels set but there’s a slight indentation left behind, give it five more minutes. If you notice that the cake is pulling away from the sides of the pan, that’s a sure indicator it’s done.
Serving Amounts per Cake
Serving sizes are standard in just about every publication and I think they are stingy as all get out. Keep in mind that the standard serving suggestion is for a two-layer cake as well, which I find just unfair as a cake glutton. I stick to the standards as far as the cake diameter goes, but as a rule (that I sometimes break) I make my cakes four layers, not two. I think that makes up for the miserly approach of the number of slices per cake. So, I’m giving you the normal servings but feel free to halve them, based on how cake crazy your guests are.
Different Cake Types and When to Use Them
A friend of mine, fellow baker, and former specialty cake maker, Michele, lamented at the fact that all the tear sheets her former clients would bring in were pictures of Australian cakes, but the layers and fillings they wanted inside were 100 percent American. You may wonder what this means but I understood immediately and it explained quite a bit about why she quit the cake-for-hire business. Some of the most amazing new cake designs come from Down Under and with Instagram and social media allowing pictures of the newest and yummiest to be transmitted across the globe in record time, brides-to-be in other parts of the world see the beauty and want some of it for their own. However, to “build” some of these complicated cakes, you often need a very sturdy interior. That means using a very dense cake, almost like a pound cake, that’s sturdy enough to handle being stacked and presented in the heat of an Australian summer. You’ll also need a sturdy filling, no whipped cream or curd. Ganache or buttercream, even a smear of jam, works best. Not knowing the mechanics of these cakes, most American brides ask that their cakes be built with the most tender and moist of cakes with soft and luscious fillings that could collapse under the weight of so many tiers or feel the strain of heavy décor and then teeter or tear.
If you’ve got a cake in mind and aren’t sure what type of layer to use, have no fear. You’ll find it in here.