-
When you buy a new grill, don’t skip the burn-in. Perhaps this should be called the burn-off. It’s an hour-long highest heat test run that will help burn off any chemicals, oils, and packaging crumbs that could become toxic smoke. Often new grills will come with instructions on how to season your new toy. If not, you’ll still need to run it for at least an hour at its highest heat level before you let it cool again and start with real food. We all love a new grill, but no one likes chicken with a new car smell.
-
My favorite trick for a new grill is to research your hot spots. Most grills have them, and it can take years to get confident with the areas of the grate that will blast heat more directly than others. One of the first cooks I like to tackle is breakfast. In fact, it’s biscuits for all. Start with a few cans (yes, the cheap cans of biscuit dough that come in tubes! I love that, oh so satisfying “thook” you get when popping the tubular cardboard can open. Cover the entire surface of the grill with the raw dough disks, then fire up the grill at its lowest heat and get ready. Bread burns fast, so after a few minutes when you can see or smell the first charring, be prepared to quickly flip each biscuit and keep it on its same spot on the grill grate. Once all are flipped, take a quick photo for future reference. Work quickly and repeat with the other side for confirmation. The clear contrast from white to brown to charred, will be evidence of the hotter areas on the grate. Take another photo and feel free to eat the results. For a sweet version of this, see my Hot Spot S’mores (found in Nuts, Cheese, Desserts & More ) .
-
One age-old grill question is this: Should I cook with the lid of the grill open or closed? The trick is to judge by the size of the food compared to your hand. If the burger, chop or other meat is thinner than the thickness of your flattened open palm, then you could leave the lid open, but if the meat is thicker than your hand, definitely close the lid and allow for a slower roast.
-
The simple trick for maintaining a clean grill is to line your drip pans and buckets with aluminum foil to ease clean up. Be sure you don’t restrict good air and smoke flow in the process. Or check with your grill manufacturer to see if they sell disposable inserts that serve the same purpose. I love how inexpensive liners help make clean up a snap.
-
Soot busting trouble? If you cook over a wood fire, you can use my old Boy Scout trick of coating the bottom of pots and pans with a thin layer of dish soap. This protective layer will allow you to rinse away typically stubborn soot that would normally cling to the surface.
-
Make your grill a smoker. Use this trick to convert your horizontal gas grill into a smoke machine. Create a smoker pouch by wrapping two handfuls of wood chips with heavy-duty aluminum foil and set it next to a burner, or on the coals. I like to start with one handful of chips soaked in water and another dry handful to allow for a longer duration of smoke and smolder. Now, some gas grills come with a built-in smoker box that eliminates the need for a pouch, or you can purchase tubes and smoker boxes (see accessories later in this chapter) that are made to do the same. Place the food to be smoked on the coolest area of the grill, grate away from an active burner or heat source. If you have multiple burners, you should ignite only one and adjust to its lowest setting. Often this is just enough heat to get the wood chips smoking and keep the grill at a low and slow cooking temperature, between 225°F and 250°F. This is why you have that thermometer on the lid! Use it as a way to “see” what’s happening inside the grill.
Grillustration:
Making a Gas Grill a Smoker

-
The easiest technique for cleaning the grill is similar to how you clean your kitchen oven. Blast it with high heat before and after every cook. Crank it up to the grill’s highest setting for five minutes to dry up and burn off all the sticky bits and scrape off any cook surface remnants with a firm grill brush. Some experts suggest placing a sheet of aluminum foil, shiny side down, over the grate to hasten the process. Once you’ve made this a habit at the end of every grilling session, the “before cooking” routine gets much easier.
-
Zone Out for the best results. One of the most basic tricks for grilling is to maintain different temperature areas, or “zones,” designated across your grate. This will allow you to shift food from one zone to another to avoid flare-ups, fire up a sear, or just hold already “done” meat until ready to serve. If you are using a gas grill, actually use those front dialing knobs (they have a purpose)! This is the easiest way to create and control your hot and cool zones. For charcoal grills, arrange your briquettes in zero, single, or deeper hot coal layers. A disposable aluminum pan half-filled with water can also help to space your cool zone. It also works great to catch drippings and avoid grease fires.
-
Got gas? One problem with liquid propane tanks is that it is hard to know how much fuel you have remaining inside. Here is a trick to use before you start your grill. Take a few cups of warm water and pour it slow down the outside of the tank to try to evenly warm its surface from top to bottom. You may need to tilt the tank on a slight angle to make it easier to coat the sides. You can determine the fuel level by touch. The top, empty, part of the tank will stay warm longer. You will feel that the tank is noticeably cooler below the fuel line.
Grillustration:
Tank Level Check

So many Grills…so little backyard. If you’re like me, you can only manage the space for two or three grills. Perhaps that’s due to budget, patio space, or spousal approval. So you need to make some tough decisions in your hunt. Here’s my quick buyers guide to help you navigate.
Kettle Grills
- Weber made the kettle grill famous. It was created in the 1950s when a welder at Weber’s Metal Works came up with the shape by cutting a metal buoy in half. This is the quintessential American charcoal grill. It’s loved for its dependability and predictability. It’s very adaptable, and, with a little charcoal wrangling, you can use it for smoking as well as hot and fast grilling. The best part about a kettle grill is simply it’s all American nostalgic good looks. They’re just cool.

Gas Grills
- Gas grills come in different shapes and sizes, but they are typically horizontal ovens. Often stainless steel to minimize rust, with a cart, handles and wheels built-in, they are made to be easily positioned from patio to garage. Though you still shouldn’t move a hot gas grill, its portability when cool, is a feature to be considered. Look for a smoker box or small drawer for wood chips and at least two adjustable burners to give you the ability to smoke low and slow. Personally, I like a sear burner and the ability to use a rotisserie, too. This is the easiest kind of grill to use. It’s just like an oven. Plus, they can be even more carefree when connected to a residential natural gas line. No more refueling.
Alas, if you absolutely must have the flavor of charcoal, gas will not work for you. You probably haven’t read this far, anyway.
Eggs
- Kamado style grills are charcoal and are typically heavy stone or enamel glazed ceramic material. The Big Green Egg is the big brand name, but there are other manufacturers like Primo. Many of my friends interviewed in the audiobook version of this book (and in the Talking Chop sections forthcoming) swear by them.

Vertical Smokers
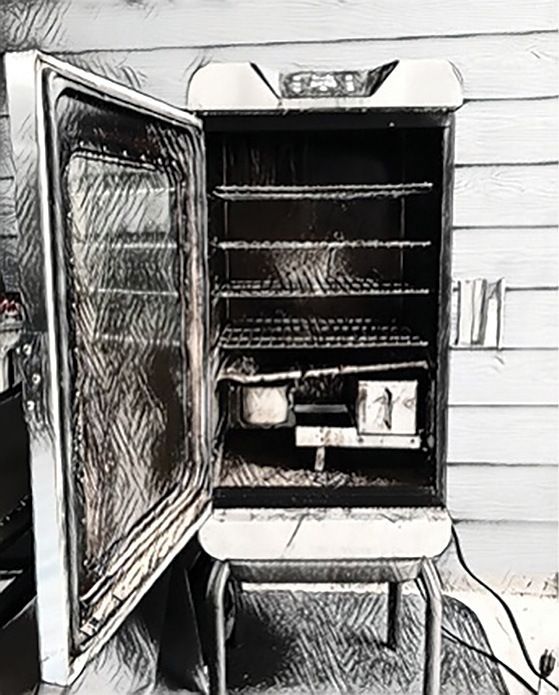
- Smokers also have many shapes and the vertical smoker also has many fuel sources. My favorite would be the Backwoods Smoker that runs with a pan of charcoal. Its heavy-duty build quality makes it a favorite of competition cooks. It’s really the Cadillac of cookers. My daily driver is a Char-Broil vertical smoker that is electric. I truly believe it is the easiest tool for smoking meat and game. Other options include wood pellet, gas, and wood-burning vertical smokers. One downside to these is that you are restricted to smoking low and slow. There is no hot and fast grilling ability with these smokers.

Bullet Smokers
- Charcoal is the primary fuel source for bullet smokers. These pill-shaped smokers are a cross between kettle grills and vertical smokers. In fact, Weber’s Smoky Mountain cooker or “WSM” is the gold standard for this type of smoker. Several of our Talking Chop experts use them (see Greg Rempe’s thoughts in Talking Chop later in this book). Competition cooks love it for its consistent performance, durability, and lightweight. However, you will need to be ready to commit to stoking wood chips and charcoal for longer duration smoking. One feature I love is the ability to remove the upper portion of the bullet and utilize the lower pan of charcoal to finish off a slow-smoke with a hot and fast “flash” grill over high heat. I started with an electric version of this smoker and still love the affordability of the early Brinkmann models.

Horizontal Smokers
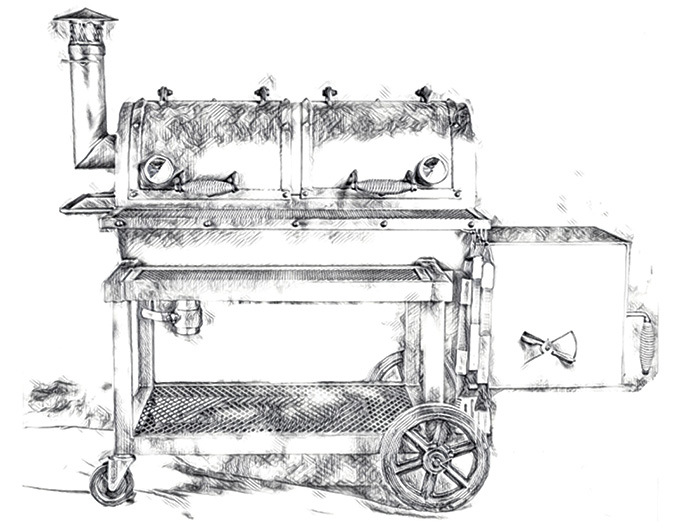
- Similar to the shape of a typical gas grill, a horizontal smoker offers a lot of grate space. The horizontal smoker is popular with “stick burner fans.” This is when you use split logs in a side firebox as your heat source. The box is positioned on the side to heat the cook chamber indirectly and still provide plenty of flavorful smoke to flow over the meat. A distinct smokestack is also a signature of this smoker, and is popular for competition cooks. Home built versions are sometimes welded out of large steel tanks. They’re definitely big boy toys.

La Caja China
- Also known as a Cajun microwave, these rustic wood chests slow cook by inversion. They have been popularized by celebrity chefs like Bobby Flay, and are real conversation starters when cooking for a crowd. In fact, it’s hard to cook small portions inside these big, metal lined, wood crates. The heat radiates down from an open pan of charcoal that sits on top of the box. Its inefficient use of fuel is a drawback. They also sit low to the ground, making tending to the coals tough on your back. Plus, the inability to grill and difficulty to clean, make it the worst of both worlds!

If you haven’t figured it out already, there is a big difference between smoking and grilling. Both are barbecues, but both types of cooking and cookers are notably different. A smoker is made to hold a low and steady (slow) temperature of approximately 225°F over many hours. Grilling utilizes various temperatures but shines when you need to hit searing hot temperatures suitable for burgers, sausages, chicken, and steaks.
Grilling Is Hot
Using a propane or natural gas grill is sometimes poo-pooed for its lack of showmanship and its lack of wood. In reality, it’s the top choice of most American households and should not be underrated. You can achieve championship level barbecue to be proud of with these workhorses of the backyard, but it helps to know a few basic tips, first.
-
With a grill, you can make quick work of an evening meal. Once the grill is hot, it’s simple to place your meat on the grill, wait four minutes, flip, and repeat. I love going hot and fast without a lot of thinking.
-
It all starts by opening the lid. Worth repeating – open the lid – and then you can ignite that satisfying “whoosh” and blue flame. Once the grill is ignited, you can close the lid, but give yourself plenty of time to allow your grill to fully heat up. Charcoal grills do not take long to heat, but I’ve found my Weber Q and smaller gas grills can take a painfully long time to heat up. You not only need to allow the time to let your grate heat, but often the gas regulators are very sensitive and throttled back for safety. Be patient and give it more time. Once everything is hot, it moves fast. This is where those knobs come into the picture to control the zones. Use them tactically to control cold zones, hot zones, and maybe even a safe zone between. Just because you are grilling doesn’t mean you have to forego smoke flavor. Use wood chips, chunks, and smoker pouches to add a layer of smoke flavor as described above.
-
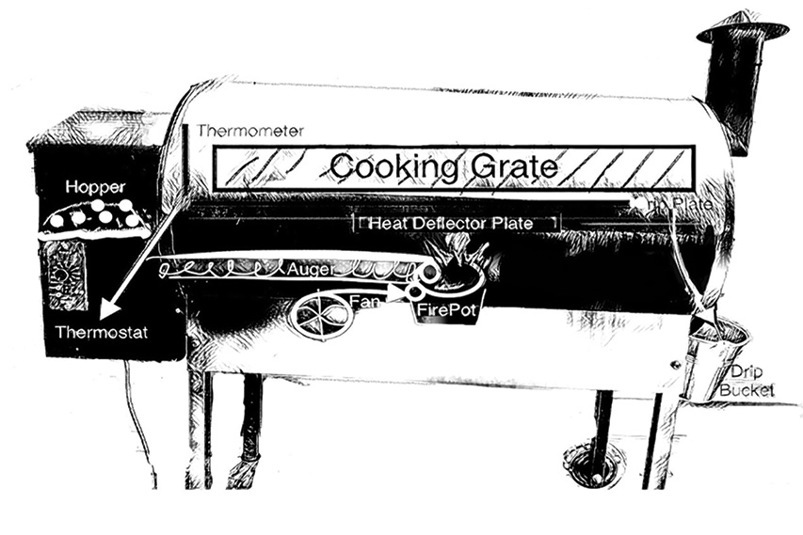
It’s important for me to insert an additional note about my favorite type of cooker, the Wood Pellet Grill. This magic trick of a cooker is my perfect combination of smoker and grill. I dedicated an entire book – The Ultimate Wood Pellet Grill Smoker Cookbook – to singing its praises. This grill enlists the help of an electric auger to stoke a tiny fire-pot in the bottom of the cook chamber. The size of a teacup, this little fire-pot cranks out more direct heat than you could imagine, and also delivers just the right amount of wood smoke flavor. These grills can pull double duty. Hot and fast, or low and slow, this grill 33handles it without the need to tend a fire. If an electric smoker can be described as “set it and forget it” cooking, then the wood pellet grill is the next best thing, and you can still pull a rabbit out of your hat with the magic of high heat grilling. Ta daaa!
Grillustration:
Wood Pellet Grill

Sinking your Teeth into Smoking
I have to admit that when I really think about barbecue, I almost always have smoking in mind. There’s no other way to attain the primal succulence of brisket, ribs, and pull apart threads of glorious pork. Smoke is also the secret ingredient in the best barbecue. You can’t achieve that glorious bark without it. And it’s not just meat that benefits from a lick of smoke. Your vegetables, nuts, and even seafood
can be a wonderful blank slate for a fragrant layer of hickory, oak, and applewood smoke.
-
You’ll need to start with a steady stream of light smoke. Not sooty black smoke but just enough to slowly baste your food. I’ve heard it described as “blue” in nature, but I’ve never seen that. Just avoid heavy black smoke that could impart a dirty flavor.
-
Take your time with larger cuts of meat. In fact, large pork shoulders and full beef briskets are usually all-day affairs. Constant stoking with wood or charcoal can be fun or work, depending on your mindset. Gas, electric, or Pellet power can alleviate the workload.
-
The magic of smoking also derives from the trickery of “low and slow.” When you take your time and maintain a temperature range of 225°F to 250°F, something special happens. Meats slowly relax the gelatin and collagen locked up in the fibers to create a new texture. One that is silky, savory, and succulent. If you go too hot, some meat will tighten and get tough; too long and things get dry. Disregard the USDA doneness guidelines and follow the pitmaster’s doneness temperatures. Steaks are best served rare, but most smoked barbecue achieves next-level fall-apart tenderness through higher temps.
-
Last, cold smoking is also a thing. It’s where you’re using smoke and spices to cure, rather than cook, your meat – perhaps for jerky. Or you enlist very low temperatures to transmit smoke flavor without the cooking. Aim to maintain a temperature under 100°F, and you can flavor delicate cheeses without melting them. Most smokers struggle to keep the heat this low, so you may need to use a smoker tube or other special cold smoking tool to achieve this special climate inside your cook chamber. A whisp of hickory or mesquite can lift a chunk of boring cheap cheddar to new heights. It’s worth the effort.