
If you’re a beginner, it’s a good idea to practice drawing all the facial features separately, working out any problems before attempting a complete portrait. Facial features work together to convey everything from mood and emotion to age. Pay attention to the areas around the features, as well; wrinkles, moles, and other similar characteristics help make your subject distinct.

STEP 1 Make a circle for the iris first; then draw the eyelid over it. (Drawing an entire object before adding any overlapping elements is called “drawing through.”) Note that part of the iris is always covered by the eyelid.
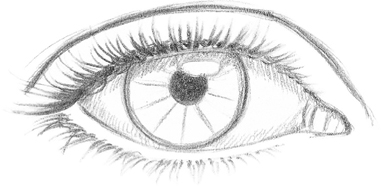
STEP 2 Start shading the iris, drawing lines that radiate out from the pupil. Then add the eyelashes and the shadow being cast on the eyeball from the upper lid and eyelashes, working around the highlight on the iris.
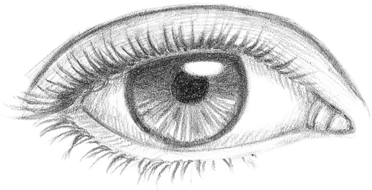
STEP 3 Continue shading the iris, stroking outward from the pupil. Then shade the eyelid and the white of the eye to add three-dimensional form.
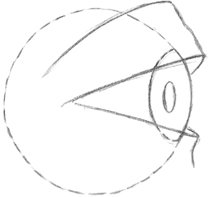
STEP 1 Draw through a circle for the eye first; then draw the eyelid around it, as shown. In a profile view, the iris and pupil are ellipses; the top and bottom of the iris are covered by the upper and lower eyelids.
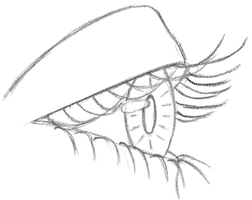
STEP 2 To draw eyelashes in profile, start at the outside corner of the eye and make quick, curved lines, always stroking in the direction of growth. The longest lashes are at the center of the eye.
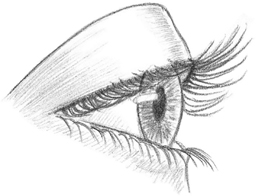
STEP 3 When shading the eyelid, make light lines that follow the curve of the eyelid. As with the frontal view, the shading in the iris radiates out from the pupil.
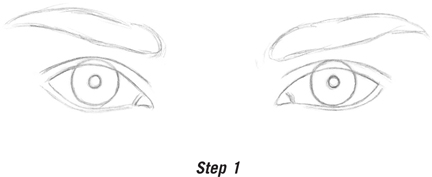
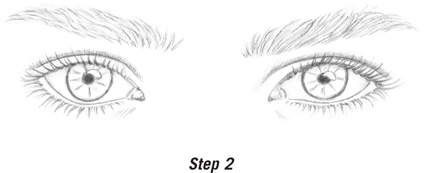
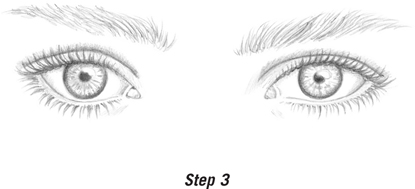
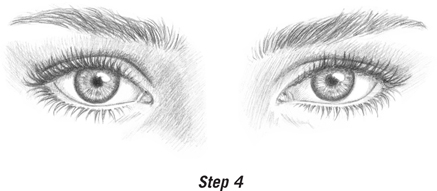
RENDERING A PAIR OF EYES After becoming comfortable with drawing the eye itself, start developing the features around the eye, including the eyebrows and the nose. Be sure to space adult eyes about one eye-width apart from each other. And keep in mind that eyes are always glossy—the highlights help indicate this. It’s best to shade around the highlights, but if you accidentally shade over the area, you can pull out the highlight with a kneaded eraser.

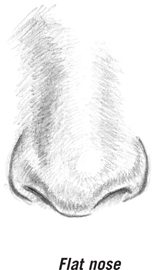
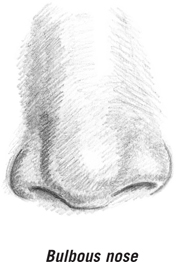
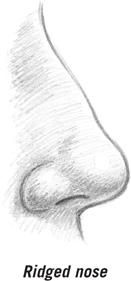
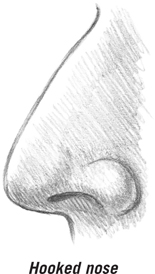
RENDERING NOSES To draw a nose, I first block in the four planes—two for the bridge and two for the sides (see “Combining Features” sidebar). Then I study the way each plane is lit before adding the dark and light values. The nostrils should be shaded lightly; if they’re too dark, they’ll draw attention away from the rest of the face. Generally men’s nostrils are more angular, whereas women’s are more gently curved.
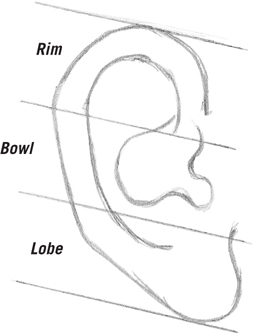
DIVIDING THE EAR The ear is shaped like a disk that is divided into three parts: the rim, the bowl, and the lobe.

SIZING THE EAR The ear usually connects to the head at a slight angle; the width is generally about one-half of the length.
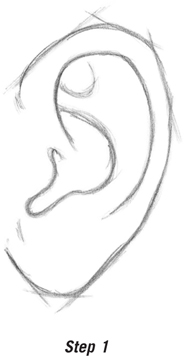
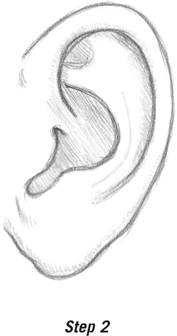
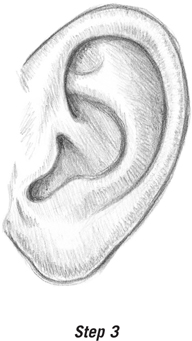
DEVELOPING THE EAR IN PROFILE I first block in the general shape, visually dividing it into its three parts. Next I start shading the darkest areas, defining the ridges and folds. Then I shade the entire ear, leaving highlights in key areas to create the illusion of form.
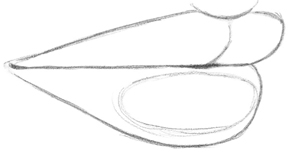
STEP 1 When drawing lips, I first sketch the basic outline. The top lip slightly protrudes over the bottom lip; the bottom lip is also usually fuller than the top lip.
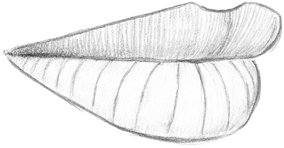
STEP 2 Next I begin shading in the direction of the planes of the lips. The shading on the top lip curves upward, and the shading on the bottom lip curves downward.
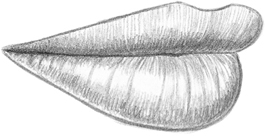
STEP 3 I continue shading, making the darkest value at the line where the lips meet. Then I pull out some highlights to give the lips shine and form. Highlights also enhance the lips’ fullness, so it’s often best to include larger highlights on the fuller bottom lip.
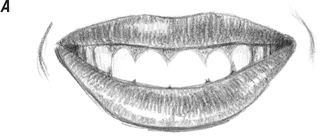


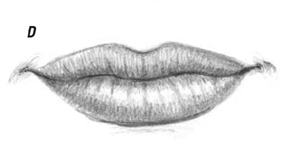
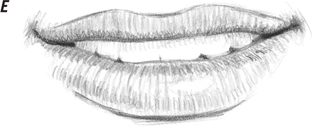
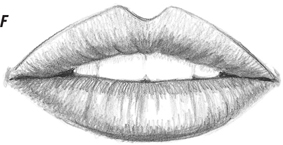
DETAILING THE LIPS Determine how much detail you’d like to add to your renderings of lips. You can add smile lines and dimples (A, B, and D), you can draw clearly defined teeth (A) or parts of the teeth (E and F), or you can draw closed lips (B, C, and D).