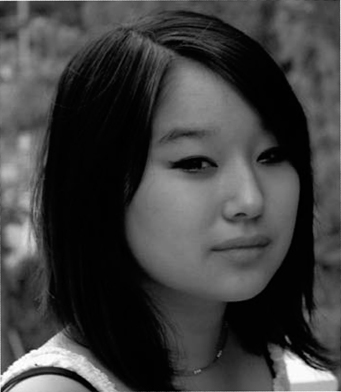
CREATING A COMFORTABLE SETUP When using live models, make sure they are comfortable and in a pose they can hold for a while. Schedule short breaks every 30 minutes so that both you and your models can take a “breather.”
Having models pose for you as you draw—or drawing from life—is an excellent way to practice rendering faces. When drawing from life, you usually have control over the way your models are lit. If you’re indoors, you can position the light source to your liking; if you’re outdoors, you can reposition your model until you’re satisfied.

CREATING A COMFORTABLE SETUP When using live models, make sure they are comfortable and in a pose they can hold for a while. Schedule short breaks every 30 minutes so that both you and your models can take a “breather.”
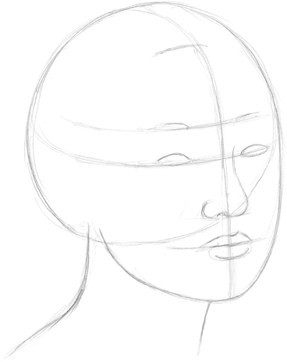
STEP 1 First I place the basic shape of the head with an HB pencil. My subject’s head is tilted at a three-quarter angle, so I shift the vertical centerline to the right a bit. (See page 7 for specific information on placing features in a three-quarter view.) I use my guidelines to block in the eyes, nose, and mouth. Then I indicate the neck.
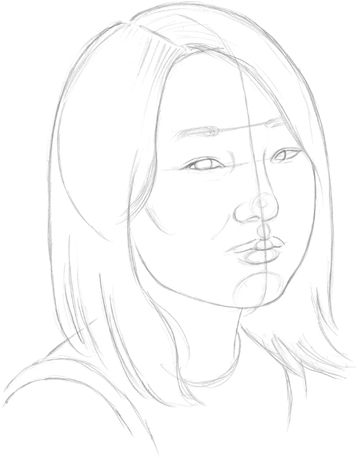
STEP 2 I use the same HB pencil to foreshorten the subject’s left eye, making it a little smaller than the right eye. (See “Distorting the Features” on page 7 for more on foreshortening.) I draw only one nostril, and I make the mouth smaller on the left side. Making closer elements larger shows that the face is angled toward the viewer.
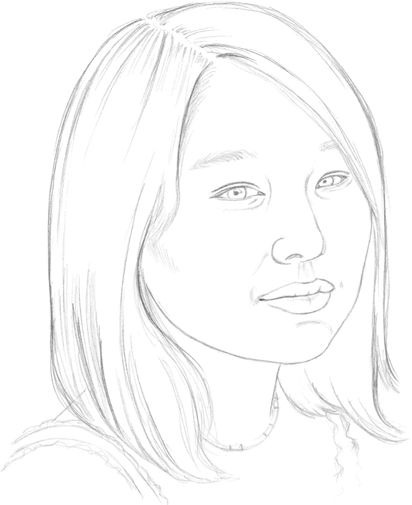
STEP 3 I let my model take a short break so she can relax and stretch while I check the proportions of my drawing. When I’m satisfied with the placement of the features, I begin to develop the eyes, nose, mouth, and eyebrows. I take note of what my model is wearing (her necklace and the ruffled shirt), and begin to render the details accurately.
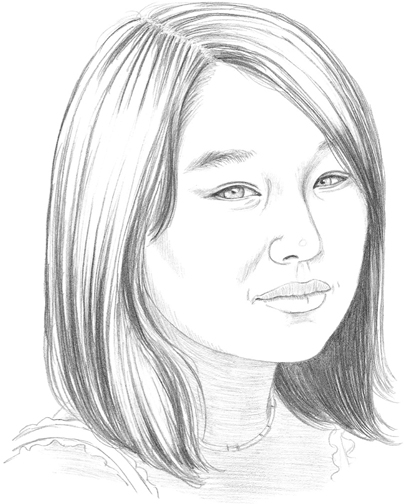
STEP 4 I start shading the face in the darkest areas, frequently looking up at my model to see where the shadows lie. I use a 2B pencil to develop the hair, varying the length of my strokes and leaving some areas mostly white for highlights. Then I shade the neck using light, horizontal strokes.
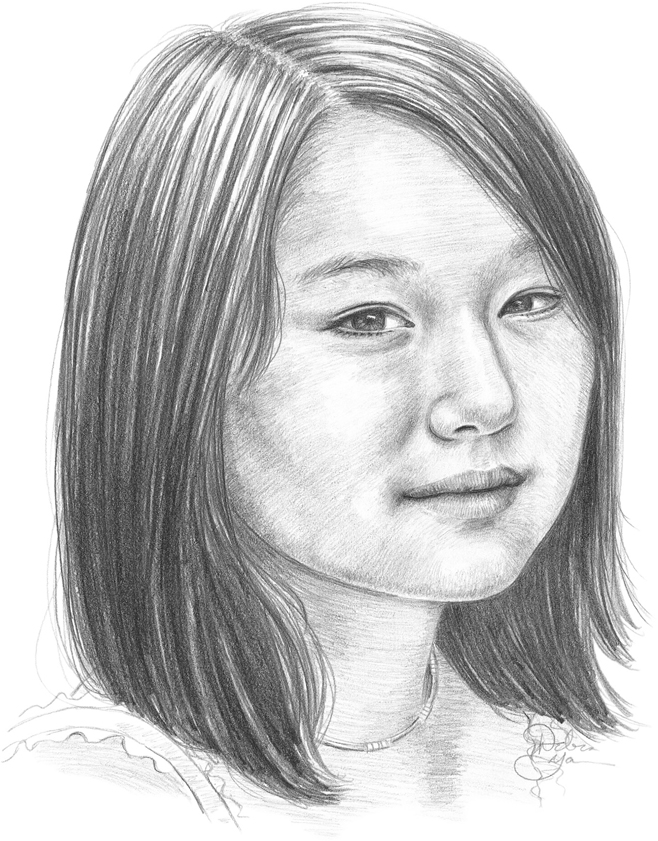
STEP 5 After another short break, I use a 3B pencil to add even darker values to the hair, leaving the lightest areas at the top of her head to show that the light is coming directly from above. Then, looking up at my model to locate the lightest values in her face, I use a kneaded eraser to lift out some highlights and to soften any strokes that are too dark, smoothing out the skin.