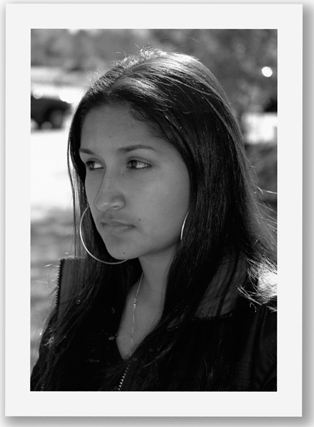
SIMPLIFYING A BACKGROUND When working from a photo reference that features an unflattering background, you can easily change it. Simplify a background by removing any extraneous elements or altering the overall values.
An effective background will draw the viewer’s eye to your subject and play a role in setting a mood. A background should always complement a drawing; it should never overwhelm the subject. Generally a light, neutral setting will enhance a subject with dark hair or skin, and a dark background will set off a subject with light hair or skin.

SIMPLIFYING A BACKGROUND When working from a photo reference that features an unflattering background, you can easily change it. Simplify a background by removing any extraneous elements or altering the overall values.
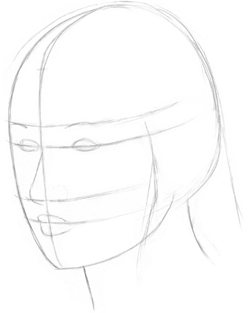
STEP 1 With an HB pencil, I sketch in the basic head shape and the guidelines. Then I block in the position of the eyes, brows, nose, and mouth. (Notice that the center guideline is to the far left of the face because of the way the head is turned.) Next I indicate the neck and the hair.
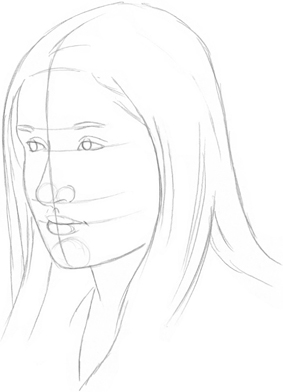
STEP 2 Switching to a 2B pencil, I begin refining the shape of the eyes, brows, nose, and mouth. I block in the hair with long, sweeping strokes, curving around the face and drawing in the direction the hair grows. Then I add a neckline to her shirt.
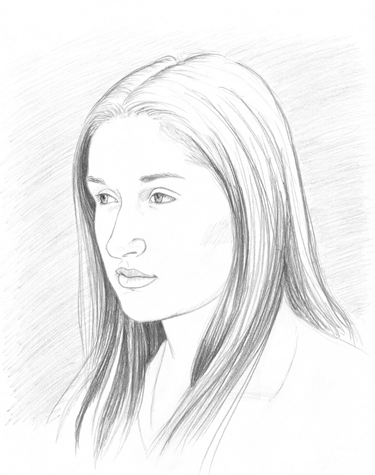
STEP 3 First I shade the irises with a 2B pencil. Then I begin shading the background using diagonal hatching strokes. Once the background is laid in, I use a 3B to build up the dark values of the hair. (I create the background before developing the hair so my hand doesn’t smear the delicate strands of hair.)
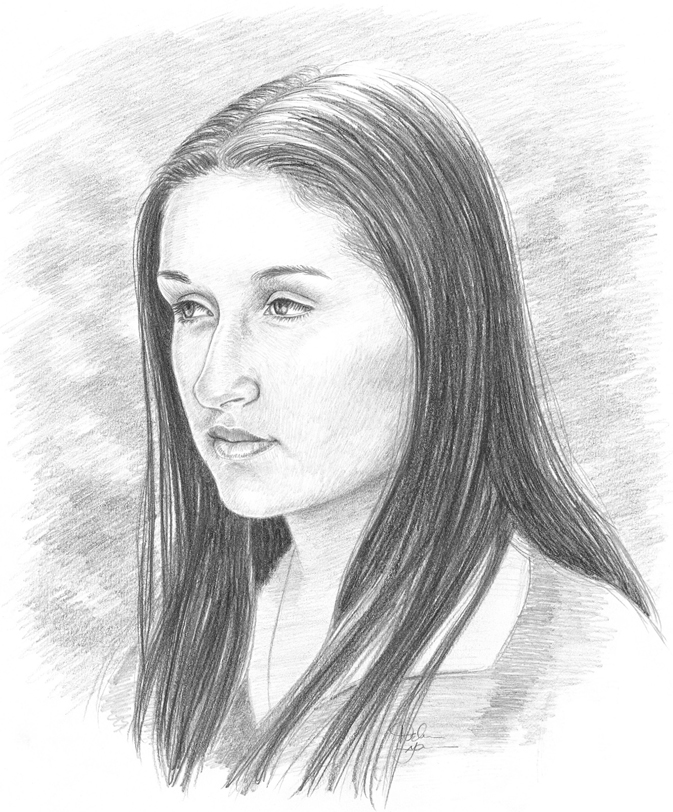
STEP 4 I finish shading the face, neck, and shirt with a 2B; then I switch to a 3B to add more dark streaks to the hair. I apply another layer of strokes to the background, carefully working around the hair and leaving a few gaps between the strokes to create texture and interest. Next I use a kneaded eraser to smooth out the transitions.