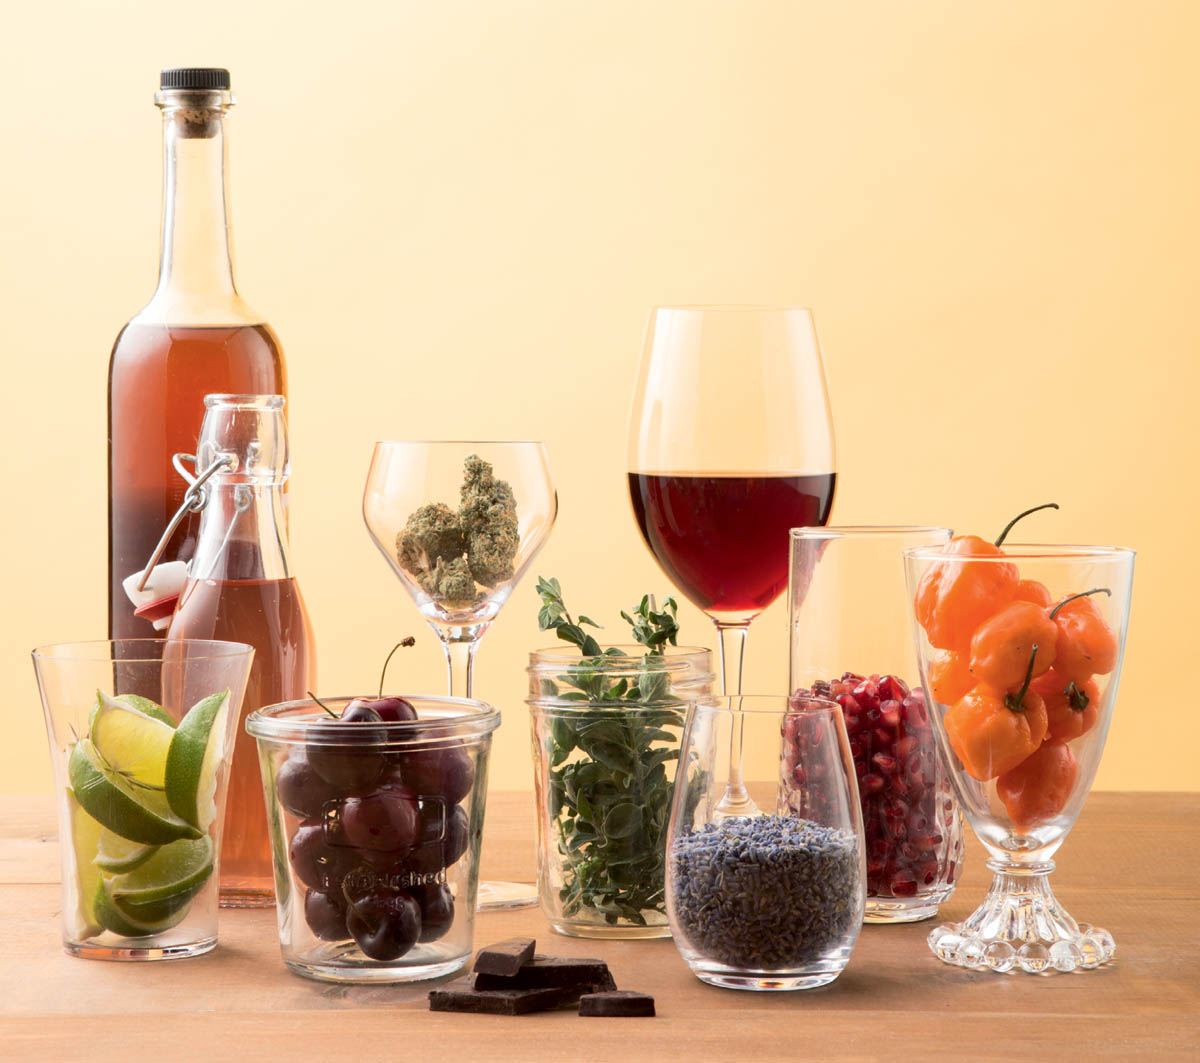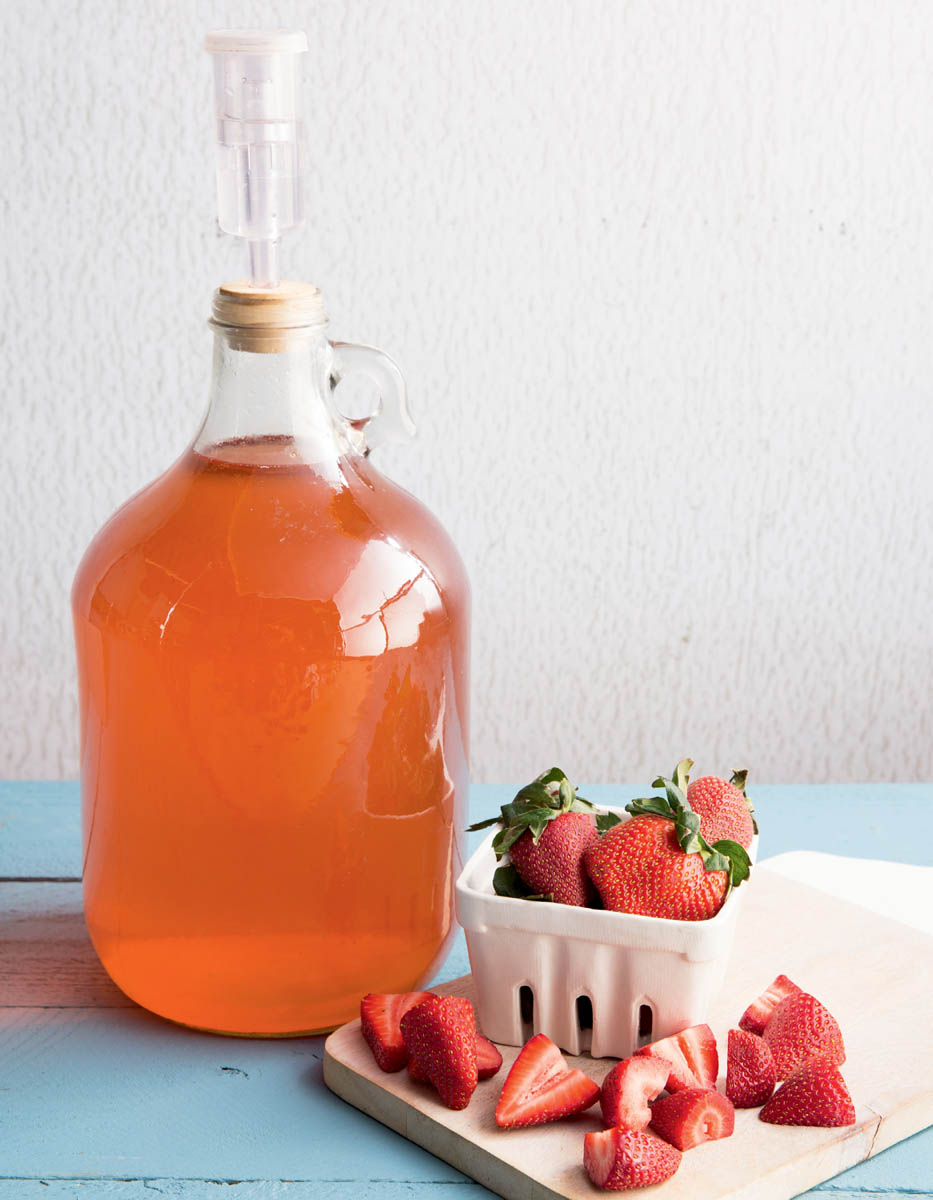
My method of winemaking is a fairly straightforward and quick process, although it can be messy. Wine can splash, spill, or even overflow its container if the fermentation is vigorous. Make and store your wine in an area where the floor and other surfaces are easy to clean — definitely not in a carpeted area. My wines differ from typical commercial wines in that they contain a wide variety of fruits (and flowers, herbs, and vegetables), use chopped or crushed fruits instead of juice, have added sugar, do not contain any sulfites or other preservatives, and have a higher alcohol content.

Before you begin the process of making wine, first consider your two main ingredients: fruit (or flowers, herbs, or vegetables) and sugar. You will need to decide whether to use crushed fruit or juice, how much sugar to add, and what type(s) of sugar to use.
Commercial grape wines are made by crushing the grapes and fermenting the juice. Adding sugar, called chaptalization, is done in some areas where grapes don’t develop high enough levels of sugar to reach the standard alcohol percentage of 12 to 14 percent, but chaptalization is prohibited in some countries and in California. Most other fruits have less sugar than grapes — and flowers and herbs have essentially no sugar — and need to have some sugar added to their fermentation to reach appropriate levels of alcohol content. As discussed in chapter 1, the added sugar can take many forms — table sugar, brown sugar, raisins, molasses, honey, and so on — but in my wines, I use primarily plain white sugar and raisins.
Many home winemakers prefer to use juice, whether purchased at the grocery store or made themselves using a press or stream extraction. One advantage of using juice and adding any sugar up front, before fermentation begins, is that you can maintain complete control over the alcohol and sugar content. You can use a hydrometer to measure the sugar content (using the Brix scale) at the start of fermentation and at the end, allowing you to calculate the residual sugar left in the wine. And by reading the specific gravity at the beginning and end of fermentation, you can know exactly what the alcohol content of your wine is (see How to Use a Hydrometer).
My fruit wines are typically made with chopped or crushed fruit rather than juice, although I have occasionally used just juice. I believe that using the entire fruit, including the pulp and skins, adds more flavor and color to the wine. When I use fruit, rather than juice, I have to add water, usually with sugar, to the developing wine. But instead of a hydrometer, I use a rule of thumb for how much sugar to add (see Basic Rules for Adding Sugar).
Because I want my wines to keep and age well, but I don’t use sulfites, they need a relatively high alcohol content. The minimal concentration needed to ensure proper preservation and aging is 14 percent, though some of my wines approach up to 18 percent alcohol, which is reaching the level of port wine.
The alcohol in wine comes from sugar. During fermentation, as the yeasts begin to feed on the sugar, they convert it, in part, to alcohol. For my wines to achieve their characteristic high alcohol concentration, they need lots of sugar. However, overloading the must with sugar can overwhelm the yeast and make it difficult for fermentation to begin. With small batches, like the 1-gallon recipes in part 2, the amount of sugar isn’t enough to bother the yeast, so you can add the sugar all at once at the beginning of primary fermentation. However, larger batches, like the 5- to 6-gallon batches that I tend to make, require a proportionately larger amount of sugar. I don’t want to overwhelm the yeast by adding all that sugar all at once, so I add it in stages.
Three pounds of sugar in 1 gallon of water will produce approximately 14 percent alcohol in a finished wine if the sugar is completely fermented. I use this calculation as a rough guide for how much sugar to add to my wine musts. Fruits with high sugar contents can get by with between 2 and 3 pounds of added sugar per finished gallon of wine. Flowers and herbs have essentially no sugar, so wines made from them need at least 3 pounds of added sugar per gallon. To avoid overwhelming the yeast, as a general rule I don’t add more than 3 pounds of sugar per gallon of wine at a time.
In addition to 3 pounds of table sugar, I also add raisins to my flower and herb wines to give them more body, make fermentation start faster, and add a little residual sweetness. I vary the amount of raisins (using anywhere from 2 to 5 pounds in a typical 5-gallon batch of wine) because I like a mixture of sweet and dry wines in my cellar. While I typically use regular dark raisins, when fermenting wine from more delicate white flowers such as jasmine, elderflower, or black locust flower, I often use golden raisins to keep the wine light-colored. In order to get maximum benefit from the raisins, I always soak them overnight in just enough water to cover them and then blend the raisins and soaking water in a blender before adding them to the must. I have flower and herb wines in my cellar that are 20 or more years old and are spectacular — disproving the commonly held tenet that homemade “country” wines should be consumed while young because they don’t age well.
I also add raisins to my citrus–hot pepper wines to balance the citrus acidity, give the wines more body, and add some residual sugar to complement the kick of the hot pepper. I typically use between 2 and 5 pounds for a 5-gallon batch, depending on my mood. I will use golden raisins if I am feeling extravagant, just because I prefer the flavor of golden raisins.
To produce a wine with at least 14 percent alcohol content by volume, the minimum needed to preserve wines that do not contain sulfites, use the following guidelines.
Never add more than 3 pounds of sugar per gallon of finished wine at a time. If you are making a larger quantity of wine, add the sugar in stages. Fermentation rates can vary with temperature and other factors, but sugar water should be added every 3 to 4 days. Observe the intensity of the fermentation and taste the must every day, if you can. Add sugar when the fermentation slows and/or you taste little sweetness in the must.
The amount of fruit (or vegetables, flowers, or herbs) to use per gallon of wine varies depending on the type of fruit and how intensely flavored you want the finished wine to be. While I give the amount of fruit, vegetables, flowers, or herbs to use in the wine recipes in part 2, these amounts should be taken as guidelines, not absolutes. I seldom actually weigh my fruit. If I purchase the fruit, I will have a pretty good idea of the precise weight because the produce gets weighed when I check out. However, I make most of my wines from fruits that I grow or forage, and I simply estimate the weight. Most fruit wines should contain anywhere from 3 to 6 pounds of fruit per gallon of wine. A smaller amount of fruit will produce a lighter, more delicate wine, while a larger amount will make a heavier, more intense wine. (As a corollary, fruits with more intense flavors will make more intensely flavored wines, and fruits with milder flavors will make more delicately flavored wines.) It’s nice to have both types of wine in your cellar. For dried flowers or herbs, I use a minimum of 1 ounce per gallon of wine.
Instead of weight, I usually go by volume when making larger batches of wine. I want my primary fermentation bucket to be about half full of fruit to make a bucket of wine. Fresh herbs and flowers should also fill about half of the bucket, with adjustments made for flavor intensity — you will need less of an intense herb like rosemary, for example, and more of something delicately flavored, like jasmine flowers. Experiment with different amounts to discover your own preferences.
If you don’t have quite enough fruit for the volume of wine you want to make, you can fill in with raisins, which will add both body and sugar. For example, I had always wanted to make persimmon wine, but the fruits don’t grow where I live in Colorado. When a friend visited from my home state of Missouri, she brought me 2 gallons of wild persimmon pulp. I added 3 pounds of raisins to that pulp to make a batch that would fit in a 5-gallon carboy. I could have made just a couple of gallons of wine without the raisins and had a more strongly flavored persimmon wine, but I wanted this rare gem to last longer.
Most cultures around the world have used fermentation for thousands of years as a method of preserving foods. Wine, yogurt, kefir, and kombucha (fermented tea) are the most well-known fermented foods, but there are many others, including sauerkraut, kimchi, miso, and soy sauce. While they are not sources of the live probiotic organisms that fermented foods are lauded for, even beer, bread, and cheese are made via fermentation.
It’s important that you start with clean equipment, so you don’t have undesirable yeasts or bacteria ruining your wine. I simply run hot water from the faucet over my fermentation buckets, jugs, hoses, bottles, funnels, and anything else that comes in direct contact with my wine, though I do add some mild dish soap when washing fermentation buckets that have held hot pepper wine. I have found that this method gets my equipment clean, but many home winemakers also prefer to use sanitizers after they’ve washed their equipment with soap and water. Star San is a very popular acid-based sanitizer that requires no rinsing (see Sanitizers and Cleaners for a full list of sanitizers). Follow the instructions on the product. If you are using an auto-siphon, it is particularly important to clean and sanitize it first, because it has so many nooks and crannies in which bacteria can hide.
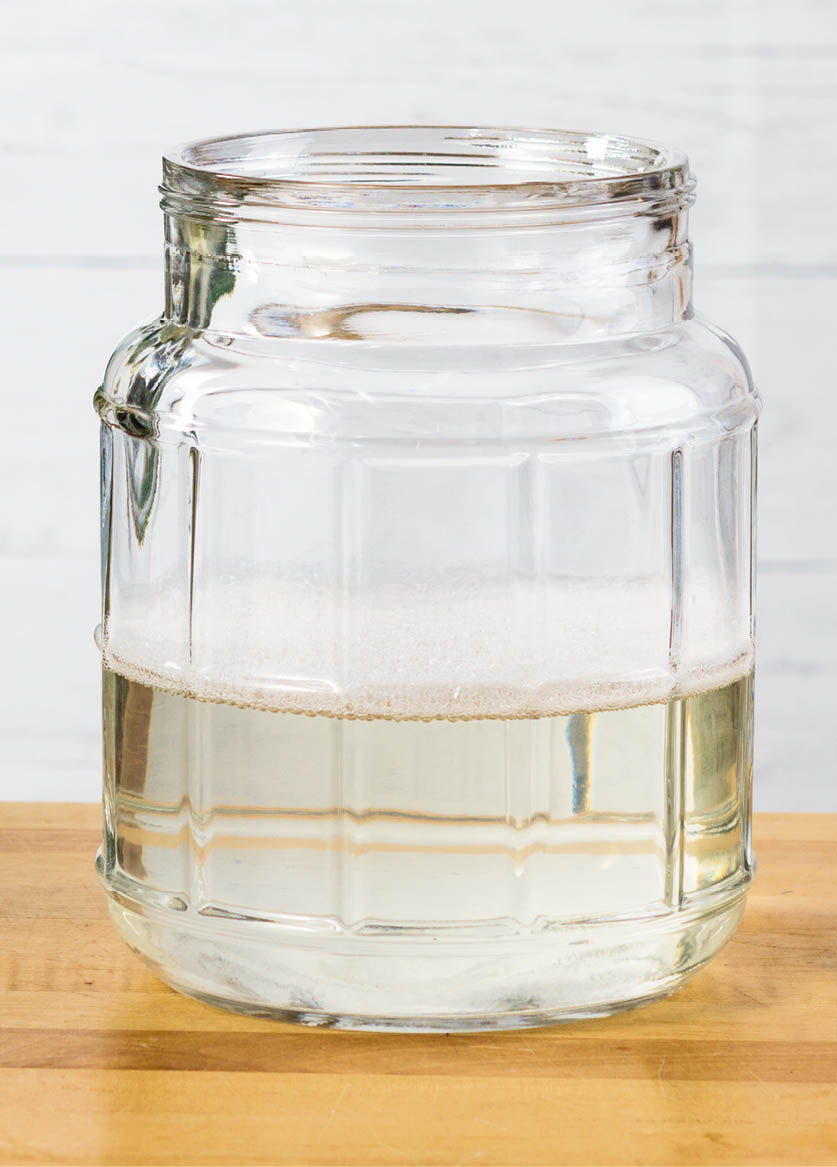
Whether you are using a glass bubbler or a plastic fermentation bucket, clean your container with hot water and use soap or sanitizer, if desired.
The exact amount of fruit, vegetables, herbs, or flowers that you use will depend on how intensely flavored you want the wine to be. In general, your goal should be to fill your primary fermentation vessel half full with the prepared produce.
Once you have acquired your main ingredient, it is time to prepare it and begin the winemaking process. Your preparations will vary based on type of ingredient.
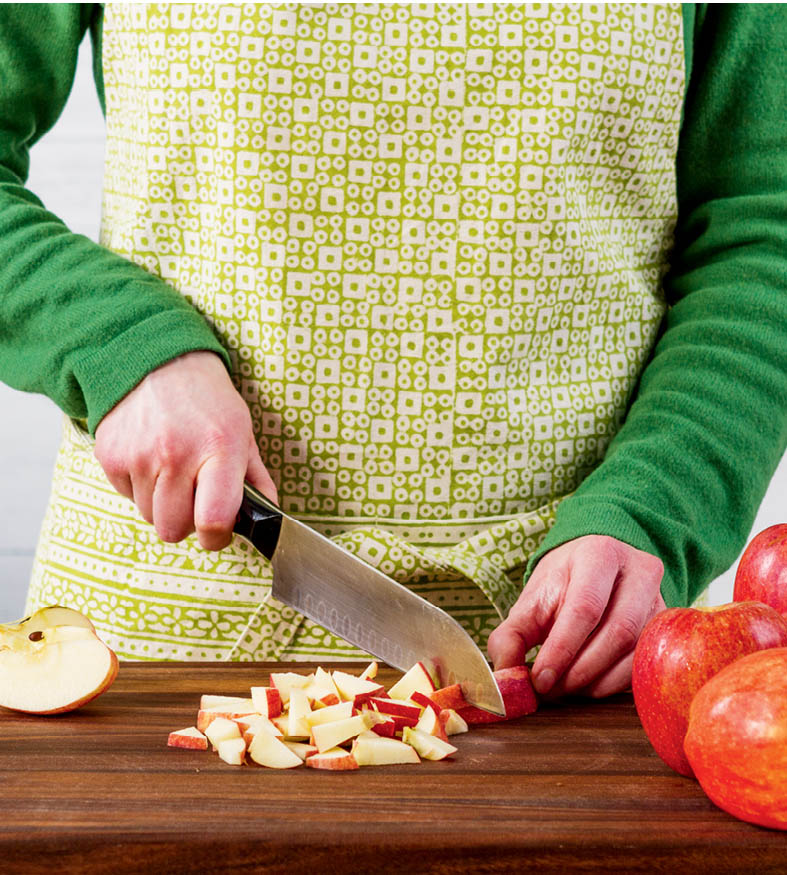
Chopping or processing your fruits into smaller pieces will speed fermentation and add more flavor.
Chop, crush, or stomp fruits and vegetables before adding them to the fermentation bucket. The smaller pieces will increase the intensity of the flavor in your wine and allow the fermentation to proceed faster. I leave the skins on all my fruits and vegetables, so I opt for organic produce.
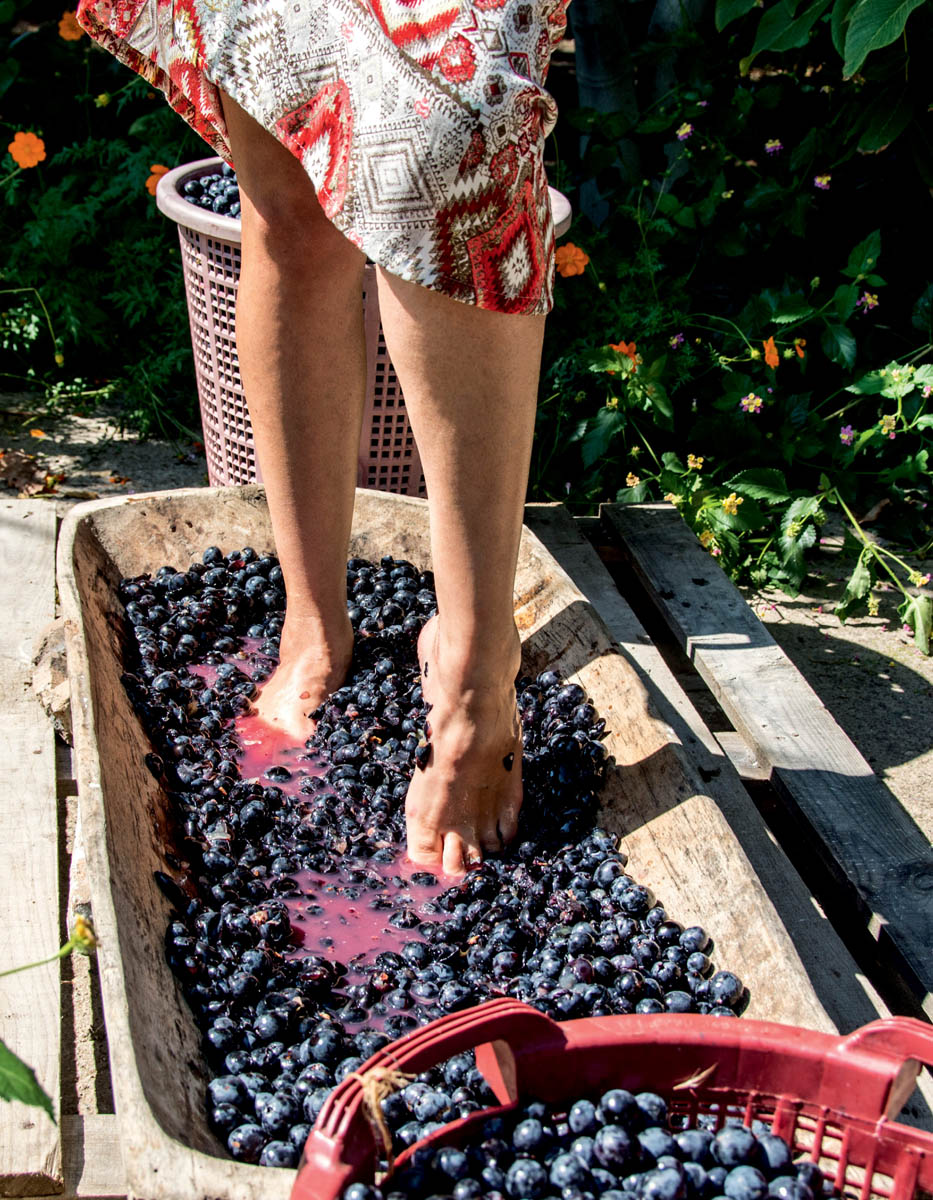
Stomping your own wine is an unforgettable experience.
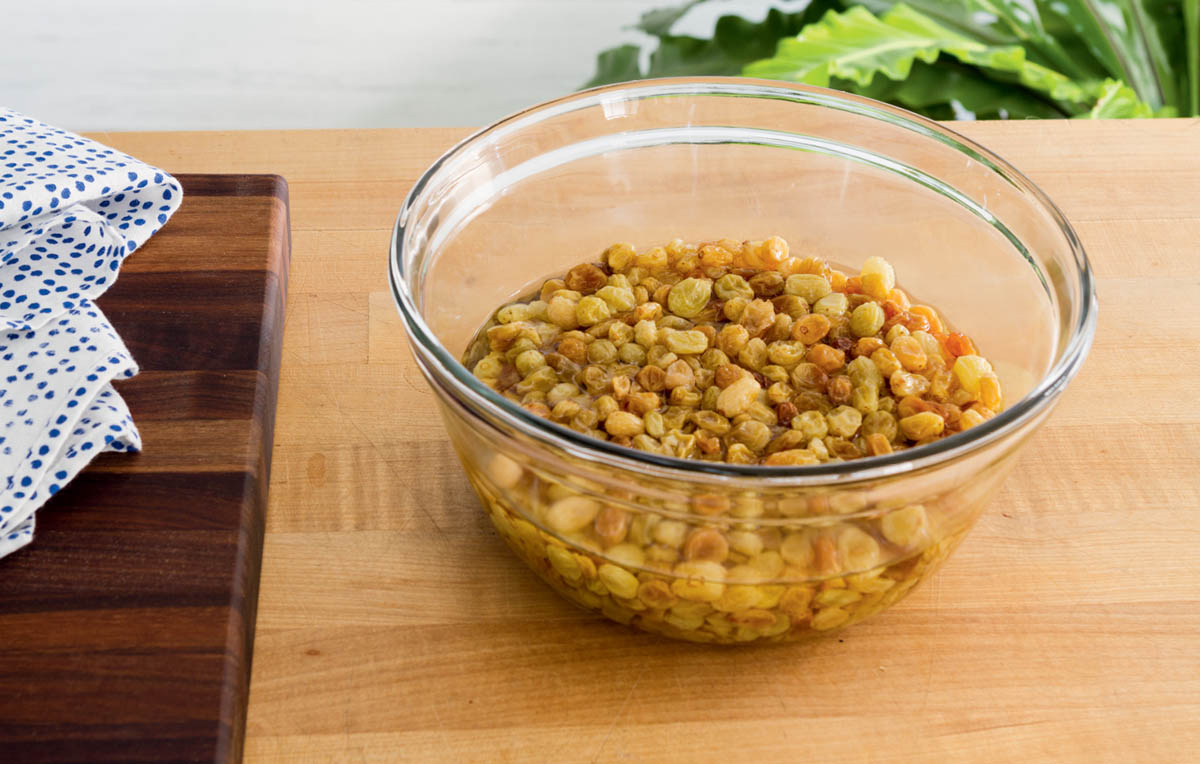
These golden raisins are soaked and ready to blend. Raisins provide the sugar to feed the yeast in flower and herb wines.
Always wear disposable plastic gloves when chopping hot peppers. The pepper heat will stick to your hands for a while even after washing with soap, and if you touch your eyes or other sensitive parts of your body, the burning sensation can be intense.
Organic peppers are best for hot pepper wines because I include the skin. I chop the entire pepper and include the seeds, which contain much of the heat, but you can leave out the seeds, or use a milder pepper, if you want a milder-tasting wine.
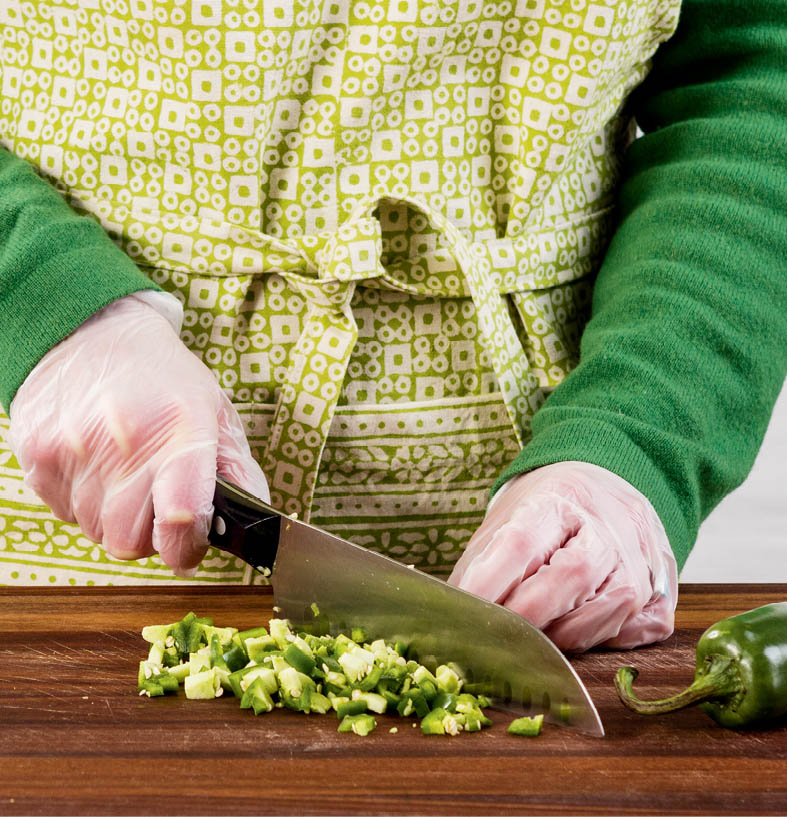
Don’t forget to wear disposable gloves when chopping hot peppers.
I use mixed leaf and trim for cannabis wines. Trim is the small leaf tips and bud pieces that are trimmed off the flowers when the flowers are being preparing for the medicinal and recreational markets. Leaves can be collected during the growing period or, even better, at harvest time.
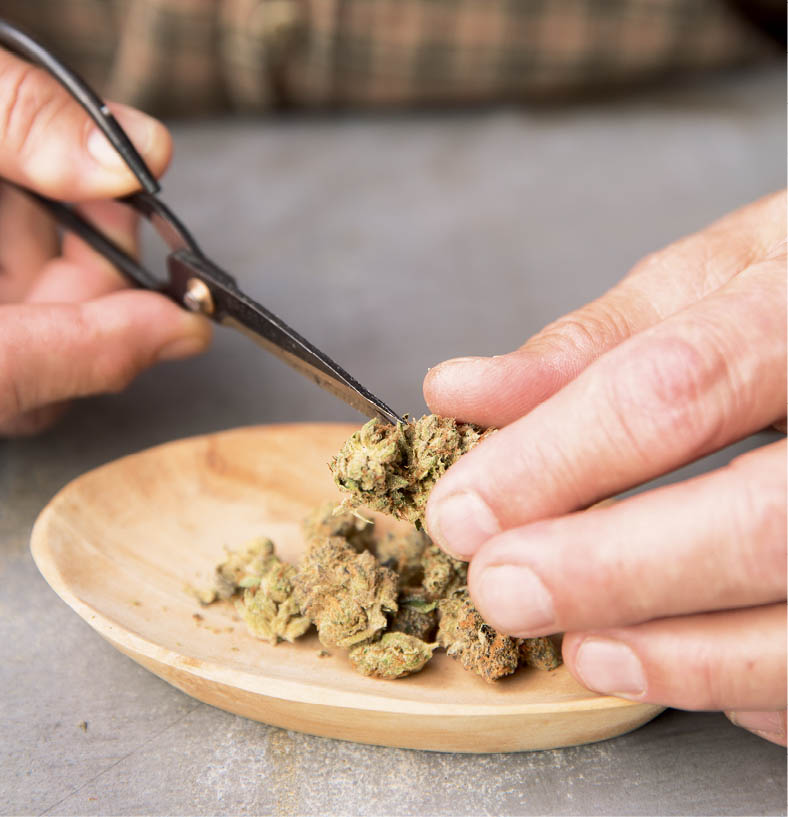
These cannabis buds have just been trimmed. You can use both the leaf and trim in cannabis wines.
I prefer to leave the pulp loose in the bucket for the primary fermentation. I believe this gets the most flavor out of the main ingredient. Many people prefer to put their pulp in fermentation bags (see Bag It?), because it’s less messy and makes removing and pressing the pulp a little easier.
Once the fruit, vegetables, herbs, or flowers are prepared and in the primary fermentation vessel, the next step is to pour in sugar water. Because I don’t use sulfites to kill off extraneous yeasts and bacteria, I make sure my sugar water is boiling when I add it as a way of sterilizing the batch.
For the 1-gallon (non-cannabis) recipes in part 2, bring 1 gallon of water to a boil, then add the amount of table sugar specified in the recipe, stirring to dissolve the sugar. Add the boiling sugar water to the bucket; there should be enough liquid to cover the fruit. Stir the must well and cover it with a lid to hold in the heat and keep bugs and contaminants out. Let it cool to at least close to room temperature. This will take several hours (I usually let it sit overnight).
For 1-gallon cannabis wines, boil 3 quarts of water, then add 2 pounds of sugar, stirring to dissolve the sugar. The rest of the water and sugar is added in step 5. Stir, cover, and let cool to room temperature.
For batches larger than 1 gallon, you will need to add more sugar water. For 5- to 6-gallon batches of wine, boil 1 to 2 gallons of water and stir in 4 pounds of sugar to dissolve. Pour the boiling sugar water over the must at the start of primary fermentation. Cover again and let cool.
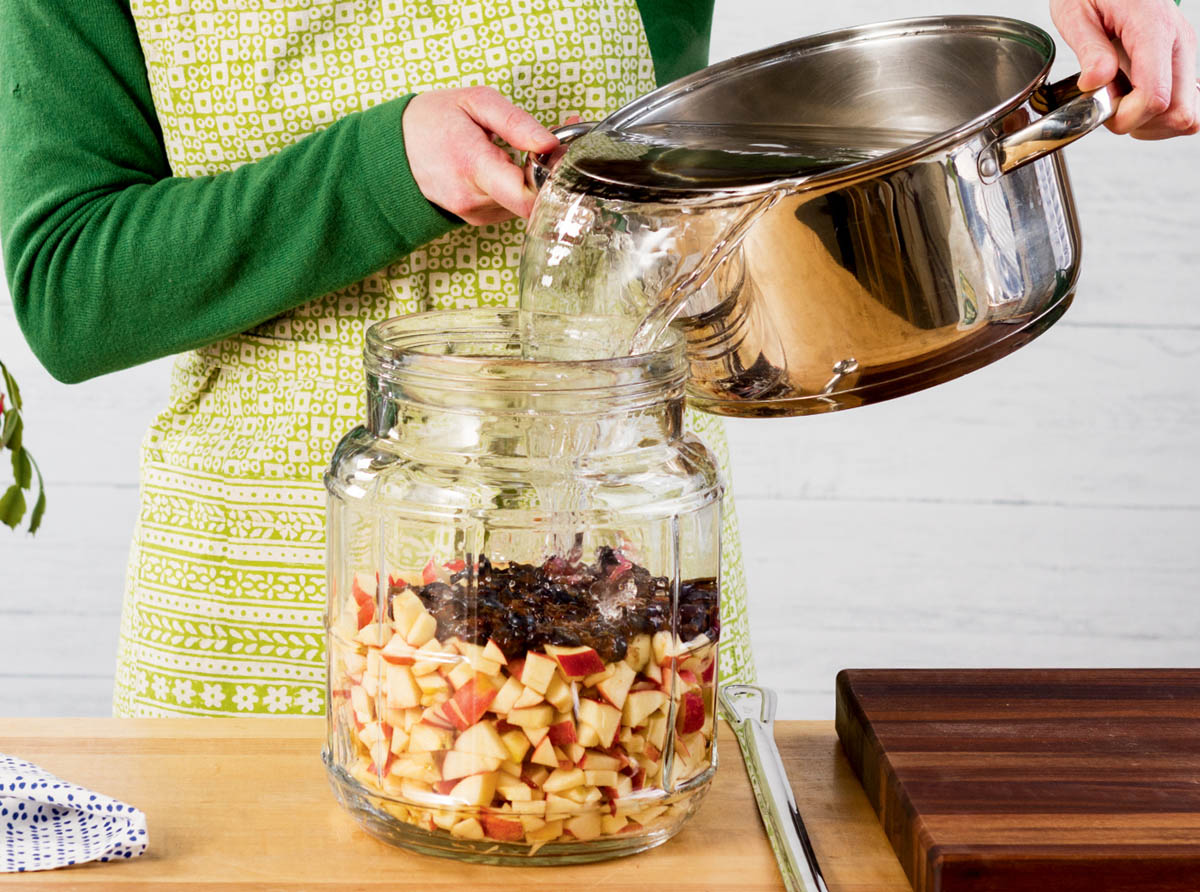
Carefully pour the boiling sugar water over your chopped fruit.
When the must is cool, it’s time to “pitch,” or add, the wine yeast. Many winemaking guides instruct you to stir the yeast into a cup of warm water before adding it to the must, but I have found that this isn’t necessary. I just sprinkle the yeast on top of the must and then stir it in.
Cover the primary fermentation vessel to keep out insects and contaminants, but also make sure that fermentation gases can escape. Some vessels come with a lid and a fermentation lock. If yours doesn’t, you can cover the vessel with an inverted plastic trash bag, leaving the bag loose around the bottom of the vessel.
Each strain of yeast has a particular temperature range where it is “happiest” and fermentation progresses smoothly. If the temperature gets too cold or too hot, fermentation may slow or stop. You can find the temperature ranges for different strains of yeasts on manufacturers’ websites. In general, white wine yeasts prefer temperatures between 50 and 64°F/10–18°C and red wine yeasts prefer temperatures between 60 and 84°F/16–29°C, but in my experience normal household temperatures have been okay for normal fermentation rates of all types of wine.
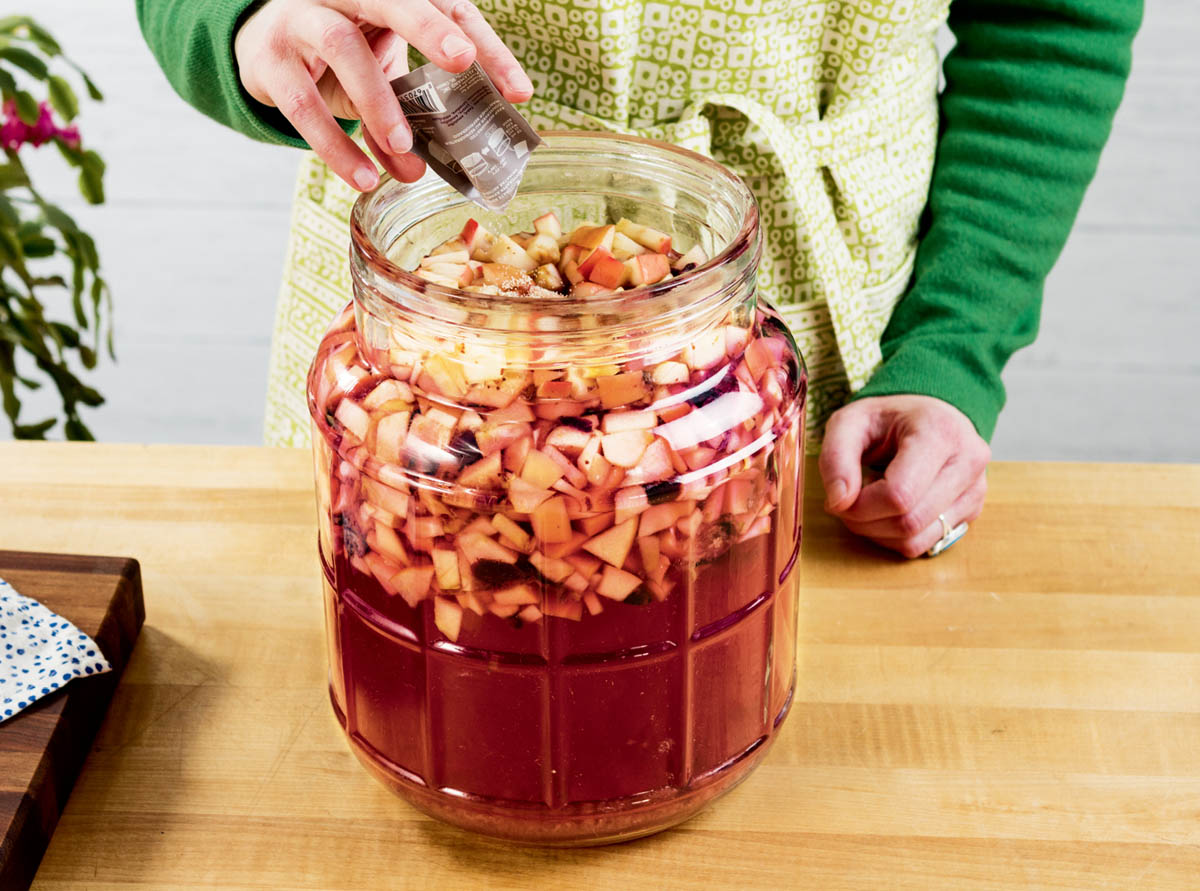
When the must has cooled, pitch the yeast and stir it in.
Fermentation locks can be filled with water, vodka, or sanitizing solution. If you fill the lock with water, you will need to refill it periodically because the water will evaporate or go bad (there is a chance that liquid from the fermentation lock could be sucked into the wine). To avoid spillage, place the fermentation lock in the bung and on the jug before you fill it.
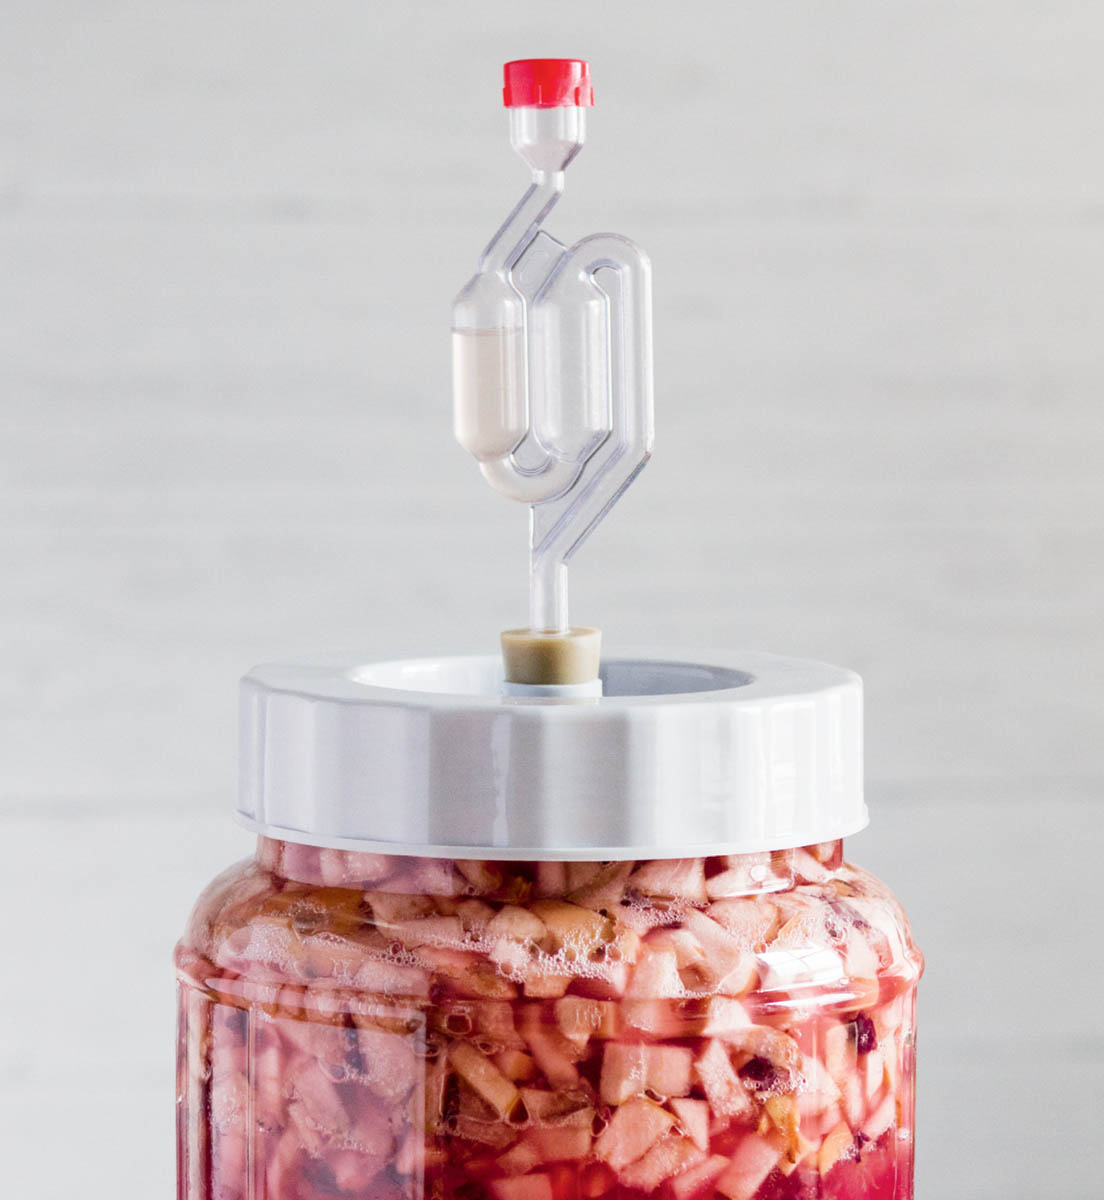
Check the fermentation at least a couple of times a day. As it gets going, the fruit pulp will rise to the surface of the must and can form a solid mat called a cap. This should be stirred back into the must twice a day, or mold can form on it and spoil the batch.
Fruit wines should start bubbling, a sign of fermentation, within a couple of hours and be going strong within 24 hours. Most fruit wines do not need any raisins, but if you are adding raisins to stretch a small batch of fruit, add the raisins a couple of days into the primary fermentation. Do not add raisins at the same time you add more sugar water in step 5, to avoid overwhelming the must with too much sugar at once.
Flower and herb wines are usually slower to ferment and may take a full day to start showing signs of fermentation.
Depending on how much wine you are making and how much sugar you plan to add, you may need to add the sugar in batches. Most of the recipes in this book are for 1-gallon batches, small enough that you can add all the sugar at once, at the beginning of primary fermentation. However, if you are making cannabis wines or larger batches, you will need to add the sugar in stages. In general, you should not add more than 3 pounds of sugar (dissolved in water) per gallon of wine at a time.
If you will be adding subsequent batches of sugar, start tasting the must after a few days of fermentation to evaluate the sweetness and developing alcohol content. The must will taste sweet early on, but that sweetness will diminish as the yeast consumes the sugar. When the fermentation starts to slow down, the must has lost some or much of its sweetness (depending on how sweet you want the wine to be), and the cap becomes less firm — typically in 3 to 5 days — boil another pot of sugar water. A typical 5- to 6-gallon batch of wine will need at least another 4 pounds of sugar, and then at least another 4 pounds of sugar 3 to 5 days after that, for a total of 10 to 15 pounds of sugar, depending on how much residual sweetness and alcohol content you want. Let the sugar water cool to room temperature before adding it to the must to avoid killing the yeast.
After you have added the total amount of sugar and the fermentation activity has slowed down (the must shows less bubbling and the cap is softer) but not come to a stop, it is time to press out the must and start the secondary fermentation. Primary fermentation should take 10 to 14 days, no matter how much wine you are making. The one exception is for wine containing cannabis: Allow the cannabis must to sit in the primary fermentation vessel for a full month. Cannabis’s active constituents are not water soluble, but alcohol will pull them out of the plant. Over the course of a month, the increasing alcohol content of the must will extract more of the plant’s constituents.
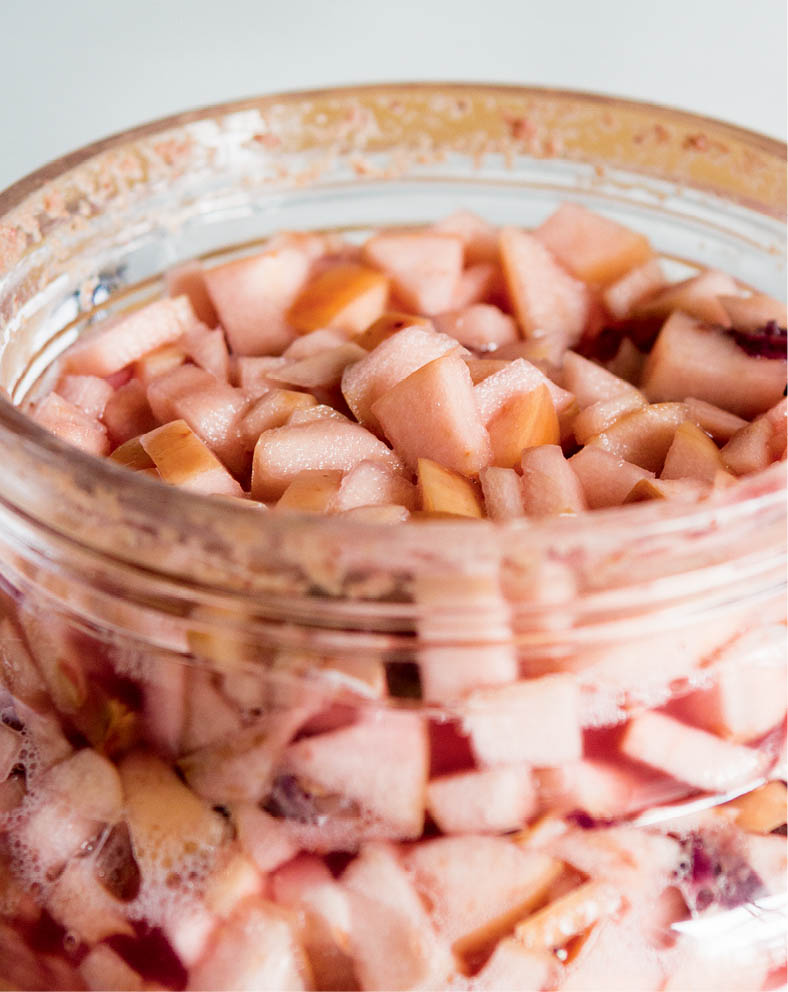
The cap will be firm during early vigorous primary fermentation. Fruit wines, like this Blueberry-Apple wine, will start bubbling within a couple of hours.
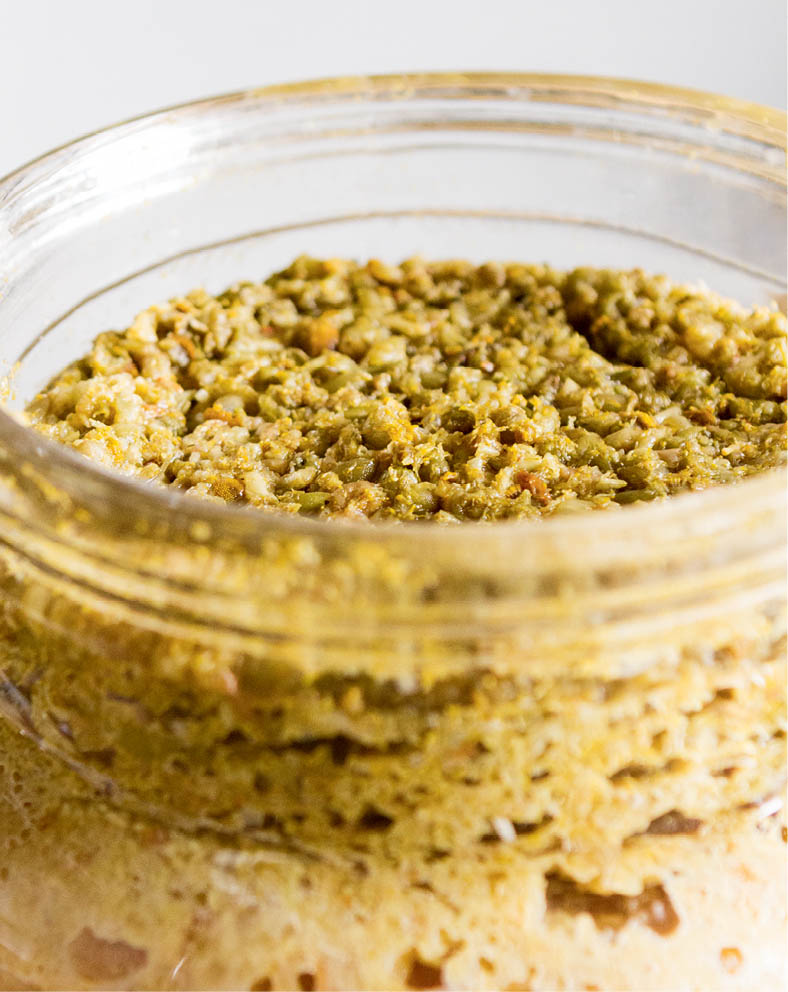
The cap will be softer near the end of primary fermentation. Flower wines, like this Chamomile wine, may take a full day before they start to show signs of fermentation.
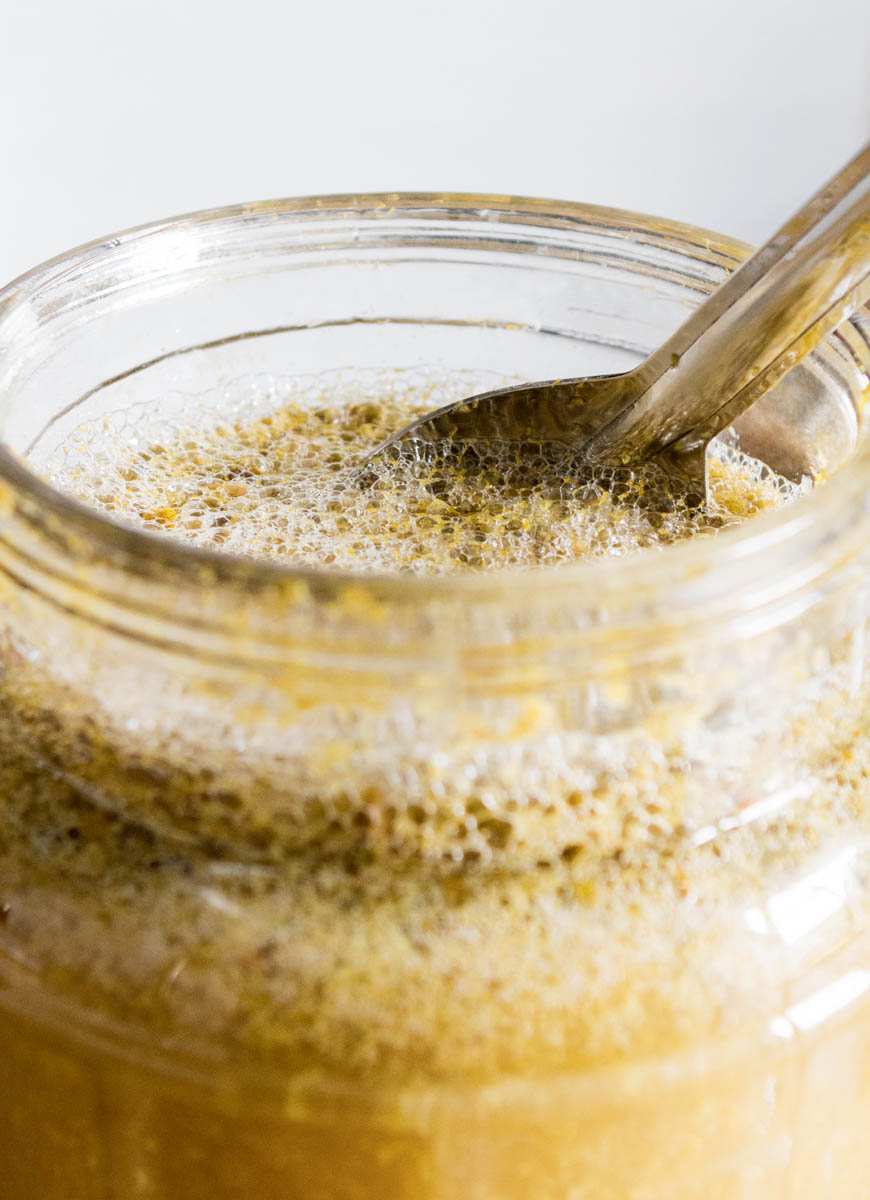
Stir the cap into the must twice a day.
As you’re making wine, it can be helpful to take notes of what you do so you know how to adjust recipes later, if needed. I don’t take process notes and enjoy experimenting each time, but this can be helpful if you are looking for particular results or are more detail-oriented.
The next step is to press out the pulp and move the wine into a glass jug fitted with a stopper and fermentation lock for the secondary fermentation. Don’t use a plastic container here; the alcohol can leach undesirable chemicals from plastic.
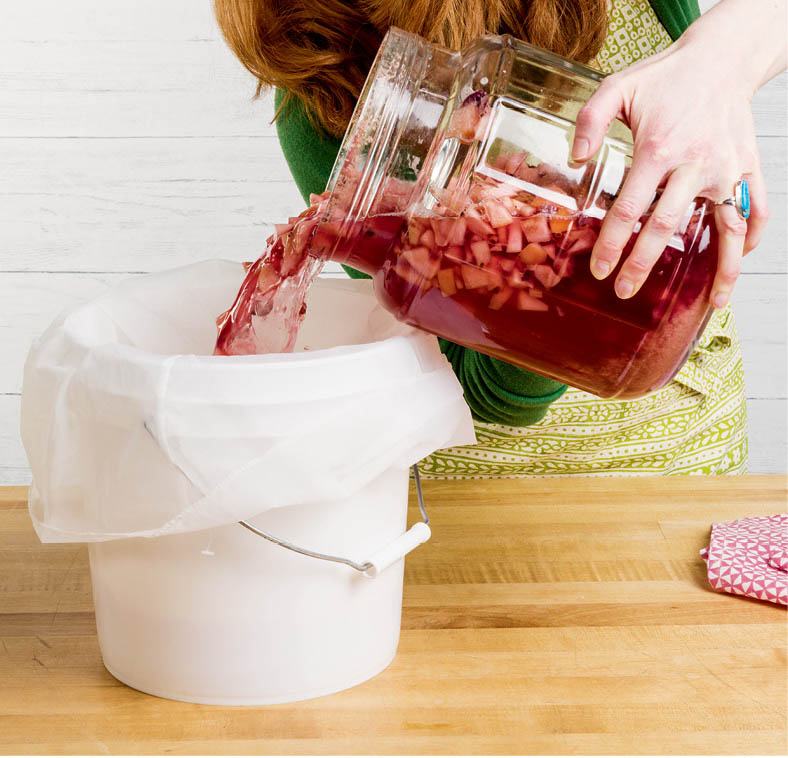
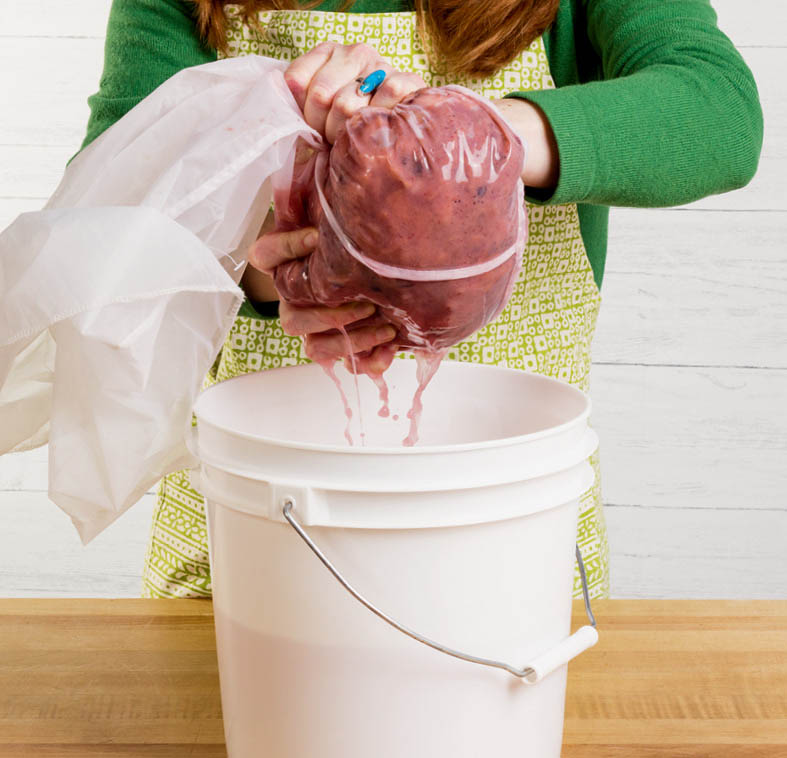
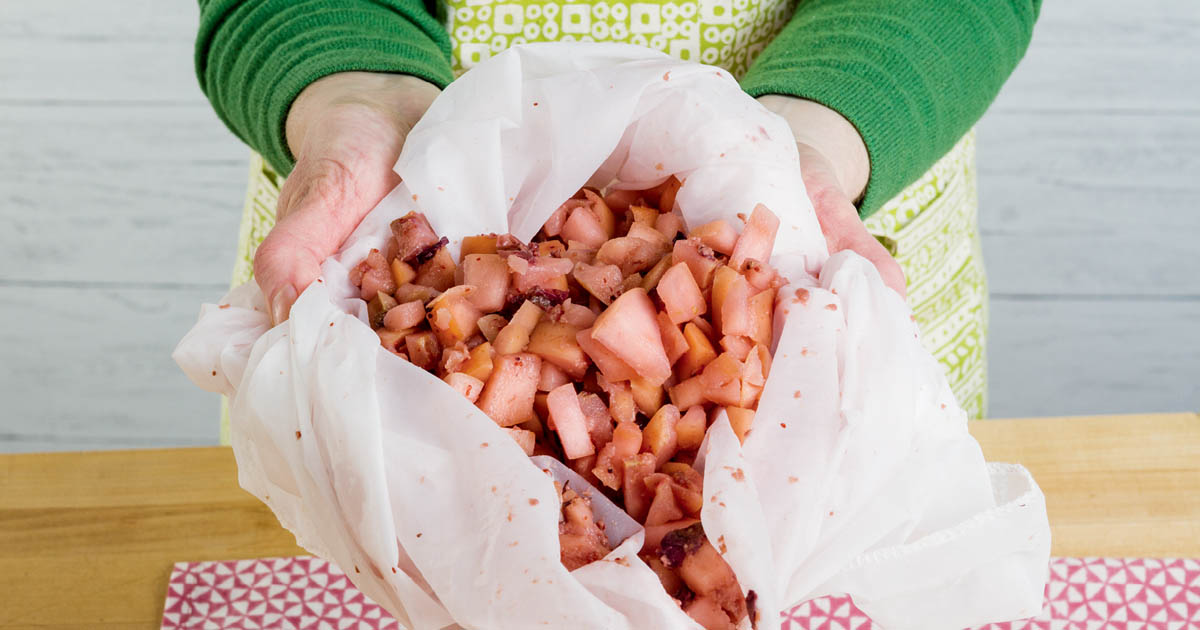
If your pulp is already in a fermentation bag, just press it to squeeze out as much wine as possible. If your pulp is loose in the bucket, line a second bucket with a fermentation bag. Pour the wine and pulp through the bag and into the second bucket, then squeeze out the bag. (See images below.) Compost the leftover pulp, or use it to make a second wine (see Second Wine).
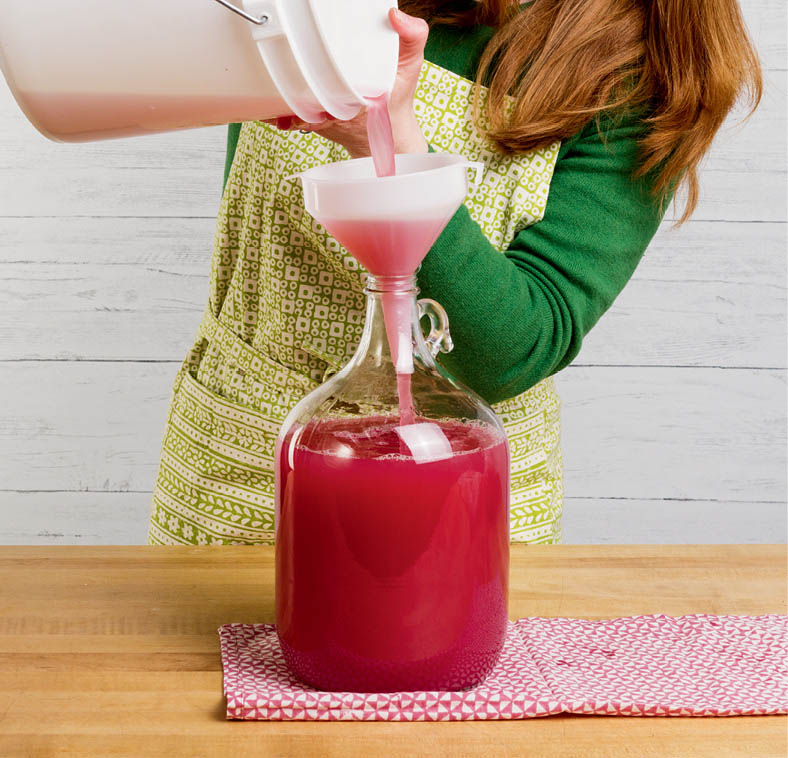
After I’ve pressed out all the pulp, I place a 4-inch funnel (use a 7-inch funnel if pouring a large batch of wine) into the top of my secondary fermentation jug and pour the wine from my primary fermentation bucket into the jug. Some people prefer to rack the wine from the primary fermentation vessel to the secondary fermentation jug using plastic tubing (instructions in Step 7: Rack the Wine and Filter the Lees) because they think that pouring may oxidize the wine, adding off flavors. I’ve always poured my wine into the secondary fermentation jug and never had a problem.
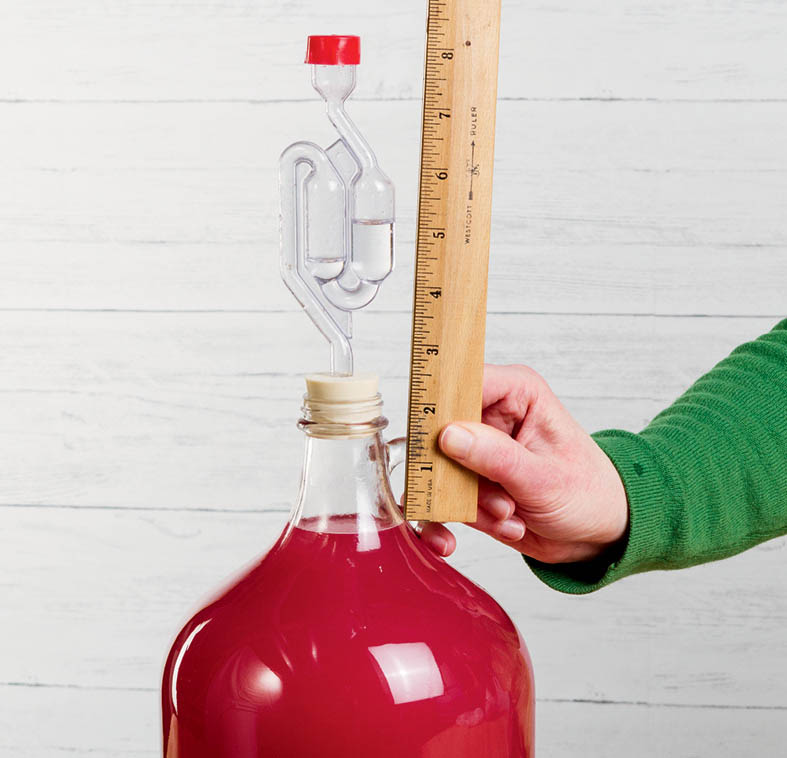
Your secondary fermentation vessel should be almost full, with just 1 to 2 inches of air space between the wine and the bottom of the fermentation lock. If you have leftover wine, it is helpful to save it in a small jug or bottle with a fermentation lock. You may need to add some of this wine to your jug after racking off the lees in the next step.
If you fall just a little short of filling your secondary fermentation vessel, you have several choices. If your wine is strong enough, you can add a little water to it to bring it up to the right level. If it’s not strong enough to handle being diluted, you can boil some more sugar water, let it cool, and add it; it will boost the fermentation. A third option is to add some juice. If you don’t have any juice from your primary ingredient, a good choice is white grape juice, which will add some body and sugar but not alter the taste much. Finish by sealing your secondary fermentation jug with a tightly fitted stopper and fermentation lock.
Always wear disposable plastic gloves when pressing out wines containing hot pepper; that pepper heat will stick to your hands for a while, even after you wash with soap, and if you then touch your eyes or other sensitive parts of your body, the burning sensation can be intense.
With intensely flavored wines like blueberry, you can reuse the pulp left over after primary fermentation to make what is called a second wine — a very nice, lighter version of your primary wine. To do so, just add more sugar water to the pulp, as well as some more fruit or raisins if you wish to intensify the flavor of the finished wine. Pitch fresh wine yeast to ensure the start of a strong fermentation. Depending on how much pulp you have left and the amount of sugar water you add, you could end up with a light wine with half the intensity of your first wine and approaching the level of a light rosé.
I started saving the pressed-out pulp from citrus–hot pepper wines a few years ago to reuse in a second wine. I freeze this pulp and wait until I have at least three batches of pulp before combining them (after thawing) to create a second wine. The citrus flavor carries through very well, but the hot pepper spice is much reduced. This creates a sweet, citrusy wine with just a hint of hot pepper. I call it Citrus Symphony.
You can also add other fruits to the pulp to create some truly unique wines. I’ve combined blueberry pulp with such things as rhubarb, apples, and pears with great results, turning out wines that are big favorites among my wine-drinking friends. Once I added blueberry pulp to a batch of Chocolate-Chocolate Mint wine that was in primary fermentation, creating a spectacular Blueberry-Chocolate-Chocolate Mint dessert wine. I’ve also added pomegranates and pineapples, in separate batches, to my citrus–hot pepper pulp to create Pomegranate-Citrus Symphony and Pineapple-Citrus Symphony.
Depending on the type of fruit you use and the size of the holes in your fermentation bag, fine particles of fruit may pass through the bag into your wine. After a day or so, these particles and spent yeast will settle into a cloudy layer, called the lees, at the bottom of your container. This sediment can unfavorably affect the taste of your wine, but you can siphon off the clear wine above the lees using a piece of plastic tubing in a process called racking. Racking will speed up the secondary fermentation process and make the wine ready to drink sooner.
To rack the wine, place your secondary fermentation vessel on a table or counter and place an empty jug on a chair beside it. Place the auto-siphon in the jug on the table, with the stopper end in the bottom of the jug. Attach one end of the tubing to the auto-siphon and place the other end of the tubing in the jug on the chair. Give your auto-siphon one or two pumps to begin suction, then watch as the wine moves from the jug on the table to the jug on the chair. Remove the auto-siphon before any of the lees goes into the jug on the chair.
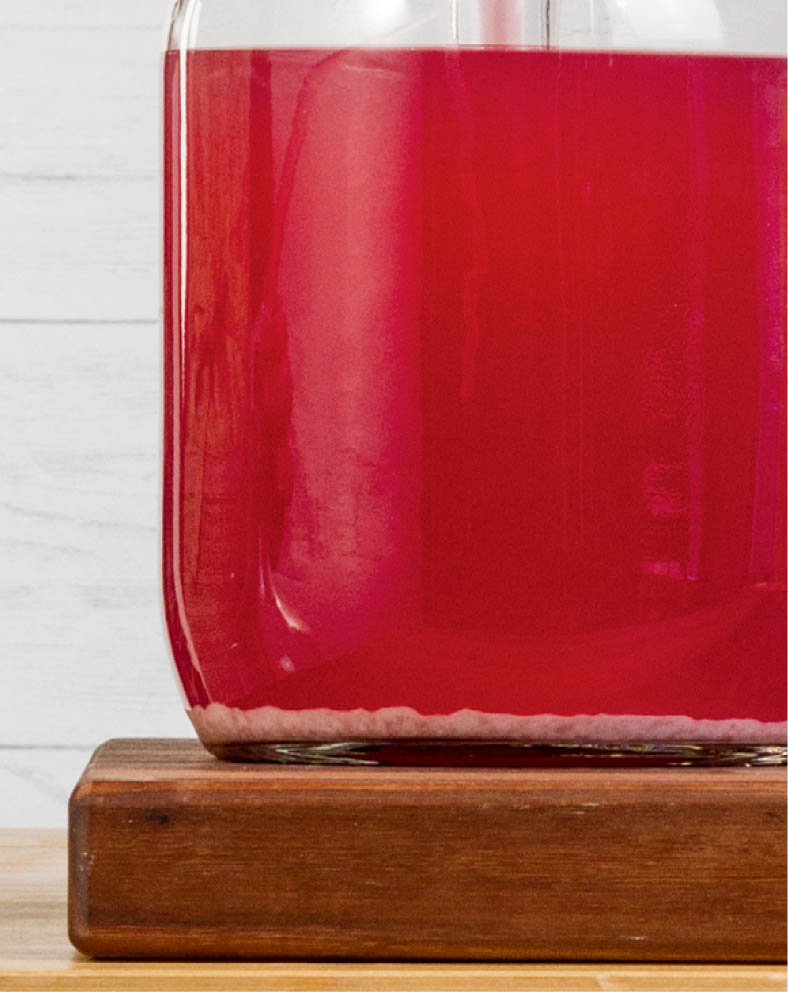
When lees are clearly visible at the bottom of your jug, it is time to rack your wine.
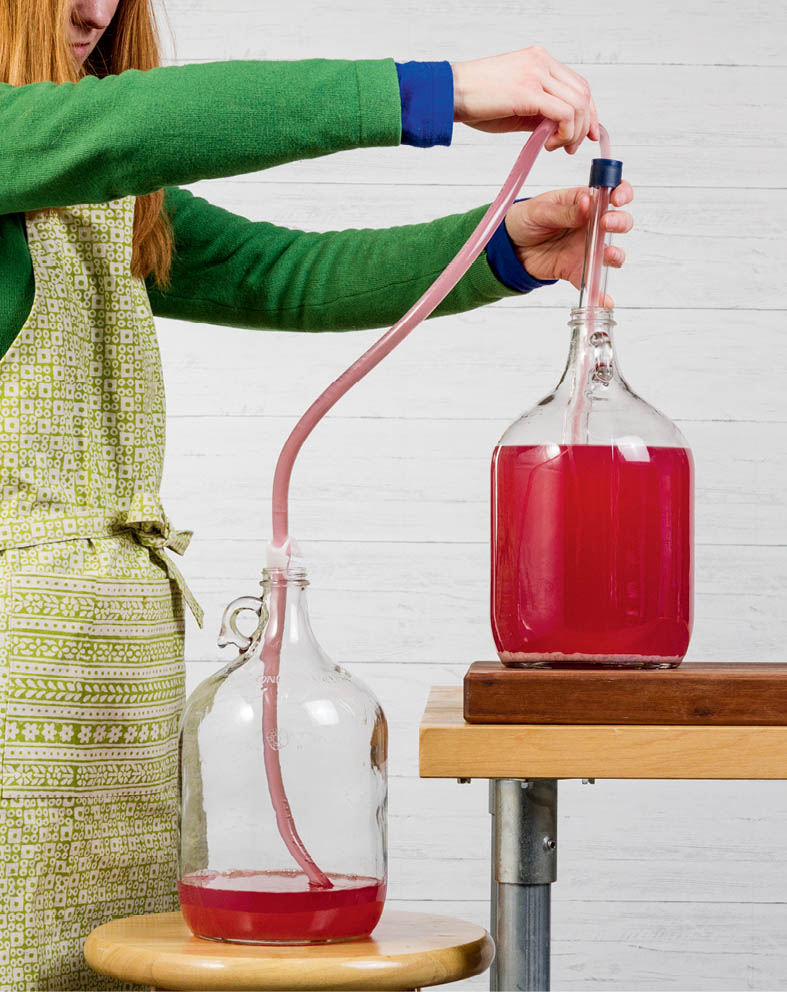
Rack your wine into a clean jug using a mini auto-siphon.
If you don't have an auto-siphon, simply place one end of the plastic tubing into the wine. Suck on the other end of the tube to start the siphon, then place that end of the tube in the empty jug. The wine will flow from the first vessel into the second. Keep an eye on the setup, and stop the siphon before any of the lees goes into the new jug.
If you take the time to filter the lees, you can save as much as a gallon of wine out of a 5-gallon batch, depending on the fruit. You can use an electronic filtering machine (available from winemaking supply shops), but they are rather expensive and probably only worth the expense if you need to filter large amounts of wine. I prefer to use small funnels and coffee filters to rack small amounts of lees. I simply set the filters inside the funnels, set the funnels over jars, and pour in the lees (see photo below). A single funnel-and-filter setup won’t accommodate much wine at a time, so I set up several jars and filter the lees in batches. It may take 4 to 6 filters to filter the lees from a 1-gallon batch of wine, depending on the type of ingredients used. Some wines take longer than others, but they typically finish dripping in 30 minutes to 1 hour. Then I add the filtered wine to the racked wine. If the wine level in the jug is lower than 2 inches below the stopper, you’ll need to top off the jug with extra wine you saved from the primary fermenter, if you have it, or with water or fruit juice.
Your wine should still be bubbling after you rack it. The bubbles can last for months if you have added plenty of sugar and don’t use sulfites. Lees will continue to settle at the bottom, although you will likely not see large amounts of small fruit particles anymore. Instead, you will see a shallow white deposit of dead yeast cells and minerals.
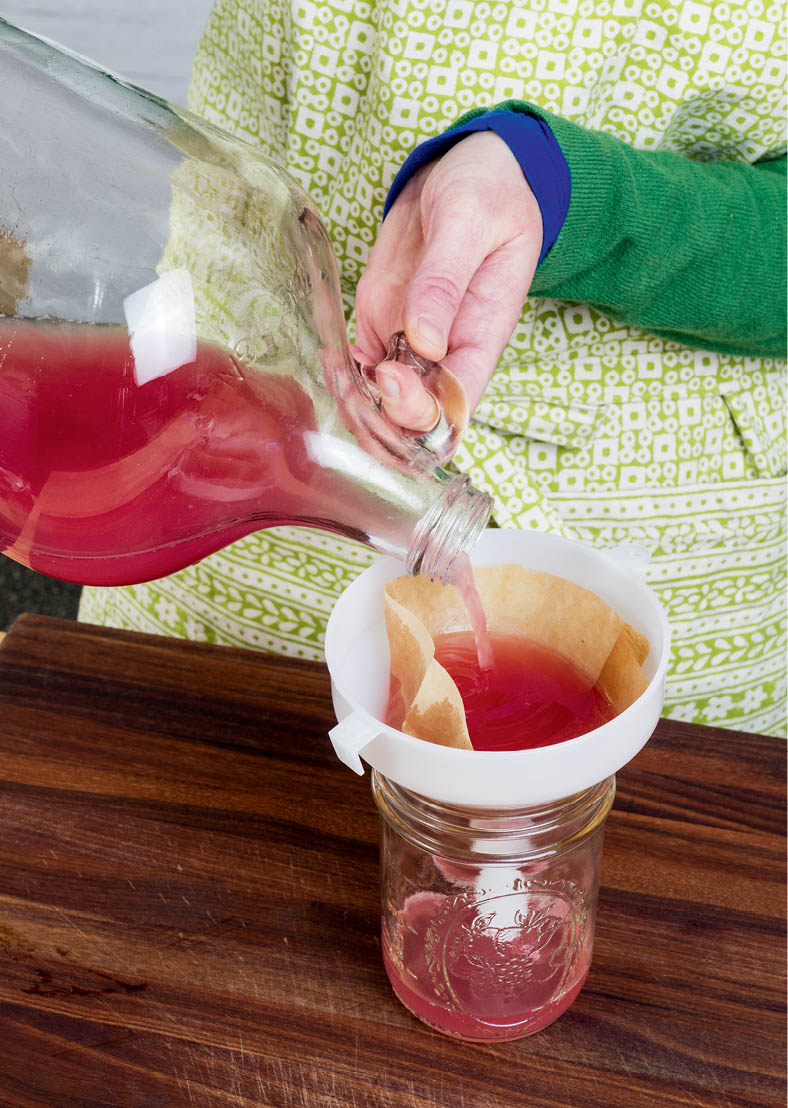
By filtering the lees through coffee filters, you will save more of your wine. Set up several jars with funnels and filters to filter more wine at once.
It’s important to monitor and taste your wines often during the primary and secondary fermentations. Problems are easy to spot: you’ll notice off smells, off tastes, or slimy must. If you find a problem, your wine may be contaminated with undesirable bacteria, or you may just dislike the taste. Either way, it’s best to dump the wine, thoroughly clean your equipment, and start over.
In my 30 years of making wine, I have dumped only four batches. My most spectacular failure was with a bumper crop of zucchini squash. It became a slimy, snotty mess in primary fermentation and was quickly dumped on the compost pile. At the time I suspected that the sliminess might just be characteristic of zucchini, but I had the same thing happen to one of three buckets of another wine a couple years later. So perhaps the sliminess was just an unusual bacterial contamination.
The other two wines I dumped were a watermelon and a Granny Smith apple. They developed an unpleasant taste in the secondary fermentation, and I decided to dump them rather than waste any more time and resources on a wine I didn’t like. I’m still not sure whether these had really gone “bad” or just didn’t appeal to me.
Winemaking is a learning process, and the more experience you have, the better your results will likely become. I have made 150 different wines over more than three decades of winemaking, and I am still learning as I go. There is always room for improvement.
For my 6-gallon batches of wine, I set up six pint jars with large (4-inch-diameter) common kitchen funnels and inexpensive coffee filters sized for 8- to 12-cup coffeemakers. I pour the lees into the six filters and let them sit to drip. When they’re done, I replace the used filters with fresh ones and pour more lees into the funnels. I pack the used filters (and their contents) into a larger funnel and let them continue to drip, which saves another glass or two of wine. It may take 20 to 30 filters to handle the lees from a 5-gallon carboy, and you may need to let some of them drip overnight to finish. If you don’t have funnels, you can use canning jars with ring lids to hold the filters.
Some wines, especially the citrus-hot pepper wines, can begin to taste good in as little as 3 months. They may still show some bubble activity at this point, especially when you rack or if you pour some wine to taste. It is still too soon to bottle these, however, unless you are willing to use sulfites and degas your wine, typically by vigorous stirring with a stirring tool attached to a drill. If you bottle too soon and don’t take these steps, you risk having the bottles blow their cork or even explode. Aging in bulk — that is, in a jug or carboy, rather than in bottles — will also greatly improve the flavor of your wines.
Let your wine age in a cool basement or cellar for at least 6 months. Every 2 to 3 months, rack your wine into a clean container, leaving the sediment behind. I recommend aging times in the recipes in part 2, but most wines are best aged in bulk for 1 year before being bottled.
I usually make wine in 6-gallon batches, which is enough to fill a 5-gallon carboy and a 1-gallon jug. I let the carboy age undisturbed in my wine cellar, and I use the wine in the gallon jug for tasting. If I decide that I want to enjoy some of that wine on the early side, before it has finished aging, I rack it into swing-top bottles, and I simply release the pressure in the swing-top bottles once a week or so.

Let your wine age in bulk for at least 6 months.
Wine is ready to bottle when it has aged appropriately and there is no bubbling and you’re sure the secondary fermentation has stopped. The easiest way to bottle your wine is to pour or rack it into a bottling bucket. Bottling buckets have a spout and are used with a long clear tube that has a spring tip. Simply place the tube into your bottle and press the tip of the tube against the bottom of the bottle. When the wine is at the top of the bottle, lower the bottle to depress the tip and arrest the flow of wine. You could also rack your wine from the secondary jug into wine bottles, but you’ll want to make sure you remove the tube from the secondary jug before your bottles overfill.
If you will be consuming your wine in a few weeks, you can rack it into swing-top bottles and enjoy it at your leisure. If you plan to store your wine bottles for a longer period, it’s best to cork them. You can purchase or rent a wine corking tool at your local winemaking supply shop, along with your choice of corks (see Corks and Corking Tools). The most economical corker, and the one I use at home, is a double-level hand corker. Soak your corks in water for 2 hours to soften them, then place a cork in the chamber of the corker (not in the bottle). Place the corker on the top of the wine bottle, make sure the piston lines up with the top of the cork, then slowly press down both levers. The cork should end up flush with the top of the bottle; if it isn’t, some corkers can be adjusted by turning a nut at the top.
Although not a necessary step, you may want to finish your corking procedure by placing a plastic capsule over the top of the bottles (see Corks and Corking Tools). You can either use preformed plastic caps or melt and apply melted wax to create a more artistic expression. Preformed plastic capsules are easy to use: you heat them to make them malleable, and they shrink into place as they cool. Generally you either heat them in a pot of hot water and then place them on your bottles, or you place them on the bottles and then heat them with a blow dryer.
The final touch is to label your bottles. You can purchase premade labels from winemaking supply shops, or you can design labels at home. Custom-designing labels for different vintages or special occasions can be fun — and a case of wine with labels customized to match a couple’s wedding decor, with their names and the date of the big event, makes an impressive wedding gift.
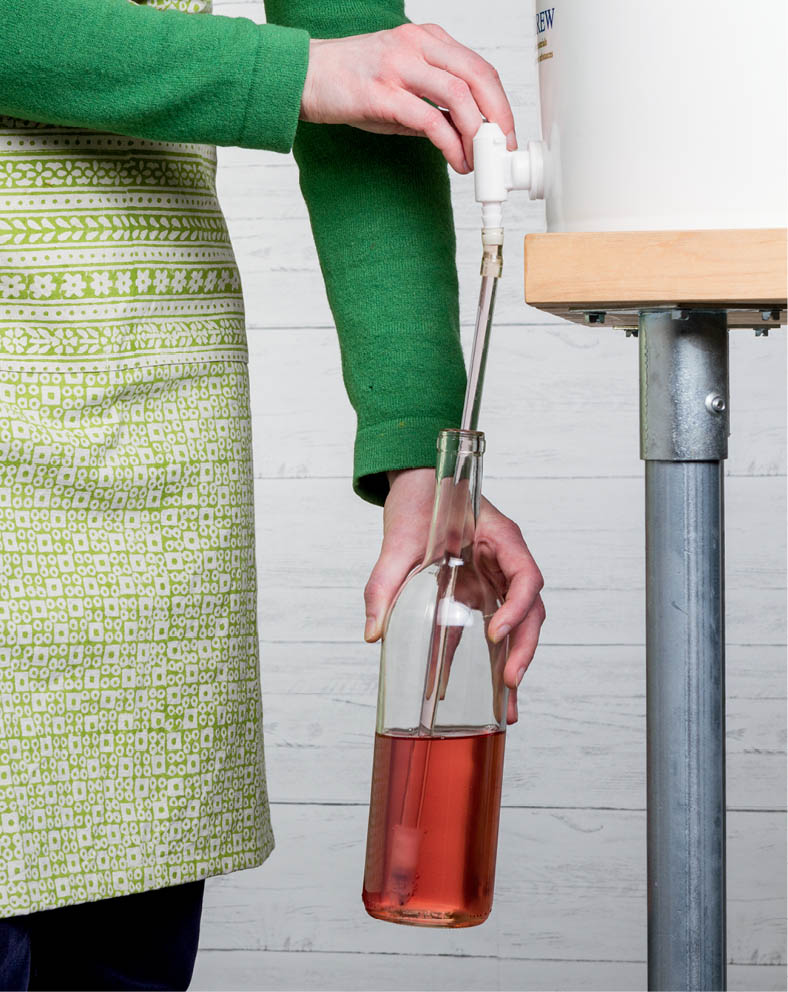
Fill your bottles to just above the bottom of the neck. A bottling bucket with a spring-tip tube makes this job much easier.
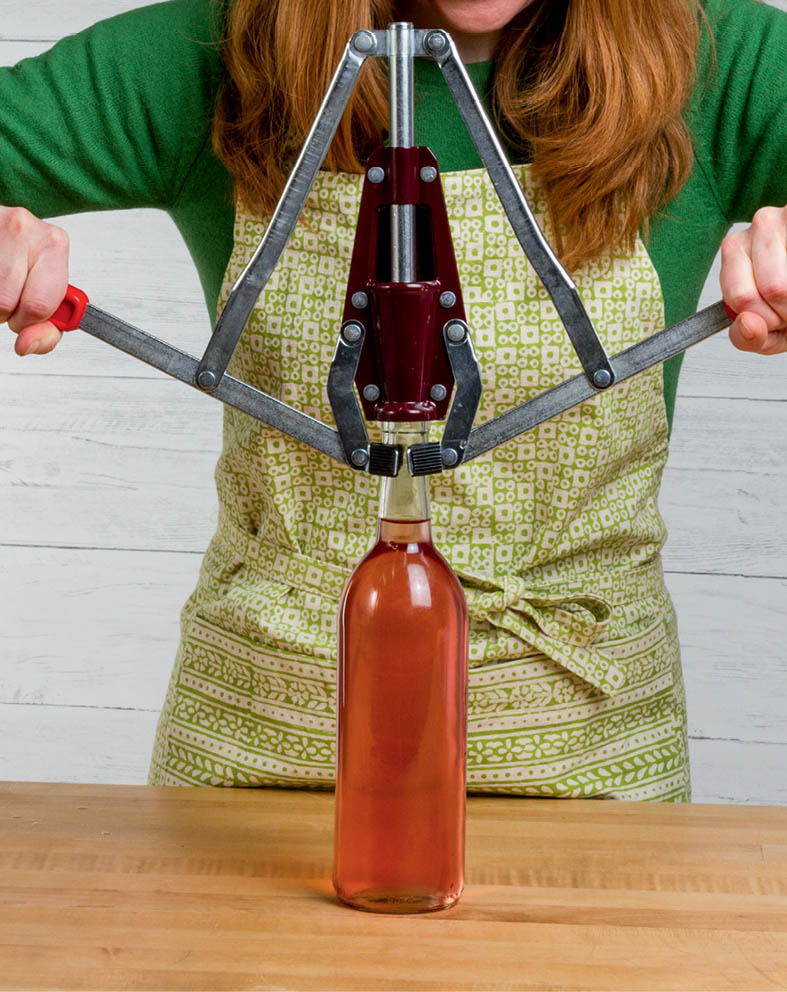
Cork your wine for longer-term aging and storing. A fairly inexpensive double-level hand corker will do the job.
If you don’t use sulfites, it’s very important that you age your wines in bulk as long as possible (at least 6 months and preferably 1 year) before bottling, or you could risk having your bottles blow their cork or explode. If your bulk wine shows any sign of bubbling when you rack or pour it, it indicates that fermentation is still happening and it is too soon to bottle. It’s also important that, once bottled, you store your wines in a cool place (not the kitchen counter!). Many of my aged wines bubble slightly when poured, indicating that a little fermentation has occurred in the bottle. If you choose to use sulfites, you can bottle your wine whenever you like. Add the sulfites to the secondary fermenter 24 hours before bottling, to allow the sulfur gases to dissipate.
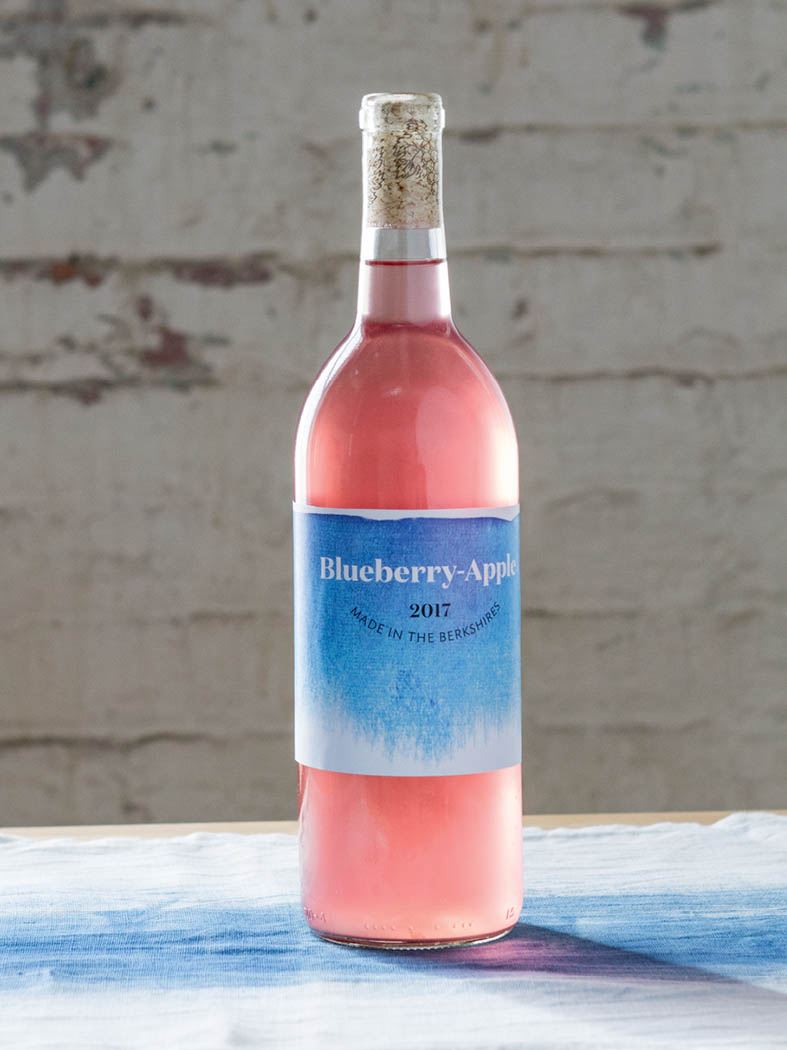
A nice label makes your bottle look good.
While most authorities claim that nongrape wines don’t store and age well over long periods, this has not been my experience. Some wines in my cellar are 30 years old, and they have definitely improved with age. Even bottles that have been opened age well (I have some opened bottles in the refrigerator that are 10 years old and still delicious). Since the wines I make are relatively high in alcohol (between 14 and 18 percent), they age more like liquors rather than traditional wines. The fact that I don’t use sulfites and my wines are still “alive” also means that they don’t age like traditional wines. Many of my wines continue to ferment after bottling and can bubble when opened.
I recommend that people store opened wine bottles in the refrigerator, though a cool basement is also fine. Unopened bottles are ideally stored on their side in a cool, dark place.
If you plan to drink them soon, you can show off bottles on an attractive wine rack in your kitchen or in a refrigerated wine cooler tucked under a counter. Large quantities are best stored in a cool basement or cellar. Large wine racks that hold a hundred or more bottles are available precut, ready to be assembled in your home, or you can custom-build racks. Racks allow easy access to your selection of wines, but one drawback is they will likely become dusty and are tedious to clean if they are on display in a finished basement. If you have the space and the resources, it can be nice to create a temperature-controlled room to store and age your wines — and you can make wines in there too.
An easy and inexpensive alternative to fancy wine racks is to use the divided cardboard boxes that hold a dozen bottles. You can usually get them for free from liquor stores. Just set your bottles in the boxes and stack the boxes on their side. If you start to build a collection of boxes, be sure to label them with the contents to make it easy to locate particular wines.
If you make a lot of wines, I suggest that you create a written inventory to keep track of what you have stored, and where. I myself have more than 200 boxed cases from 30 years of winemaking, and I would have a hard time finding the wines I want without my inventory notes.
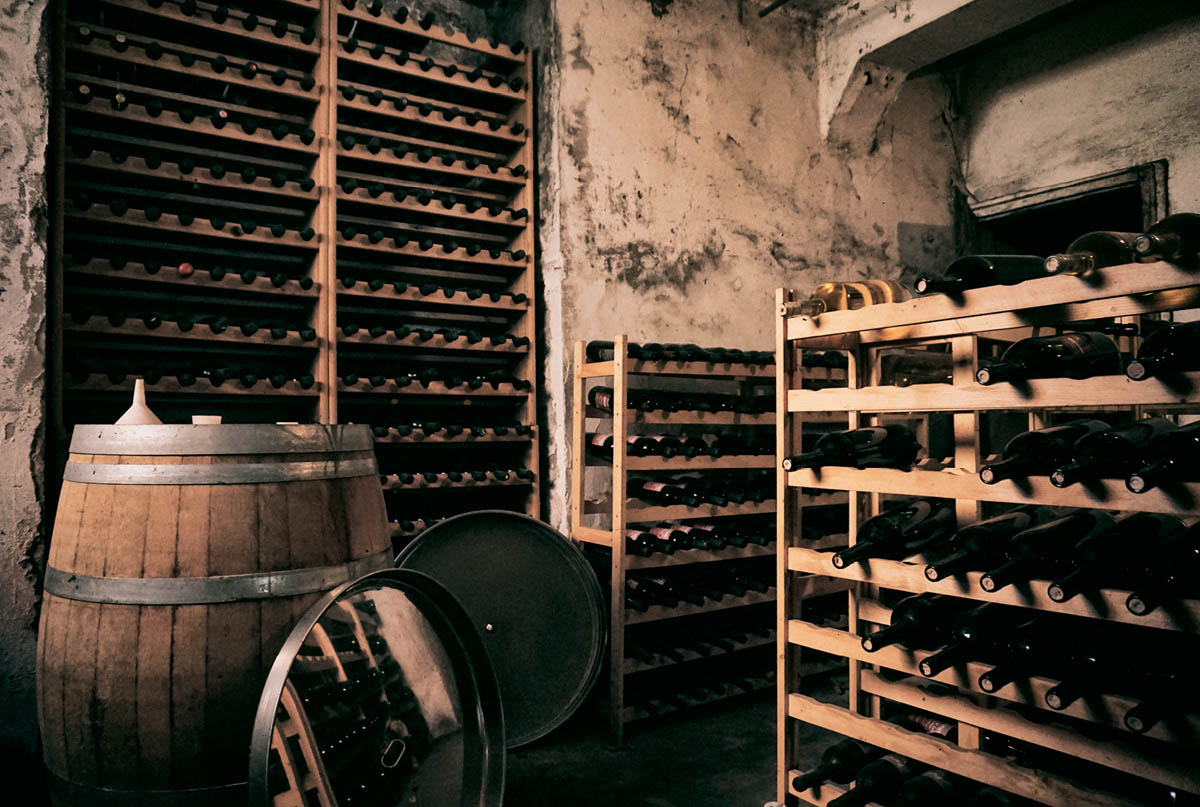
Store your bottles on their side in a cool, dark location.
Probiotics are microorganisms, such as bacteria and yeast, that are beneficial to human health. Many live in the gut, where they keep harmful microorganisms in check, help move food through the digestive system, break down toxins found in some foods, and even synthesize vitamins from food.
The first historical references to the benefits of probiotics comes from the Roman naturalist Pliny the Elder, who recommended drinking fermented milk to treat intestinal problems. He may not have known about the existence of bacteria, but he well understood the benefits of probiotic-rich fermenatations. Louis Pasteur’s work in the 1800s brought to light the effects of microorganisms on health and disease in human populations. Early researchers at the Pasteur Institute who studied long-lived Bulgarian peasants concluded that consumption of yogurt and the microorganisms therein was in large part responsible for their good health. Today, most people are well aware of the benefits of probiotics, and you can find a proliferation of probiotic products in grocery stores, along with many articles and books touting their benefits.
Wine, being a fermentation, naturally contains probiotic organisms. However, almost all commercial wines have added sulfites, which kill the probiotics. The wines described in this book are all made without sulfites, so all of the probiotic organisms in the wine are left intact. I describe my wines as being alive, and I know from anecdotal evidence from my friend, who cannot tolerate the chemicals and additives in commercial wines but feels good after drinking my wines, that they are beneficial for some people.
My wines, like commercial wines, also contain antioxidants, polyphenols, and B vitamins. Wine is a rich source of antioxidants. Polyphenols are a category of plant-based chemicals that have specific benefits for the body, and many of them, such as carotenoids, flavonoids, and resveratrol, are found in wine, especially red wine. Polyphenols are present in many fruits as well as other foods like vegetables, grains, coffee, spices, and even tea. Some of the fruits that are highest in polyphenols are plums, cherries, blueberries, and apples, and vegetables high in polyphenols include onions and kale — and you will find recipes for making wine with all this polyphenol-rich produce in this book. And wine’s B vitamins are created through the process of fermentation; drink the wine, and you’ll get a good dose of these essential vitamins.
