
A self-steering system is ideal for small yachts planned for big journeys, such as this 22ft (6.7m) transatlantic Westerly Nomad. No power is required, and it is fairly easy to repair under way.
Windvane self-steering
for the voyaging yachtsman, wind-powered self-steering gear is a ‘tireless helmsman’, holding a course for days on end without requiring a single amp of electricity. It excels in heavy weather and some designs also double up as an emergency rudder.
Windvane self-steering is simply a self-powering autopilot that uses the force and direction of the wind to hold a yacht under sail on a preset course. Apart from making your yacht look like a serious ocean explorer, windvane self-steering is a very practical and low maintenance piece of kit that will helm on almost all points of sail. The tougher the conditions, the more effective it becomes. However, the windvane can only hold a course in direct relation to the wind, rather than to a compass heading (as with electronic autopilots), so if the wind suddenly changes direction, then so does the yacht.
Over the years, several types of windvane self-steering systems have been developed; some are more effective than others, and some better suited to specific kinds of yacht or multihull. The concept is particularly popular with boatowners who may be single-handed or short-crewed, but wish to undertake long passages without relying on complex and power-consuming electronic pilots.
A self-steering system is ideal for small yachts planned for big journeys, such as this 22ft (6.7m) transatlantic Westerly Nomad. No power is required, and it is fairly easy to repair under way.
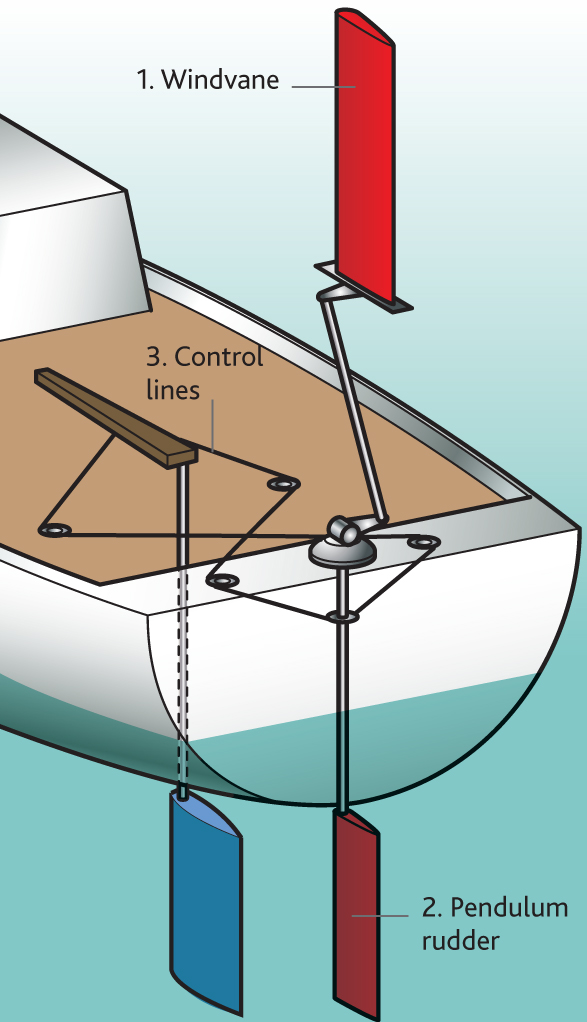
The windvane (1) is moved by the wind, making the pendulum rudder (2) rotate around a vertical axis. Water flows past the pendulum rudder so it swings sideways around a horizontal axis. Control lines (3) connected to the pendulum rudder and the boat’s main rudder help the boat steer back to the correct course. The windvane returns to its initial position.

Most types can be made to fit any kind of transom. This Aries – its paddle and vane removed – has been adapted to fit a canoe stern. The more robust the vane design, however, the heavier it will be.

When not in use, the windvane can be removed and the blade swung out of the water, or it can be detached completely to prevent damage.
How it works
The heart of each system is the windvane itself, which may use a horizontal movement (where it hinges at the bottom and is blown over by the wind) or a vertical movement (where it swings around like a weathercock). Once the yacht is settled onto its chosen course and the sails have been trimmed, the vane is pointed edge-on to the wind and the steering gear connected. When the yacht wanders off course, the vane detects a change in wind direction and triggers a response.
Some systems use the pressure of the wind alone to provide the necessary mechanical force to work a semi-balanced auxiliary rudder, while others harness the energy of the water rushing past the yacht to turn the main rudder. These servo-pendulum types are the most common and are also very powerful, with quick response times.
Other types utilise a trim tab on the main rudder, and several can accept the connection of an electronic autopilot for use in light airs or when under power, too.
Pros and cons
When deciding whether to fit windvane self-steering gear, there are several considerations:
Pros:
 Requires absolutely no electrical power to operate.
Low maintenance, and usually quite simple to repair.
Very responsive, especially in strong winds.
Excellent in heavy weather.
Can be engineered to fit almost any hull shape.
Ideal for singlehanded or short-handed passage making.
Cons:
Can be heavy or bulky, depending on type.
Only holds a course relative to the apparent wind.
Takes a little ‘getting to know’.
Not very responsive in light airs or on a dead run.
Adds vulnerable clutter to the stern.
Can be expensive new.
Compared with electronic autopilots that feature push-button operation and hidden mechanisms, windvanes are a bit more cumbersome and take more getting used to. They tend to be the preserve of keen, passage-making yachtsmen, although they will happily take over the helm at a moment’s notice for coastal sailing. Many of the manufacturers are bluewater yachtsmen themselves, and have developed their particular system after thousands of miles of voyaging.
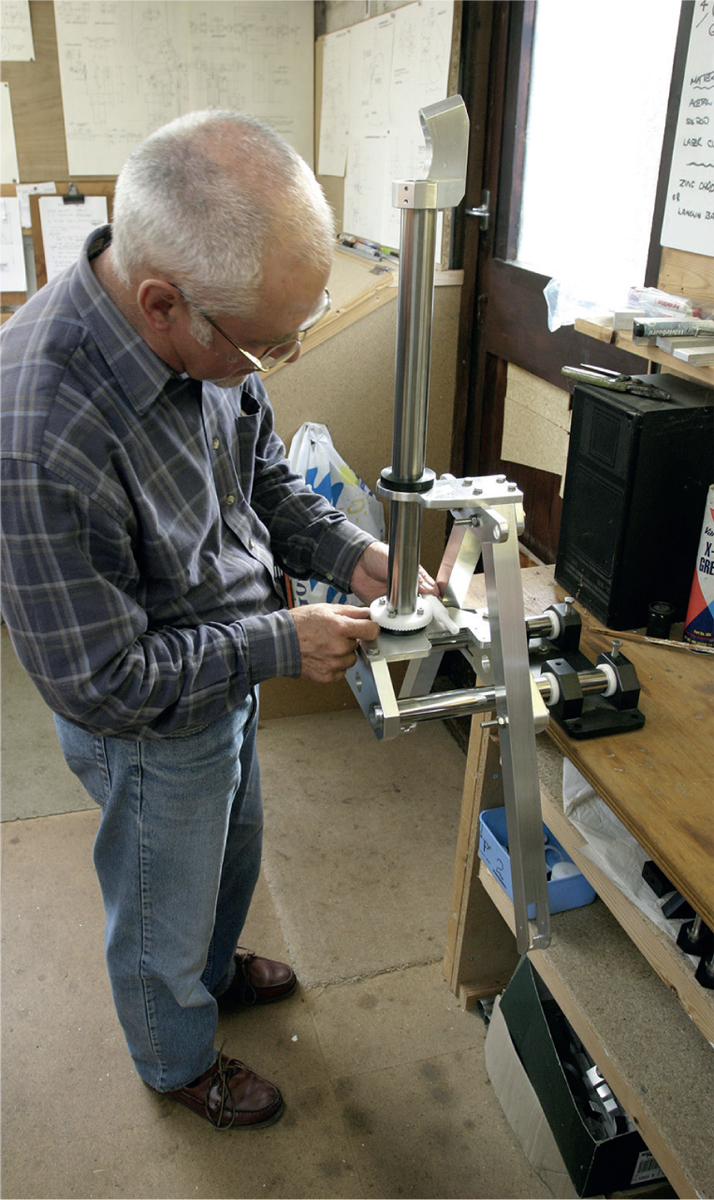
The customer has provided measurements and photographs of his boat for the vane gear manufacturer, who then builds the unit and the specific supports it will need.

The fitting is best done with the boat afloat, and in full cruising trim. Here it has been backed up to the pontoon for easy access.
Fitting a windvane
Each manufacturer will have comprehensive instructions for fitting its system, and when it comes to the popular servo-pendulum models, most require the trailing blade to be sited along the yacht’s centreline, using the backstay as a guide. Even a little way off-centre will compromise the unit’s performance. Whatever the shape of the transom or the design of the rudder, struts can be engineered to support the mechanism in the ideal position.
Because windvanes are built in small batches, some on a semi-custom basis, there is a great deal of customer support available. Usually a boatowner will contact the supplier with details of the yacht, and the supplier may already have an archive of ideal solutions on similar vessels. Once the unit has been delivered, most often as a kit, fitting is best done with the yacht moored stern-to in a berth, with spring lines attached to limit its movement. When the yacht is afloat it is easier to see where the yacht is lying to the waterline mark, as the amount of paddle that is immersed is critical to performance.
Any fixtures on the transom can interfere with the position of the system, but the suppliers insist that for best performance, priority should be given to the correct alignment of the steering gear, and other equipment relocated around it.
When fitting a windvane, take careful measurements and then centre the unit on the transom, supporting it with ropes from the pushpit or temporary gantry while you mark the drill holes for the supporting struts. Double-check inside the transom to ensure that the securing bolts won’t interfere with any pipes, wires or access points.

Having checked for obstructions below the aft deck and inside the transom, holes are drilled for the anchor points. Some may be on deck.

The transom supports are then cut, fitted with end caps and retaining grub screws, and then attached to the hull with through-bolts to backing plates.
Once you have drilled the holes for the brackets, you may have to adjust the length of the struts so that the unit is sitting vertically in exactly the right position. Use sealant and backing plates for a solid, watertight connection to the transom.
With the frame bolted to the hull, attach the paddle, which will swing up when not in use, and then lead the control lines into the cockpit. For tiller-steered boats, cross these control lines over at the vane gear before leading them to each side of the cockpit and attaching them to a length of chain that will allow for correcting weather helm.
On wheel-steered boats, fasten a special attachment to the wheel. You can feed the lines in from the same side of the cockpit, if necessary, via a set of guiding pulleys. The last attachment is usually the windvane itself, and then the system is ready for testing.
Using vane gear
The vane gear works best when the yacht is nicely balanced on its desired course. To deploy the paddle gear, it is often a good idea to slow the yacht down by rounding up into the wind for a few moments. With the paddle down and locked, get the sails trimmed just right, so that when the yacht wanders off course there is a natural tendency for it to correct itself. This means the vane gear doesn’t need to exert too much effort to work efficiently.
Once sailing this way, attach the windvane and turn until its leading edge is pointing directly into the wind. Then connect the control lines, and monitor progress until you are happy that the vane gear is steering correctly.
Adjustments can be made for light airs by swapping to larger vanes, and this also works for the slightly more tricky downwind sailing when the breeze loses some of its power. When not in use, the paddle should be pulled up and locked to avoid damage, and the vane itself taken off to avoid excessive wear on the system.

The steering lines are cut to size, and attached to a length of chain. The links can be adjusted over the pin in the tiller to allow for weather helm.
TIP
Some yachtsmen have found that kite-surfing rope makes for a very efficient control line, as it is thin and light, yet incredibly strong. This reduces friction in the system in light airs.