 They should be comfortable.
Cockpit cushions
Comfort afloat has become a big issue. Gone are the times when cruising sailors were content to spend hours at the helm, their sterns parked on unyielding cockpit seats that became harder and harder with every passing minute.
Cushion requirements
So, what makes for good cockpit cushions? Well, there are only a few essential requirements:
They should be comfortable.
They should be non-slip when stood upon.
They should dry out quickly and not remain waterlogged.
They should be buoyant so they can be heaved overboard as an instant response to that direst of emergencies – an MOB situation.
These seem easy aims to fulfil. However, it’s not until you review the various commonly employed materials that you realise that none satisfy all demands:
Polyurethane foam: cheap, cheerful and readily available, but lacks any significant buoyancy. It will soon become waterlogged and will take days to dry out. You can, of course, cover them with a waterproof fabric such as reinforced PVC. But this is quite slippery underfoot and, anyway, the seams and zips will still leak. Also it’s heavy and can be unpleasant to sit on, particularly in hot climates.
Closed-cell foam: it doesn’t absorb water and it floats, but it lacks springiness, being little more resilient or comfortable than the original cockpit seats.
Reticulated foam: meaning ‘net-like’, forming a structure of open galleries (as opposed to cells), which drain rapidly and can’t hold large quantities of water, like a conventional sponge. However, reticulated foams are non-buoyant, which doesn’t fit one of the criteria.
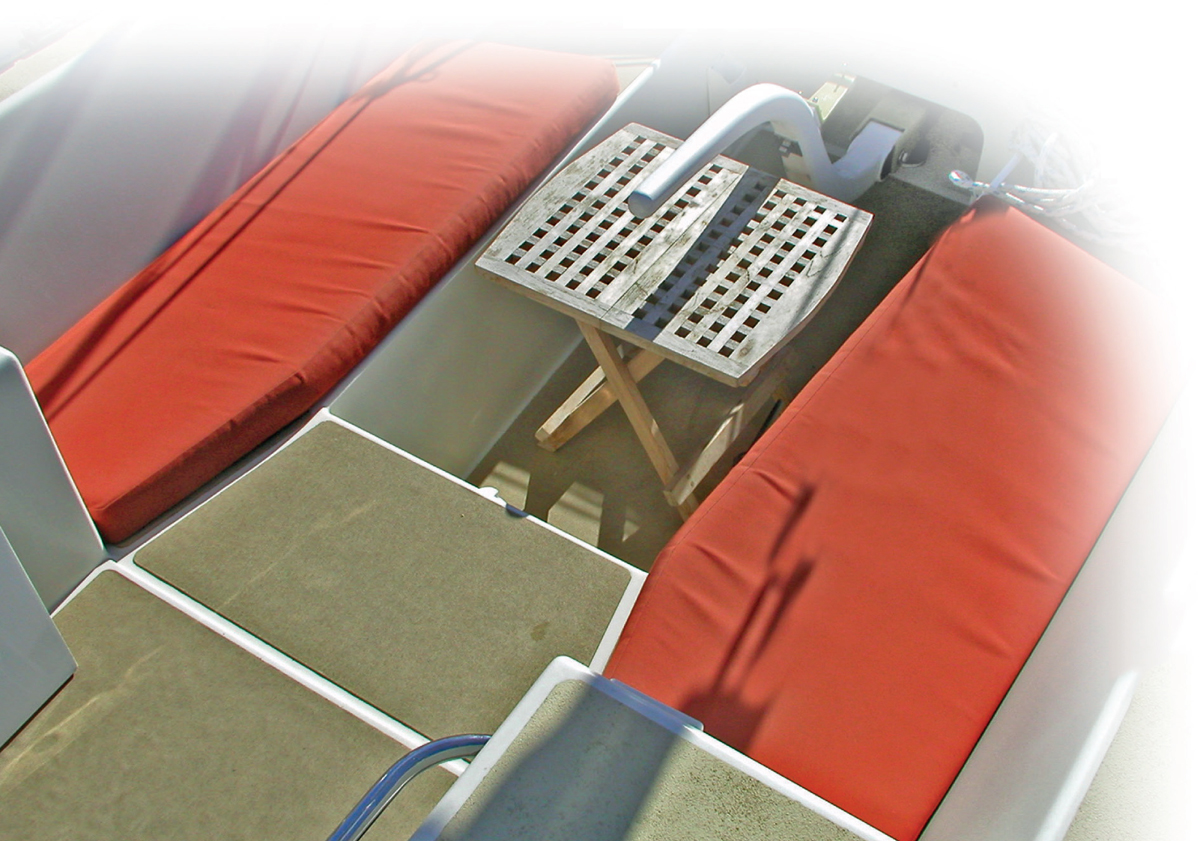
The cockpit cushions in place. The foam core and top layer of reticulated foam make an ideal combination for cushions.

The top (yellow) foam is the reticulated variety, the white beneath it is buoyant closed cell.
However, by combining the closed-cell and reticulated foams together as a laminate and then covering the whole in acrylic canvas, you end up with a cushion that is comfortable to sit on, and has good non-slip properties.
The feature that makes this type of homemade cockpit cushion unique lies in the foam core. The cushion resembles, at least visually, a layer cake. It comprises a laminate of two different foams glued together. The bottom layer is 25mm (1in) of closed-cell foam topped by 75mm (3in) of reticulated foam. The thicknesses aren’t critical, but they do work well together.
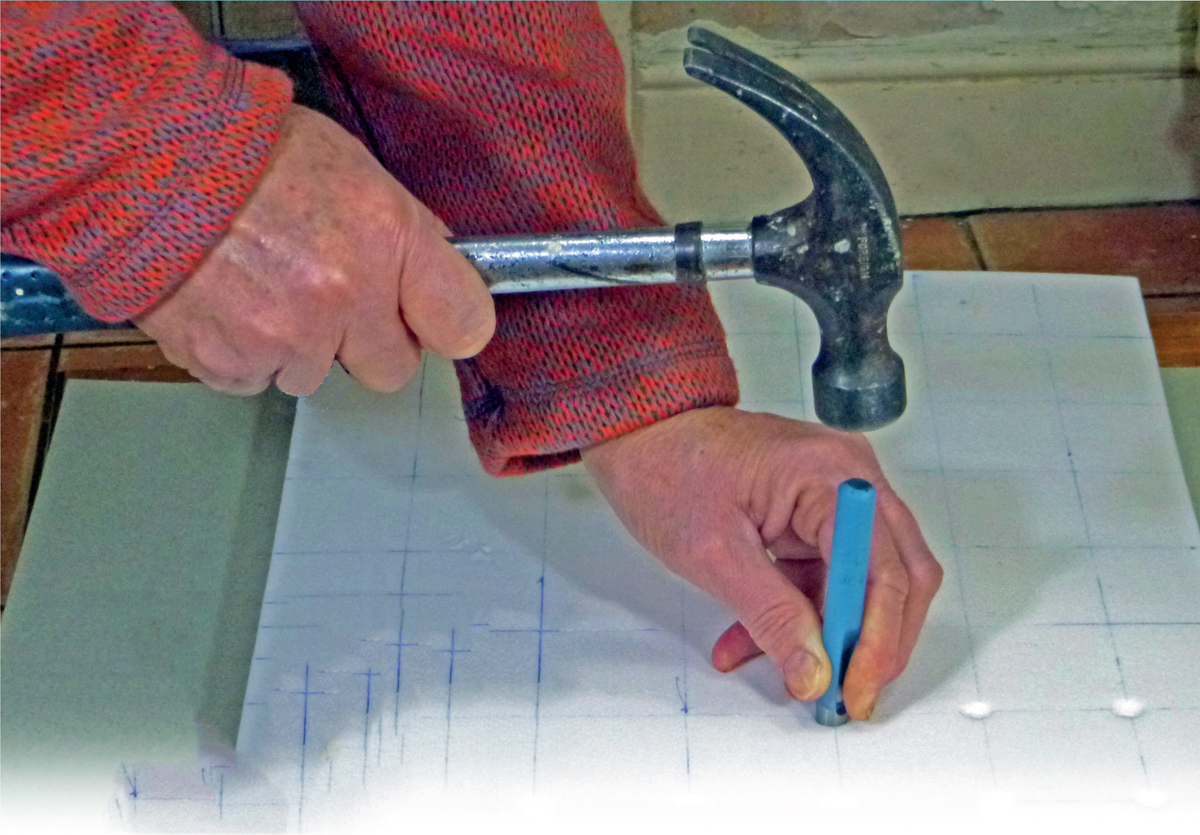
Use a punch to create drainage holes in the closed-cell layer. A 6mm (¼in) diameter is ideal for the holes.
Although the foam can be cut by hand with a sharp knife, an electric carving knife makes the job a lot easier.
Making the cushions
Start by making a template of the seat you intend upholstering – perhaps out of plastic sheeting or wrapping paper. Also check that both the port and starboard sides are the same. Surprisingly, dimensional symmetry can’t always be relied upon on yachts.
Lay the template over the closed-cell sheet and draw around its perimeter and cut out the shape. A domestic electric carving knife cuts foam cleanly, quickly and without tearing. Be accurate. If possible, lay the shaped foam in its actual place on the boat to confirm that it fits. Being closed-cell makes this a rather incompressible material, so the footprint of the bottom layer will determine that of the whole cushion.
Water will drain quickly through the reticulated foam, but will face an impenetrable barrier when it reaches the bottom layer. Some form of drainage must be provided; the simplest being to make a number of holes through the closed-cell foam. What works surprisingly well is a hammer and 6mm (¼in)-diameter punch. The neatest way to do this is to mark a grid with lines about 50mm (2in) apart and drive the holes through at the intersections.
The next task is to cut out the reticulated foam. Use the closed-cell layer as a template and draw a cutting line about 25mm (1in) outside it. This excess is to allow for any inaccuracies when you glue the two layers together.
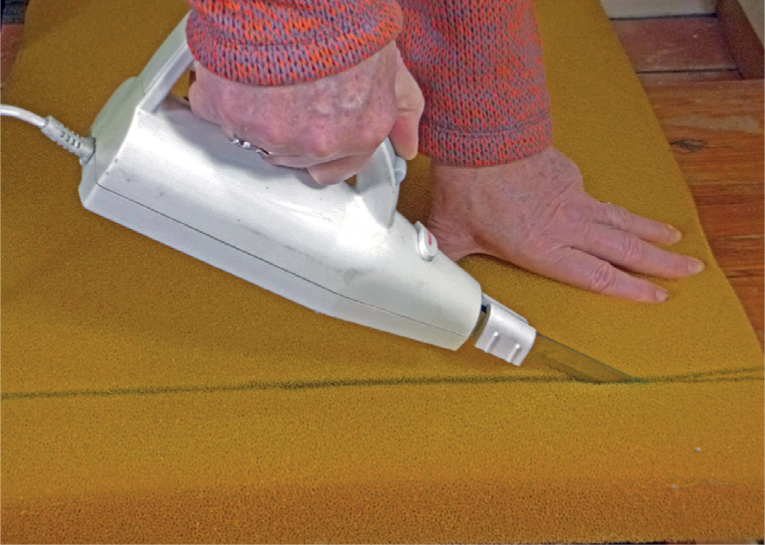
The next job requires an aerosol sprayed contact adhesive, available from a commercial upholstery materials suppliers or carpet shop. When applying the glue there are two options, depending on the size of the cushion. One way is to spray both joining surfaces, allowing them to dry (about 4 minutes), then bringing the two pieces together for an instant bond. A safer option for larger cushions is to spray just the upper face of the closed-cell foam, then press the reticulated layer onto it as soon as you can.

An aerosol-type adhesive makes applying the glue a very easy task.
It’s possible to do this in stages, bending the reticulated foam up to allow you to spray adhesive underneath it as you work your way along. The bond between the two layers isn’t very critical anyway, since it will all eventually be held together by the fabric cover. Whichever method you choose, you will need a flat surface that is large enough to move the cushion around as you bring the two layers together. An uncarpeted floor space, protected by plastic sheeting or strewn newspapers, is ideal.

The two layers of foam are now glued together to form a single laminate.
Once the two layers are joined, all that remains is to trim off the excess reticulated foam, again with the electric carving knife, and you are ready to make the cover.
The best material to use for this is acrylic canvas, which has good resistance to UV light, holds its colour well and doesn’t fray easily. The traditional method is to make ‘boxed’ cushions. This is a very apt term to describe a cover that has a top, bottom and sides, the last of which is a narrow strip that runs continuously around the perimeter without seams in the corners.
The original template is used to mark out the top and bottom panels, allowing an extra 25mm (1in) or so all round for the seam. It’s best to use a chalk marker that will not permanently stain. The side strips should be made a little narrower (by 6mm/¼in) than the total depth of the cushion. If, say, the uncompressed foam filler was a total of 75mm (3in) thick, make the side strips just 70mm (2¾in) wide, plus 25mm (1in) each side for the seams – a total of 120mm (4¾in). Having the cover slightly too tight will help remove creases from the finished cushion.
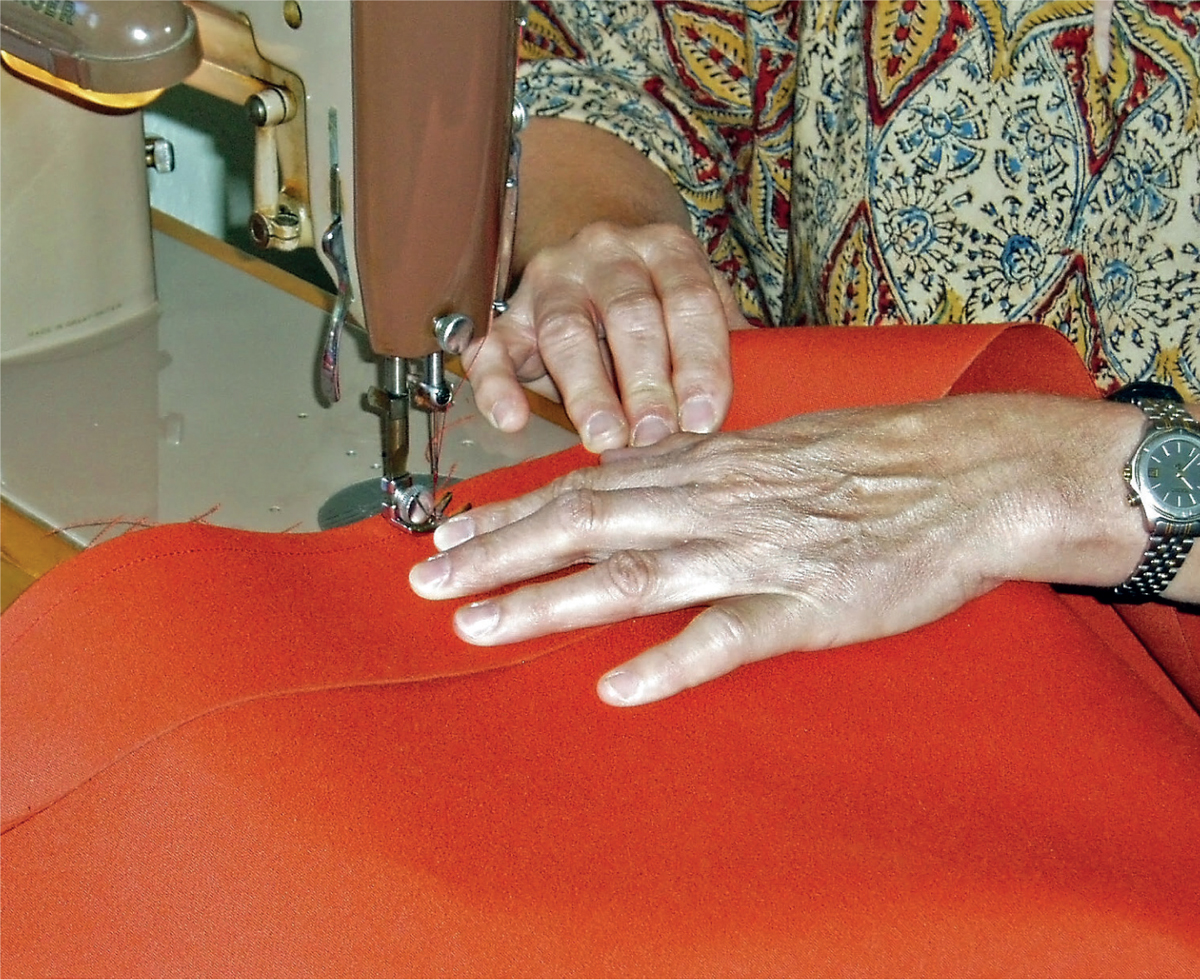
A domestic sewing machine is well able to sew acrylic canvas but make sure you have the right needles for heavy material on your machine.
Using an ordinary domestic sewing machine, the seams are stitched with the cover inside out. It’s common to fit a zip into the hidden side so the filler can be stuffed in. But zips and seawater are not happy bedfellows, so some people prefer to close the cover by making the last seam by hand. It’s easy to pull the seam tight with a needle and thread and the tension helps pull out any creases.

A sailmaker’s palm and needles close the final seam. Zips could be used for the seam but in time are likely to corrode and seize.
TIP
You may need some form of attachment to prevent cockpit cushions blowing away. There are several methods you can use. One of these is fitting snaps into the cushion and the boat surfaces, such as the corners of seats.
