

Now you have your farm, whether it is on some rural acreage, in a suburban backyard or on a city rooftop. Your gardens are prolific, your fresh milk is in the freezer, and you have more eggs than you know what to do with. You’ve given some things away to family and friends, but you still have more than you can use at the moment. So, what do you do? You essentially have two choices: you can either preserve your excess for the winter months, when you’d otherwise lament the loss of your garden and its harvest, or you can market the excess.
When you have harvested whatever was ready in your garden that day, the foods should first be cleaned. The way foods are cleaned depends on the food itself; foods that have had pesticides sprayed on them will need a more thorough cleaning than an organic food. Some foods will need a much gentler cleaning than others. For example, hard root vegetables will usually need a good scrubbing after harvesting simply due to the soil that will be clinging to them. You can take a little scrubber brush and clean under running water; however, to conserve water and prevent it from going down the sink drain, it is advisable to scrub the root vegetables first in a basin of water, and then quickly rinse in the sink of clean water.
With onions, you may just be able to be gently wiped off of with a rag, as you need, at this point anyways, to be careful that you do not remove the paper skin; although, if one layer with all of the dirt comes off easily, that will clean the bulb up for you nicely. Garlic is the same way: just a light cleaning, so as to preserve the paper skin. Tomatillos may have the skin or husk totally removed, as you would not normally preserve the husk anyway.
Foods with either thin skin or no skin at all (like tomatoes, berries, apples, and plums) should be lightly washed and either gently dried or left to air dry. There is, however, one food that should not be washed, just gently wiped off, and that is mushrooms. If dropped into water or held under with running water, mushrooms will absorb the water like a sponge. So instead of washing a mushroom, just take a clean towel or napkin and gently wipe to remove any dirt. If the bottom of the stem is a little dirty after picking, it may be trimmed off.
At this point, you will have your foods washed and cleaned. Next you will need to get whatever equipment you’ll need out and ready to use. From here, the food is prepared as per the recipe being used and the method of preservation being employed. For example, tomatoes would need to be peeled and seeded no matter what method is used. Vegetables or meats intended for dehydration need to be sliced according to the specifications of the dehydrator or the recipe. Fruits may need to be sliced, chunked, and so on. Again, at this stage your preparation depends on what you are doing.
After all the preparations are done, you can get started with the actual food preservation.
There are a variety of ways to preserve food, with the most commonly used being canning, freezing, drying, pickling and smoking. Unlike during ancient times, we are no longer limited in our choices of preservation methods by the climate that we live in. Instead, we are able to choose the method that best fits our needs, tastes, time, and storage capabilities. Even drying can easily be done almost anywhere. If it can’t be done by the sun, there are a number of ways available to us today; where once we needed to depend on the sun, now we can use generated heat instead to dry our foods.
Since almost any method of preservation you choose is available for use today how exactly do you narrow things down and select the correct method? The first thing that should be mentioned is that you do not have to restrict yourself to just one method. You also do not need to process your foods into just plain fruits, vegetables, or meats. For example, you may have many tomatoes from your harvest, but you really don’t want 40 jars of preserved tomatoes on your pantry shelf. What do you do? Think about what you use those tomatoes for throughout the year, and plan your preservation accordingly. Do you use pasta sauce? If so, then take some of your tomatoes, make up a batch or two of sauce, and can or freeze it. Do you prefer salsa? Then take some of your tomatoes and make up a batch of salsa. If you use sun-dried tomatoes then you can dry some of your tomatoes, either in the sun, the oven, or dehydrator. Don’t forget to save and can/freeze some whole tomatoes as well, to use for cooking.
Of course, if you are tight on time and just need to get your preserving done so you don’t lose anything, you may end up with those 40 jars of tomatoes sitting on your shelf for a while, until you can put them into direct use. The point is that you have options, in both how you preserve foods and the method or methods you decide to use.
In this section, we’ll look at each of these methods individually.
Developed in France in the 1790s, canning is one of the “newer” methods of preserving food. Despite this, most think of this revolutionary method of food preservation as being practiced in their grandmother’s kitchen! For all that, canning may actually be one of the most labor intensive methods of preserving; however, once done and done properly you will have a shelf full of product that needs absolutely no refrigeration (at least until you open the jar). Canning is the perfect method of preservation for those who live in storm and power outage prone areas, as well as for those who choose to live off the grid, with limited power.
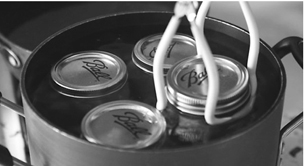
Despite the investment required in equipment and time, canning is one of the most versatile and effective means of preserving and storing your harvest. Photo by thebittenword.com under the Creative Commons Attribution License 2.0.
There are some things you will need when canning. While these initial purchases can be expensive, know that most of the equipment will be reused, saving later expense. The list is as follows:
Canning Jars: The glass jars that will hold the preserved food; they can be purchased in grocery stores, farm stores and other outlets. Make sure that there are no cracks or chips in the jar, as these will render the jars unusable.
Lids and Rings: The two-piece lids for the canning jars.
Canner: The pot used for canning. Filled with hot water, the jars are placed in for a set amount of time, allowing them to seal (this is called the hot water bath method).
Canning Basket: The jars sit in this basket, making it easier and safer to insert and remove the jars in the hot water.
Canning Funnel: A funnel with a large open end which fits in the mouth of the jar, making it much easier to fill the jars.
Magnetic Lid Wand: A plastic wand with a magnet on the end. This tool makes it easy and safe to pull the lids and rings from the boiling water during sterilization.
Clean Towels: Lint-free terrycloth towels to safely dry off the cans.
Clean Knife, Chopstick or Wooden Skewer: These implements are used to help release the air from the filled jars before putting on the lid and placing it in the canner.
Permanent Marker and Labels: To mark the jars with the contents and date of canning.
Jar Lifter: These are basically tongs created especially to remove jars from a hot water bath (if you are not using a canning basket).
When you start a session of canning, the lids and jars first need to be sterilized. This is very easy: fill the canner with water and bring it to a boil. After you have carefully inspected the jars for chips and cracks, carefully place the jars and lids in the hot water and let go for at least five minutes. Using the jar tongs, very carefully remove the jars from the hot water; not only will the jars be hot, but most will likely be filled with scalding hot water. Remove the lids and rings using the magnetic lid wand, and set the lids, rings and jars on clean towels until they’re ready to be filled.
Once you have the contents of the jar prepared and ready to can, use the canning funnel to fill each jar up to one inch from the top. The jars should be cool enough to handle before you begin this part of the process. If you are preparing something in a brine or juice, remember that the food needs to be covered by the liquid. If you are doing whole pickles or whole tomatoes, do not use the canning funnel.
When the jars are full, using the knife, skewer or chopstick, poke down the sides of the filled jar. You will begin to see little bubbles coming up the sides. This is releasing the unwanted air in the jar. Continue until the bubbles cease. Wipe the rim of the jar with a clean, damp, lint-free terrycloth towel to remove any brine, juice or food that may be stuck on the edge. Once cleaned, place the lid rubber-side against the glass and then screw on the ring. Make sure that the lid is on firm, but not tight. Place covered jars in the canning basket, and then lower them back into the water in the canner. The water should be at least one inch over the top of the jars. Bring the water to a boil and leave the jars in the canner for the proper amount of time for whatever you are preserving. As a side note, remember that altitude can have an effect on canning time.
When ready, remove the jars from the water bath and set them to dry on towels, covering with additional towels and allowing them to cool. During this period you should begin to hear some popping sounds; you may hear it while the jars are in the hot bath, as well. This is normal and proper, as it is telling you that the lids are sealing. Once cooled, check the lids to make sure they are properly sealed. This is done by putting your finger on the middle of the lid. If it is solid, the jar is sealed; if the lid pops up and down, the seal is not good and cannot be stored on the shelf. Should this happen, you can either try the hot water bath one more time and see if it seals, or place the jar in the refrigerator and use immediately.
Storing canned food is easy; just keep the jars on a shelf (out of direct sunlight) in a cool cabinet or shelf area in a pantry or cellar (or even in a crate in the closet).
You may also choose to use the pressure canning method. This involves using a pressure canner (which is similar to a pressure cooker) instead of a hot water bath. Although the initial preparation of the jars and food is similar to that of the hot water bath method, the actual process of using the pressure canner is different; so, should you choose this method for your canning needs carefully read and follow all the directions that came with your particular canner. Although the new canners are said to be much safer than the old pressure canners and cookers, they can still blow if something in the process is done incorrectly, creating a potentially dangerous situation. The point is, while it may not necessarily be the best starting place for a preserver just starting out, pressure canning is an excellent tool for the careful canner.
Freezing is a preservation method that almost everyone uses, but which few really think of as being a food preservation technique. One of the easiest methods to use, the biggest drawback to freezing is that a long-lasting power outage or a simple freezer malfunction can ruin your entire stock.
The materials needed for freezing include plastic bags (or containers made specifically for freezing) and plastic wrap. Using bags or containers made specifically for the freezer will allow your food to keep longer without suffering freezer burn. They won’t last forever, and frozen foods will sometimes have a shorter life than foods preserved using other methods (unless used in combination with vacuum packaging), but it is a quick way to preserve foods when time is short (or if you have no other method at your immediate disposal).
Although there are many, many things that you can freeze, some things simply do not freeze well. Lettuce is an example; most varieties, when frozen, will be nothing but a useless, mushy mess when thawed. Fresh herbs also tend to come out mushy when frozen. If you plan on using the herbs in soups or stews, this isn’t really a problem; in short, freezing is a viable method for herbs so long as you don’t need a pretty herbal presentation. Cheese, on the other hand, can be frozen with little difficulty, save that freezing cheese in block form will make it crumbly when you bring it out and try to cut it. Grated cheeses and already crumbled cheeses seem to do well.
Many fruits and vegetables will freeze well, but some may require a little prep work. Some things, such as broccoli and beans, should be blanched before packing for freezing. Blanching is basically a quick 1-minute swim in boiling water before dropping them in ice water to stop the cooking immediately. This holds the color and flavor of the vegetable, while keeping them firm. Other foods, such as tomatoes, most fruits, peppers, broccoli, and cauliflower, should not be frozen whole. If there are pits or seeds, they should be removed. The items may then be sliced, quartered, cut into pieces, or whatever is best for your use.
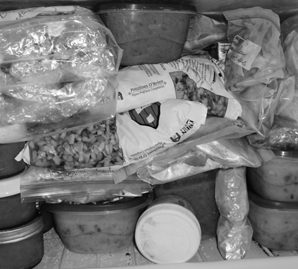
A freezer full of preserved food gives you another way to save your excess, as well as more options in the kitchen throughout the season. Photo by Serene Vannoy under the Creative Commons Attribution License 2.0.
There is a lot that can be done using freezing as a preservation method. It’s a quick way to preserve your foods while saving you some time, but it can have some drawbacks. However, if you have a lot that needs to be done in a short time, and don’t have time to spend on other preserving techniques, freezing is definitely the way to go.
Drying or dehydrating is one of the oldest techniques of food preservation, and is a surprisingly simple process. However, if foods are not thoroughly dried, spoilage and mold are a certainty with this method. That said, drying and dehydrating is not difficult to learn and can be done using an oven, microwave, dehydrator—even the sun, if you are fortunate enough to live in an area with lots of sunshine.
Dehydrating/drying involves removing all the moisture from food, thus drying it out. The items that you can dry are endless: herbs, meats, most vegetables and fruits, even liquids (when using a dehydrator). Drying and dehydrating can take a little prep time, but when a food is dried properly, it will have a long shelf life with little worry of spoiling and no need for refrigeration.
One of the most fun ways to dry fruit is by turning it into fruit leather. Fruit leathers store for a long time, provides opportunity for a wide variety of flavors, and makes for a popular treat for kids. You do need to remember that, when you make fruit leather, there will be little else that you will be able to do with the leather besides eat it as is (or create cake and cupcake decorations with them). So, unless your family eats a lot of fruit leather (and you do not need to preserve fruit for anything else) you might want to limit the percentage of your harvest that you devote to this tasty, albeit limited treat.
Sliced fruits may also be dried and later reconstituted with water (or juice) as needed, or else eaten dried as a delicious (but sometimes overly sweet) snack. Fruits that make for excellent dried snacks are pineapples, mangos, apples (especially if you sprinkle cinnamon before drying), figs, tomatoes, bananas and strawberries. Citrus, although it will dry, is not something that you will want to eat later on. However, you may want to save citrus skins to dry, as their powdered skins are often used in cooking and baking. Once dried, fruits will need to be kept dry, as any moisture will introduce mold, forcing you to throw the fruit away.
Dried vegetables have many uses: you can add them to soups and stews where they will rehydrate on their own; rehydrate in a little water or broth and use in casseroles; or, make a seasoning mixture by combining an assortment of dried vegetables, ground or crushed into a powder.
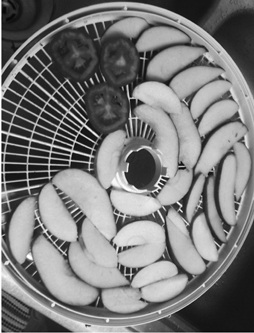
Dehydrated fruit slices not only make for a great snack, but provide plenty of delicious options in a number of recipes. Photo by Kelly Cree under the Creative Commons Attribution License 2.0.
To grind or crush dried vegetables, use either a mortar and pestle or an electric coffee grinder. If you plan to use a coffee grinder (which works great for herbs and spices, too) try to keep a separate grinder for just this purpose: the oils from the herbs and spices you grind will leave a residue on the plastic lids of the grinders, and although they can be washed, you will not get all of the oils out. As a result, if you use the same grinder for your coffee, the ground coffee may pick up the oils from the spices and herbs, adversely affecting the coffee’s flavor.
Another way of preserving is through the use of pickling. When you first think of pickling, you no doubt think of pickles—dill, sweet, sour, hot, whichever way you like it, the word pickling is almost synonymous with pickling a cucumber. But there is so much more that can be pickled! Fruit, eggs, cauliflower, okra, meats, relishes; all of these can be pickled, with alcohol as well as vinegar.
Pickling came about as a result of the need for another way to preserve foods without needing refrigeration. The process basically swaps out the water in a food for the pickling agent (usually vinegar). By soaking food in a salt water solution you can remove the water, such that the pickling liquid can penetrate and soak into the food. This way, the vinegar slows any bacteria growth, thus preserving the food.
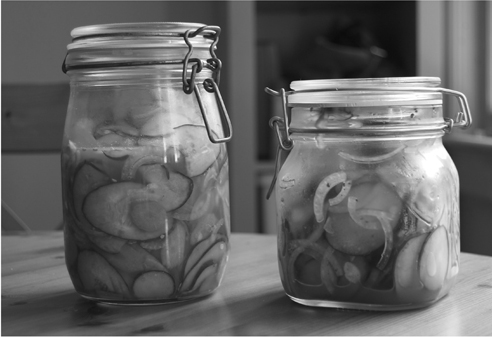
Contrary to popular belief, vinegar pickling provides a preservation method for far more than just pickles; you can pickle virtually your entire vegetable garden. Photo by Eunice under the Creative Commons Attribution License 2.0.
The materials necessary for pickling are basic and easy to find. They are:
• Crock, bowl or any other non-reactive vessel (to hold the vegetables as they are brining)
• Strainer and cheesecloth
• Non-reactive pot for cooking the vegetables in the pickling solution (not all recipes will call for the vegetables to be cooked in the solution)
• Canning jars, lids and rings
You will also need various herbs, spices, salt and sugar, depending on the particular recipe that you are following. When ready for pickling, follow the same directions as with any canning project.
As much as we like pickles (and as much as you will enjoy pickling), there is one drawback. Pickling can increase the salt content of food, while at the same time reducing the vitamin content. So, if you or a family member has a problem with sodium, this is definitely something to keep in mind when deciding which preservation method to use.
However, you can also pickle using alcohol. A good example is the “boozy fruit,” which you may remember from your grandmother’s cupboard. This is an example of using alcohol to preserve fruit. Basically, the fruit is preserved in a mixture of alcohol and sugar. The type of alcohol and the alcohol/sugar ratio will vary by recipe; however, it is a simple and almost foolproof method of preserving—so much so, in fact, that this makes a great project for a beginner. And, as the alcohol also kills bacteria, the fruit will (normally) need no refrigeration.
Pickling is a fun preservation technique, and there are thousands of recipes for pickling everything from cucumbers to pig’s feet. Once you have become comfortable with the basics, you can begin to create your own recipes and combinations.
Another preserving technique that has become popular once again is curing. Curing is a method of preservation using salt, sugar and/or nitrates, with salt being the main component and sugar and nitrates an option. The salt removes the water from the meat, slowing oxidation and preventing the meat from becoming rancid. When curing, the bacteria in the meat are not killed, just slowed. The sugar counteracts the strong salt flavor and feeds the beneficial bacteria. The sugars may be in the form of white or brown sugar, maple syrup, honey or corn syrup. Curing may be used on its own, or done as a step before the smoking process.
Nitrates kill harmful bacteria, enhance flavor and provide the reddish pink color that is a characteristic of smoked meats (without nitrates, the meat can be a gray color). However, even though nitrates are necessary in curing sausage and other dry meats (to prevent botulinum toxin), using nitrates is now in question, due to the fact that when there is a high concentration of nitrates present and the cured food is cooked at high temperature, nitrosamines may be produced, which have been shown to be carcinogenic in animals. There have been some possible substitutes produced for nitrates; however, all of this remains under debate. It is basically up to you to do your due diligence before you begin the process.
There are four methods of curing:
Dry: A salt cure with nitrates. A rub is made and applied generously to the meat by hand. The meat is tightly packed into a large container with drainage. Curing time fluctuates, but the rule of thumb is two days per pound for small cuts, and three days per pound for large cuts. Dry cured meats will lose 15–20 percent water weight.
Wet: Curing using a salt brine. A sweet pickling brine will occur with the addition of sugar. The wet cure is commonly used with hams and butts, and is usually used in conjunction with smoking. Wet curing is a slow process, with the meat remaining submerged in brine at a 40°F for up to two weeks.
The wet cure process does have some drawbacks: the meat will need turning for even distribution of the brine, and the brine will need to be skimmed periodically to prevent the possibility of contamination. And, if the process is not done correctly, there is a risk of spoilage of the meat, especially close to the bone. So, if you use this technique, you will need to be vigilant.
Combination: Just as it says, this method uses a combination of the dry and wet methods, usually with a dry cure being applied first, with the wet brine added a few days later. Curing time runs from four days on up, depending on the cut. The meat is then usually smoked.
Salt Curing: Another form of dry curing which is still used with some meats. Salt curing eliminates the need for nitrates. This is the cure used for prosciutto.
For safety, the salt concentration needs to be at least 10 percent, but as this method words to quickly pull and remove the water from meats, it is the fastest method of curing. When you are salt curing a ham, for example, a 10 pound piece of ham could take up to seven months to cure. This is due to salt curing also involving air drying of the meat, instead of smoking.
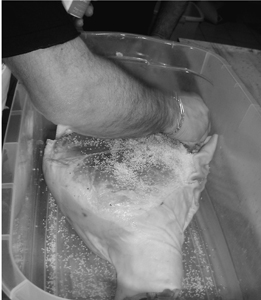
A sea salt solution provides an effective (and tasty) option when curing meats, and is the method used to prepare prosciutto. Photo courtesy of Wikimedia Commons.
Smoking is a preservation technique that often goes hand in hand with curing. Smoking is done slowly, over a low heat. Along with meats, cheese, fish and peppers are the foods that are commonly smoked.
Smokers can be electric, charcoal, propane, or water and steam. Although you can find many of these smokers in backyards today, if you can’t have a smoker, a regular charcoal grill will work as well. Simply keep your heat on one side of the grill, and then place the meat on the cold side. This will give you the same indirect heat that a smoker will.
There are two methods of smoking:
Hot Smoking: This method fully cooks the meat and kills most common bacteria. You can usually consume hot smoked meats without further cooking. It is through hot smoking that you get the coveted pink smoke rings under the bark or crust or under the skin. Hot smoking temperature is at least 150°F.
Cold Smoking: This technique is for flavor enhancement only. Normal temperature is around 100°F or less, so it does not cook the meat.
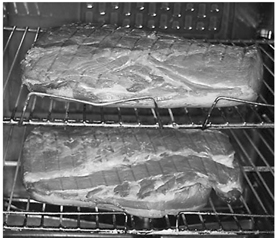
Smoked meat, in combination with or separate from curing, produces flavorful meats that will last longer than prepared meat. Photo by Cookipediachef under the Creative Commons Attribution License 2.0.
When using a smoker, it is the wood chunks or chips used to create the smoke that both add to and preserve the flavor of the meat. Hardwoods are commonly used due to their lack of sap or resin, with the most popular being oak, maple, cherry, pecan, mesquite, apple and hickory. You can find all types of hardwood chips and chunks in home improvement, hardware and outdoor stores across the country.
The process of producing the smoke involves soaking the wood chips and then placing the wet chips directly on hot coals, or placed in a packet (with holes), which is then placed on top of the hot coals (smoke boxes are also available; however, these can be expensive.)
When preserving with oil, you are basically preserving the flavor of the food that you have packaged in the oil, not in the food itself. This method is also known as infusing oils. Olive oil is the best oil to use, however canola oil will also work well. It should be noted that olive oil will tend to go rancid.
You should only use good quality herb leaves, garlic, spices, or peppers. The herbs may be fresh or dry, and spices may be whole or ground, but the ground spices (or herbs) need to be wrapped in cheesecloth before submerging into the oil. This will make it easier to pull the little pieces of herbs or spices out of the oil.
Although there are a wide range of recipes available for oil infusions, there are basically two ways to prepare them: cold infusions and hot infusions.
Cold infusions involve simply taking your flavoring ingredients, dropping them into a bottle or jar of warm oil, and then sealing and letting it sit for at least two weeks, to allow the flavor to infuse into the oil.
Hot infusions, by contrast, involve heating the oil and ingredients together in a sauce pan (a heavy bottom pan is best) until you can actually smell the flavor in the oil. Bottle or jar it, allowing it to cool. Refrigerate, and use within a few weeks. Heat infused oil allows for immediate use, as cold infused requires waiting for the flavors to meld with the oil.
Infused oil is fun to make, and if doing a cold infusion, the kids can even help. When you are ready there are hundreds of recipes online, in books and magazines available to start you off. Once you become proficient and comfortable with the process you can create your own recipes as well!
Although we have just covered the main methods of preserving food, there are also a few more that you can consider as part of your homesteading.
Jams and Jellies: Jellying is actually its own form of food preservation. Although the process dates back to the early Middle East, it is best known as the way fruits were preserved during early American colonial times. Although the terms are used interchangeably, jelly is a fruit juice cooked with sugar and pectin, while jam is crushed fruit or pulp, cooked with sugar and pectin.
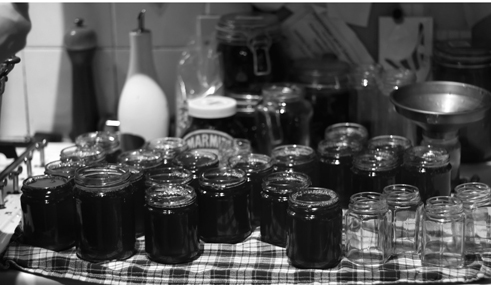
Somewhat less versatile than other preservation methods, jams and jellies nonetheless provide another attractive way of creatively using your garden’s harvest. Photo by Paul Alberta under the Creative Commons Attribution License 2.0.
Vinegar: The flavored vinegars that you have either purchased or made actually preserve the flavor of the herb or pepper (which works the best, but other things may be used) by letting the herb or pepper sit in vinegar (usually white) for at least a few weeks.
Root Cellar: An underground chamber used to store food at a low temperature and an even humidity, root cellars prevent foods from freezing. The best foods for a root cellar include (but are not limited to) potatoes, pumpkins, apples, onions and squash.
These are just a few ways to preserve your excess food. For more in depth information, refer to Backyard Farming: Home Harvesting and Backyard Farming: Canning & Preserving in this series.
After you have given away, eaten and preserved all of the fruits and vegetables that you want, if you still have more leftovers than you need, what can be done? Farm markets, farm stands and farmer’s markets provide an opportunity to offload your excess product, and make a little profit while you’re at it. But what’s the difference?
A farm stand is when you set up a little stand in front of your house, which can be a little free-standing one, or something as simple as a picnic table, set up with your display of vegetables and fruits for sale. This is a great way to get rid of the odds and ends from your garden.
A farm market is an actual market, set up on the farm, usually in a building of some sort (though it may sometimes be enclosed, it oftentimes is at least partially open air). A farm market is typically considered a business, and so business regulations for your area may apply, as well as any state regulations that may exist. You may also be required to carry insurance.
The farmer’s market is a market that you will see set up in various places, such as parks and parking areas, where farmers and growers come to sell their produce. At many modern markets, you may be asked to explain what you are selling. This is usually in an attempt to keep the products home grown, as opposed to produce purchased at auction to sell at market, as well as keeping out imported “junk” gifts. Most farmers’ markets will also require insurance, as well as proof of insurance.
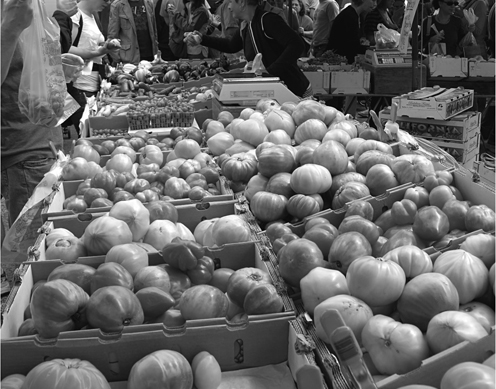
A farmer’s market not only provides an opportunity to sell your produce and get your name out there; it also gives you a chance to dialogue with other local farmers and share each other’s experiences. Photo by John Loo under the Creative Commons Attribution License 2.0.
If you have excess vegetables and fruits to sell, or any other on-farm food products that you make, but you don’t want to sell them yourself, farmer’s markets will sometimes take area produce from other farms/producers to sell at their market, especially if it is something they don’t already have. They may purchase the produce outright, or more likely will negotiate on a commission basis. Still, it can be a good way to make use of all your extra food.
There is also something called a value-added product, which can bring in some extra money for your homestead or backyard farm. A value-added product takes something you already have and changes it to become an even more valuable product; for example, turning fruit into jelly to sell, or turning branches trimmed from your fruit trees into saleable wreaths.
A few more ideas include:
• Turning dried tomatoes into tomato powder
• Bunching together dried stems from herbs stripped of their leaves for grilling with charcoal grills
• Dried vegetable flakes
• Beef jerky
• Fruit leather
• Cheese, butter, or ice cream
• Salad/green mixes
• Dried fruits
• Baking, soup, and dip dry mixes
• Rubs and sauces
• Herbal and hot pepper vinegars
• Dry, strung chiles and chile wreaths
• Cut flowers and dried flowers
• Fresh and dried herbal wreaths
• Wood (if you have a woodlot)
These are just a few examples of what you can create from items off your farm or already in your cupboards. For some of these projects (specifically food related projects) certain permits or stipulations may need to be considered. For others, you could get started today. Use your imagination, keep your eyes open for new ideas, and if you have an idea of your own … go for it! Who knows—your little home farm product could turn into big business!
Another way to earn extra income for your farm is to become a teacher. When you feel that you are comfortable enough with something that you feel you could teach it to others, start a workshop.
Workshops are not difficult to do if you are well-prepared (and public speaking doesn’t bother you), and they can be lots of fun. You can either have them on the farm/on-site, or else look for schools and community colleges that offer adult continuing education programs, as they are usually looking for new ideas and new instructors. You don’t have to be a certified teacher to conduct these workshops; just have a good handle on your topics, good presentation skills, and the ability to make your class enjoyable.
Your workshops can run as long as you need them to. Some do well as a single, 2-hour program, while others do better with half or full day sessions (with breaks). If you don’t want to do a full-day workshop, you can split it up over several weekly sessions, teaching for two hours each session for a few weeks. If you are working with an adult education program, they may have specific needs regarding scheduling, and may ask you to work around it. Others will just accommodate your preferences.
In terms of payment and fees, if you are teaching on-farm workshops on your own site, you decide what you will charge for your classes. Keep in mind any materials you plan on including with the fee; when you supply the materials, your fees will be higher. If you want to keep them lower, issue a supply list of necessary materials when a student signs up and sends in their payment. If the materials are difficult to find, make sure to include places where the materials can be purchased. You can also decide whether or not to offer refunds for cancellations. If you are not supplying any materials, you may decide to offer a full refund if someone cancels within a certain time period (set by you). If you are supplying materials, it’s fine to offer only a 50 percent refund; that way, you are not stuck eating the cost of the materials if someone doesn’t show.
If you are teaching through an adult education program, there will usually be a set price that they pay their instructors. Going this route, you probably won’t make as much as you would conducting the workshops at your own site; however, it does eliminate your having to do advertising and provide the space. If you’re uncomfortable having strangers at your homestead, teaching through a continuing education program is a good way to avoid that stress. It’s also a good way to get started, learn the ropes, get comfortable teaching and become known for what you do through a reliable source. You can go out on your own afterwards, if you wish (when you feel ready).
If teaching workshops isn’t your thing, or if you’re looking for a few more ways to make extra money on the farm, you can take a look at agritourism.
Agritourism, or agricultural tourism, can include any of the following:
• Farm tours
• One-time, on-farm events
• A farm petting zoo
• Seasonal and holiday events such as corn mazes (on a larger homestead or farm)
• U-Pick pumpkin patches (where the customers pick their own pumpkins) with hayrides
• Sugaring events during maple syrup/sugaring time
• On-farm bed and breakfasts
• Other U-Pick events, such as u-pick tomatoes, apples, strawberries and other berries
• Farm-made cheese tasting
These are just a few of the events and programs that you can feature. You may need to check the regulations in your area before you begin, and insurance coverage will likely be necessary, but there usually aren’t any major problems when first starting out.
Agritourism can be conducted in a multitude of ways; sometimes there are fees, sometimes there aren’t. For example, you may charge fees for a cheese tasting event, but when your farm is open for U-Pick, the money typically comes from the sales of the vegetables or fruit (unless you decide to have something else going on at the same time, such as a picnic or strawberry shortcake social).

Even a simple petting zoo with a few (well-behaved) animals can serve as a draw, bringing more people to your farm. Photo by David McSpadden under the Creative Commons Attribution License 2.0.

One thing to mention regarding U-Pick orchards: if you have decided on pursuing this set-up, it is best to plant dwarf trees, instead of full-sized trees. Dwarf trees will still bear a lot of fruit, but their smaller size means they will be easier for your customers to pick from (as ladders can be a liability) and safer for your customers to deal with.
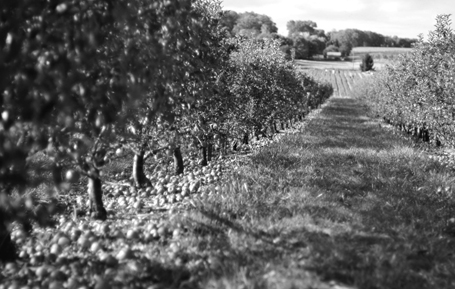
Opening your orchard to the public allows you to save time and energy harvesting your ripe fruit, while letting you sell off your excess at the same time. Photo by Jeff Kubina under the Creative Commons Attribution License 2.0.
How much you charge will be up to you, but will usually depend on the fruit. Berries are usually priced by the pint or quart basket, while apples, tomatoes, and other fruits and vegetables are usually priced by the pound. However, some locations will price their produce on a per-item basis. No matter how much you decide to charge, you can usually charge less than pre-picked fruits and vegetables; after all, your customers are the ones supplying the labor to pick the food, not you. Customers enjoy U-Pick; many will make a family outing of it, especially during the fall. Whether selecting the Halloween pumpkin, enjoying apple harvest time or just going strawberry picking, U-Pick orchards can provide a reliable way to make use of larger harvests. Some farms will even have special events during weekends of a U-Pick harvest.
If you decide to pursue agritourism at your location, first figure out what you can realistically offer to your potential customers. You’re not going to be able to offer a maze at an urban farm, or a U-Pick operation in a backyard. But as you are designing your farm, you can design it with U-Pick or corn maze in mind. Make sure it is something you will enjoy, and that you don’t mind dealing with people or strangers on your farm.
A few final notes: As you will be opening your doors to complete strangers, use common sense and take precautions:
• Don’t allow people into your home to use a restroom. Either have one in your market, or rent a portable toilet for market and/or U-Pick season.
• Don’t have equipment or tool rooms open to where people can see what you have on your bench.
• Don’t give customers free run of your farm. Make sure that you have a “public area” clearly marked.
• If you have a petting zoo, which some markets and U-Picks do, try to make sure that someone is keeping an eye on things at the pen. People are usually pretty good with behaving themselves, but you can sometimes get rambunctious kids or even adults that can spook your animals.
• On the subject of petting zoos, have animal feed already portioned out and available so that people can feed the animals (if you want them to feed your animals). It will save you the grief of a little kid trying to feed a calf his lollipop, or adults who want to see if goats really do eat “anything.” When you portion the feed, it also helps to prevent over-feeding.
• If you have a farm market, make sure that you have adequate parking. You don’t want to start getting complaints from customers and neighbors about having no parking or having cars backed up down the street. You can’t always have parking for everybody, but you do need to be able to service your average number of customers with accessible parking.
There are a number of ways to make extra money with your homestead, no matter the size and location. Although you do need to be careful, you’ll find that most people who visit your farm are great, with many who become repeat customers, and even friends. This chapter represents only a small percentage of what you can do. Use your imagination and stand out from the crowd. Believe it or not, there’s a lot of competition out there, so you will need to stand out!