
Look for hardy succulents to grow well in outdoor miniature gardens.
Outdoor miniature gardens are excellent conversation pieces when placed near the front door or on a patio or screened-in porch. These gardens are planted with plants hardy to the growing zone where the gardener lives.
While you can plant outdoor miniature and fairy gardens that use accessories and props, you can also plant miniature gardens that showcase just plants that you can’t easily grow in the ground where you live or that would disappear in a full-sized garden.
If you have the space, you can plant a miniature in-ground garden. These are especially useful if you have larger “mini” plants such as a dwarf conifer or miniature hosta collection. You can also use larger accessories in in-ground gardens.
If you’re growing a plant in a container above ground, subtract one hardiness zone from what the plant tag says. For example, a plant that’s hardy to zone 5 will likely only be hardy to zone 6 if it’s grown in a container.
While visiting my mom the summer I worked on this book, she casually remarked that she wanted to get her mother a miniature garden. I told her I’d love to make Grandma a garden and photograph it for the book. We combed through garden centers for accessories that reminded us of Grandma. She has an antique watering can collection, so of course we had to put some of those in the garden. She and my grandpa always had birdhouses and birdbaths. You can see one of each nestled among the plants in this miniature garden.
Even though this is an outdoor garden, I still used a few tender annual plants and herbs. That will give Grandma something to do each spring, picking out new colorful annuals to fill the tiny garden.
The style of this garden—a backyard setting—will also lend itself well to holiday decorating, something else my grandma’s a pro at doing.
I created this for my grandma who now lives in an apartment with a porch. This miniature garden is filled with personal touches that remind me of the full-sized gardens she had while I was growing up.

Unable to decide whether to use the blue furniture or the white while at the garden center, I brought home both. (The blue, of course, ended up as the inspiration for the Wild Wild West Garden.)
Flower fence
Arbor
Terra cotta pots
Birdbath pick
Gazing ball pick
Bird’s nest pick
Bird house pick
American flag on flagpole
Resin frog
Lantern on a pick
Patio furniture
Wheelbarrow
Watering cans
Large planting urns
Fairy-sized small gravel
Gardening angel
Preserved sheet moss
This container is all wood and has drainage holes drilled into the bottom. It measures 16 inches by 16 inches and is 3 inches deep.

Arranging the plants and accessories in the container at the garden center helps ensure that you arrive home with just the right number of plants to fill the garden.

“Trees”
Rosmarinus officinalis, rosemary
“Shrubs”
Miniature hosta
Ajuga ‘Chocolate Chips’
Sagina subulata, Scotch moss
Calibrachoa, Million Bells
“Groundcovers”
Thymus praecox ‘Pseudolanuginosus’, woolly thyme
Thymus praecox ‘Coccineus’, red creeping thyme
Muehlenbeckia axillaris ‘Nana’, maidenhair vine (also labeled wirevine)
Purple, green, and gray are the predominant colors of the plants in this garden. More interest is added to the garden with blue, yellow, and red accessories.
All of the plants in this container can take full to partial sun, including the miniature hosta. It’s a good idea to protect the garden from full hot afternoon sun, though. Several of the groundcovers are from the Stepables line of plants. The maidenhair vine is hardy to zone 7. It is possible that it will have to be replaced after a hard winter, but that’s okay, as they can grow fairly aggressively.
Use regular potting soil for outdoor garden containers.
1. Fill the container halfway with potting soil. Some of the plants are larger than others, and I find that it’s easier not to fill the entire container to start, but to fill it part way, plant the largest plants, and then add more soil before planting plants with smaller rootballs.

2. After filling the container with soil, arrange the plants and main accessories again just to make sure that you know where you want to put everything. Start by planting the largest plant (the miniature hosta) first. Then place the arbor and plant the wirevine. From there, you’ll be able to fill in the rest of the plants. You can see, from the design, that the arbor anchors one corner, while the rosemary stands tall in the other corner. Plants of varying heights are scattered in between.

3. Add the extra soil around larger plants and ensure that they’re settled before planting the smaller plants. You can see the three woolly thyme plants staggered around the garden. This helps achieve the design element of repetition. Two plants will go behind and next to the arbor, while one will be planted across the garden from the arbor to lead the eye around the garden.

Tip: It’s handy to have floral wire and wire clippers when working with metal fences (to shorten them) and vines (to tie the vine to the arbor or fence to start training it). Cut 3/4-inch-long pieces of floral wire to use when anchoring the vine to the arbor.

4. Secure the vine to the arbor. Plant the vine on one side of the arbor. Then, using bits of wire, tie pieces of vine to the arbor to encourage it to grow. You will have to continuously wind and train the wirevine. Unlike some vines, it doesn’t have wrapping tendrils to secure itself to the arbor.
5. Pour the patio. I used fairy-sized gravel to make an informal gravel patio and pathway in the garden. This is where the patio set will sit and also where the wheelbarrow will rest.

6. Fill in around the plants with dried and preserved sheet moss. You can buy this moss, prepackaged, at a garden center or craft store. Don’t use moss from your own garden unless you microwave it (for one minute on high) to kill any insects that might be living in it. Moss looks like a groundcover and adds green to the garden while the other groundcovers are just starting to grow and establish themselves.

7. “Plant” some moss in the miniature terra cotta pots to make the scene more lifelike.

8. Place the accessories. In a garden this large you can have several “scenes.” There’s a scene with the patio furniture under the arbor. A secondary “work area” showcases the wheelbarrow, small pots, and birdbath. In the corner by the rosemary there’s a small bench and a bird “nesting” in the Ajuga.
Tell a Story with Accessories
Although you can certainly buy whatever looks cute and put it in your miniature garden, a garden will have so much more meaning if you select accessories that tell a story about you or the person for whom you’re creating the garden.

Some gardens have fairies, but Grandma’s Garden has a gardening angel. I selected this one because the yellow flowers added color to the garden.

Grandma and Grandpa always had a flagpole and flag in their front or back yard wherever they lived, so I had to include one in the miniature garden.

No matter how small the garden, Grandma always had an arbor or trellis with climbing roses, honeysuckle, black-eyed Susan vine, and hummingbird vines growing on it.
To me, succulents have always looked like sea creatures or sea plants. This garden would be equally beautiful with a few more succulents and no accessories other than the blue tumbled glass mulch, but when you add a ceramic starfish, some shells, and a sea turtle, you create what’s clearly an underwater world.
Most succulents will grow best in full to partial sun. Place this on a table in your porch or on the patio. It will become a conversation piece the moment your guests lay eyes on it.
Choose succulents that are hardy in your area for this style of garden.

The sea turtle and seal figurines are actually porcelain striker Wade figurines from Red Rose Tea tins. You can find these at flea markets and yard sales. You’ll know that’s what you’re holding if the bottom is rough enough to strike a match against it.

A variety of hardy succulents
Tumbled glass mulch
Sea shells
Sea animal figurines
Pottery sculpture

A plain terra cotta azalea pot that’s 12 inches in diameter and 6 inches deep.
Use a mixture of two parts potting soil to one part vermiculite for this succulent dish garden.
The plants in the Garden under the Sea are all succulents hardy to zone 8. This includes some aloes, Sempervivum (hens and chickens), sedum, and other succulents. The exact plant list does not matter if you want to create this look. What does matter are the colors and shapes of the plants you select. When I purchased plants for this garden, my shopping list looked something like this:
One red succulent
One trailing sedum
Two medium-sized spiky succulents
One succulent that looks like brain coral
Not too specific, right?
Select plants that have the same sunlight requirements and that will contrast with one another in terms of form, size, color, and texture. Your Garden under the Sea won’t look the same as this one, but it will have the same feel, and that’s what you’re going for.

1. Fill the container with soil, leaving 2 inches between the soil line and the top of the container. Break apart any plants that you want to use in smaller clumps and in multiple places. Certain succulents aren’t multi-stemmed, and can’t be broken up. Sedum and Sempervivum are always good candidates for splitting, though.

2. Plant the plants. In this garden, one pot of Sempervivum has been split into several pieces, flanking the large succulent on the right side of the pot. I repeat—repetition is your friend.

3. Add height with long-stemmed succulents. I had these ghost plants (Graptopetalum spp.) growing in my garden. They were getting a little long on the stem and needed to be cut off and replanted in the garden to root closer to the ground, anyway. So I broke off a couple of pieces to stick into the Garden under the Sea to add height. You could just as easily achieve this effect with jade plants that have their lower leaves removed.

4. Topdress with mulch. Tumbled blue glass symbolizes water around these low-water plants. You can find tumbled glass at craft stores.
Tip: Sprinkling a few pieces of lighter blue glass on top of the darker glass mulch adds more depth to the garden. (Pun intended.)

5. Add accessories. The sea turtle figurine and ceramic starfish made the final cut. The gigantic painted koi fish did not. It just looked out of scale with the other plants and accessories.
Air Plants + Succulents = Good Combination
Air plants and succulents grow well together. Air plants can be easily removed and watered under the sink, and, because they’re not planted in the soil with the other plants, their water habits won’t disrupt the succulents.

Make a hermit crab by placing an air plant inside a conch or snail shell.

I personalized this garden with a replica of my standup paddleboard and paddle “floating” over the Garden under the Sea. Gardening and paddling—two of my favorite things combined in one little scene.
You can customize with shells you’ve picked up on vacation or plants that look like the coral reefs you’ve snorkeled through. If you have an aquarium, you could paint ceramic figurines that look like your fish.
The curse of good drainage in a full-sized garden is that it’s difficult to grow interesting sedges and rushes that need wet feet. You can still enjoy these plants without a hike to the swamp by planting a miniature water garden. By planting it in a birdbath, you can more easily enjoy the unique shapes and forms of the plants.
Plant what’s available and hardy in your area, and whatever has a relatively small and shallow root system. Birdbaths aren’t very deep.

The focus of this garden is the plants, not the accessories; however, a bunny in a little canoe wouldn’t be out of place.

All of the plants used in this garden like to have “wet feet.”
Pea gravel is used as mulch around the plants to keep the soil in place.
Plants, clockwise from top left:
Cyperus prolifer, dwarf papyrus
Juncus filiformis ‘Spiralis’, Corkscrew rush
Acorus gramineus ‘Aureopusillus Minimus’, miniature
variegated sweetflag
Adiantum spp., maidenhair fern
A concrete birdbath on a pedestal or any shallow container without drainage will work.
The plants are planted in playground sand as it’s heavy and less likely to wash out.

1. Fill the birdbath with sand. Playground sand is certain to be clean and uniform.

2. Break up plants that you want to use in multiple pieces. Breaking up the plants helps reduce the size of their rootballs, thus allowing them to more easily settle into the shallow birdbath container.
3. Plant the plants. You can break up the rootballs and spread them out horizontally in the birdbath. Cover the roots with sand. Sand does not have the same amount of nutrients that soil would, but by allowing the water to collect in the garden (along with leaves and stray bits of plant debris that falls into it), the plants will receive nutrients.

4. Topdress the garden with pebbles. Add pebbles until the sand is covered. The rocks will help keep the sand from running out when it rains and will help hold the plants upright.

5. Water the garden until water spills out over the sides of the birdbath.
Who doesn’t love a tea party? When starting out as a miniature gardener or fairy gardener, some of the easiest accessories to find are those that will help you recreate a garden party, tea for two, or another semiformal outdoor setting. From pergolas to trellises, white-painted wrought-iron bistro tables and decorative miniature garden planting urns, you’ll find hundreds of treasures in this style.
This project would work equally well as an outdoor or indoor mini-garden, depending on the plant choices. You can use a pergola or trellis as a focal point or unifying feature or a (relatively) larger shrub or plant as a “tree” in place of the pergola.
Think “white wicker” or “wrought iron” for your Victorian Garden Party miniature garden. Look for faux concrete urns and a tea set or lemonade pitcher. Ask yourself, “Would lovely ladies in white dresses like to sit a spell at this table or rest a minute on this bench?” It helps to put yourself in the place of the miniature inhabitants for whom you’re planting the garden.
White painted “wrought-iron” furniture, including
a pergola
Tiny gravel for a patio
“Concrete” birdbath and planting urns
Tea set
Birdhouse
Garden cloches
Topiary planter
Garden fairy
The accessories used in this garden are somewhat ornate, so your best container choices will be simple. A wide-mouthed terra cotta bowl, a square miniature garden planter, or a plain, glazed pot are all good containers for this project.
Use standard potting soil (not garden soil or topsoil) for this project.

Because the accessories are key to this garden, choose plants that will set off the accessories nicely. Remember the principles of contrast (so that all of the plants and accessories show up distinctly and don’t blend together) and scale (so that everything works together and creates a lifelike scene), which you can see in the photo on the left.
You might not use every plant that you gather. That’s okay. You’ll have more left for another garden, or because these are outdoor plants, you can find a place to tuck extras in the perennial border or give them away to friends. I find it easier to have more choices, rather than fewer, especially if I’m at home planting the garden, rather than at the garden center.
“Trees”
Buxus spp., boxwood
Ilex vomitoria ‘Nana’, dwarf yaupon holly
“Shrubs”
Hosta ‘Blue Mouse Ears’, dwarf hosta
Ajuga ‘Chocolate Chips’
Ophiopogon japonicus ‘Nana’, dwarf mondo grass
“Groundcovers”
Muehlenbeckia axillaris, wirevine (this is hardy where I live; it is an indoor plant in zones 6 and lower)
Mentha requienii, Corsican mint
Laurentia, white star creeper
Selaginella kraussiana ‘Gold Tips’, Gold Tips spikemoss
Ficus pumila var. quercifolia, oak leaf fig

1. Fill the container. Add potting soil (not garden soil) to the container until it is one-half to two-thirds full. You want to leave room for the plants and still have a slight lip or edge of the pot sticking up when you’re done planting and filling with soil. (That way, when you water the garden, you won’t end up with soil or gravel spilling over the sides.)

2. Position the pergola. You always should position the largest plant or accessory first. If you were going to use a larger “tree” instead of a pergola, you’d place the tree first.

3. Break up your plants. One standard-sized pot of dwarf mondo grass or white star creeper goes a long way in a mini-garden. Separate plant clumps when you can in order to get more plants. You’ll get more out of your purchases and you’ll be able to mold the plantings to your design aesthetic, meaning you won’t be stuck with large masses when smaller pieces would fit better.

4. Add accent plants. Once the massed plantings are in place (the mondo grass and white star creeper), you can add accent plants. In this planter, the oak leaf fig will trail over the side. The Ajuga is used as a specimen shrub in several places in the container. It is situated between the white star creeper and where the patio gravel will eventually go because its dark leaves will contrast against the lighter colored gravel.
Keep Adding to Your Miniature Garden
Just because the main assembly is done, the fun doesn’t stop. I’m always on the prowl for accessories that will complete the look. In this case, I found some blown-glass “picks” to add to the garden that remind me of full-sized blown-glass art by one of my favorite artists, Barbara Sanderson. With their addition, this mini-garden is truly a little replica of my larger garden. (I also added a blown-glass marble to the birdbath to approximate the pond floats I have from Barbara.)

5. Add more potting soil. If you’ve primarily just positioned your plants, it’s important to go back and actually plant them before you add accessories. You’ll find out quickly, in a day or two, if you didn’t plant something, as it will start to shrivel up because its roots are exposed to air and can’t get water.

6. Create the patio. After the plants are planted and before you place the furniture and accessories, create the patio. I’ve used tiny gravel that mimics river rock. You could also use aquarium gravel. The smaller the pieces, the more it looks like pea gravel and less like a flagstone path or patio.


7. Position the accessories. Once the plants are all planted, you can add the accessories. Place the furniture, “plant” any miniature containers within the mini-garden, and set the table for tea. In this garden, tumbled blue glass serves as “water” in the birdbath. The finished garden is a perfect setting for a visiting garden fairy.
Design Alternatives
This garden would be just as charming without the pergola or with a tree as a focal point, or “shelter” under which the bistro set could be placed. If you were going to plant this garden with indoor plants, you could use ferns and polka-dot plants for the shrubs instead of the dwarf mondo grass and Ajuga. Use the spikemoss instead of the white star creeper for the groundcover. A dwarf myrtle or fig tree would work instead of a holly or boxwood if you want to include a tree instead of a pergola.
Same furniture, different garden. This miniature fairy garden has a small tree to provide shade or shelter over the same bistro table and chairs.

Miniature conifers are the showpiece plants of the Botanical Garden. True miniature conifers can be hard to find. Look for them at your local independent garden center. They can also be tricky to grow; however, if you can purchase them locally or buy them online, they’re worth a try to grow because they are just so interesting. True mini-conifers grow less than 4 inches per year. (Some grow as little as 1/2 inch per year.) Yet they still look just like their full-sized counterparts. You’ll have a, “Honey, I shrunk the plants!” reaction upon looking at them.
This is a garden designed and planted to last for a long time. It’s worth the money to invest in a high-quality container (hypertufa, in this case) to showcase your tiny specimens. Unlike some of the other miniature gardens, with the right care, this garden can remain, virtually untouched, for several years.
Soothing green and gray tones in the plants, container, and accessories make this garden restful to look at.
To replicate the look of a botanical garden, use a variety of mulches and gravels for the patios and pathways. This gives the illusion of a garden that’s larger, with different garden “rooms.”
Clockwise, from lower left: alabaster chips, small fir bark pieces, and fairy garden gravel.

“Concrete” fountain
“Concrete” statue
“White marble” resin statue
“Concrete” planting urn
Resin cat
The style of this garden is “formal historical” and is carried through with the faux concrete and marble accessories.

Plant a few perennials with the conifers for texture and depth.
Sedum, fine leaf gold stonecrop
Chamaecyparis obtusa ‘Golden Sprite’ (in finished garden), dwarf Hinoki cypress
Thuja occidentalis ‘Golden Tuffet’ (pictured), golden tuffet arborvitae
Miniature hosta
Juniperus horizontalis ‘Pancake’, dwarf creeping juniper
Chamaecyparis thyoides ‘Red Star’, dwarf white cedar
Ophiopogon japonicus ‘Nanus’, dwarf mondo grass (not pictured)

Hypertufa pots are handmade from a unique mixture of cement, peat moss, and perlite. As such, they have natural variations in color and texture.
To complement the accessories, this garden is planted in a hypertufa pot that is 19 inches wide and 9 inches deep. While lighter than concrete, this container is still quite heavy when it’s planted.
Use regular potting soil for this project.

1. Fill the container with potting soil, leaving 3 inches between the top of the soil and the rim of the container. Place the plants in the pot to determine spacing. These plants are going to grow in the same pot for a long time, so this step is important. Plant them where you want them the first time. Take care to add soil so that all of the plants’ roots are fully covered. (Dwarf mondo grass, in particular, resists being thoroughly planted. It seems like there’s always a root that wants to escape. It is also a plant that doesn’t grow well unless the roots are fully covered, unlike many succulents.)

2. While you’re placing the plants, you can also place the main accessories. In this garden, the biggest plant is the dwarf white cedar and the largest accessory is the fountain. (To give the fountain more width and height, it is placed on top of the base that came with the faux concrete statue.)

3. Mulch the garden. White alabaster chips form a base for one of the statues. Fine granite chip gravel (which came as mulch on top of the miniature conifers) covers the “ground” around the concrete fountain and “marble” statue. Small fir bark chips act as “regular” wood mulch, like what you’d see around the plants in the flower beds at a botanical garden.
Tip: Don’t leave the soil bare! You can always use small wood-chip mulch or soil conditioner as mulch on top of a miniature garden.

4. Place the accessories. This statue did not have a pick on the bottom side. It is propped in the garden with alabaster chips at the base to hold it up. The white rock chips contrast nicely with the dark gray of the statue.
What Is Unique?
When thinking about accessories for any garden’s theme, try to remember what makes the place that you’re recreating with plants different than anywhere else. What is unique about the scene that you’re building?
This miniature botanical garden has a cat resting on the pathway just like many “real” life-sized botanical gardens do. Cats are an important part of the integrated pest-management program at Longwood Gardens where I went to school. Each garden area has its own cat that is responsible for “small mammal population control.” If there’s a garden near you, think about what makes it unique and special, and recreate some of that in miniature for your tabletop version.

Every garden needs a cat.

Is this a full-sized statue in a large garden or a miniature statue in a miniature garden? When you pay careful attention to scale, you can create tiny lifelike worlds ready for exploring.
Fairy gardens in the middle of life-sized gardens are a delightful surprise for garden visitors young and old. You can create an in situ (in place) fairy garden or miniature garden with any theme you can dream up. These larger mini-gardens are ideal for showcasing collections of plants or for setting up larger furniture and accessories. Do you have an outdoor train set? Make a miniature garden around it to provide more for the train’s passengers to see.
This miniature garden is a woodland hideaway suited for fairies of all shapes and sizes. It even includes a lifelike campfire with marshmallow roasting sticks.
Rustic wood bench
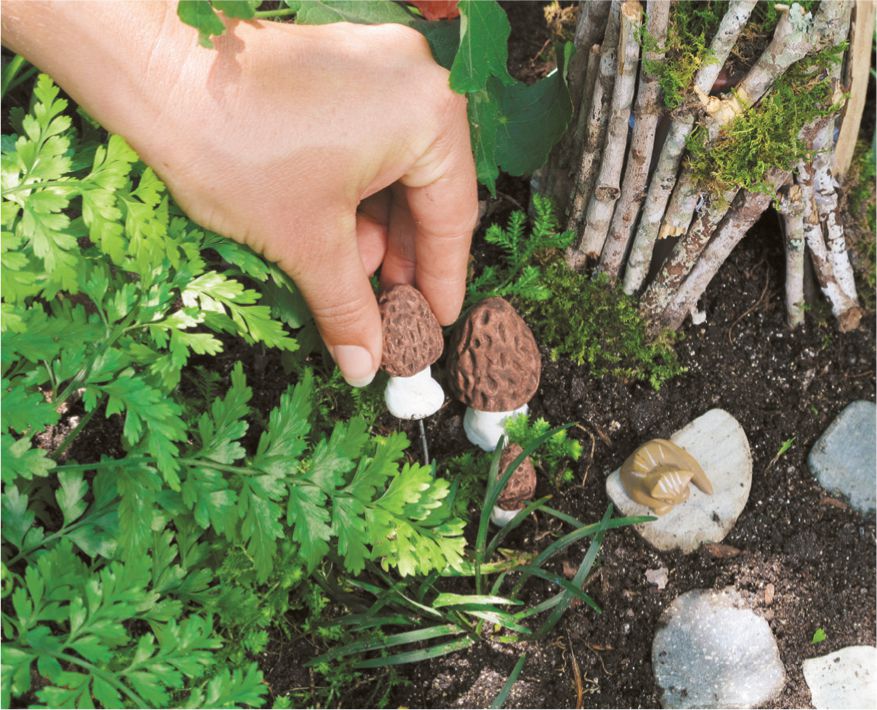
Clay or plastic mushrooms
White picket fence
Flag and flagpole
“No Humans Allowed” sign
Wheelbarrow
Clothesline
Fairy house
Resin rabbit
Garden tools
Campfire and marshmallows
Birdbath
Basket
Watering can
Bucket
Stone mat
There is no container for this garden. It was planted in the middle of a larger garden in an area that is mostly shaded with a couple of hours of midmorning sun.

Fuchsia spp., fuchsia
Heuchera spp., coral bells
Abutilon spp., flowering maple
Pteris spp., table fern
Ophiopogon japonicus ‘Nanus’, dwarf mondo grass
Ajuga ‘Chocolate Chips’
Hosta ‘Blue Mouse Ears’ (not pictured)
Buxus spp., miniature boxwood

This empty space will soon be a fairy garden!

1. Prepare the area for the miniature garden by digging some potting soil into the area where you plan to plant.

2. Place the largest plant or accessory, in this case the fairy house. It will serve as a focal point and anchor, around which you will build the rest of the garden.

3. Create the pathway by removing the steppingstones from the mat and placing them individually in the garden.

4. Place the plants. In this garden, they form a horseshoe shape around the fairy house and the patio or pathway.
5. Plant the plants, taking care to make sure they are fully planted at the correct depth. (The soil line of the garden is even with the soil line of the plants’ rootballs.)
6. Place the accessories. Because this is an outdoor garden, ceramic, wood, or plastic accessories work best. Water the garden. You can water outdoor miniature and fairy gardens with the same frequency that you’d water other outdoor annual and perennial gardens.
Creating Scenes Within a Scene
More space means more room to play. The Woodland Hideaway has several places for fairies to relax, including a campfire, the fairy house, and the rustic garden bench in the shade of a miniature hosta.

The campfire, including a stack of firewood, log benches, marshmallow sticks, and the fire pit, were handmade by an artist on Etsy.

A second seating area composed of a garden bench situated between a fuchsia plant and a miniature hosta is completed with a handmade ceramic birdbath and a resin bunny rabbit keeping watch.


