2
Appliance Types and Planning Considerations
This chapter explains how kitchen appliances work, beginning with a discussion about how appliances are rated for energy efficiency. The chapter also includes a list of how users can impact the efficiency of their kitchen appliances.
To present this equipment review, we have divided the discussion into the three primary work centers in a residential kitchen:
- Food preservation center. The refrigerator, freezer, and other types of chilling appliances
- Cleanup center. The food waste disposal and dishwasher
- Cooking center. Includes all methods of transferring heat from either natural gas or electricity sources for the preparation of food
This third center is a complex one. Heat is transferred in a variety of ways, a wide variety of appliance configurations can be specified, and there is some new special-purpose cooking equipment. This center also includes a very important noncooking element: the ventilation system. We have included an extensive review of the various ventilation systems available, and have detailed basic duct path information that must be considered when specifying these appliances.
We conclude the chapter with a comprehensive checklist on appliance selection, placement, and installation considerations developed by the author after some 40+ years as a kitchen designer. It is our hope the practical information included in the checklist will help you remember to settle all the details before the plan is finalized, products are ordered, and the installation begins.
- Learning Objective 1: Provide comprehensive information about energy efficiency ratings available for appliances as well as ways users can reduce the energy consumed when operating various kitchen appliances.
- Learning Objective 2: Explain how the major appliances function in the three primary work centers in a residential kitchen. This review provides the foundation knowledge needed when selecting from various manufacturers' offerings.
- Learning Objective 3: Identify and categorize what types of heat transference methods are available for the home cook.
- Learning Objective 4: Describe the differences between the major categories of ventilation systems, and explain the interconnected specification requirement of appliance plus location plus duct path planning.
SELECTING MORE EFFICIENT APPLIANCES
For many years, North Americans have recognized the importance of thinking green—living environmentally conscious lives. Only recently have kitchen and bathroom professionals been given the tools and training to incorporate environmentally safe products and practices into their design practice.
Responsible designers and homeowners know that the phrase “think globally, act locally” applies as much to the design of the room, the family's purchasing habits, and the use of the space and its equipment as it does to other planning and usage of the kitchen and bathroom.
Because the international need to understand and employ conservation tactics and waste management techniques is so important, we begin this section on appliances by tackling these two key topics first.
When it comes to residential conservation, just how can designers and homeowners help limit world energy consumption? Most energy specialists agree on three key actions that provide an excellent foundation for residential energy conservation:
- Install more efficient appliances and equipment.
- Adapt better everyday energy usage habits.
- Improve the thermal integrity of the building.
Over the past 40 years, federal regulations have continuously challenged appliance manufacturers to develop new energy-efficient and environmentally safe equipment. The first milestone was the introduction of the EnergyGuide label in 1972. These bright yellow labels continue to provide important data during the equipment selection phase of the kitchen planning process.
Some appliances also may feature the Energy Star logo, which means the appliance is significantly more energy efficient than the average comparable model. Energy Star products exceed minimum U.S. government energy standards by 10 percent or more. A list of appliances that qualify for the Energy Star label can be found www.energystar.gov.
ENERGYGUIDE AND ENERGY STAR LABELS
EnergyGuide Label
The yellow EnergyGuide label is found on appliances and is provided by the Federal Trade Commission, the nation's consumer protection agency (see Figure 2.1). The label helps you and your client compare appliances and their energy efficiency. This guide rates energy and water consumption, not performance. The EnergyGuide tells you:
- Key features of the appliance for easy comparison between models.
- Basic information, such as make, model, and size.
- The estimated cost to run the appliance based on electricity used and national electricity prices.
- The cost range chart compares how much the appliance can potentially cost annually versus other similar models.
- The annual estimated energy use based on average use. To find the operating cost in your client's community, multiply this number by the rate on the consumer's electricity bill.

FIGURE 2.1 The EnergyGuide label
Courtesy of the Federal Trade Commission
The Energy Star logo is displayed when the appliance is Energy Star rated.
Energy Star Label
The Energy Star logo is an international symbol of premium energy efficiency (see Figure 2.2). In the United States, Energy Star is a program of the Environmental Protection Agency (EPA) and the U.S. Department of Energy that promotes the protection of the environment through energy-efficient products and practices.

FIGURE 2.2 Energy Star logo
Courtesy of U.S. Department of Energy
Energy Star was established to:
- Reduce greenhouse gas emissions and other pollutants caused by inefficient use of energy.
- Make it easier to identify and purchase energy-efficient products without sacrificing performance, features, or comfort.
Energy Star product specifications are based on these key guiding principles:
- Product categories contribute significant energy savings.
- Qualified products deliver the features and performance demanded by consumers, as well as increased energy efficiency.
- If the energy-efficient product costs more than the less-efficient product, the purchaser recovers increased initial cost through utility bill savings within a reasonable period of time.
Adopting Better Everyday Usage Habits
However, your assistance in helping the client select the most energy-efficient appliance is not enough. All family members must adopt new ways to minimize the energy and water consumption of each appliance. The next guidelines may help your clients become more conscious of the residential appliance energy usage in their own home.
Dishwasher
Scrape but do not prerinse dishes, especially under a steady stream of water. According to the EPA, washing dishes by hand uses much more water than using a dishwasher does. Using an Energy Star–qualified dishwasher instead of hand washing will save annually 5,000 gallons (18,927.06 liters) of water, $40.00 in utility costs, and 230 hours of time.
On average, an Energy Star dishwasher uses 4 gallons (15.14 liters) of water, whereas the average non–Energy Star dishwasher uses 6 gallons (22.71 liters).
The University of Bonn in Germany conducted a study of 113 people from seven European countries, comparing their water usage with a dishwasher and without. Each person washed 12 place settings. On average, hand washing used 27 gallons (102.21 liters) of water and 2.5 kilowatt-hours (kWh) of water-heating energy. The human time it took to wash, rinse, dry, and put away was approximately 80 minutes. The dishwasher used approximately 4 gallons (15.14 liters) of water, consumed 1 to 2 kWh of total energy, and required 15 minutes of human time (loading and unloading the dishwasher).
- Do not block the spray arm action by improperly loading the dishwasher preventing water from reaching some dishes.
- If available, use top-shelf wash only or other cycles available for small loads.
- Wash full loads and use the energy-saving drying cycle.
- Pots and pans with charred-on soils from delayed meals or fast cooking should be scraped or soaked before placing in the dishwasher.
- Do not use the dishwasher to warm plates.
Food Waste Disposer
Always use cold water when operating the disposer to solidify fatty and greasy wastes. Use a strong flow of cold water and keep it running at least 30 seconds after the noise of grinding has stopped.
Run the disposer each time food waste is put in it. Before leaving home for several days, check to be sure that all waste has been flushed out of the disposer to avoid odors developing. If odors do occur, they can be removed by running orange or lemon peels or ice cubes through the disposer.
When washing dishes in a sink with a disposer, check to be sure all small objects have been removed from the sudsy water before draining the sink.
Periodically (and always after disposing of fibrous food wastes) purge the drain line by filling the sink with 2 to 3 inches of cold water. Turn on the disposer and allow this water to run through with no waste added.
If the home uses a septic tank, plan on cleaning the tank twice as often as normally scheduled.
Kitchen Waste Management
Kitchen waste management is another important part of residential energy conservation.
The solution to our management problem is centered in three areas: reduction, recycling, and control. We can produce less waste, we can reuse more of what we would otherwise throw away, or we can allow the consumer product itself to be controlled by virtue of its disposability.
Well-planned kitchens include multiple recycling bins in or near the primary cleanup area, allowing easy sorting of materials to be recycled and those to be disposed of.
Refrigerator/Freezer
Open the door only when necessary and for a minimum amount of time. Organize the storage items in the refrigerator. Label all frozen food packages.
Do not overload the food storage compartment, especially with items that do not require refrigeration.
Cover all liquids and most foods before placing in the refrigerator. The food will retain its quality better by not allowing extra moisture to escape. (Extra moisture places an extra load on the defrost system.)
Keep the freezer compartment as full as possible. This will reduce cold air lost when the door is opened.
Locate the refrigerator-freezer away from other heat-producing equipment, such as the range or heat vents, and out of direct sunlight.
Check to make sure there is the proper amount of clearance for a refrigerator/freezer with back-mount condenser coils.
Make sure the doors seal tightly. To check the gasket, close the door on a dollar bill and pull the dollar bill straight out. There should be some resistance. On models with magnetic door seals, an even more effective test is to place a light inside, close the door, and inspect the perimeter of the seal in a dark room to see if light is coming through the cracks.
Vacuum/clean the condenser coils on the back or the bottom of the refrigerator at least twice a year.
Gas and Electric Ranges
Select small appliances for some cooking jobs. Small electrical appliances often require less energy for the cooking job than the oven or the surface cooktop of a range because they have an enclosed heating element and often a thermostatic control.
Defrost frozen foods before cooking to cut down on the cooking time. A defrosted roast requires 33 percent less cooking time than one that is still frozen.
Preheat the oven only as long as necessary, usually for no longer than 10 minutes. Many recipes do not need a preheated oven.
For more efficient range-top cooking on glass ceramic and electric coil surfaces, use pots and pans with flat bottoms. Use tight-fitting covers on pots. Turn off the surface units as soon as you have finished or shortly before, and allow foods to finish cooking on retained heat.
If the range has two ovens, use the smaller one whenever possible. Bake several food items at once and then freeze for future dinners.
When using the broiler, put the food under the broiler before turning it on. Turn it off before removing food.
Do not peek! The temperature may drop as much as 25° or more every time the door is opened.
Never use the oven to heat the kitchen.
Keep the oven clean. Make sure the gaskets on the oven door provide a good, tight seal. Maintain the drip bowls under coil cooking elements so they can efficiently reflect the heat upward.
When cooking with gas, use a low or medium flame. Cooking seldom requires a high flame and then only for a short while. Tailor the size of the flame to the size of the pan. A high flame licking up the sides of a pan wastes gas.
Selecting Appliances
After considering the positive ramifications of specifying energy-efficient appliances as well as learning use and care recommendations useful to the client, designers should familiarize themselves with the basics of appliance operation and planning guidelines.
Metric Conversion
Once again, we must address the sizing differences between American appliances sized in inches and European appliances sized in metrics (or sometimes in inches).
- American manufacturers build all appliances to dimensions in inches and then parenthetically qualify these dimensions in metric in the technical section of their Web sites.
- International manufacturers build in metric sizing. Typically, a hard conversion to imperial inches will be listed on manufacturers' Web sites and in product literature.
- If an international manufacturer is launching a product exclusively for the US market, it may choose to engineer, manufacture, and specify all dimensions in inches on the technical part of its Web site.
KITCHEN FOOD PRESERVATION CENTER
The first home delivery of ice in America occurred in 1802. This necessitated the inclusion of an ice chest (a heavy wooden box, large enough to hold both ice and food together in a single compartment) in the kitchen. Today, refrigeration and freezing may be provided by a combined single vertical appliance or by several separate models. Regardless of configuration, the cooling system remains the same.
Selection Criteria
The following should be considered when selecting an appliance:
- Size of family, type of cooking, and entertaining plans determine recommended cubic footage of fresh and frozen storage space.
- Decor of room, size of room, and project budget will be used as a guide to select between built-in/freestanding and the use of panels with cabinetry material/appliance color.
- Family kitchen usage and room size are primary considerations when planning point-of-use refrigeration beyond the primary appliance.
Method of Cooling
The most important concept to grasp is that refrigeration is the removal of the heat that causes food to deteriorate (see Figure 2.3). Tests have shown that bacteria multiply rapidly at warm temperatures; therefore, all modern refrigerators are constructed to maintain temperatures at no more than 40° F (4.45° C). Lower temperatures usually are recommended for specific foods: between 32° F (0° C) and 35° F (1.67° C) for milk and 25° F to 31° F (–3.89 C to –.56° C) for fresh meat, for example. It is because of these different temperature requirements that many refrigerator models include different compartments for meats and vegetables so currents of extra cold air can be circulated around the specific compartment. The appliance design elements are described next.

FIGURE 2.3 How a refrigerator works
Enclosure
Refrigerator cabinets are made of various materials designed to create an inner and outer shell with insulation between. Experiments have proven that 80 to 90 percent of the heat that gets into the refrigerator comes through the walls of the appliance. Consequently, a great deal of engineering and design time is spent perfecting the insulation and making sure the door gaskets provide a tight seal.
Compressor
The compressor consists of a motor and pump sealed inside a steel case concealed within the refrigerator structure. The pump compresses refrigerant vapor that concentrates the heat and sends it to the condenser.
The majority of manufacturers have engineered an appliance with one compressor used to support both the fresh food and frozen food refrigeration temperature and air-quality requirements. Single-compressor refrigerators protect against food spoilage by maintaining a constant temperature. Temperature fluctuation can quicken food spoilage. An internal sensor system monitors and regulates the temperature so that it remains constant to maximize the food preservation capabilities of the appliance.
Some appliances offer a dual compressor system. Pioneered by Sub-Zero Freezer Co., the dual refrigeration system keeps fresh food fresh longer and preserves frozen food longer because of the two separate self-containing cooling systems—one for the refrigerator and one for the freezer. Sub-Zero’s company literature explains the dual compressor system by comparing it to apartment dwellers. A refrigerator/freezer is like a duplex, where the residents of one apartment like moist, 38-degree air and the residents of the other like dry, zero-degree air. If the two must share a cooling system, both will be uncomfortable. With dual refrigeration, both the fresh food compartment and the frozen food compartment get exactly what they need. When air is transferred between the fresh and frozen food compartments, tastes also are transferred from some foods to the others.
Condenser
The condenser is a long folded tube that receives hot, high-pressure refrigerant vapor pumped by the compressor. As the heat leaves, the vapor inside it cools and condenses back to liquid. Condensers in many built-in refrigerators are located at the top of the appliance. Freestanding refrigerators are engineered with the condenser on the back or underneath the appliance. The capillary tube connects the condenser to the evaporator, metering the flow of liquid refrigerant to the evaporator.
Evaporator
The evaporator, also a long tube, receives liquid refrigerant from the condenser. The liquid boils and vaporizes as it picks up heat from inside the cabinet. In a side-by-side refrigerator, it may be found behind the rear wall of the freezer, whereas in a top- or bottom-mount appliance, it is usually found between the refrigerator and freezer.
Configurations of Refrigerator and Freezer Appliances
There is a wide variety of refrigerator and freezer appliance configurations to consider when specifying for your clients.
- Stand-alone refrigerator and freezer appliances. Sometimes referred to as towers, separate refrigerator and freezer appliances are available as narrow as 18 inches wide and up to 36 inches wide. These single-purpose appliances are upright vertical units that are typically designed to be installed flush with or integrated into the cabinetry, as seen in Figure 2.4.
- Combination refrigerator/freezer appliances. The most popular combination appliances are configured:
- Freezer above/refrigerator below. This entry-level type of refrigerator is a freestanding appliance requiring air circulation around the unit.
- Freezer drawer below left- or right-hinged refrigerator door. These appliances typically are designed to be flush with or integrated into the cabinetry, as seen in Figure 2.5.
- Two-door/one- or two-drawer configuration. Often called French doors, this configuration places the refrigeration portion of the appliance behind two doors, with the freezer in one drawer below. (See Figure 2.6.) Some models include a middle refrigerator drawer to provide a separate compartment, which can offer special temperature controls. This configuration is available in standard depths and counter depths or as integrated systems.
- A single appliance with a vertical freezer and vertical refrigerator compartment. (See Figure 2.7.) This configuration provides an organized shelf system in the freezer compartment; however, the refrigerator space may be limited in smaller-width models. Some units are available with glass inserts in the door.
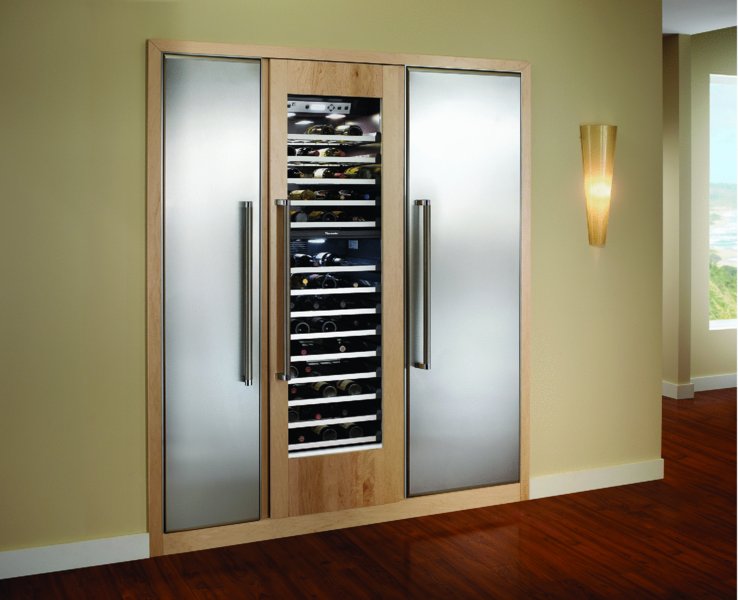
FIGURE 2.4 Tower refrigeration: Appliances can be combined in various configurations.
Courtesy of Thermador
FIGURE 2.5 Refrigerator integrated into cabinetry with matching wood panels
Design by Ellen Cheever, CMKBD, ASID, CAPS Photo by Peter Leach

FIGURE 2.6 Surrounding a refrigerator with cabinetry gives it a built-in appearance even though it is not flush with the cabinetry.
Courtesy of Showplace Wood Products, Inc.

FIGURE 2.7 A stainless steel refrigerator fully flush integrated with the cabinetry
Courtesy of Jenn-Air, Design by Mary Jo Peterson, CKD, CBD, CAPS, CAASH
Special Features Available
Some refrigerators have a filtered water accessory inside the refrigerator section of the appliance. Some models have an exterior-located filtered water and ice dispenser accessory available. There are a few models available with a glass door front. Today, appliances are being introduced that include LCD touch screens and Internet connectivity. Discussions abound about new refrigerator appliance innovations that will track the foods stored within.
Temperature-Controlled Compartments within the Refrigeration Appliance
All types of refrigerators should maintain 33° F to 38° F (.56° C–3.33° C) in a fresh food section. A few refrigerators/freezers have special compartments with temperatures a few degrees cooler or warmer than the rest of the fresh food section. An example of a cooler area is a meat keeper compartment that is connected to the air circulating around the freezer section. A refrigerator has a single temperature control, while the refrigerator/freezer model has either single or multiple controls for the fresh food and freezer sections. In most models with multiple controls, the primary sensor is in the fresh food section. In these models, the refrigerator may not run enough to keep the freezer temperature low enough if the room temperature around the refrigerator is lower than 60° F (15.56° C) or if the fresh food section has large amounts of very cold food in it (such as frozen food defrosting).
Controlling/Removing Ethylene Gases in the Refrigeration System
There is a lot of talk about controlling the emission or transfer of ethylene gas within some refrigerator systems. Ethylene gas is emitted from enzymes inside certain fruits and vegetables as they ripen. These gases can cause other specific fruits and vegetables to deteriorate more quickly; therefore, food preservation is enhanced if these two groups are stored apart from one another.
Fruits and vegetables emitting ethylene gas include: apples, apricots, avocados, ripening bananas, blueberries, cantaloupe, citrus fruit (not grapefruit), cranberries, figs, guavas, grapes, green onions, honeydew, mangoes, melons, mushrooms, nectarines, okra, papayas, passion fruit, peaches, pears, persimmons, pineapple, plantains, plums, prunes, quinces, tomatoes, and watermelon.
Fruits and vegetables that become damaged by ethylene gas include: asparagus, broccoli, Brussels sprouts, cabbage, carrots, cauliflower, chard, cucumbers, cut flowers, eggplant, endive, escarole, florist greens, green beans, kale, leafy greens, lettuce, parsley, peas, peppers, potatoes, romaine lettuce, spinach, squash, sweet potatoes, watercress, and yams.
Point-of-Use Refrigeration
Appliance manufacturers offer a wide variety of point-of-use refrigeration systems designed to provide smaller versions of a typical refrigerator or custom-designed units for specific food/drink products. The majority of these appliances are designed to fit underneath a normal countertop. Popular models are:
- Under-counter refrigerator drawer appliances that can be two refrigerator drawers, two freezer drawers, or a combination.
- Under-counter mini-refrigerators. These range from the very affordable college dorm room–type of appliance, to elegantly styled and engineered under-counter refrigerators that may include a separate ice-making compartment—an appliance perfect for a refreshment center in a specialty area in an upscale residential kitchen.
- Matching refrigerator/freezer separate under-counter with left- and right-hinged doors. Occasionally these small appliances are substituted for full-size equipment in urban living environments. They are also quite suitable for specialty kitchens planned in outdoor living areas, mini-kitchens, an adult master suite, or fully equipped second kitchens in a game room environment.
Beverage Centers/Wine Storage Units
Wine storage units are designed to be installed under the counter (see Figure 2.8) or as a tall stand-alone tower appliance.
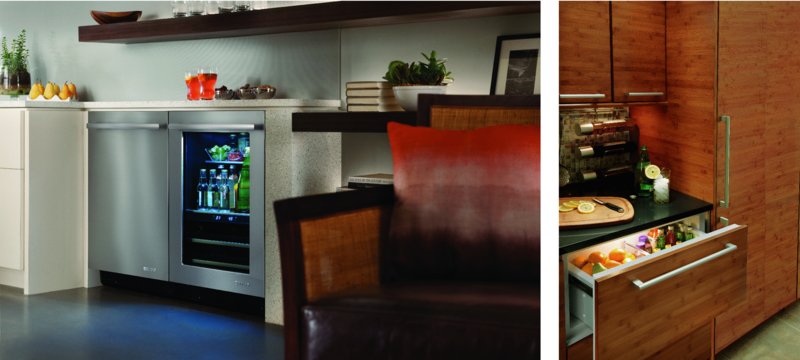
FIGURE 2.8 a. Under-counter point-of-use refrigeration; b. An Under-counter beverage center
(a) Courtesy of Sub-Zero; (b) Courtesy of Jenn-Air
Some varieties of beverage centers are designed to chill and store both red and white wines. Combination units chill and store wine as well as provide shelf space for other beverages.
Appliances designed for wine storage protect the bottles from light by using UV-resistant bronze-tinted glass, monitor the humidity so corks do not dry out, and minimize vibration by carefully cradling the bottles in specially designed shelf systems.
Many wine storage appliances offer different temperatures at the bottom of the unit (as compared to the top), calibrated to protect red wines typically stored in the mid- to low 60° (16° C), while a cooler temperature is maintained for white wines. The control setting can be set manually to match the client's wine storage needs.
Planning Tips from Kitchen Pros
Experienced designers suggest the next considerations when selecting a new refrigerator.
Accessibility. In side-by-side and three-door models, the vertical door split minimizes the door projection into walkway spaces. The interior is also easier to access for people with limited reach. Unfortunately, though, the left- and right-hinging configuration blocks adjacent countertops on either side of the appliances. Additionally, in smaller models, the freezer may be so narrow that a frozen pie package will not fit into the space, let alone the 25-pound Thanksgiving turkey.
Appliance placement. If a client is going to reuse an existing refrigerator that may only have a few more years of service, do not plan the entire kitchen around this outdated appliance. While many refrigerators are permanently hinged in one direction, some models have reversible doors, so there is no longer a left-hinge or right-hinge limitation. If the refrigerator will be replaced in a short time, design the best kitchen first. Then suggest that your clients work with the old appliance until it is replaced with a new one with the proper hinging to support the overall design concept.
Boxed-in versus built-in versus integrated. If the appliance is framed with panels that extend to the floor, it is called a boxed-in look. Experienced pros caution, “Do not call this a built-in look.” The necessary air space on each side and above the refrigerator, as well as the oversize depth of this type of freestanding unit, prevents a true built-in look. (See Figure 2.9.) For a refrigerator to be built-in, some type of trim kit from the manufacturer will be used to make a seamless transition from the side of the appliance to the adjacent cabinets. The appliance is considered to be integrated into the cabinetry when it has a finished face paneled in material to match the cabinets and fit into the casework so that it is difficult to see where the cabinets stop and the appliance starts.
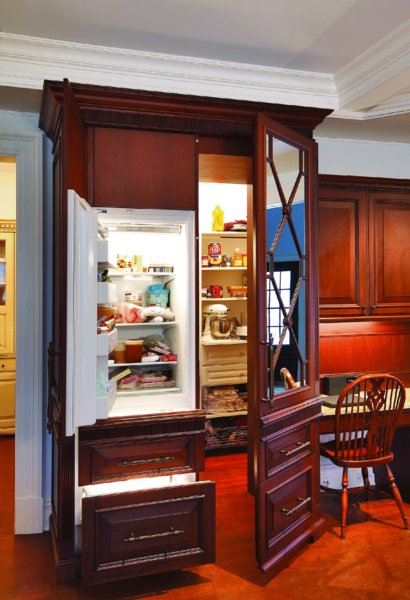
FIGURE 2.9 A refrigerator is built into the cabinetry, creating a piece of furniture.
Design by Vincent Cappello
Decorative panel. If you are selecting a decorative wood panel for the refrigerator, be cautious about specifying a ¼-inch sheet of paneling in a kitchen that features solid-wood raised panel doors. The graining difference between the veneer panel and the solid-wood panel might be unacceptable. If you have a heavily styled raised panel door on the cabinetry, suggest to the client that an equally intricate styled panel be ordered for the refrigerator.
Door swing. If you are planning to reuse an existing refrigerator, verify whether any door swing engineering problems limit access to the crisper bins within. Some models require doors open far beyond 90 degrees to allow bins to be pulled out from the interior. This will severely limit where that appliance can be placed. Always check the manufacturer's specifications.
Freezer location. Because the most accessible shelf space is located between 22 and 56 inches off the floor, appliances that are designed with a lower freezer are more desirable than top-freezer models. Ideally, the lower freezer should be a bin that pulls out to the user.
Glass doors. Many point-of-use specialty appliances have glass door options.
Separate units. The all-refrigerator and all-freezer residential units that are available are ideal for large kitchens where appliances are heavily used. Two general sizes are available: a pair of 27-inch units equaling 54 inches of total space or a pair of 36-inch units requiring a total of 72 inches of space.
Storage above. Ideally, a 24-inch-deep cabinet should be placed above the refrigerator so that this cabinet is accessible. A good use for this type of cabinet is vertical tray storage.
KITCHEN WASTE MANAGEMENT
Food Waste Disposer
The food waste disposer is a popular means of disposing of food waste products. Clients value this appliance because it removes food waste products efficiently, eliminating concerns with odors and rodent/insect problems associated with garbage placed in the normal trash receptacle.
Differences of opinion abound about whether a disposer can be installed in a home with a septic tank system. Plumbers generally recommend that if you have a home that is on a septic system and you are adding a dishwasher and a food waste disposer, the septic system should be 40 to 50 percent larger than one for a house without these appliances. In a renovation situation, the tank should be cleaned out twice as often if these appliances are added. Therefore, instead of every six years, it should be cleaned out every three years.
In addition to the concerns about a food waste disposer installed in a home using a septic system, verify if local codes will allow the use of this appliance. In some high-rise condominium developments, you cannot install a food waste disposer. In some municipalities, they are simply not allowed; in others, they are required.
Selection criteria for food waste disposers:
- The location for a wall-mounted electric switch, a deck-mounted air switch, or a batch-feed appliance cap switching system will be of concern when the sink is placed on an island or if a decorative backsplash is planned.
- Better disposals featuring near-silent operation are good investments in open-plan kitchens.
- The space required by the disposal inside the sink cabinet will determine the available remaining space for under-sink storage plans.
Operation
There are two types of operation available in food waste disposers. A continuous feed appliance operates from a toggle switch on the wall or an air switch on the sink. It operates continuously as it is fed refuse; hence the name. A continuous-feed disposer allows the most flexibility in use, but it is also the most dangerous because a person's hand or a utensil can be caught in the disposer when it is turned on.
A batch feed appliance is activated when the lid is turned. This is a safer appliance because it cannot operate unless the lid is in place. However, it can be more complicated to use because to activate the disposal, the lid must be in a halfway position; to use it as a stopper for the sink, it must be pushed to a full close position. This action can be confusing and require dexterity difficult for a child or an elderly family member.
Regardless of the method of activation, the disposer actually disposes of food waste in the same manner.
Six types of action are employed in the waste disposal process: hammering, shredding, cutting, grinding, rubbing, and pulverizing. As waste reaches the bottom of the shredding compartment, the whirling impeller comes in contact with the food. The centrifugal force presses the waste against the impeller arms, the fibrous waste cutting blades, and the grind positioner. As the action continues, waste is finally divided into particles small enough to pass through into a lower evacuation chamber. From this point, the particles enter the drain and flow through the drain system to exit the house. Because of the movement of food waste particles to the drain system, it is imperative that the drain line enters the wall low enough so the food waste is not forced to flow uphill. Generally, the centerline to the drainpipe at the wall should be between 17 and 19 inches high.
Many people do not realize that the effectiveness of the disposer's operation is directly related to the rate of flow of cold water. Cold water should be flowing during the entire process of disposing of food and several minutes afterward to clear the waste line. Cold water is used, not hot, so fat or grease can be hardened so it can be cut and flushed away with other types of waste. If warm water is used, grease will be melted and as it comes in contact with lower waste pipes in the system, it may harden and cause a stoppage. Many specialists recommend periodically flushing the drain lines through the disposer by filling the sink with 3 to 4 inches of cold water and then activating the disposer.
Disposers come with different amounts of insulation and different grind chamber sizes. Motor sizes also vary; larger motors provide extra thrust for tough-to-grind loads. The increased sound insulation makes it much more pleasant for the cook to use the disposer because noise levels are kept low. When reviewing the noise of a disposer in operation, designers also must alert the client about the impact the sink material can have on noise transmission.
All disposals have some type of an anti-jam feature: It may simply be a reset button at the bottom of the disposer, or it may be an automatic reversing action. In this latter case, if the disposer jams, the unit will pause for a brief time and then automatically reverse the direction of the impeller blades.
In addition to a larger motor and more insulation, better disposers also use better interior materials to improve the durability of the appliance.
If you are working on a renovation project and the client wants to reuse the food waste disposer, be cautious. Typically, existing disposers and dishwashers that are removed and left inoperable for several weeks during the renovation may not function properly when reinstalled.
If the disposer is older than three or four years, recommend that the client purchase a new one or add a clause in your contract stipulating that you will not be responsible for the operation of this appliance once reinstalled. The same concern exists for a dishwasher if it is 10 years or older.
Trash Compactor
Environmentalists do not recommend trash compactors because the decomposition process is slowed down by compacted mixed refuse. However, you may have a client who has had a compactor in the past and wishes to have a new version of the appliance.
On the other side of the argument, manufacturers feel the concern for the environment is one of the rallying cries for purchasing a trash compactor. Their argument is that when you have compacted refuse that is one-quarter the volume of that found in a loose trashcan, you minimize the burden on garbage company landfills. This is a discussion worth continuing.
Under-countertop trash compactors are typically 15 inches wide. They may have a charcoal filtering system built in or use a deodorizer to minimize the odors associated with refuse that is left at room temperature for an extended period in the compactor. Even with this deodorizing mechanism, the appliance's use and care manual will instruct the user to carefully rinse all containers before placing them in the compactor.
Some units have pullout bin doors; others have doors that swing to the left or right and include a pullout bin within the opening. Several models have a small tilt-out door at the top to facilitate disposing of one small container or such.
Compactors plug into a standard household circuit, much like the dishwasher and disposer. They are operated by motors that vary in size. The motor drives a single ram down that compacts the trash. Some appliances on the market can be operated by a foot pedal, and most have a key lock to prevent children from playing with the appliance.
Dishwasher
A dishwasher typically is installed as a built-in appliance adjacent to the sink. It may have a fold-down door or be a series of drawers. Drawers come individually or as a stacked pair. Some appliances place the controls on the top edge of the door so that the appliance can be totally concealed in the cabinetry. Interiors are available in plastic, stainless steel, and porcelain. The most popular size is 24 inches wide (
 inches for European-manufactured appliances). Both 18- and 30-wide models are also on the market.
The depth of a dishwasher varies by manufacturer. Typically, European dishwashers are shallower than are those produced by American manufacturers. Always check the specifications if you are planning an installation where the dishwasher will flush-out with the adjacent cabinet doors or cabinet case.
Selection Criteria
Large households or families who entertain extensively may require two dishwashers. The dishwasher location should be carefully plotted in relation to landing counter space for stacked soiled dishes and in relation to storage cabinetry/pantry areas. Raised dishwasher installations can provide an attractive special-height pedestal cabinet and make the appliance much easier to access.
The type of dishwashing action varies to some degree with each manufacturer. Rotating arms, fan jets, and other enhancements are used to maximize the effectiveness of the washing actions. In most machines, the water is filtered and recirculated during the washing process, thereby reducing the amount of water required. In fact, a recent research study demonstrated that dishwasher wash cycles used less energy, less time, and less water than hand washing.
Better dishwashers are insulated and engineered to reduce or eliminate any noise when the appliance is in operation.
When evaluating a dishwasher, first look at the racks. Better units offer some flexibility in racking arrangements and provide various rack height options. Most manufacturers have two racks that accommodate glasses in the top; plates and larger pieces on the bottom rack. Some manufacturers have engineered the appliance with three racks rather than two. The third rack is placed close to the top of the appliance cavity for flatware, serving pieces, and other small items. One of the most important things to understand about well-designed dishwashers is that, because of the improved washing action and better filters, prerinsing is not necessary. Filters built in to the dishwasher trap food particles and prevent them from being redeposited on the dishes. To overcome the necessity of cleaning filters, some models feature a small disposer that chops food particles and discharges them into the drain. An important feature is a rinse agent dispenser to prevent spotting and lubricate the pumps and seals.
Length of the Washing/Drying Cycle
The best water temperature for dishwashing is between 140° F and 160° F (60° C and 71.11° C). This is important both from the standpoint of sanitation and from the requirement for hot water of at least 140° F (60° C) to dissolve typical dishwasher detergents. Although many families do set their hot water tanks at 140° F (60° C), many people today are turning down their domestic water heaters to conserve energy. Therefore, newer dishwashers have thermostatically controlled delay features to allow the built-in heating element to raise the water temperature to 140° F (60° C) before beginning the washing cycle. All dishwashers have one or more washing cycles and one or more rinsing cycles as well as a drying cycle. Drying is generally done by warm air blowing across the dishes, heated by an internal heating element. Many models today have an energy saver switch that turns off the heating element during the drying cycle and simply relies on heat within the dishwasher and room air for drying.
The temperature of the water entering the dishwasher, the cycle selected, and the drying method selected determines the length of the washing cycle. Manufacturers also have extended the washing time to provide an excellent wash using minimal water and, therefore, conserving energy. Some manufacturers have a special cycle specified by a name or the length of the cycle that minimizes the time it takes for the dishwasher to complete washing and drying. This shorter cycle typically is accomplished by using more water and therefore compromises the energy efficiency of the appliance.
Many municipal codes call for an air-gap to be installed as an overflow protection device for the dishwasher. This mechanical planning consideration is covered in the Kitchen & Bath Residential Construction & Systems volume of the NKBA Professional Resource Library.
Some clients may prefer a dishwasher that contrasts with the adjacent cabinetry, as shown in Figure 2.10.
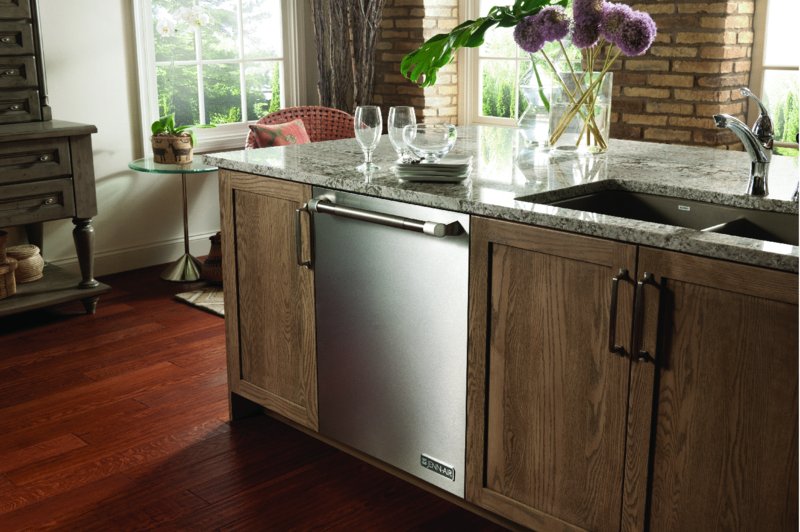
FIGURE 2.10 Dishwasher with stainless steel panels contrasting with the adjacent cabinetry
Courtesy of Jenn-Air Design by Mary Jo Peterson, CKD, CBD, CAPS, CAASH
Other clients may prefer a dishwasher that integrates into the cabinetry so the entire dishwasher front can be paneled to match the cabinetry or finished in stainless steel. For this type of installation, the controls are located on the top edge of the dishwasher door. Today's dishwashers offer a variety of racking options (see Figure 2.11). Although dishwashers typically are installed under the counter, they can also be raised to make access more convenient (see Figure 2.12).
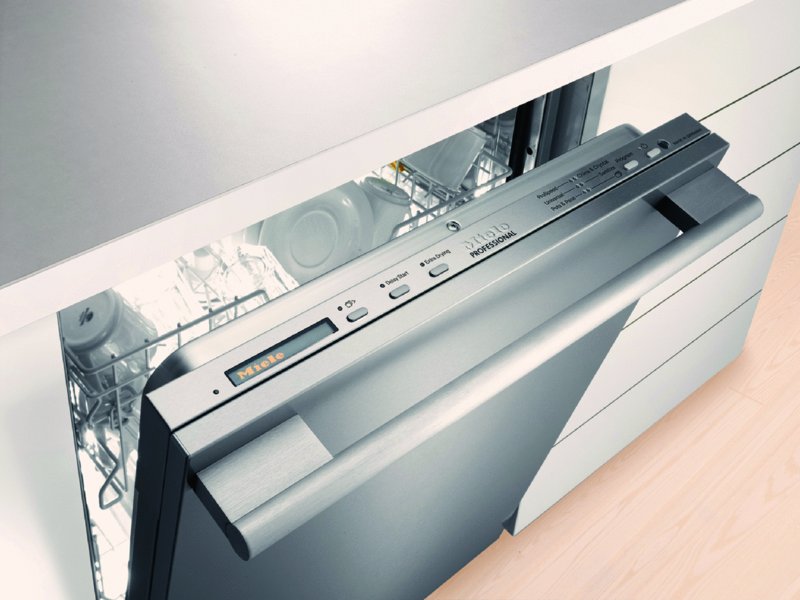
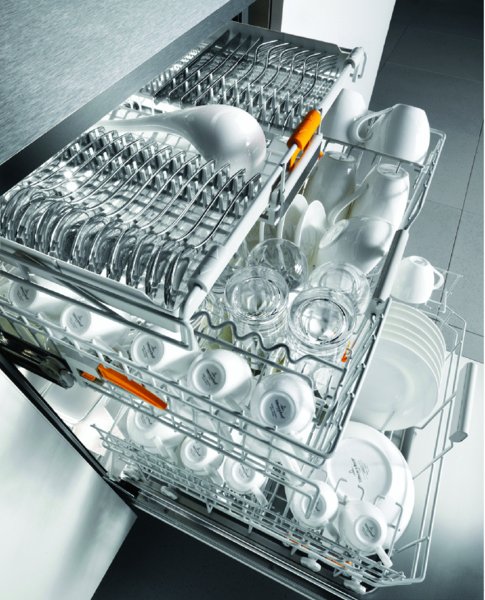
FIGURE 2.11 a. Dishwasher controls located on the top edge of the door; b. Dishwashers offer a variety of racking options within the appliance.
Courtesy of Miele, Inc.

FIGURE 2.12 A dishwasher can be raised to make the appliance shelf access more convenient.
Design by Joseph Giorgi, Jr., CKD. Photo by Peter Leach
COOKING CENTER
Cooking: That is what most people think about when they hear the word kitchen. A kitchen specialist needs to carefully select the equipment that will help the cook roast, bake, broil, and sauté delectable meals for family and friends. The quandary of determining which appliance (or a combination of appliances) will best suit the workspace available and the homeowner's cooking style can be resolved only by adapting a systematic approach to the selection process. Surprisingly, the old gas versus electric issue should not be your first decision:
- Step 1. Identify the method of heat transference selected: conduction, convection, or radiation.
- Step 2. Identify the cooking methods to be included: microwave, induction, or steam.
- Step 3. Select the heat source: electricity or gas.
- Step 4. Choose the appliance style.
- Step 5. Plan the ventilation system.
Methods of Heat Transference
When it comes to cooking, we need to turn our attention away from heat sources and consider methods of heat transference. Whatever form of energy is used to create heat, the transference of it is what cooks the food.
There are five general ways by which heat is transferred.
Conduction
Conduction is a process by which heat is transferred through a substance or from one substance to another that is in direct contact with it by molecular activity. In conventional surface cooking, the source of heat starts the molecules at the bottom of a pan into rapid vibration. They strike other molecules in the metal, putting them in motion. The molecules on the inside of the pan put the layer of water molecules next to them in motion, and they, in turn, start other water molecules moving. The motion of molecules, called heat, has been given to the water in the pan. Heat has been transferred by conduction from the heat source to the pan and from the pan to the water touching it.
In microwave and magnetic cooking, the energy is placed in direct contact with the food substance, bypassing the cooking vessel. Normal conduction activity then takes place.
Convection
Convection is a more rapid process of heat transference than conduction. It involves the motion of heated matter from one place to another. This transference of heat appears in both liquid currents and in air currents. In surface cooking, water is kept in motion by convection while it heats. The layer of water at the bottom of the pan is heated first by conduction. Because of the rise in temperature, the water expands and becomes lighter. The lighter water is then displaced by the heavier cold water. In the oven, air is heated by the electric element or gas burner at the bottom of the oven. It expands and rises to the top of the oven, allowing the cooler, heavier air to come to the bottom to be heated. Therefore, convection is a natural form of heat transference. Convection ovens modify and control the air movement by adding one or more strategically placed fans.
Radiation
Heat transfers by conduction and convection are involved in cookery on top of the range. Radiation and convection are of primary concern in oven cookery. Radiation of heat takes place at the speed of light (186,300 miles per second) in electromagnetic waves. No material medium is required for its transmission. All bodies warmer than their surroundings radiate heat. If a cold object is brought into a warm room, the walls of the room radiate heat to the cold object, and the cold object, when heated, radiates heat to the walls of the room. Since the walls are at a higher temperature, they give more heat per second to the cold object than the cold object gives up. The temperature of the cold object, therefore, rises until it comes to the same temperature as the room. When an oven is heated, the bottom and sides of the oven become hot and radiate heat directly to utensils and foods in the oven. In a conventional oven, 60 to 70 percent of the heat is radiant heat.
Microwave
Microwave energy is a form of nonionizing radiation. Ionizing radiation (X ray, gamma, cosmic rays) can cause chemical changes to take place with little or no temperature rise. Nonionizing radiation (infrared, microwaves, broadcasting waves) in sufficient intensity will cause a rise in temperature but will not cause cell changes. Radiant waves are characterized by their wavelength and their frequency of vibration.
Microwaves vibrate millions of times per second and are very short waves, hence the term “microwave.” There is one microwave frequency in general use for microwave ovens, 2450 MHz (wavelength 5 inches long). The term “MHz” stands for megahertz and means a million cycles. The 2450 MHz stands for 2,450 million cycles per second. This wave has vibration amplitude about the thickness of a pencil. This thickness prevents the waves from passing through the small metal mesh installed in the oven doors.
The microwave oven cooks food within the oven by activating the dipolar (water) molecules so they rotate in a rapidly alternating electrical field. Thus, the amount of moisture in food has a direct bearing on its heating rate in the oven. The molecular rotation occurs as the molecules behave like microscopic magnets and attempt to line up within the field. However, when the electrical field is changing millions of times each second, these tiny magnets are unable to keep up because of other forces acting to slow them down. Such forces, which restrict their movement, may be mechanical, such as ice, or viscous, such as syrup. The energy of the microwave in trying to overcome these forces is converted into heat. Thus, the heat is restricted to within the food product, and the oven interior remains cool.
Microwave energy penetrates deeply into the food materials and produces heat instantaneously as it penetrates. This is a sharp contrast to conventional heating, which depends on the conduction of heat from the food surface to the inside.
Because of this energy penetration, the highest temperature occurs 1 inch in from the surface of the food. The remaining interior is cooking by conduction. The cooking by conduction takes place during the recommended standing time. Because the heat is generated within the food substance, the heat conduction process should occur without the continuing input of microwave energies. Disregard for this principle will result in overcooking of the outer surface. Because of the penetration limitation, the ideal food configuration is that of a doughnut. This allows a maximum of surface area for maximum penetration.
The exterior surface of an item cooked in a microwave oven will be lower in temperature than the interior. This is due to radiation of heat from the food surface to the cooler surroundings of the cooking vessel or oven interior. Thus, the homemaker cannot judge the doneness of a food product by the outer temperature. Nor should he or she be told that the cooking vessel will always be cool. Some utensils will require the use of a potholder for removal from a microwave oven.
The magnetron is the device that creates the waves. It is a little broadcasting station with an antenna. It has a central cathode from which electrons escape, pressured by high voltage, and as they move outward circularly, they pass by many little charged cavities in the surrounding anode. This sets up a vibration that creates the electromagnetic microwaves. These microwaves are discharged by the antennae into the wave guide. The waves enter the cavity through the wave guide and are circulated by the stirrer. It diffuses the waves in order for them to enter the food material from all directions. A transformer within the oven converts the ordinary 120 or 240 volts to a voltage between 3000 to 6000 volts. This high voltage is needed for the magnetron to operate.
To develop a sense of timing in microwave cooking, it is first necessary to know how much power is available in the oven. Research has shown that it is not uncommon for the actual available power to be 10 to 15 percent less than that specified by the manufacturers. The cooking wattage is a major factor in cooking times. Other factors include the food density, arrangement, quantity, temperature, moisture content, and bone conformation.
Microwaves can be installed in a variety of ways including placement in a wall cabinet (see Figure 2.13) or as a drawer below the counter (see Figure 2.14).
Microwave planning tips from kitchen pros:
- Select the appliance and its door-hinging configuration before finalizing the design. The door should swing away from the user, avoiding the need for a family member to walk around an open door.
- When installing a microwave oven in a wall cabinet, select the appliance before completing the design to determine:
- Is the microwave shallow enough that it can fit in a standard 12-inch-deep cabinet, or is an oversize cabinet needed?
- Does the appliance require a trim kit, or can it simply sit in an open-air opening?
- Is there room to completely conceal the microwave within a cabinet and cover the exterior with a door mounted on special-purpose cabinet hardware?
- If the microwave is installed in a cabinet extending to the counter, hold the microwave off the countertop
 to
to
 inches to make sure the door does not hit the counter or hit a shaped “no-drip” countertop edge.
FIGURE 2.13 Microwave oven placed in a wall cabinet
Design by Pietro A. Giorgi, Sr., CMKBD, and Ellen Cheever, CMKBD, ASID, CAPS. Photo by Peter Leach
FIGURE 2.14 Microwave drawer placed below the countertop
Design by Carl Bruen, CGR, codesigners Robin Bruen, Debbie Kerr, CKD. Photo by Wing Wang
Induction
Kitchen designers are being introduced (or reintroduced) to a new electronic cooktop heating system: induction. The system's key attributes of being very fast, very controllable, and very energy efficient are known by kitchen designers. Planners are also aware that special pots and pans must be used. Specifying this surface cooking system for a prospective client takes a clear understanding of how it works and what cookware is the best to use. Let us take an in-depth look at this system of heat transference.
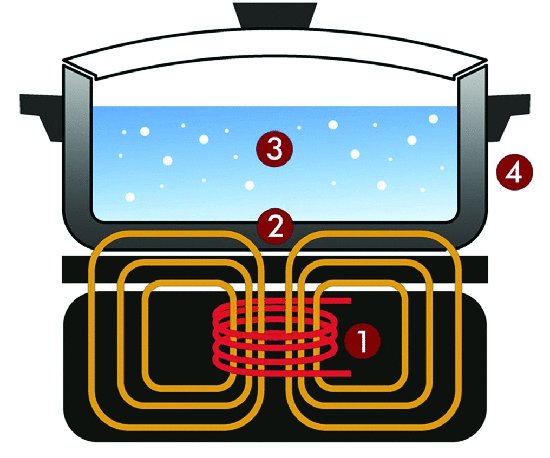
FIGURE 2.15 Diagram of how an induction cooking surface produces heat
An induction system has powerful, high-frequency electromagnetic elements under the unit's ceramic surface. When a good-size piece of magnetic material—such as a cast iron skillet or stainless steel pot—is placed on the element's magnetic field, the field transfers (induces) energy into metal. The magnetic current causes the molecules of the metal cookware to vibrate at high frequencies, creating friction that heats the cooking vessel. By controlling the strength of the electromagnetic field, the cook controls the amount of heat being generated in the cooking vessel. Such control can be changed instantaneously.
Some models have designated element locations. A new zoneless system is also available that allows the user to place the cooking vessel anywhere on the surface. The power level available between these two systems is different, and the number of cooking vessels that can be used on a zoneless system may be limited. Designers should carefully evaluate the differences between these two systems before recommending one above the other.
The difference between induction cooking (see Figure 2.15) and either electric element or gas flame cooking is that the heat is generated directly in the pot or the pan itself rather than being transferred by conduction.
Advantages of Induction Cooking
- Fast cooking—faster than gas. Induction cooktops are faster because the technology is direct and much more efficient. Review the next list to better understand the difference between common heat sources. Moreover, elements in some induction units can share power with one another, so if not every element is in use, one can be “boosted” beyond its normal power level for such cooking activities as bringing a large of pot of water to boil or preheating a fry skillet. The following example shows the time required to boil 2 quarts of water:
- Induction: 4 minutes 46 seconds
- Gas: 8 minutes 46 seconds
- Halogen: 9 minutes 00 seconds
- Electric coil: 9 minutes 50 seconds
- There is no heat produced by the cooking surface, so the kitchen air temperature will not be increased when the chef goes to work.
- Safe because heat is not transferred by conduction. When the only heat exists in the pot itself, there is no open flame, red-hot coil, or other radiant element to burn the chef or kitchen visitors during the cooking process. When a pot is removed, the surface is warm to the touch but not hot enough to burn.
- Easy to clean. Because the cooking surface is a flat ceramic top, which does not get hot, spills, splashes or drips are easy to wipe clean.
-
Energy efficient. One of the most important benefits of induction cooking is its efficiency. Because excess heat is not lost to the air around a pan, more of the energy used in the cooking process goes straight to the pan. (Table 2.1 details the difference in efficiencies of the most popular types of cooktops.)
- Does not require a commercial-style canopy hood or ventilation systems with high cubic foot per minute ratings. All cooking products need to be properly ventilated because foods being prepared can create grease-laden vapors and smoke. However, induction cooking products require far less ventilation than gas or electric cooktops because they do not give off excess heat or gas emissions.
Table 2.1 Stated Power versus Delivered Power for Various Cooking Types
| Type | Power | Efficiency | Delivered Power |
| Induction | 2.8kW | 90% | 2.52kW |
| Halogen | 2.2kW | 60% | 1.32kW |
| Electric coil | 2.0kW | 55% | 1.1kW |
| Gas | 3.5kW | 50% | 1.75kW |
Installation Considerations
- May require a 220 (US) volt 40 or 50 amp electrical line. A typical electric element cooktop requires a 220 (US) volt 30 amp electrical line. Therefore, an induction cooktop often requires a higher-amperage line than typically planned for a cooktop. Such extra electric power may not be available in the current service box. The voltage required by the cooktop determines the wattage of power available to each element on the cooktop.
- May require air circulation clearance below the cooking surface, which means an induction cooktop cannot be placed above an oven, nor can a drawer be installed below it.
Selecting Induction-Compatible Cookware
To create the electromagnetic field, compatible cookware with a magnetic base must be used so that the heat is transferred to the food or liquid inside. Induction cooktops do not produce any heat whatsoever; therefore, nothing will happen if you place noninduction-compatible glass or copper pot on an induction cooktop surface. When the correct cookware—made of a magnetic metal or engineered with an induction-compatible conductive disk in the bottom of the pan—is used, the magnetic waves generated by the induction cooktop immediately stimulate the magnetic molecules in the pan, resulting in instant, precise, and very controllable heat.
The first test that must be performed when selecting cookware for an induction cooktop is to determine if an induction-ready metal is on the bottom of the pan. This test is conducted simply by holding by a magnet to the bottom of the pan. If the magnet sticks, the cookware is induction compatible. The stronger the magnetic bond between the magnet and the pan, the better that cookware will perform. It is important to be aware that a weak magnetic bond can cause a clicking sound when a pot is placed on an induction burner.
Cookware manufacturers are continuously redesigning their collections to be induction compatible. There are stainless pans that are manufactured that can be used on induction cooktops. The stainless uses either a carbon disk embedded or encapsulated in the bottom or uses a 400 series ferretic (magnetic) steel as a material or conductive disk. A number of manufacturers embed a 400 series stainless steel disk into the bottom of aluminum cookware, which enables the pan to work on induction cooktops. There is a lot of this construction in European cookware, where induction is more frequently found than in the United States. Not all stainless steel works. Stainless steel in the 300 series used in exteriors of pans is not magnetic. Stainless most often uses conductive aluminum disks on the bottom to transfer heat. These will not work on induction tops
It is worth noting that product innovators predict future induction cooktops will be engineered to work with any metal. On the horizon is newer technology that will work with any metal cooking vessel, including copper and aluminum. This new technology uses a significantly higher frequency field, which is able to induce a current in any metal. (Ceramic and glass, however, would still be unsuitable for induction cookware, even with this new technology.) Such technology is already being used in a few units made by one Japanese manufacturer, but experts predict it is still a few years away from maturity.
The second test when selecting cookware for an induction cooktop is determining how flat the bottom of the pan is. For maximum efficiency, the cookware selected for an induction cooktop must have a flat bottom.
The third test is whether it is good cookware. Cheap cookware has hot spots. It does not have ergonomic, well-designed handles. The handles may also conduct heat from the pot, making them dangerous, and they may also not be oven-safe.
Once the induction-ready metal content of the cookware has been established, the attributes of the product as it relates to general cooking should be considered.
Steam Ovens
Steaming is a method of cooking using steam, and is considered a healthy cooking technique. Steam is capable of cooking all kinds of food.
Steam cooking on the surface unit takes place when a steaming vessel sits atop a reservoir of water. As the water boils, it vaporizes into steam; the steam then carries heat to the nearby food and cooks the food. The food is kept separate from the boiling water but has direct contact with the steam, resulting in a moist texture in food products. Overcooking or burning food is easily avoided when steaming it. Some gourmet chefs claim that steaming reduces the fat content of the food because of the cooking technique and because no cooking oil is needed. Steaming also results in a more nutritious food than boiling because fewer nutrients are leached away into the water, which is usually discarded. For example, a 2007 US Department of Agriculture comparison between steaming and boiling vegetables showed the most effective nutrients were folic acid and vitamin C. When compared to raw consumption, steaming reduced folic acid by 15 percent and boiling reduced it by 35 percent. Steaming reduced vitamin C by 15 percent and boiling reduced it by 25 percent. Phenolic compounds with antioxidant properties have also been found to be retained significantly better through steaming than through boiling or microwaving.
The advantages of steaming are now incorporated in built-in ovens and combined with convection heat transference.
To understand the advantages of cooking with steam, let us start with a discussion about cooking in a water bath. There is a current interest in a cooking method first described in 1799 and then rediscovered in the mid-1960s and employed in the industrial food industry, called sous-vide (sü-'veˉ d), French for “under vacuum”. Sous-vide is a method of cooking food sealed in airtight plastic bags in a water bath for longer than normal cooking times—72 hours in some cases—and an accurately regulated temperature much lower than normally used for cooking (typically around 131° F to 140° F) meats and higher for vegetables. Advocates of this method feel that this is the best way to cook an item evenly and to prevent it from being overcooked on the outside; therefore, the food is the juiciest.
The limitation of sous-vide cooking is that the low temperature does not brown foods. In addition, the flavors and texture produced by browning cannot be obtained with only the sous-vide technique. Therefore, food products must be browned after being removed from the water bath using techniques such as grilling or searing in an extremely hot pan or with a blowtorch.
For sous-vide enthusiasts, it is all about control. In normal cooking, heating stops a few degrees below the targeted temperature while residual heat continues to cook the food for a while, and overcooking can be the result. In sous-vide cooking, the process stops when the center of the food has reached its targeted temperature. It is then removed and will not cook more after it stops being heated.
The steam and convection oven offers an ideal bridge appliance. Because the food is surrounded by a vapor blanket of steam, the cooking temperature remains constant and the food remains tender. This cooking method not only keeps food heavier, fresher, and juicier; it also saves time. The addition of convection solves the browning dilemma. Adding the convected hot air into the equation introduces enough heat to brown the food item. The main modes of operating the combination oven are steam (vaporized water surrounding the food), convection (circulation of hot air), and a combination of both systems (simultaneous use of vapor and hot air). The appliance is ideal for many culinary applications, including baking, roasting, grilling, steaming, braising, blanching, and poaching (see Figure 2.16).
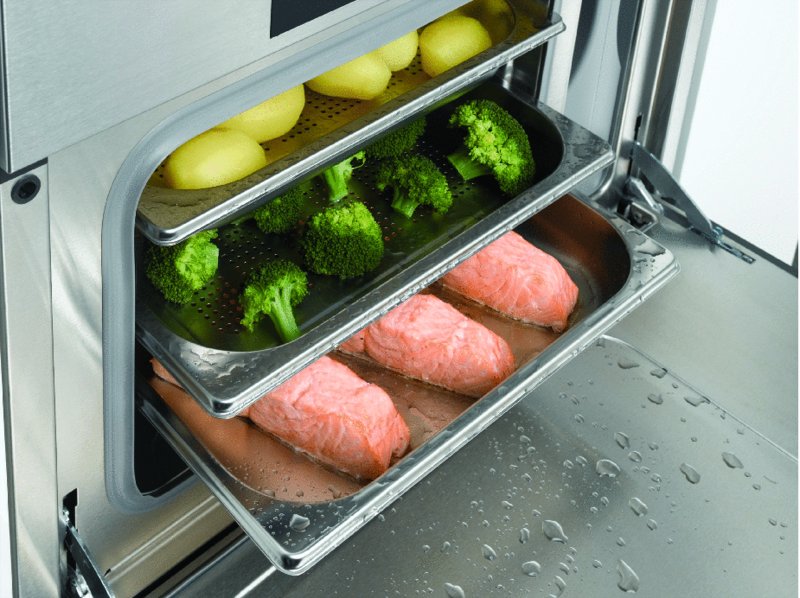
FIGURE 2.16 A steam oven can cook a variety of food products; it is not limited to vegetable preparation.
Courtesy of Miele, Inc.
New Appliance Technologies Combine Heat Transference Methods
Over the past decade or so, major cooking appliance innovations have been introduced that change how appliances work, how efficient appliances perform cooking tasks, and how appliances are controlled. New touch-pad control panels on built-in conventional and microwave ovens add new placement concerns for the kitchen designer, a topic addressed later in this chapter.
Let us first focus on point-of-use or special-purpose appliances available today. These include, for example, built-in gourmet coffee systems, individual specialized cooking elements (wok, deep fryer, or other modular units), and ovens with combination heat transference systems. One of the most impactful innovations has been the combination of heat transfer methods in oven cooking. The most popular combinations are:
- Conventional heat combined with convection cooking in traditional full-size oven cavities.
- Microwave energy combined with conventional heat transference and electric browning elements.
- Steam ovens combined with convection heat transference.
There are no limits on the cookware that can be used when conventional/convection/steam heat transference systems are combined. There are specific recommendations for cookware in an oven cavity that combines microwave/convection/conventional browning elements. Most manufacturers of these types of combination microwave ovens offer some type of multilevel browning pan that has been engineered to provide an excellent surface to facilitate browning and are compatible with microwave cooking. When the cook would like to combine microwave energy with convection energy, there are limits on the cookware that can be used. Manufacturers list the recommended cookware materials in a generic fashion in their use and care manuals. All recommendations are the same: Glass, ceramic glass, or earthenware (pottery or clay) bakeware is ideally suited to cooking when combining microwave energy and convection heat transference. While these cookware materials can work in a combination oven, they vary in their desirability as a container to bake in. From a baking standpoint, metal bakeware has always been considered the best because of even browning. However, this is simply not a choice for the microwave/convection oven.
Glass bakeware. Glass conducts heat extremely well. Therefore, it is an excellent baking container. A word of caution: Recipes with a lot of sugar (pound cakes and cookie bars) might start to burn before being cooked all the way through. Glass always has the advantage of being nonreactive: You can store foods in the baking dish without worrying about the food picking up metallic flavors. It is excellent for baking, casseroles, puddings, and other dishes where browning is not of key importance.
Ceramic bakeware. This type of bakeware has the same problem as glass pans regarding browning. The original pyroceramic glass version was introduced in the 1950s as a product usable on a cooking surface as well as in the oven. Current bakeware is no longer pyroceramic; it has been reformulated for cookware that has resulted in a product that is no longer useable on the stovetop. Products available today are only appropriate for use in the oven.
Silicone bakeware. Silicone has great nonstick attributes; however, it is a poor heat conductor, and baked goods tend to brown very little, if at all, when baked in these pans.
Earthenware (pottery and clay). Earthenware bakeware has clay base that is sometimes fired with a ceramic coating. These earthenware products slowly and evenly diffuse the cooking heat to the very center of the cooking dish. Therefore, food is cooked evenly. The products have superior heat retention properties, which keeps food hot when on the dining table or kitchen table. They can go from freezer to oven because of their thermal shock properties. These products should be seasoned prior to their first use.
Heat Sources
The designer has now finally arrived at the factor foremost in most consumers' minds as they talk about a cooking appliance: the decision between a gas and electric heat source.
Natural Gas
Gourmet cooks usually prefer gas because it permits precise control of heat and offers an instant on/off feature. Gas appliances feature pilotless ignition systems that eliminate continuously burning pilot lights and save about 30 percent of the gas used by the range when compared with older equipment.
Designers should understand how gas cooking works. Gas is composed of molecules continually in motion. Since a gas tends to expand and diffuse, the molecules completely fill the containing vessel, and their motion is limited only by the size of the enclosed space. They exert equal pressure in all directions. The tendency of gas to diffuse is the fundamental essential for gas flow.
Just as water flows from a higher to a lower level and heat flows from a hotter to a cooler body, gas flows from a place of higher pressure to one of lower pressure.
The heating value of a gas is the amount of heat produced when a unit quantity is burned. It is measured in Btus (British thermal units) per cubic foot. A Btu is a unit of heat energy: the amount of heat required to raise the temperature of 1 pound of water by 1° F. This amount of heat is equal to that produced by burning an ordinary wooden match.
The standard cubic foot of gas, as defined by the American Gas Association, is the quantity contained in one cubic foot of volume at a barometric pressure of 30° of mercury and at a temperature of 60° F.
Gas is regulated by a meter on the house exterior. Gas travels through a pipe from the meter to the appliance. The Btu rating of the appliance determines the diameter of the pipe. The flow of gas is directed by the turning of a valve handle. A horizontal pipe through which gas flows from the fuel line to the different orifices is called the manifold. Attached to the manifold are burner valve handles that direct the gas through the orifice and mixer head into the burner.
Forced through the orifice at velocities of 100 to 160 feet per second, the gas develops sufficient suction to draw air through the partly open shutter. This air, called the primary air, mixes with the gas before it is ignited in a porcelain-lined mixing tube, the smooth finish of which increases the injection of primary air and gives a clean, sharp blue flame.
The gas/air mixture now flows through the ignition port on the side of the burner head. This port is connected to the solid state ignition. The spark that ignites the gas when the burner is turned on is caused by the electric ignition. The electric system also turns the gas off.
Gas cooking appliances incorporate a grate over the flame to allow for the necessary oxygen for correct combustion of the gas.
Gas burners are designed to give a circular flame pattern, the size of which can be controlled, to some degree, by the amount of gas delivered to the burner. The burners usually are controlled by a throttling valve that resembles a rotary switch in appearance. The intensity of the flame can be controlled on a graduated basis from low to high. Some burners are equipped with special simmer units, which are, in effect, a very small burner located in the center of the main burner. Although gas burners differ somewhat in form, the principal parts are the same, and the way the gas is ignited is the same.
Most gas range tops or cooktops today have high-rated Btu burners. In the past, typical residential equipment provided burners at 9,000 to 12,000 Btus. Many appliances are available today that offer 15,000 to 20,000 Btu rated burners. These gas burners have been engineered to provide a very low Btu output for simmering as well.
Many cooks consider natural gas surface cooking to be the most ideal. Electric oven cooking typically is preferred over gas oven cooking. This combination of preferences has led to freestanding ranges that are considered dual fuel. The cooking surface is gas and the oven is a pyrolytic self-cleaning electric oven.
Electricity
Alternatively, an electric heat source can be specified. Four types of electric cooktops generally are available for home kitchens today.
Conventional Coil Elements
This is the most inexpensive of all available electric cooktops and has a good heating speed. These cooktops have, for the most part, been replaced with glass ceramic surfaces.
Coil elements are versatile. If equipped with a special raised canning element or a contoured wok element, they will accept large canners or woks. With conventional coils, electrical resistance is used to create heat. Wire is encased in a metallic tube filled with an insulation material. The tube is shaped into a coil and flattened for maximum contact with cooking utensils. Heat travels from the hot coils to the cookware by both conduction (where there is contact) and radiation.
Glass Ceramic Cooktops
Electric resistance coils are located under the smooth glass ceramic top. The heat radiates to the glass surface, where it is transferred to the pot by conduction and some radiation. In order to conduct heat efficiently, contact between the pan bottom and the cooktop must be good. Designs on the cooktop indicate heating areas. Withstanding temperatures to 1300° F (704.44° C) without expanding or contracting, glass ceramics will not warp and are very hard to break. Yellowing of white ceramic surfaces has been eliminated, and elements have been redesigned to achieve faster heating.
In addition to conventional radiant heat, two other technologies are used with glass ceramic cooking surfaces. The first is induction, which was discussed earlier in the chapter. The second is halogen.
Halogen
Halogen range burners combine the elegance of smooth glass ceramic cooktops without giving up cooking performance. Whereas a conventional electric burner gets hot because of electrical resistance as electricity flows through a nichrome wire, a halogen burner works like an incandescent light bulb. Electricity passes through a tungsten filament inside a quartz-glass tube. Resistance causes the filament to heat up, and, in the process, tungsten particles boil off. Therefore, conventional electric energy is converted into light and heat beneath the glass ceramic surface.
In conventional light bulbs, the tungsten particles settle inside the glass, which darkens it. In a halogen bulb, halogen gas combines with the evaporated tungsten to form tungsten halide. When this compound nears the filament, the heat breaks down and redeposits the tungsten on the filament, so the lamp does not darken and the filament lasts longer. The energy emitted is mostly infrared and wavelength. Therefore, the waves pass readily through the glass ceramic cooktop. About 10 percent of the output is visible light. Consequently, the burner's red glow instantly shines through the translucent cooktop. This allows the cook to know immediately if the burner is on, overcoming a problem with traditional glass-top cooktops.
Solid Disk Elements (Electric Hobs)
Originally from Europe, solid disk elements are popular today because of their sleek lines and cleanability. The cast iron surface, which contains electric resistance wires below, has a noncorrosive coating and is grooved for traction. It is surrounded by a stainless steel spill ring and sealed to the cooktop. With the solid elements, the entire disk becomes hot and conducts heat to the cookware. Since the solid element disk is cast iron, it shares many of the positive qualities of cast iron: gradual heat up and heat retention so cooking can be finished after the power has been turned off.
Two types of solid disk elements are available: the thermostatically controlled version has a central thermostat that senses the temperature of the pan bottom. Controls can be set for a range of temperatures. The second version has a thermal protector or limiter that ensures the long life of the element by preventing overheating when heat is not properly conducted away from the element surface. Regardless of the type of control, solid elements do not glow red. (The temperature of the element does not become high enough to be a fire hazard.) Because the element is a thick plate of metal, the problem of warping is eliminated. Sealing the element into the cooktop eliminates the need for cleaning drip pans or the area underneath. Periodic treatment may be needed to prevent rusting, but generally it is not necessary if the manufacturer's directions for care are followed. Heavy-gauge, flat-bottom metal cookware of the same diameter as the element is recommended.
Thermostatically Controlled Surfaces
Some cooking surfaces on the market have one or more surface units that are thermostatically controlled. This type of element has a central sensitive disk backed by a spring that holds the disk in contact with the bottom of the utensil. The control is connected to the switch or valve handle and operates to maintain the temperature for which the dial is set. Such a controlled burner is equivalent to using a small electric appliance and helps to eliminate scorching of food. Since the action of the thermostat is regulated by the temperature of the center of the pan in contact with the disk, it is good practice to have the food cover the center of the pan. Additionally, utensils used with these thermostatically controlled burners should be made of heavy-gauge material that is a good conductor of heat. The pan must also have a flat bottom.
Methods of Heating
Gas Ovens
The gas oven is heated by a burner, which is beneath the oven floor. The floor plate has openings at the corners or along the sides through which the convection currents rise to circulate throughout the oven. The food in the oven is heated partly by these convection currents and partly by the radiation that occurs once the lining of the oven becomes heated. Gas ovens are available with pyrolytic self-cleaning systems from American manufacturers. Convection systems are also available for gas ovens.
Gas ovens offer pilotless ignition systems, which have eliminated the need for a constantly burning pilot flame. It is estimated that this innovation has saved up to 30 percent of the gas used in residential cooking.
Most gas ovens have broiler drawers below the oven; some appliances have a waist-high broiling element that allows oven broiling.
Electric Ovens
Because electric heat is flameless, the electric heating units are placed within the oven itself, which is of a tight construction. Generally, there is a heating element at the top and another at the bottom of the oven. There may be tubular enclosed or open wiring. The lower unit is usually a single coil, and the top unit will be a single coil, several loops, or two coils. The oven vents through the center of the reflector pan beneath one of the back surface units. Electric ovens are available with pyrolytic self-cleaning and convection cooking systems.
Controlling Gas and Electric Ovens
Temperature in both gas and electric ovens is controlled by a thermostat. However, the thermostatic action is different in gas and electric ovens. For example, if the thermostat in an electric oven has been set for 325° F (162.77° C) and the switch is turned on, the unit will operate until a temperature of about 400° F (204.44° C) is reached. This temperature is known as the preheat overshoot—it allows the door to be opened and cool food to be placed within the oven without losing too much heat. At the end of this preheat period, the electricity cycles off automatically and the temperature drops somewhat lower than the 325° F (162.77° C) setting. The current then turns on again and continues to cycle on and off usually 10° above and below the 325° F (162.77° C) setting.
In a gas oven, there is also a preheat overshoot. However, the gas does not shut off completely; rather the valve partially closes, reducing the flame size to maintain a constant preset temperature. Ranges that feature the low 140° F to 250° F (60° C to 121.11° C) temperature may use the cycling method, but the curves have smaller amplitudes than found in the electric range. Temperature in the food does not cycle but continues to rise until the food is cooked.
Types of Ovens
Convection Ovens
Convected hot air for baking was introduced to the baking industry as a commercial advantage in the 1950s. It was an immediate success, creating considerable savings in energy and time and, offering greater flexibility in baking with a more even bake. Virtually all bakeries and restaurants now use convection ovens, and the convection cooking principle is now widely available for home use in several brands of ovens.
In a convection oven, an element heats the air and a fan then circulates this air evenly throughout the oven cavity. The circulating hot air penetrates food faster than the motionless air in a conventional oven. Therefore, several cooking advantages are offered to the consumer.
The circulating hot air cooks foods evenly and in a shorter period. Eggs and cheese dishes bake higher and lighter. Meats and poultry remain juicy and tender and brown beautifully. Any dish normally baked in a standard oven can be cooked in a convection oven with no special bakeware required. Additionally, several items can be baked at the same time, or the oven can be filled with several trays of the same item because air circulation space need not be so generous around all the foods as in a conventional oven.
On the down side, baking pans and casseroles must have low sides and be uncovered to take advantage of the circulating air. For cooking covered foods, convection ovens offer no time or energy savings.
Clients can convert favorite recipes to take advantage of convection cooking features. Many convection ovens today include an autoconversion feature, which allows the cook to enter the temperature and time from a traditional recipe, and the oven makes the conversion. Additionally, convection ovens are available that have a variety of settings, allowing the oven to modify the manner in which the convection fans operate so that convection roasting is programmed to operate differently from convection pastry baking.
Microwave Ovens
Microwave ovens can be freestanding countertop models, built-in models with a trim kit, a combination appliance combining the microwave and a ducted or duct-free ventilation system placed above a cooking service, or a full-size oven that is combined with convection cooking as well as some type of browning ability. The appliance also can be configured as a pullout drawer, designed to be installed below the countertop in a base cabinet enclosure.
In better-designed kitchens today, the microwave is installed as a built-in appliance, as part of a multifunctional oven, or in the drawer configuration. The least desirable configuration is a combination hood/microwave unit placed over a cooking surface. The concern about this installation relates to a safety issue: A child or petite adult will find it awkward—and possibly dangerous—to retrieve hot items from a microwave installed higher than the NKBA Kitchen & Bathroom Planning Guidelines recommend.
Oven Cleaning Systems
Pyrolytic System (Self-cleaning)
Pyrolysis is a chemical change brought about by the action of heat. Heat is the key word in describing this self-cleaning or pyrolytic oven. In this system, the oven is heated at temperatures ranging from 850° F (454.44° C) to 1000° F (537.78° C). At the end of the completed cycle, after the cool-down period, all that remains of the food soil is a powdery ash that is easily removed with a damp cloth.
To activate the cleaning system, a lever is moved to lock the oven door and two controls are set. An inner lock is provided so the oven door cannot be unlocked when the oven temperature is too high for safety. An electrostatic precipitator usually is included to remove smoke that would otherwise come from the oven vent. However, do warn the clients that they probably will smell an odd odor during the cleaning process. Supporters of the pyrolysis system claim that with this method, all six sides of the oven interior are cleaned completely and no special care is required to prevent scratching or damage to the oven surface. Additionally, the extra insulation provided in these ovens to protect against heat transference from the oven to the adjacent living spaces means cooler cooking throughout the year and less cycling on and off the heating element.
Catalytic System (Continuous Cleaning)
The catalytic system is designed to eliminate the need for cleaning an oven. A catalytic material is mixed into the porcelain enamel coating on the oven liner panels. This material causes a chemical reaction at normal cooking temperatures that oxidizes food soils continuously as they occur during the cooking operation. This method, then, does not require a separate cleaning cycle at high temperatures because the cleaning takes place simultaneously as the food is cooked. Manufacturers using this system emphasize three points:
- Heavy spillovers will not be cleaned without first wiping up the excess with a damp cloth.
- Harsh abrasives, chemical oven cleaners, and scouring pads should not be used on excessive soil or stubborn stains.
- Certain types of food stains may not disappear in one operation but will fade during continuous subsequent use of the oven.
This type of catalytic system is the most commonly specified cooking appliance in Europe. When combined with a true convection oven, the continuous cleaning cycle works in an acceptable fashion. However, when it is not a part of a convection oven, many people find that the oven does not look clean. Advocates of the catalytic approach point out that the oven is never locked during its two to five hour cleaning process; therefore, it is always available to the cook. All that continuous cleaning prevents any buildup of soil, and very little basic redesign of existing ovens is required since high temperatures are not used. This is another reason why this system is employed in European appliances, which are generally smaller than domestically produced ones. If the interior oven size of a European manufacturer model were further reduced because of the extra insulation required for the pyrolysis system, the appliance probably would not be usable.
Major appliance manufacturers are constantly devoting resources to product improvement; therefore, appliance specifications change regularly. Additionally, new innovative appliances are introduced to the kitchen and bathroom industry on a frequent basis. On a regular basis, designers should study manufacturers updated literature, visit manufacturer Web sites, and attend national and local trade shows where new products are introduced to the market.
Primary Cooking Center
The next decision lies in determining which style unit or units will suit the space and cooking needs of the client.
Built-in Equipment
Ovens
The family's cooking patterns will direct the recommendation for a single, double, or a combination of single and micro convection equipment.
One of the biggest advantages of built-in oven/cooktop units is that the designer and client have complete freedom and flexibility in placement. The two appliances can be placed side by side or separated to create distinct work cells.
An oven should be placed at a comfortable, accessible level.
Ovens built into a tall tower offer the convenience of one oven at waist height and one below in the case of double ovens.
Some ovens are designed to be placed in the base cabinet so counter space is not lost. An oven should be placed at a comfortable, accessible level. Under-counter installations should be suggested only with ovens engineered for such a location.
Single oven(s) also can be placed in “mid-height” base units, alone or side by side with a second single oven. This design makes the appliance more accessible and maintains a landing space above it . This installation is more expensive than specifying a double oven, which requires only one 220 circuit, but may be the best solution if a client is height challenged or if individuals of varying heights will use the appliance.
Built-in appliances have a higher cost than freestanding ranges, which combine both oven and cooking surface. Additionally, installation fees and electrical wiring requirements will be greater than needed for a single appliance.
Ergonomic Concerns When Locating a Built-in Oven
A planning concern is the wall space required for ovens placed apart from the cooktop. Oven cabinets are 27, 30, or 33 inches wide for single- or double-stack ovens. Placed side by side, ovens can require as much as 66 inches of wall space. The two built-in units also use a minimum of 55 to 60 inches of wall space, which might cramp countertops in a compact kitchen. Last, the interior dimension of most built-in ovens is smaller than a 30-wide-wide freestanding range oven.
Appliance manufacturer specifications guide designers in proper placement off the floor as well as heat concerns related to cabinetry above the oven. Some built-in ovens are designed to be installed flush with the adjacent cabinetry. This is possible because the oven vents are located on the face of the appliance.
Most built-in ovens today have touch-screen technology operating the control panel. This type of screen has largely replaced turn and push knobs. Because of the visual interface required to operate an oven, new concerns have arisen about how high ovens should be installed. Architectural Graphics Standards has identified that the sight line of a typical man or woman is 4 inches below their overall height. Ideally, an oven should be placed so that the control panel is at or near this height, allowing the user to see the control panel and easily operate it (see Figures 2.17, 2.18, 2.19, and 2.20).
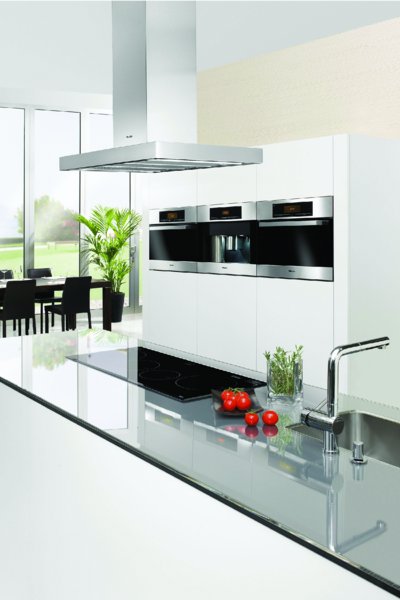
FIGURE 2.17 Ovens offering various cooking functions installed adjacent to one another makes all units easily accessible.
Courtesy of Miele, Inc.
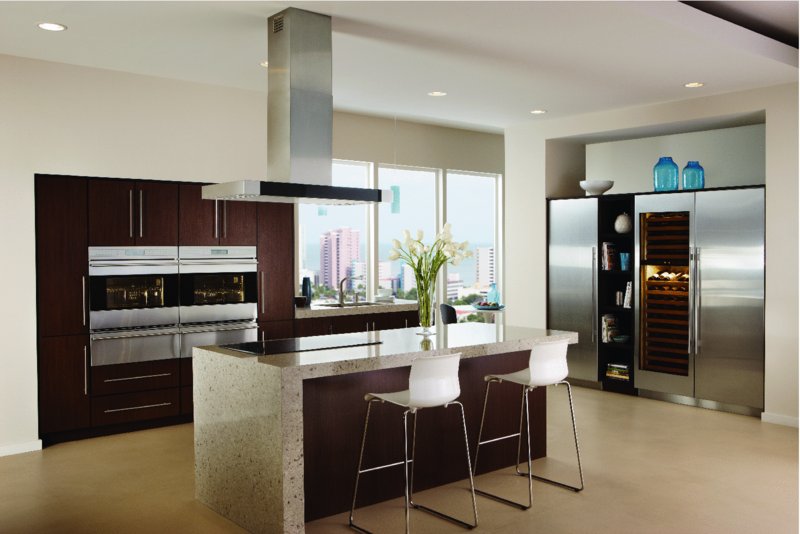
FIGURE 2.18 Single ovens can be installed next to one another for easy access. Note the placement of warming drawers below the ovens, making these appliances accessible as well.
Courtesy of Sub-Zero and Wolf
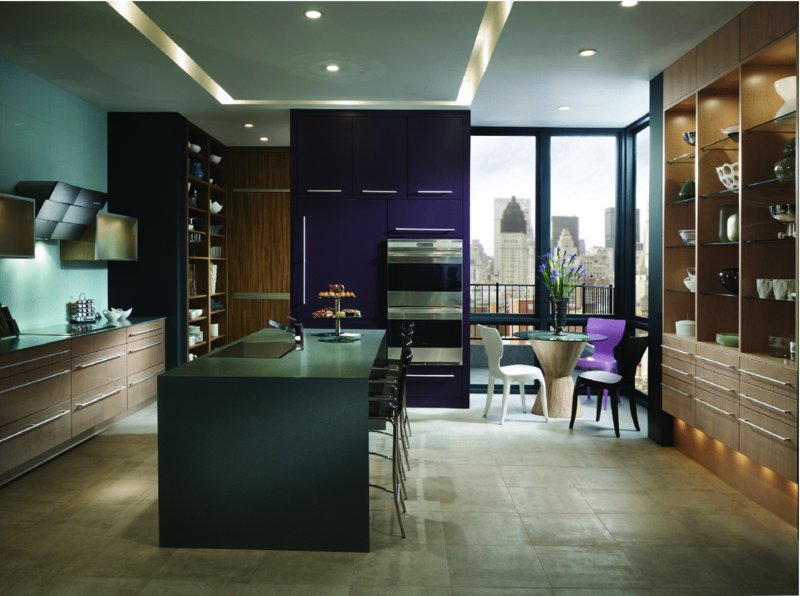
FIGURE 2.19 A double oven stacks one appliance above the other. Access to the control panel may be difficult for a petite cook.
Courtesy of Wood-Mode Fine Custom Cabinetry
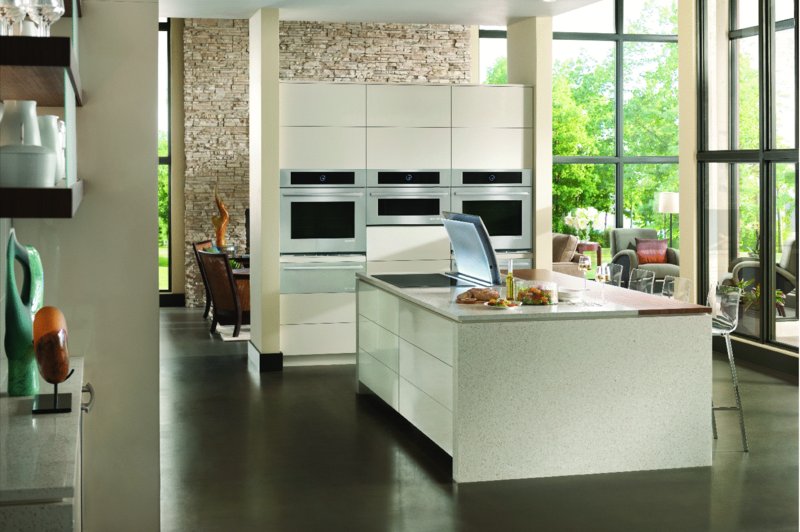
FIGURE 2.20 Single ovens and a combination microwave/convection oven installed adjacent to one another with warming drawers below.
Courtesy of Jenn-Air
Cooktops/Range Tops
Built-in cooktops come in two configurations. The first is a self-contained surface unit that drops into a cutout in the countertop and is called a cooktop. The second popular style is a front-controlled unit, which requires a lowered cabinet height to accommodate the front panel controls and is called a range top (see Figure 2.21).
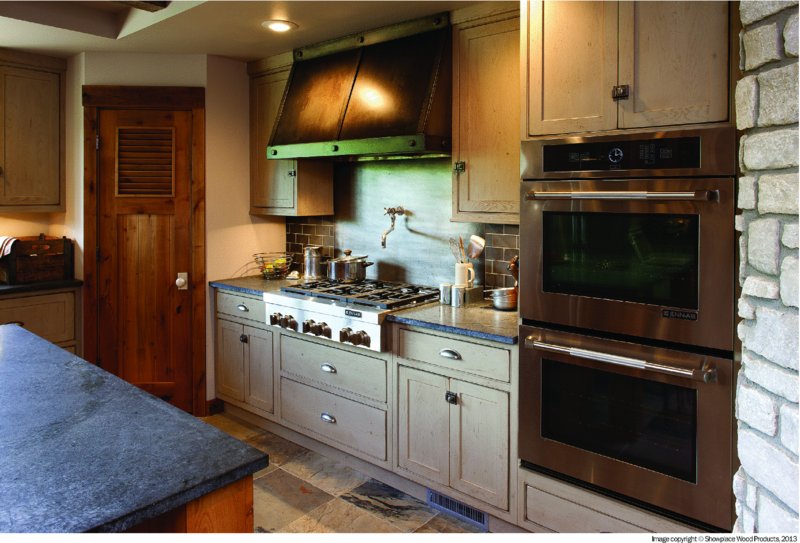
FIGURE 2.21 Gas range top with controls at front of appliance
Courtesy of Showplace Wood Products, Inc.
Cooktops come in a wide variety of sizes and configurations. Simple four-burner cooktops often are used in more modest projects. For the serious cook, five- or six-burner range tops often are specified.
The method of ventilating the cooktop must be determined in the early design phase. If a downdraft separate ventilation system is going to be used, the overall depth of the cabinet may need to be increased.
Slide-in and Freestanding Ranges
Slide-in and freestanding ranges (see Figure 2.22) feature an oven below the cooking surface. These are the least expensive types of ranges and may suit the client's cooking needs, space limitations, and budget. However, they will not add the sleek look of built-in models or the gourmet cooking style of commercial-type freestanding equipment. Regardless of expense, models with the controls along the range's backsplash should be avoided. They are awkward to use and potentially dangerous to the cook.
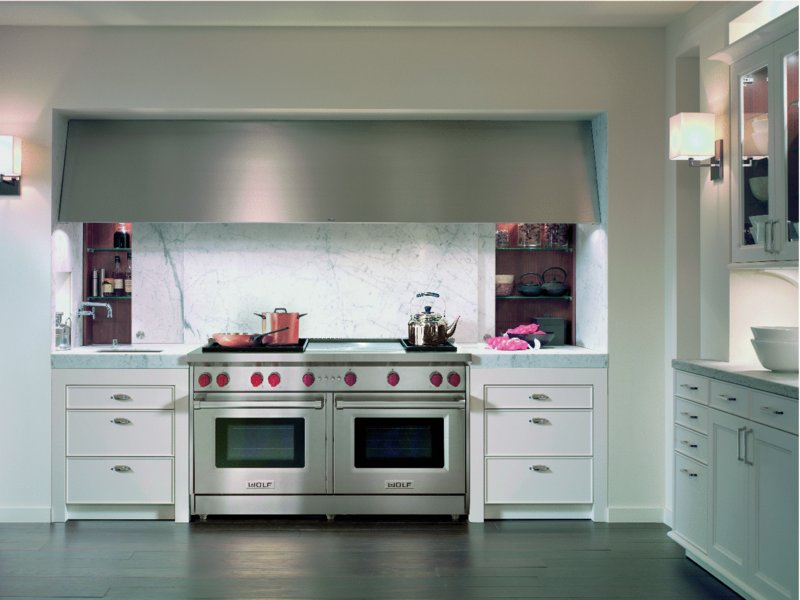
FIGURE 2.22 Freestanding gas ranges are available in 30-, 36-, 48-, and 60-inch widths.
Courtesy of Sub-Zero and Wolf
If the slide-in or freestanding range being considered has the controls along the top and can accommodate a downdraft ventilation system, designers may need to increase the depth of the adjacent cabinetry to accommodate the downdraft appliance.
Drop-in Range
The third option is a drop-in range. Although similar in looks and price to the slide-in, this appliance is installed between base cabinets and supported by the range deck or by adjacent cabinetry. A rim provides the transition from range to countertop that helps avoid cleaning problems. Generally, the controls are placed along the front of these 27 to 30 inch wide appliances so they are simple to reach and safe to use.
If the drop-in range will be combined with a downdraft ventilation system, extra cabinets around the range and on each side may need to be planned.
Specialty Appliances
- Coffeemakers. Built-in coffeemakers are available in both plumbed and nonplumbed configurations. Engineered to recess into a normal wall thickness, they can provide a coffee station for the consumer without the bulky coffeemaker appliance from sitting on the countertop.
- Electric fryer cooktop. An electric fryer cooking module is another specialty cooking appliance. A deep container is an integral part of this unit, into which a series of baskets are used to deep-fry food. Accurate temperature control is essential; therefore, the better units have digital temperature readout to provide complete control.
- Electric grills. Individual electric grills can be incorporated under an overhead ventilation system or as part of a combination cooktop vented with a downdraft system. Extra attention must be paid to the ventilation system when planning an integrated grill cooktop. Typically, high-wattage or Btu-rated elements provide heat under a low-profile, one-piece grilling grate. For ease of cleaning, there will be some type of plate or removable tray to accumulate unwanted grease and make removal and disposal easy.
- Griddle. Cooktops and range tops with six burners often have an interchangeable griddle available that can take the place of two burners for specialty cooking.
- Steamer cooktop. Steamer modules are used to provide temperatures of 140° F (60°C), allowing food to be kept hot for long periods or to defrost easily without drying out or losing the flavor. A typical steamer will have a 2-gallon capacity, which can hold up to 14 cups of cooked food, and will feature a dome lid to maximize the interior space.
- Warming drawers. Warming drawers are available in single and double configurations. They may have a decorative door or be concealed to match the cabinetry. Featuring both moist and dry settings, they are used to maintain food at a serving temperature after the product has been cooked. Some homeowners also use them to heat plates.
- Wok cooking. Several custom manufacturers offer a built-in wok to augment normal cooktop/range-top cooking. Other manufacturers design their high-rated Btu burners to accommodate a surface wok, ensuring sufficient heat for the quick stir-fry nature of wok cooking.
Ventilation
Please review the material in the Kitchen & Bath Residential Construction and Systems volume of the NKBA Professional Resource Library to familiarize yourself with the basic engineering and mechanical concerns of a well-designed ventilation system.
Once you have considered the categories of equipment available, you should evaluate whether the model you are considering offers the type of ventilation system that will enhance your design.
The designer must be familiar with several ventilation systems:
- Proximity or downdraft ventilation systems, allowing design freedom and creativity above and around the cooking surface.
- Decorative metal or wood with an integral or a remote located blower.
- Overhead ventilation systems, which can be concealed within the cabinets or be a low-profile, pullout hood.
- Combination microwave and hood appliance. This combination often does not provide an ideal location for the microwave oven and does not always allow for a proper holding canopy for an effective hood.
- Mantel or chimney hood, where a ventilator is housed in a custom enclosure, which acts as a focal point in the space. Again, the motor may be part of the interior structure or mounted remotely. Designers typically purchase an interior liner, including the ventilator and lighting portion of the system, and surround it with a job-built frame or incorporate it in a prefabricated plasterlike enclosure. This decorative hood may be mounted on brackets returning to the wall or be completely enclosed with a mantel-type extension to the countertop. Providing proper landing space is critical with this type of hood.
Importance of Ventilation
In addition to an overhead hood being beautiful or a downdraft less visible, the system must be engineered, located, and ducted to maximize the efficiency of the appliance. It takes collaboration between the design professional, the appliance specialist, and the heating, ventilation, and air-conditioning (HVAC) technician to properly plan an effective ventilation system. Ventilation experts sometimes talk in terms of efficacy rather than efficiency.
Understanding the home ventilation system starts by knowing how air moves throughout the home. There are three major ventilation systems used in the home:
- Natural ventilation (opening a window).
- Spot ventilation (an exhaust appliance placed above a cooking appliance, behind it, or as an integral part of the cooking surface).
- An overhead system can be engineered with a canopy or perimetric hood to capture and remove vapors.
- A proximity system (downdraft or telescoping) can be integral to the cooking surface or a separate appliance placed behind the cooking surface.
All systems can be engi'neered to duct to the exterior or can be duct-free.
- Whole-house ventilation (systems designed to exhaust stale air and/or supply fresh air to the entire dwelling).
The Focus for Kitchen Designers: Spot Ventilation
If a traditional canopy-type overhead vent is specified (see Figure 2.23), airborne vapors will rise naturally (see Figure 2.24) into a capture area of the canopy. The internal blower then pulls them out from the capture area and exhausts the air to the outside.
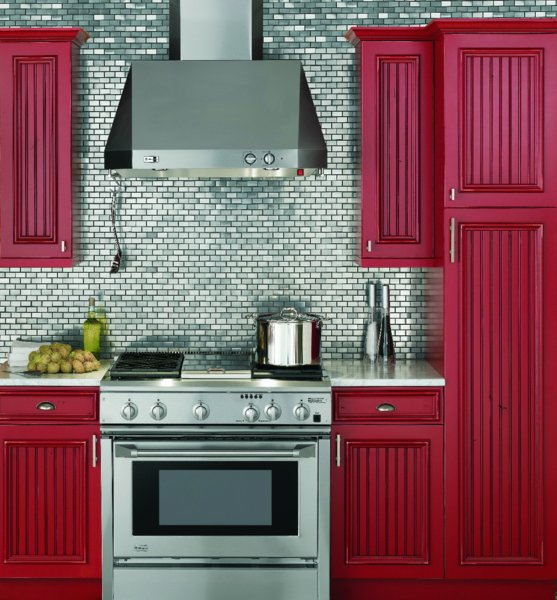
FIGURE 2.23 Canopy hood above a 30-inch range installed against a wall
Courtesy of GE Appliances
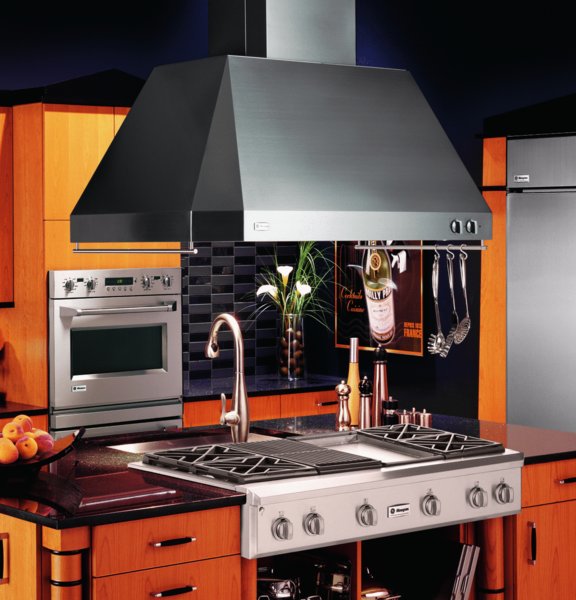
FIGURE 2.24 A canopy hood installed above an island can be compromised because of air current.
Courtesy of GE Appliances
If a proximity vent is specified, the ventilation system will pull airborne particulates from the surface (like a vacuum) and exhaust them down and to the outside (see Figures 2.25 and 2.26).
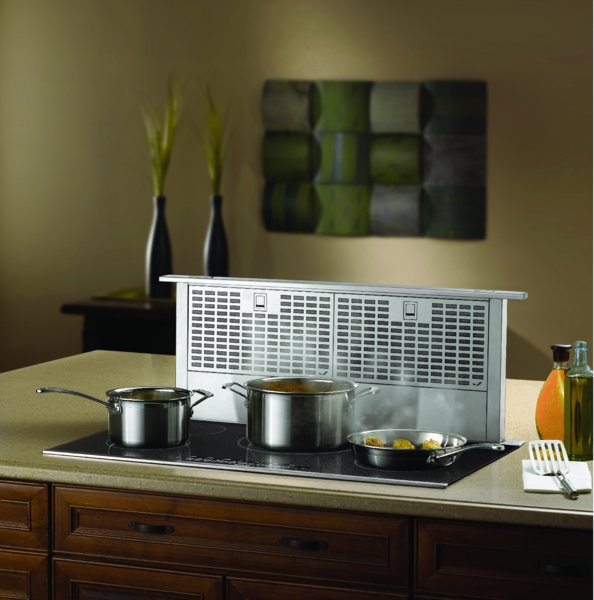
FIGURE 2.25 A telescoping downdraft system installed behind a cooking surface
Courtesy of Jenn-Air
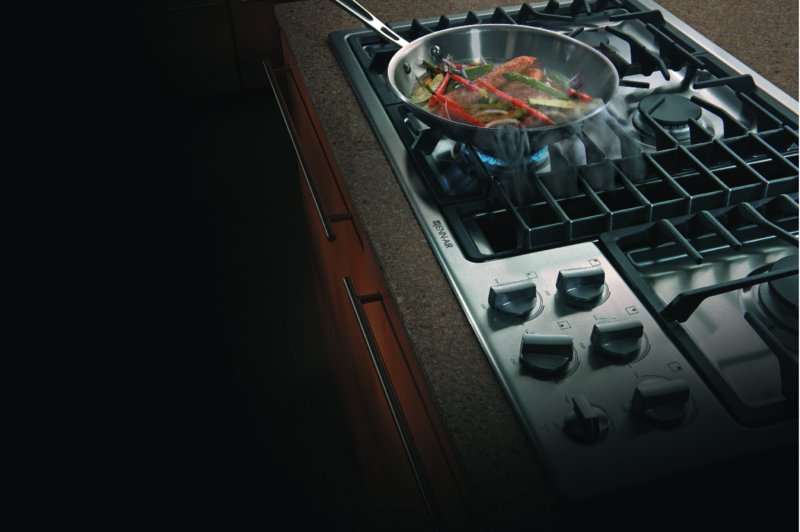
FIGURE 2.26 A proximity ventilation system built into the cooking surface.
Courtesy of Jenn-Air
A new choice is available today based on a new way of moving air, called perimetric (see Figures 2.27, 2.28, and 2.29.) Airborne particulates are pulled through narrow slots along the edge (the perimeter) of a center panel into an enclosed space. The internal blower then exhausts them to the outside.
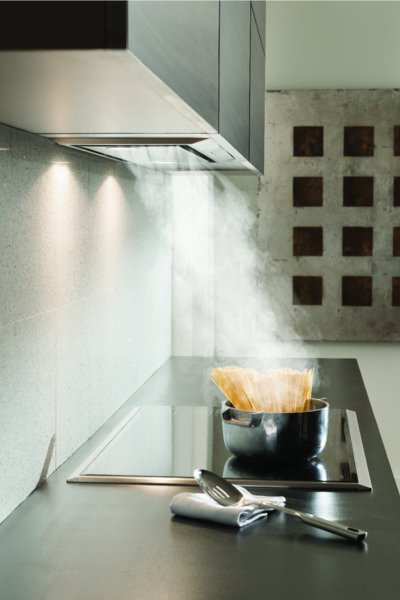
FIGURE 2.27 A demonstration of the efficiency of a perimetric ventilation system.
Courtesy of BEST Range Hood, LLC
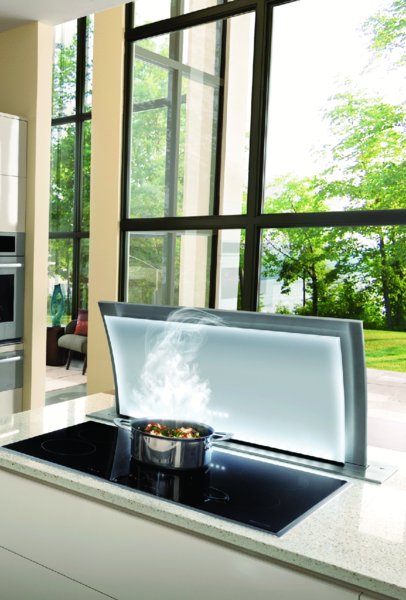
FIGURE 2.28 A telescoping downdraft appliance is also available with perimetric ventilation engineering.
Courtesy of Jenn-Air
FIGURE 2.29 A perimetric ventilation system can transform the hood into a sculptural design element.
Courtesy of BEST Range Hood LLC
Ventilation System Selection Criteria
There are four key components to be considered when selecting a ventilation system:
- Duct path. Improper ducting diminishes the efficiency of the system. A layout for the ductwork that follows all of the guidelines set forth by ventilation manufacturers regarding length of run and number of allowable turns should be prepared before a system is specified.
-
Hood width and depth. The shape of the appliance and its placement determine the capture ability of the system.
The Home Ventilating Institute (HVI) stresses that the width and depth of the canopy-type hood dramatically impacts its efficacy (how well the hood does its job) for serious cooks.
While a 30-inch-wide hood above a 30-inch-wide range will work, if space permits, HVI recommends extending the hood 3 inches on each side of the cooking surface. This will provide the best possible capture of steam, grease, and smoke.
- System power, which is rated in CFMs (cubic feet of air removed per minute). The required power level is determined by the heat generated by the cooking appliance, the type of heat source, and the anticipated type and frequency of cooking.
- Operational noise level, measured in sones. The smaller the sone number, the quieter the noise level.
To provide an efficient ventilation system, these four key components must be planned together during the preliminary design stage of a kitchen project.
Ergonomic Considerations: Pairing the Ventilation with the Cook's Height
Additional considerations should be given for a ventilation system installed above a peninsula or an island. A design dilemma occurs when planning an island installation for a tall or petite cook. Placing the ventilation system low enough to maximize its efficacy means it may block the user's view. Raising it up may decrease its efficacy. Although ventilation system placement is of primary concern in an island installation, it is also a concern when a hood is placed against the wall. Always check the manufacturer's specifications for the required installation height.
Proximity Ventilation System
A proximity ventilation system—where the ventilation technology is near the cooking surface—is an alternative to an overhead hood.
The first type of proximity ventilation was introduced in the early 1960s. The downdraft ventilation unit was an integral part of the cooktop. This system then evolved into a separate downdraft ventilation unit installed behind the cooktop, called a telescoping system because it extends up from the counter when in use.
This type of ventilation allows for an open plan in the kitchen: a style that continues to be popular today with active extended families and aspiring (or inspiring!) gourmet cooks interacting in the kitchen.
Proximity ventilation captures the vapors in the zone around the cooking surface and vents them to the exterior of the house or through a filtered system and then back into the room.
Duct-free Downdraft System
One new innovation is a duct-free downdraft cooktop system that uses a HAPA (high airflow particulate air) filter. This is a great solution when planning a room that has installation restrictions or ducting limitations. The HAPA filter captures smoke, grease, and moisture while allowing air to travel through the filter without loss of efficiency. The clean air is vented through the cabinet toe-kick space back into the room. The filter has an indicator light alerting the user when it needs to be replaced. Because this system takes up the majority of the interior cabinet space, designers need to plan additional storage for pots and pans. Designers also must review state and local municipality ventilation codes: Some codes do not allow any residential duct-free systems.
Telescoping Downdraft System: Behind the Cooking Surface or Range
In the second type of proximity system the unit is placed behind the cooking surface. Depending on the depth of cabinetry used, you may need to pull them from the wall or plan for deeper cabinets. Extra depth in the layout design will be required if a telescoping system is planned behind a range.
Perimetric Suction Filter System (Perimetric Advanced Extraction Technology)
The perimetric suction filter system is a new ventilation system that has been introduced into the North American market. In it, air is drawn into the range hood through collector slots along the perimeter of a central deflector panel. Therefore, it is referred to as a perimetric or perimeter hood.
The perimetric panel design decreases the space for air to flow through, which increases static air pressure. This results in an increase in the overall velocity of the air movement.
This is a very different way to move air from the traditional ventilation system, which has a larger holding cavity to catch airborne cooking vapors until the internal or external fan has time to push/pull them over the filtering system.
By shaping the air flow, a perimetric suction hood offers improved overall performance (increased suction at the sides of the unit) compared to a traditional mesh filter, where most of the function is concentrated in the center of the canopy holding area and then drops off rapidly toward the sides.
It is important to understand that the performance of a perimetric hood is measured in CFMs, just like a traditional ventilation system. This new system does not offer more power for less CFMs; it just moves the air in a different way.
Importance of a CFM Rating for Ventilation Systems
The CFM rating—that is, cubic feet of air per minute that is whisked away by the ventilation system—is the third part of the system engineering puzzle. Guidelines are not consistent for a cooking surface placed against a wall.
- The minimum code-required exhaust rate for a ducted hood is 100 CFM ducted to the outside.
- The HVI recommends a minimum of 40 CFM for every linear foot of the range.
- NKBA Kitchen & Bathroom Planning Guidelines recommend a minimum of 150 CFM ducted to the outside.
These minimums are not adequate for many installations.
HVI's CFM Rating Guidelines
For best results, successful designers follow the recommendations from HVI in Table 2.2. The HVI recommends increasing the CFM levels over high-powered gas cooking surfaces.
Table 2.2 HVI CMF Rating GuIdelines
| HVI recommended rate | ||
| Width of hood: | Against a wall | Over an island |
| 2.5 feet (30 inches) | 250 CFM | 375 CFM |
| 3 feet (30 inches) | 300 CFM | 450 CFM |
| 4 feet (48 inches) | 400 CFM | 600 CFM |
Many gourmet cooks feel the best cooking appliance is a gas unit with highly rated, powerful Btu burners. Such an appliance needs to be coupled with the proper, powerful ventilation system.
A large overhead canopy hood that is at least the size of the range top or range (preferably 3 to 6 inches wider on each side) with a deep canopy holding area is required. It is not just for the cooking—it is for the gas particles escaping into the atmosphere. Gas ranges are typically about 50 percent efficient; that means that 50 percent of the gas emitted by the burners enters the ambient air stream.
The ventilation system needs to capture and exhaust these gaseous particulates.
Some manufacturers have ventilation recommendations for their ranges, but and many do not. Minimum code standards never address this issue. Table 2.3 gives the HVI's recommendations.
Table 2.3 HVI Recommendations for Ventilation
| Btus | Recommendations | |
| Gas burner output | < 60,000 Btus | 100 CFMs per linear foot of cooking surface length |
| Gas burner output | > 60,000 Btus | 1 CFM per 100 Btu of cooktop outlet |
| When a grill, griddle, wok, or fry basket is used | Add 200 CFMs to the estimated base need calculated on the Btu outlet of the cooking surface |
A New Requirement for the Ventilation System: Planning for “Make-up Air”
Pulling air from the kitchen lowers the air pressure inside the home. Today, newly constructed homes are very airtight. Therefore, building code regulations are being adopted to prevent dangerous backdrafting—when the flow of combustion gases can be reversed and be pulled into the house (rather than exiting) because of this lower pressure. The solution is referred to as make-up air.
The 2009 International Residential Code (IRC) began requiring the introduction of make-up air when kitchen exhaust equipment capacity exceeds 400 CFMs. This code is implemented at the state level; therefore, designers need to familiar with such requirements in their specific business area. Although the 2009 IRC requires make-up air for large exhaust systems, it provides almost no guidance for how it is to be provided. The main installation requirement states that a fan shall be “automatically controlled to start and operate simultaneously with the exhaust system.” This leaves it up to the designer or builder to specify an appropriate type of make-up air system. Further, proper installation of the system is important to avoid hazardous conditions and unnecessary construction costs.
Appliance manufacturers are introducing make-up air dampers designed to operate in tandem with their ventilation appliance offering. There are two systems currently in use.
Active systems may use a sensor to detect air movement in a range hood air duct to open the damper. Other systems open the damper and activate the make-up system at the same instant the hood is activated. In both cases: the user does not “start” the system: the hood starts the process: the hood switch and the make-up air system switch are the same.
Here is how an active system works:
- The damper is intended to prevent any outdoor air from entering the house when the exhaust system is not in operation. The automatic control is accomplished with an electrical circuit involving an air current–sensing relay.
- The current-sensing relay senses when the exhaust fan is operating. It allows a signal to pass through and open the motorized damper. When the fan is turned off, the circuit is closed and the signal is removed from the damper.
Passive systems, using no electricity, operate by a drop of air pressure in the home. When the high CFM hood is activated the home will generally have a drop in air pressure. When that happens, a vent will open allowing outside air into the home automatically. When the hood is turned off, the air pressure returns to normal and the vent closes.
It is important to note none of these systems is integrated into the conditioned air systems for the home. Therefore, when the damper is in an open position: exterior air at the temperature outside enters the house. If a make-up air system is requested that ties into the AC or heating system: designers should call in an HVAC specialist.
A Good Hood Is a Quiet Hood: The Importance of Sones
The word “sones” is an internationally recognized unit of loudness, which simplifies reporting of sound output. Sones translate laboratory decimal readings into numbers that correspond to the way people sense loudness. (To give you a reference, an average quiet refrigerator operates at 1 sone; a normal conversation is between 6 and 7 sones.)
The design of the hood fan and its placement in the system has a lot to do with its sone rating. Designers should experience—that is, hear—a fan in operation to understand its noise level.
Newer designs (see Figures 2.30 and 2.31) involve insulating the motor, changing its position within the hood's structure, or better managing how air moves through the system, all of which can result in a quieter hood.
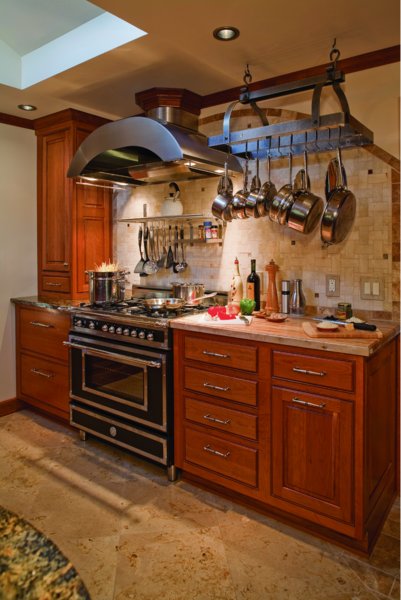
FIGURE 2.30 A decorative custom hood
Design by Joseph Irons, CGR, GMB, CAPS, CGP, and Terence Tung, CKD
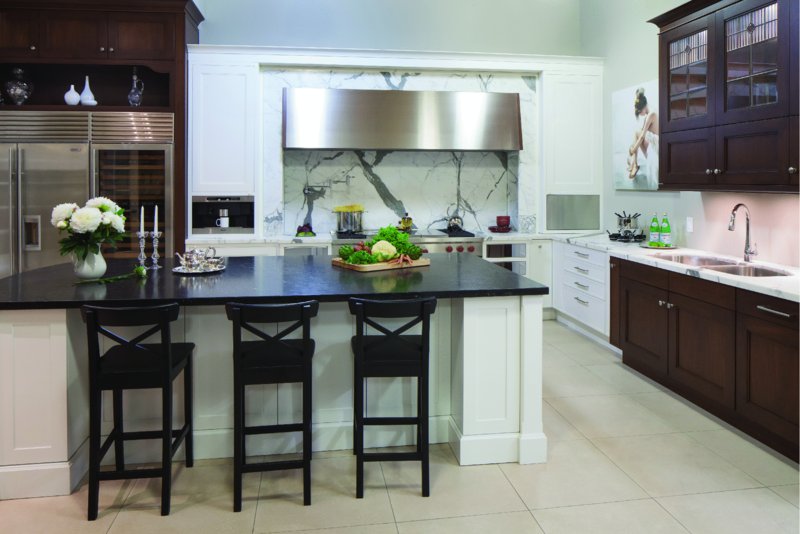
FIGURE 2.31 Another example of a decorative hood creating a focal point in the finished kitchen.
Courtesy of Artcraft Kitchens
Appliance Checklist
Use the Appliance Checklist (Appendix B) as you complete the final specifications for each kitchen project you work on. It will help you estimate and specify all the planning details of appliance placement.
SUMMARY
For many consumers, the appliances selected for their new kitchen are the most important part of the decision-making process. Kitchen designers need to be familiar with how kitchen appliances work as well as how they should be used and maintained. With the generic foundation provided in this chapter, designers can research and evaluate specific offerings by the manufacturers they have chosen to represent within their business or recommend to clients securing the appliances from another source.
It is important for designers to remember that some clients are interested in a new appliance that simply does the functions they are accustomed to better. This might be, for example, a gas range that has a better-designed gas burner offering more power when needed, as well as a very low simmer. Alternatively, prospective clients may be interested in appliances that complete their assigned task in new and different ways. For example, a client might have had a gas range in the past but would be very impressed by the efficiency and safety possible with an induction range top.
Often consumers think they know what new appliances they are interested in. Successful designers listen carefully to the consumer's want list or wish list, and then, after a careful survey of the family's lifestyle and the cook's methods, offer alternative solutions in the type of appliance or the configuration of the appliance.
REVIEW QUESTIONS
-
Explain the difference between an EnergyGuide label and an Energy Star label. What do these two labels tell the consumer? (See “EnergyGuide and Energy Star Labels” pages 92–93)
-
Describe how a food preservation appliance manages temperature and humidity in the refrigerator to extend food shelf life. (See “Method of Cooling” pages 96 – 97)
-
How does a dishwasher provide proper water temperature to complete the washing action? (See “Length of the Washing/Drying Cycle” page 106)
-
What is the difference between how heat is transferred in the following methods of cooking? (See “Methods of Heat Transference” pages 108 – 115)
- Conduction
- Convection
- Radiation
- Induction
- Microwave
- Steam
-
Describe the difference between a pyrolytic and a catalytic self-cleaning oven. (See “Oven Cleaning Systems” page 120)
-
Compare the efficiency of an open gas flame to a conventional electric coil under a ceramic glass top and an induction cooktop. (See “Advantages of Induction Cooking” pages 112–113)
-
What are the differences among an overhead canopy hood, a proximity ventilation system, and a parametric ventilation system? (See “Ventilation” pages 125–130)
-
Explain the following terms:
- Btu (See “Natural Gas” page 116)
- CFM (See “Importance of a CFM Rating for All Ventilation Systems” page 132)
- Sone (See “A Good Hood is a Quiet Hood” pages 133–134)