Perform the following steps:
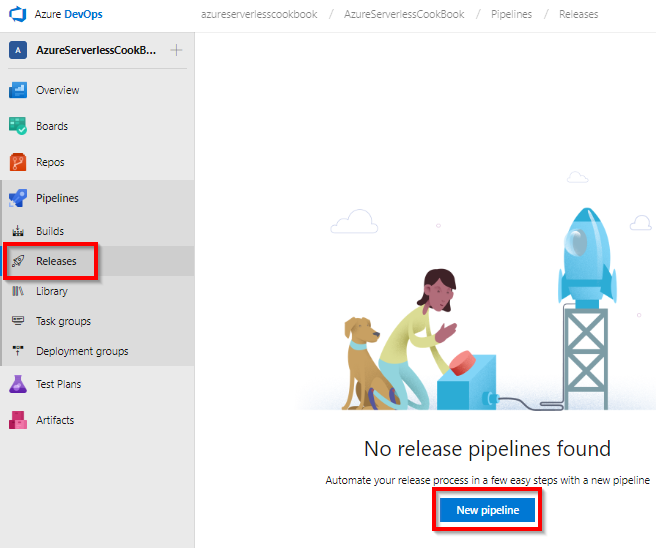
- Navigate to the Releases tab, as shown in the following screenshot, and click on the New Pipeline link:
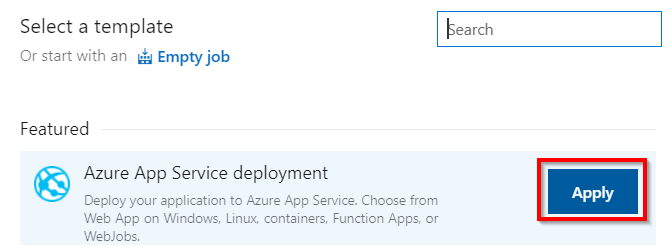
- The next step is to choose a Release definition template. In the Select a template popup, select Azure App Service deployment and click on the Apply button, as shown in the following screenshot. Immediately after clicking on the Apply button, a new environment (stage) popup will be displayed. For now, just close the Environment popup:
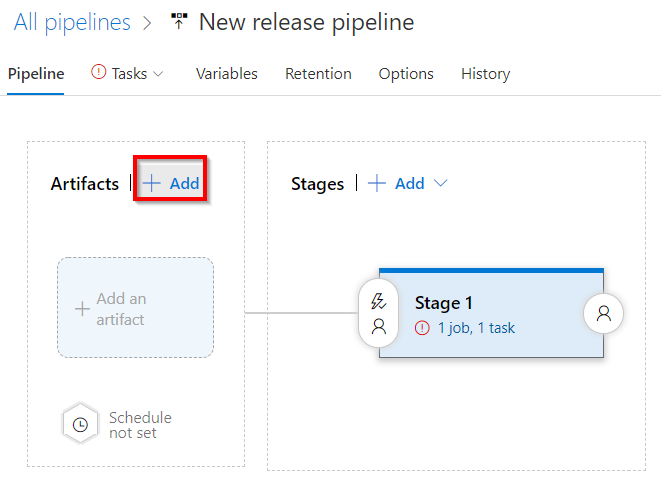
- Click on the Add button available in the Artifacts box to add a new artifact, as shown in the following screenshot:
- In the Add an artifact popup, make sure that you choose the following:
- Source type: Build
- Project: The team project your source code is linked to
- Source (build definition): The build definition name where your builds are created
- Default Version: Latest
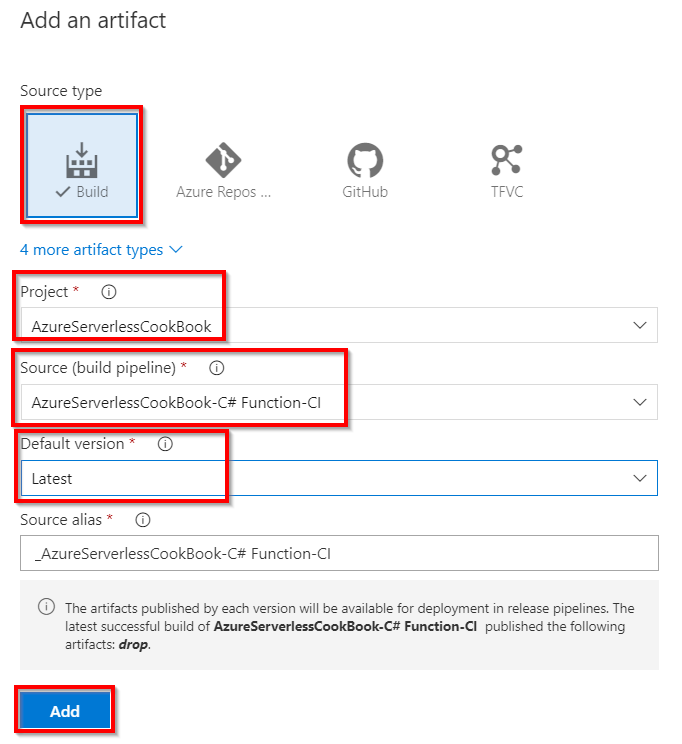
- After reviewing all the values on the page, click on the Add button to add the artifact.
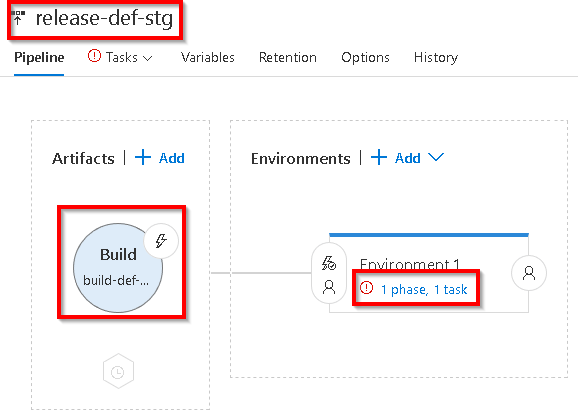
- Once the artifact is added, the next step is to configure the stages, where the package needs to be published. Click on the 1 phase, 1 task link, shown in the following screenshot. Also, change the name of the release definition to release-def-stg:
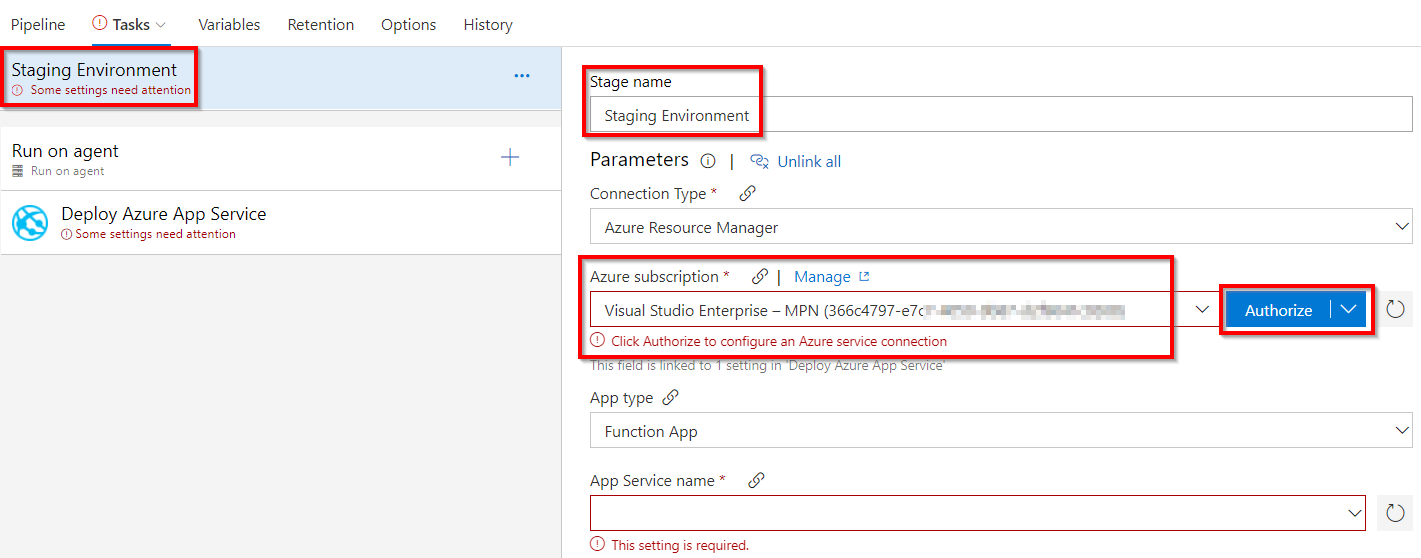
- You will be taken to the Tasks tab, shown next. Provide a meaningful name to the Stage name field. I have provided the name Staging Environment for this example. Next, choose the Azure subscription in which you would like to deploy the Azure Function. You will need to click on the Authorize button to provide the permissions, as shown here:
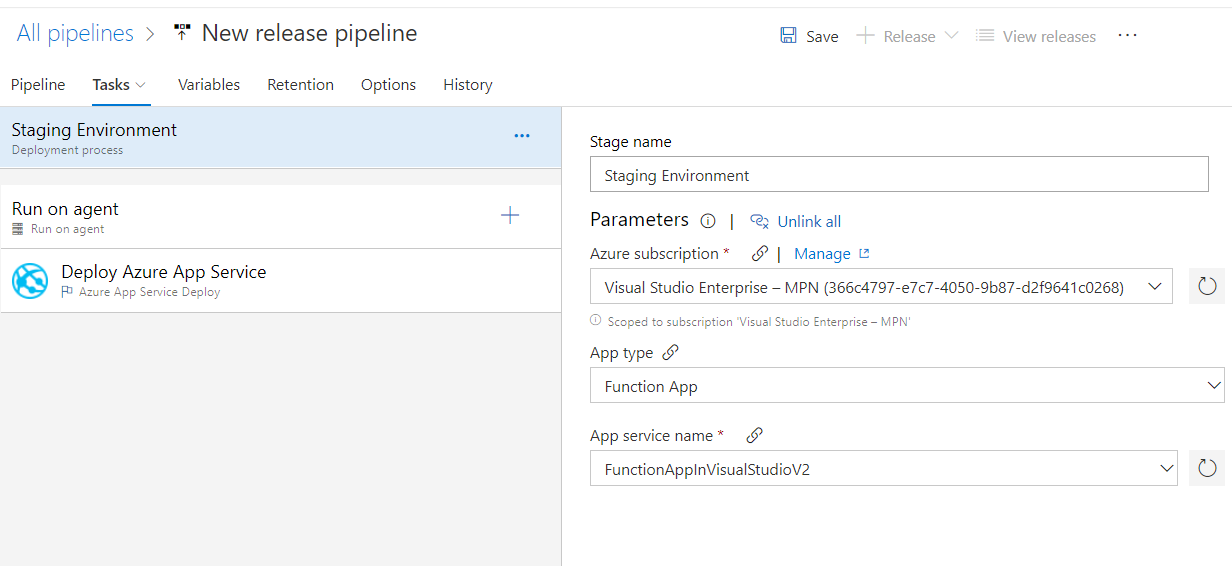
- After authorizing the subscription, you need to ensure that you have chosen the App type to be Function App, and then choose the function app name in the App Service name to which you would like to deploy the package, as shown here:
If you don't see your subscription or app service, refresh the item by clicking on the icon that is available after the Authorize button of the above screen screenshot.
- Click on the Save button to save the changes. Now, let's use this release definition and try to create new release by clicking on Create release, as shown in the following screenshot:
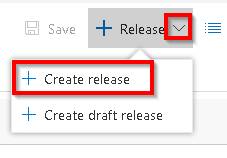
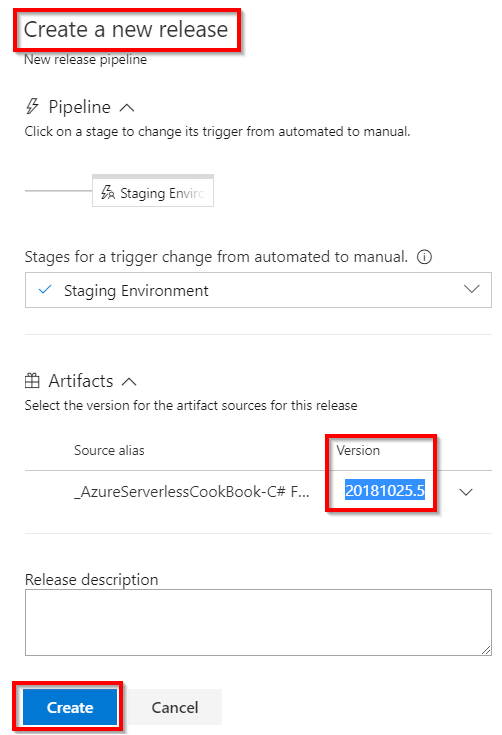
- Next, you will be taken to the Create a new release popup where you can configure the build definition that needs to be used. As we have only one, we can see only one build definition. You also need to choose the right version of the build, as shown here. Once you review it, click on the Create button to queue the release:
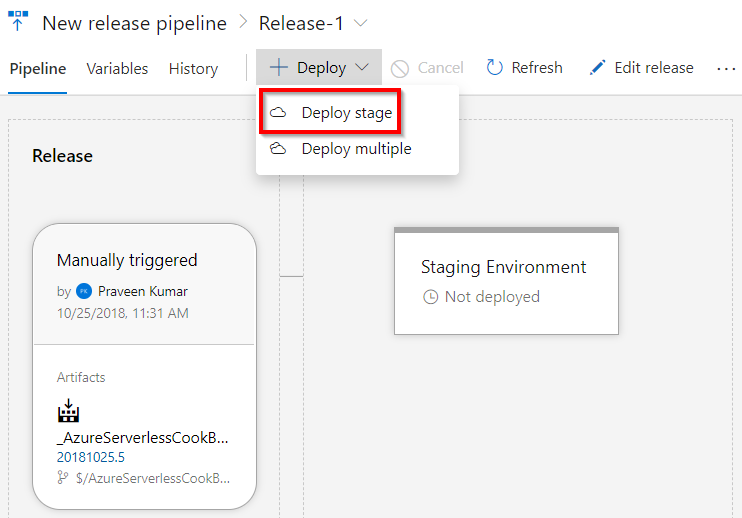
- Clicking on the Create button in the preceding step will take you to the following step. Click on the Deploy stage button as shown here to initiate the process of deploying the release:
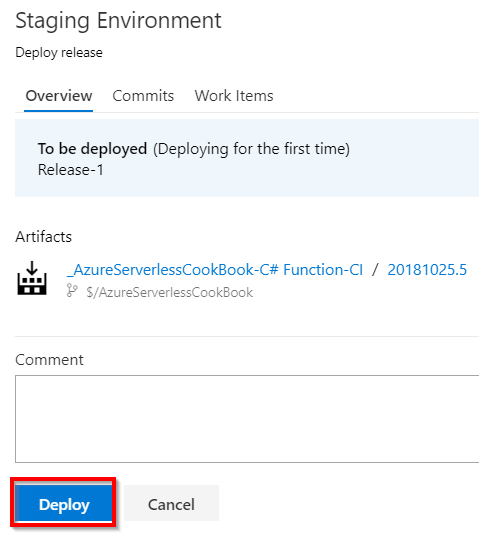
- You will now be prompted to review the associated artifacts. Once you review them, click on the Deploy button as shown here:
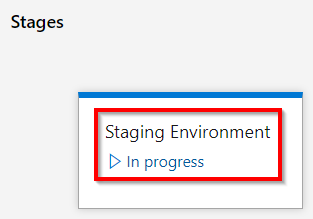
- Immediately, the process will start and it will show In Progress to indicate the progress of the release, as shown here:
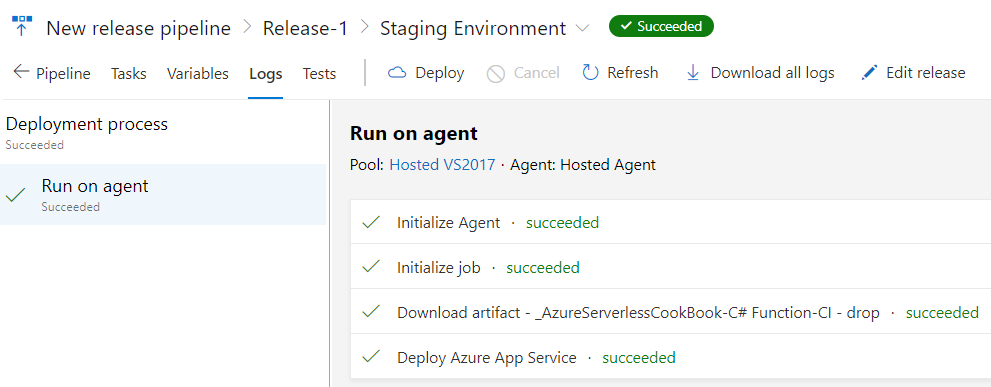
- Click on the In Progress links shown in the previous screenshot to review the progress. As shown next, the release process succeeded:
