Self-Guided Face Mapping
What does that mean? Simply put, it means you can manipulate and control the size, shape and details of a face using two simple shapes and some basic, easy-to-remember guidelines to create faces from your imagination. This allows you total freedom to explore and develop a stylized look. It’s freeing because you can draw faces anywhere, anytime, with no model or photo to work from. The face emerges from the guidelines, allowing you to see work that truly comes from within.
By using a circle to represent the head mass and an oval to represent the basic front plane of the face and positioning that oval around the mass, you can create front, side and three-quarter view portraits. You can also adjust the attitude of the head to upward tilt, downward tilt and anything in between. Simple and basic guidelines show how the facial features line up. They can be drawn freehand with no measuring—all you have to do is divide in half! This truly allows for each face to morph into its own and allows your style to emerge.
As you go through the stepped-out process in this chapter, keep in mind that your faces will not and should not look exactly like mine. I’ve tried to keep the faces very basic so they guide rather than distract you. It’s important to listen to your own work. If your eyes keep coming out a certain way, try to work with it rather than fight it. This could be significant in developing your own style. Start simple, creating basic facial features at first if you aren’t used to drawing faces. Don’t get distracted by the work of others. Put those blinders on and focus on what your work looks like and build on it. Remember that artists who have a particular look to their work have most often put in many, many hours of practice for their styles to emerge.
Pencils and Drawing Tools
Pencil leads are classified by a letter or a letter plus a number. H stands for hardness, and B stands for blackness. The higher the H number, the harder the lead and the lighter the lines. The higher the B number, the softer the lead and the darker the lines.
Blending stumps are used to smudge, soften and move the graphite on the paper. They can be cleaned by wiping them on a scrap of paper or a chamois cloth and sharpened on a sanding block or sandpaper.
Kneaded erasers are self-cleaning and lift the graphite off the paper. You can control the amount of lift by the intensity of the pouncing. They don’t leave eraser nubbies on your paper and can be cleaned by simply kneading them.
Left Three-Quarter View
Here are the face-mapping guidelines for a figure looking to her left in three-quarter view.
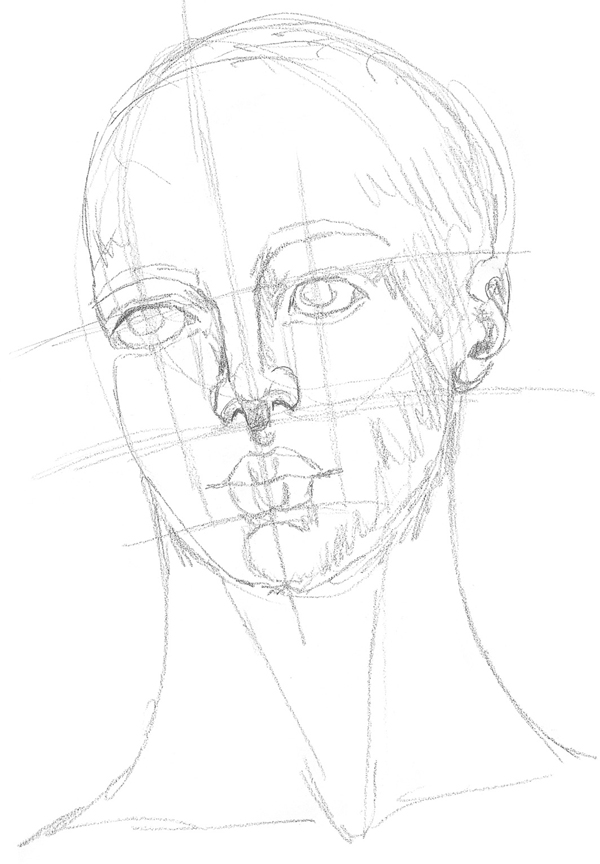
Three-Quarter View With Slight Downward Tilt
This image shows the face-mapping guidelines for a three-quarter view with a slight downward tilt to the figure’s right.
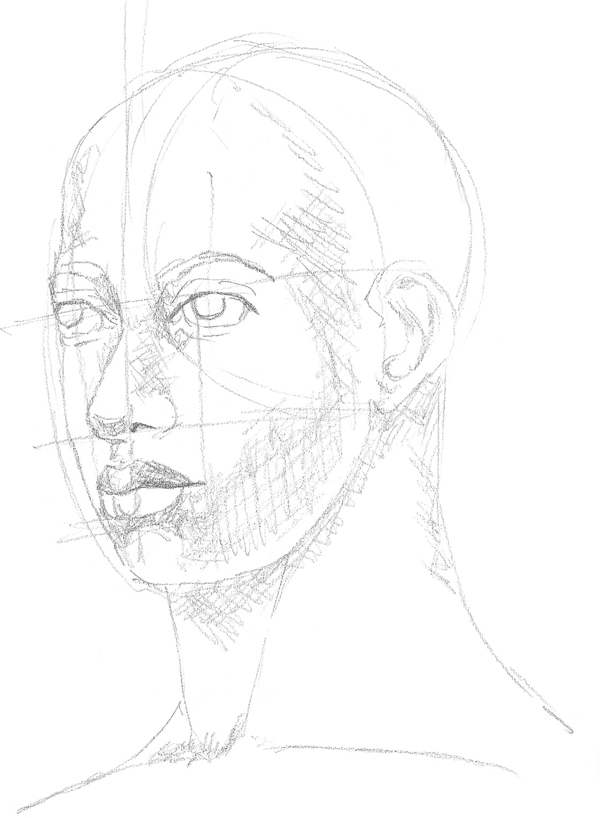
Right Three-Quarter View
These face-mapping guidelines are for a figure looking to her right in three-quarter view.