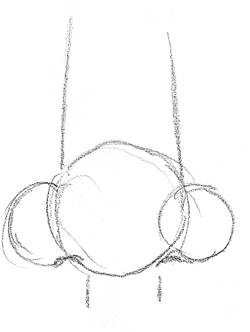
You can create a variety of noses by simply using circles. Depending on the position of the circles, you can create distinctive looks. In general, the bottom of the nose is one eye width (the edges are straight down from the tear ducts on the face map). Small adjustments can have big effects, so play around to find a nose that fits your face.
drawing/sketching paper
pencil
Draw a center circle (ball of the nose) and two smaller circles, one on each side of the central one, overlapping it. By moving the nostrils up and down you can create different noses.
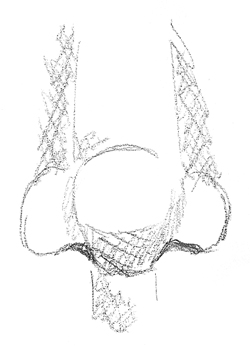
Add crosshatching to each side of the nose, on the underside of the ball of the nose and to the philtrum area. Darken the nostrils, being careful not to make the shading circular.

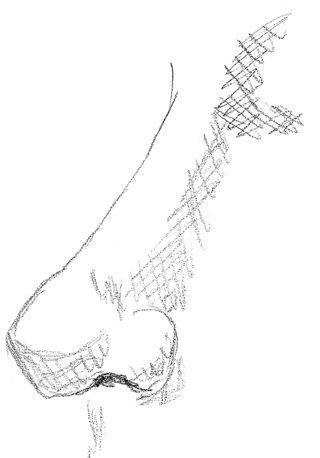
Draw a circle (ball of the nose) and two smaller circles, one almost completely overlapping the ball (this will be the nostril on the side of the face that you don’t see) and one barely overlapping the ball of the nose.

Add crosshatch shading to the eye socket areas, the side of the nose that’s showing, under the ball of the nose and the philtrum area. Darken the nostrils.

Draw a circle and then draw one smaller circle to the side of the first one. You can move this circle up and down to create different noses.
Shade from the nostril upward on the side of the nose.
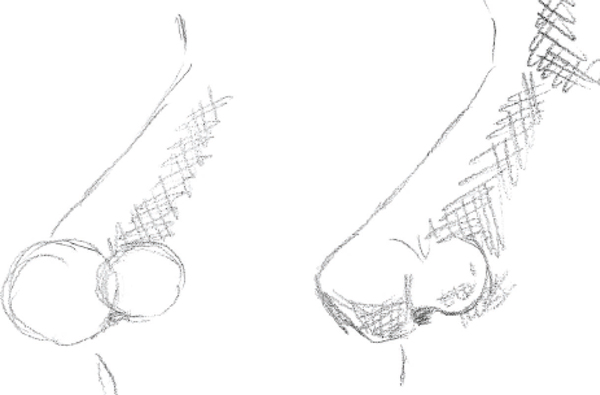
By placing the nostril (small circle) in a slightly higher position, you can easily change the look of the nose a bit. You can try placing the nostril circle(s) in various positions to the ball of the nose (large circle) to create a variety of noses.