
This view may seem a bit daunting because the features are at an angle and require adjustments, but it’s my favorite to draw. Mapping the face will guide you through the adjustments and feature placement. The circle and oval help to place the ear correctly.
blending stump
kneaded eraser
drawing/sketching paper
pencils
Draw a circle. Then draw an oval on top of the circle to one side or the other, keeping the tops of both even with each other.

Draw a vertical midline halfway between the side of the oval and the side of the circle (1). Draw another vertical line dividing the space between the side of the oval and the midline (2). Draw one more vertical line dividing the last section of the oval in half again for the other eye line (3).
Draw a horizontal midline through the circle for the horizontal eye line (4). Draw a line halfway down from that to form the nose line (5). Draw another line halfway down from the nose line to form the line the mouth’s lower lip will rest on (6).

Add the eyes to the intersections between the horizontal and vertical eye lines. The pupils might not be exactly centered in this view, depending on the direction the subject is looking. Draw the eye shapes accordingly. Note that the eye on the side of the face that is showing the least will show less as it’s tucked behind the nose a bit.
The nostril on the side showing the most in this view will line up with the inside corner of the eye, but the other nostril will show little, if at all. Both sides of the mouth will line up with the eye midlines in this view. The ear will fall between the horizontal eye and nose midlines and angle back slightly.
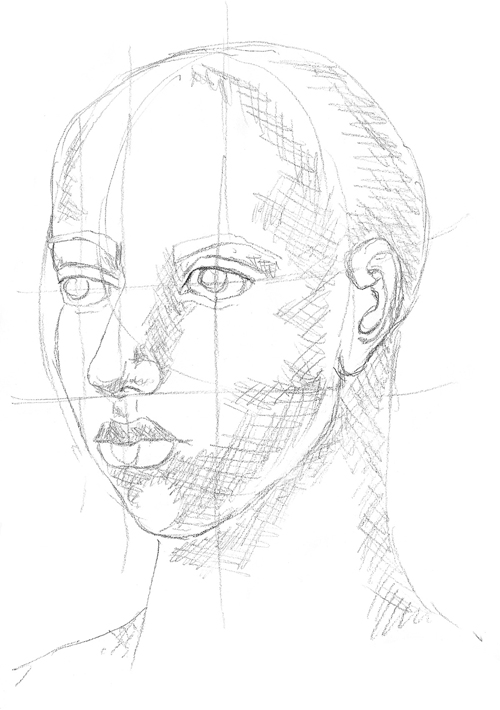
Use crosshatching to shade areas such as the inside corners of the eyes, the side of the nose that is on the less visible side of the face, under the nose, under the lower lip and chin. Also lightly shade the more exposed side of the face along the jawline to establish the cheekbone area.
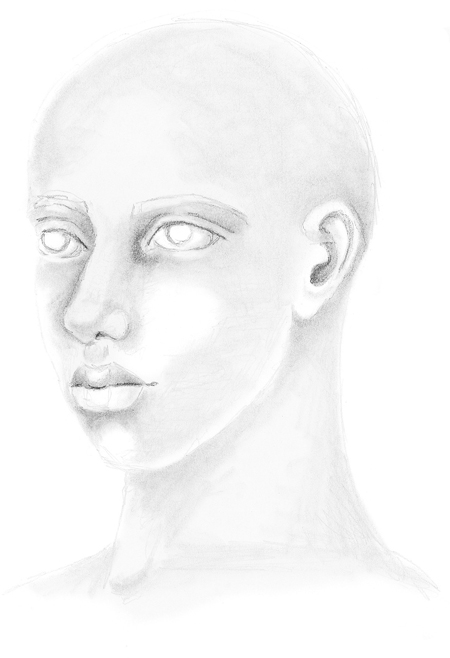
Continue on with the blending stump and kneaded eraser as in the other face views.