
Working with complementary colors is the extreme in color play. The combinations of color complements are dynamic as they play up each other’s intensity, and, contrary to what you might think, they lend a soothing, balanced air to your work. By blending these colors together, they become more neutral and are perfect for creating portraits with depth.
Surface
Strathmore inkjet watercolor paper
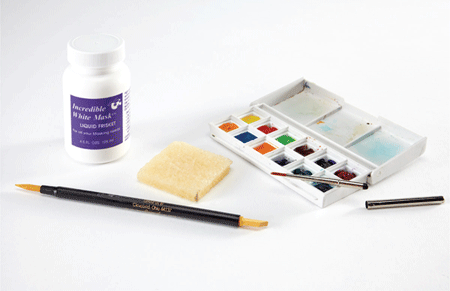
Watercolors
complementary colors of your choice
Brushes
no. 8 round
Other Supplies
baby wipes, Incredible Nib or no. 6 round, liquid frisket or clear wax crayon, liquid frisket remover tool (optional), scanner/printer or lightbox, stencil
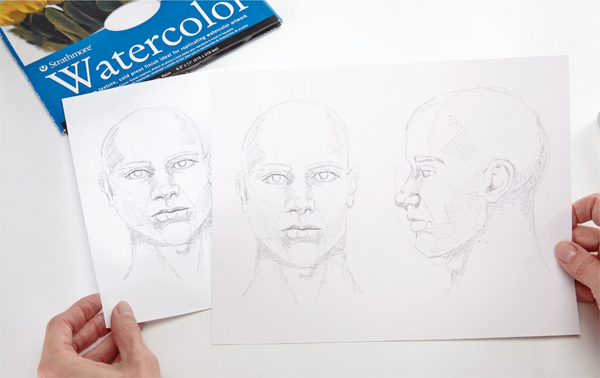
Print a saved sketch onto Strathmore inkjet watercolor paper, or you can trace your sketch over a lightbox.

Use an Incredible Nib tool or a no. 6 round to apply liquid frisket (or use a clear wax crayon) to highlight areas on the face, including the upper eyelids, the whites of the eyes, the bridge of the nose, ball of the nose, nostrils, the philtrum area, lower lip and the outer fold of the ears. Let air dry.
The Incredible Nib wicks up the frisket and allows you to apply it like a marker. If you use a brush, be sure to wash it thoroughly after use. The frisket ensures that you will have white whites in your final painting.
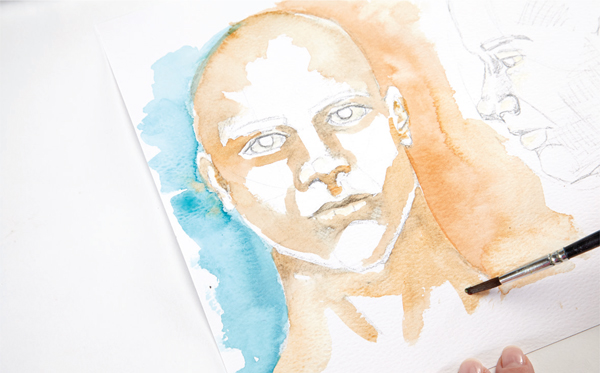
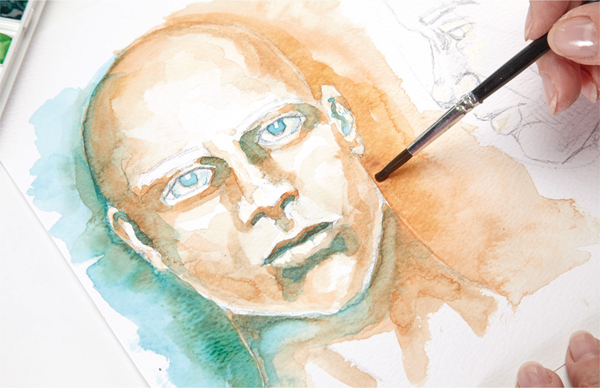
Choose a color combination from the Complementary Color Slides in Chapter 4. Apply the darker/cooler of your chosen colors (I used Phthalo Turquoise) to the left of the face with a very wet no. 8 round. Then apply the lighter/warmer color (I used New Gamboge) to the right side.
Add the lighter/warmer color to the shaded areas of the face with a very wet no. 8 round. Start around the outside edge of the forehead, painting in toward the temple a bit. Then paint around the eye socket areas, down the sides of the nose, underneath the nose, the upper lip, the lower lip, under the lip, the cheekbones above the jawline, under the chin in the neck area and the inner ears. Let air dry.

Using a darker concentration of the lighter/warmer color and a no. 8 round, add darker touches to the edges of all the areas you just shaded. Let dry.
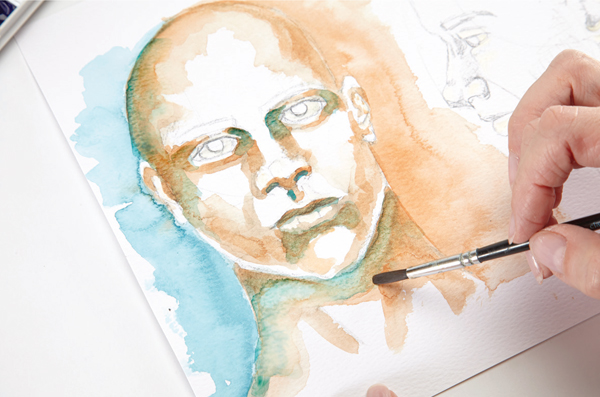
Use the darker/cooler color to create the darkest shadows. With a very wet no. 8 round, apply the color to the left side of the top of the head in the temple area, a little into the outer corners of the eye sockets, the nostril area, a little in the philtrum area, the midline of the lip, under the lip and under the chin.

Use a no. 8 round to add a darker concentration of the darker/cooler color to the eyes, to the inner ear folds, the middle of the lip and under the chin. Let dry.
Keep layering colors with a no. 8 round, letting them dry, then adding more on top to create the tonal values of the skin. Let dry.
Build up layers in the background as well. You can mix the complements together to create additional colors in the background. Let dry.
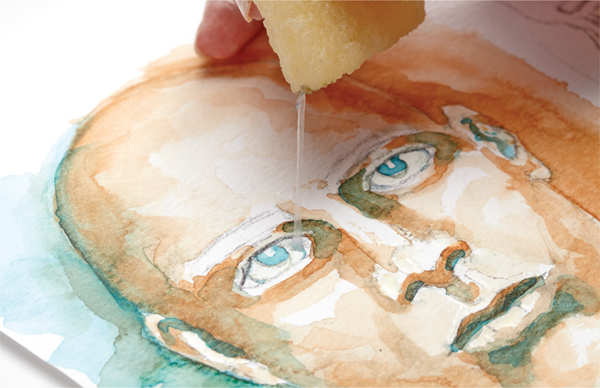
Remove the liquid frisket by gently rubbing and pulling with a remover tool or with your fingers. (If you used wax crayon, you won’t be able to remove it, so it will remain part of the piece.) Add additional watercolor to help blend the white areas into the surroundings as needed. Let dry.

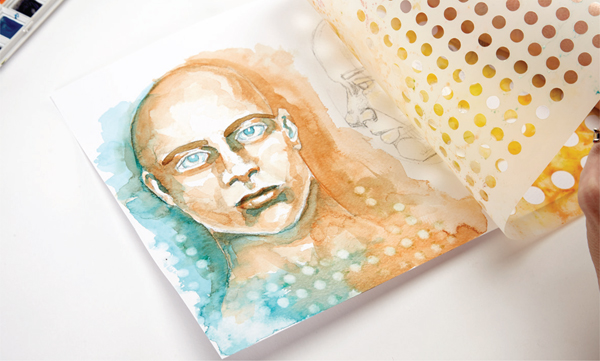
Lay a stencil on the background and use a baby wipe to lift some of the paint to reveal the design.