For the final project we’ll go a little old school and dig out those oil pastels and use a very old method called “sgrafitto” to scratch design into the applied pastel. You may have avoided using oil pastels because you think they’re messy and hard to use, but this project will show a way to use them that leaves your hands clean and your art beautiful!
Surface
Strathmore Artagain black paper
Oil Pastels
Black, Blue-Gray, Flesh Ochre, Burnt Sienna, Luminous Yellow, Violet Ochre, White, Yellow Ochre
Other Supplies
ballpoint pen or stylus, sgraffito tool or other scratching tool, Wipe Out tool or other blending tool

Place a copy of a sketch on top of a piece of Artagain paper or thick black pastel paper. Use a stylus or ballpoint pen to trace all the lines. This will leave embossed marks on the black paper.

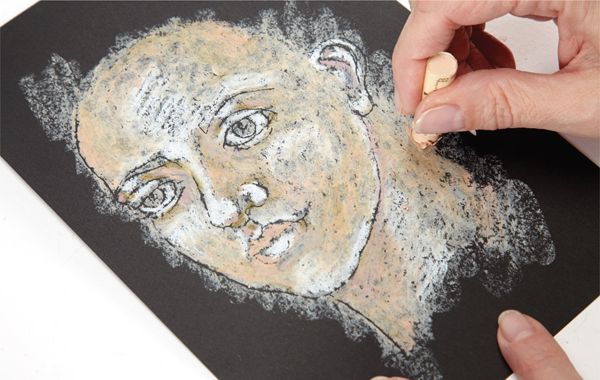
Color over all of the embossed marks with a Flesh Ochre oil pastel. You should be able to clearly see the embossed lines.
Oil pastels are pigments mixed with a binder to create a soft, easily blended, slightly greasy stick. The binder is made of mineral oils and waxes. Because oil pastels include mineral oil, they never really dry.
There are many different brands from high-end artist quality to very inexpensive school grade, and each will behave differently. I prefer Sennelier for this demo because they are so smooth and creamy. They’re expensive, but you can buy them individually, which makes them a bit more affordable. But use what you have—there’s no need to buy new ones.

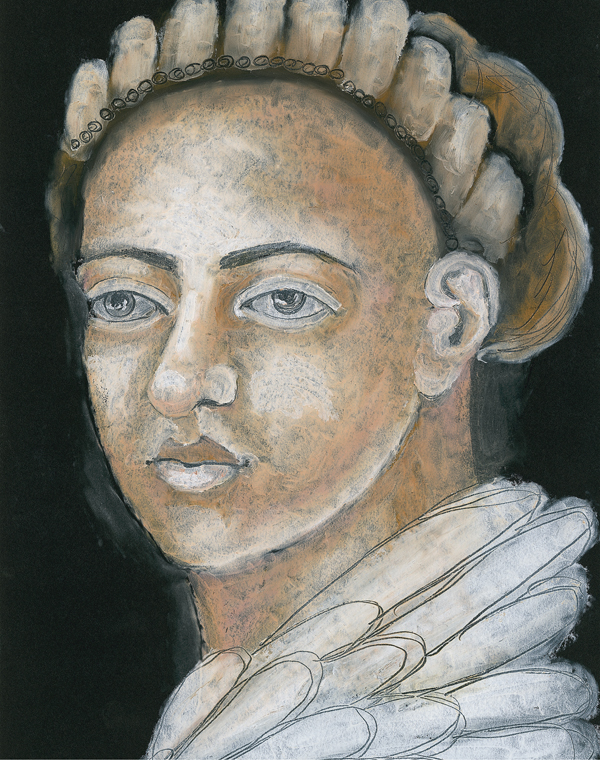
Add White oil pastel to highlight areas, including the middle of the forehead, on the brow bones, the bridge of the nose, the ball of the nose and nostril, each upper eyelid, a little highlight underneath the eyebrows, the whites of the eyes, lower eyelids, cheekbones, above the upper lip, on the lower lip, the ball of the chin, the jawline, the outer folds of the ear and the side of the neck.

Add Yellow Ochre directly to the shaded areas, including the outside edges of the forehead, the eye socket area, the side of the nose, under the nose, under the lower lip, along the jawline (next to the white highlight) and under the chin on the neck.

Use Violet Ochre to deepen the shade on the inside corners of the eyes, under the nose, under the lower lip, underneath the jawline and to the inner folds of the ear.

Add touches of Blue-Gray to the darkest areas, including the innermost corners of the eyes, under the bottom lip and in the inner ear.
Use Luminous Yellow to pull all of the colors together, applying it to all areas except for the white highlights, blending as you color.
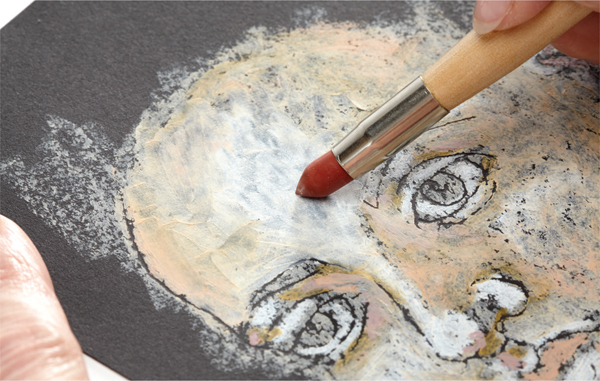
Use the Wipe Out tool to blend, using the wider tip for the larger areas and the smaller tip for the intricate areas around the eyes, ear and lips. Reestablish white highlights as needed.

Add Black and Burnt Sienna to the hairline and blend with the Wipe Out tool. Add decorative elements to the hair as desired. Color White below the neck area, and blend with the Wipe Out tool to create a base to scratch into for the clothing.

Use a sgraffito tool to gently scratch the hair, clothing and additional details into the work. Scratch out black areas for the pupils of the eyes, the nostril and to reestablish eye details as needed.