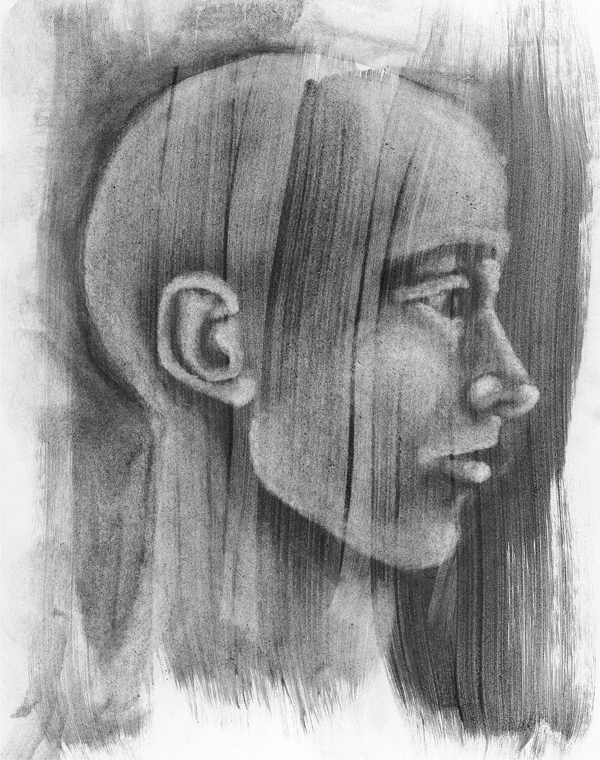
Reductive drawing helps you turn your focus from thinking about the line to thinking about value, tone and shape. Begin with a background covered in Liquid Pencil Sketching Ink (you can also use a woodless graphite pencil to rub graphite onto the paper). Then use vinyl and kneaded erasers for drawing tools as you lighten the value to create the imagery. By varying the pressure and the type of eraser as you lift the dry Liquid Pencil, you can achieve a wonderful range of tonal values. At the end you can also use a wet brush to further play with this fun medium.
10" × 8" (25cm × 20cm) 90- or 140-lb. (190 or 300gsm) hot-pressed watercolor paper
1-inch (25mm) flat
no. 8 round
black pen, blending stump, electric eraser (optional), kneaded eraser, lightbox, rewettable Liquid Pencil Sketching Ink or a woodless graphite pencil, sharpened pencil-type eraser, vinyl eraser
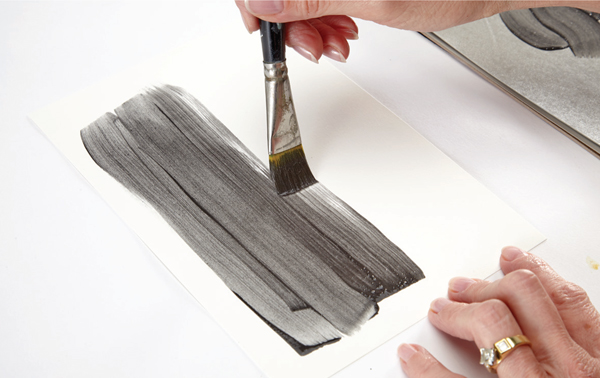
Apply Liquid Pencil to hot-pressed watercolor paper. (Hot-pressed paper has more sizing, which prevents the pencil from soaking into the paper, so you’ll be able to remove the color more easily.) Apply the liquid directly to the paper, then blend with a 1-inch (25mm) flat brush, making strokes from top to bottom only. Avoid overworking the color. Let air dry. Note: you can also use a woodless graphite pencil to rub graphite onto the paper.
Liquid Pencil Sketching Ink, a blending stump and a variety of erasers are necessary tools for this project.

Take the sketch you want to work from (or a copy) and go over the outlines with a black pen. I use artist’s pens since they don’t soak through the paper.

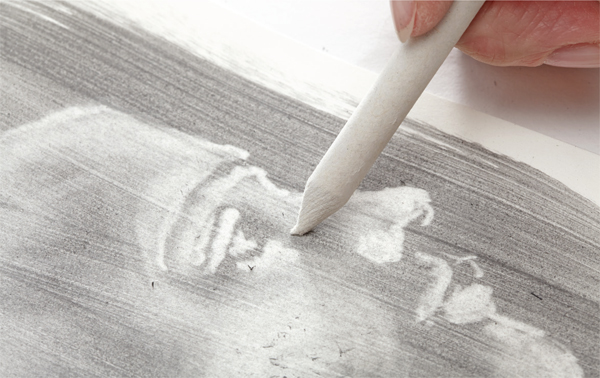
Lay the traced sketch on a lightbox and place the painted paper on top. Use an electric eraser or a pencil-type eraser that you can sharpen to establish the outline of the portrait, going along the inside of the darker lines. Erase the raised parts of the ear to establish its folds. Now establish the lower lip, erasing most of the graphite. Erase the white part of the eye. Erase any other highlights completely.

At this point you can remove the paper from the lightbox. Establish and refine the highlights. Work back and forth between a kneaded eraser, a vinyl eraser and the sharpened erasers. Start blending in the hard outline of the top of the head. Blend the cheek areas, the back of the head and the jawline. Develop the tones. Don’t eliminate the dark dark areas; just lift and blend with the eraser as needed. Use a blending stump to soften and blend the details.
Use a vinyl eraser to redefine the details that you started with the electric eraser, smoothing them out. Vary the pressure to lift more as needed. Touch up all the hard lines, blending them into the face. As your work progresses, it will begin to feel like you’re painting with an eraser instead of a brush.
If the kneaded eraser gets too dirty, you’ll feel it begin to slide more, and then you can just knead it until it looks clean again.
Use a blending stump to soften the details. You may need to use an electric eraser to redefine highlights and bring the white of the paper back. Use a blending stump to start blending the shadows, making sure there are no hard lines.

After you’ve blended, use a wet no. 8 round to reactivate the background around the head, letting the graphite puddle out. This will eliminate the outside lines and set the background off from the face.