
Painting portraits outside the normal color palette can be surprisingly fun. By using the color wheel you created in the “Hue, Tint, Tone and Shade” exercise in Chapter 4, you can get a peek at the way a single color can play out when mixed with white, gray and black. Your color choice might be outside your comfort zone, but when you look at its tonal qualities, you can begin to see the possibilities for creating one-color portraits.
10" × 8" (25cm × 20cm) 140- or 300-lb. (300 or 640gsm) cold-pressed watercolor paper
black, white, gray (or mix white and black together) and a color of your choice
no. 8 round
baby wipes, lightbox (optional), palette, Stabilo All aquarellable black pencil, stencil
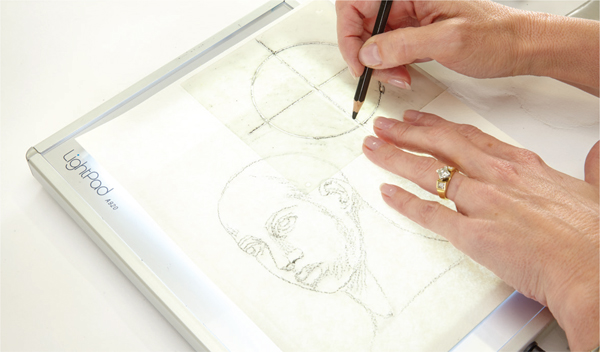
Trace a face sketch using a Stabilo or other water-soluble black pencil on watercolor paper, using a lightbox or other light source. Add a color wheel to the paper on the upper right corner (use a stencil, draw it freehand or trace the template at the end of the book).

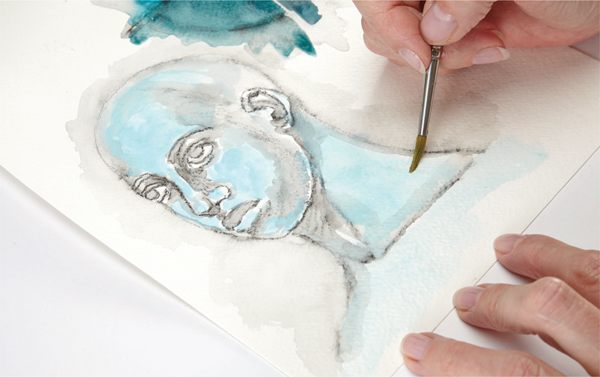
Remove the paper from the lightbox. Activate the pencil with a wet no. 8 round brush. Allow the pencil to bleed out in a watercolor effect into the shaded areas, both around the face and in the background to the right of the head. The cold-pressed watercolor paper will absorb a lot of liquid, so be generous with the water. Soften the edges of the color wheel with the wet brush as well.
A neutral, midtone gray palette is ideal for mixing accurate color values. Paint will show true on a gray background. I love Jack Richeson Grey Matters disposable paper palettes for the ease of use, easy cleanup and especially the lovely neutral gray background.

Refer to your color wheel from the “Hue, Tint, Tone and Shade” exercise in Chapter 4 to determine the hue you want to use. (I’m using Matisse’s Southern Ocean Blue.)
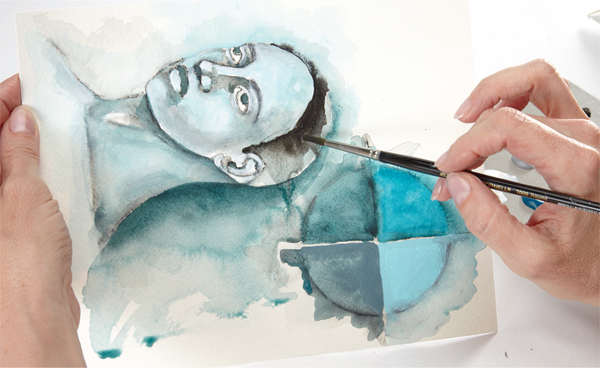
Put a small amount of each of the paints onto a palette. You will be mixing the tint, tone and shade of your chosen color as you work your way around the simple color wheel. Start by painting the straight hue in the upper left section of the color wheel, right over the wet pencil. The paint will bleed out from the wheel. Mix the tint (white + the hue), then paint this mixture in the upper right section of the wheel. Mix the tone (gray + the hue), and paint this mixture in the lower right section of the wheel. Mix the shade (black + the hue), and paint this mixture in the remaining color wheel section.
Use the tint mixture to establish highlight areas first, including the cheekbones, forehead, nose and lower lip. Use a very wet no. 8 round throughout the painting process to help with blending.
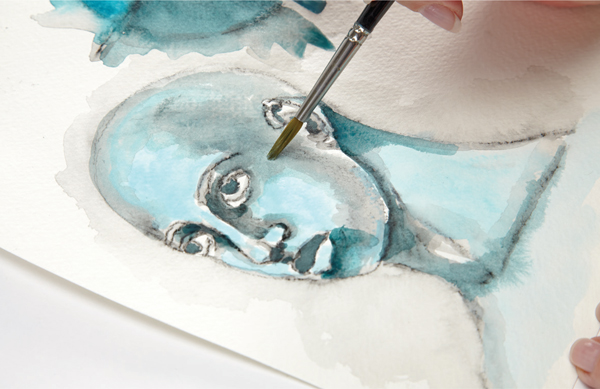
Use the shade mixture to establish the shadowed areas, including the inside corners of the eyes, the inner ear, the upper lip, under the lower lip, under the nose and under the chin. Continue using a very wet no. 8 round.

Continuing with a very wet brush, use the tone mixture to create the midtone areas. These areas between the highlights and darks are along the jawline, at the side of the nose, under the eyes, around the nostrils, under the chin, behind the ear and around the outside edge of the head.

Use white acrylic paint to add pop to highlight areas, including the nose, the ball of the nose, a little on the nostril, the lower lip, a bit around the ear, the collarbone, the shoulder, the chin, along the upper jawline (not underneath it), the upper eyelid and below the lower lid. Use a wet no. 8 round to blend the white into the other colors to create the tones you want.
If needed, redefine the facial details with a water-soluble pencil and reactivate with a wet brush.
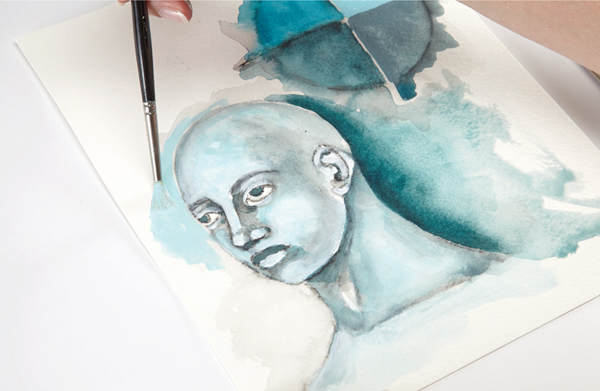
Add additional shade mixture as needed to further define the shadowed areas, including the background area on the right side of the face. Use a very wet no. 8 round. Add tint to the left side of the face, blending out with a wet brush.
Use a water-soluble pencil to add the hairline. You can dip the pencil into water to make the lines darker. Use a wet no. 8 round to blend out the hairline from the pencil. Let the hair flow into everything else.

Place a stencil over the background, and use a baby wipe to remove the paint through the stencil design for a “reductive” stencil method. Emphasize the design by adding paint through the stencil as well.
You can use pens to journal on the page if you like. I added a note about the color I used.