Chapter 9: Managing Computer Files and Folders

You can manage files and folders on your laptop using File Explorer. File Explorer enables you to perform a variety of file management tasks, such as copying and moving files, renaming files, and deleting files when you are finished using them. A folder you open in File Explorer appears in its own folder window.
Move and Copy Files and Folders
Understanding File Formats
You can create all kinds of different files on your computer; each type of software program you use creates different types of file formats. For example, a word processing application allows you to create document formats, whereas a graphics program creates graphic file formats. A file format is how information is encoded and saved to the file. The file format determines what sort of programs can read the file; for example, a photo app may not be able to read a document file format, but can read other types of digital image formats.
File Extensions
When you create files, you must give them distinct names; a default file format is also assigned. Some programs allow you to assign other, similar file formats. File formats appear as extensions added onto the filename preceded by a dot, such as Letter.doc. Usually, you cannot see a file extension unless you choose to view it. If you ever encounter a problem opening a file, it might help to view the extension to see what sort of format the file is.
Program and System Files

You can recognize program files by their .exe extensions, which means executable. When viewing Windows system files, you quickly find a variety of file types pertaining to different parts of the operating system, such as DRV for device driver or DLL for dynamic link library. Other than recognizing these as important parts of Windows, there is no reason to try and open these file types other than the EXE format. If you open an EXE file, you are opening a program.
Document File Formats

You can create document files in word processing programs, such as Microsoft Word or WordPad (which installs with Windows 8), WordPerfect, and Corel Write, just to name a few. The DOC format is one of the most popular file formats for files you create with a word processor app. Other document formats include TXT, RTF, and ODT. Adobe’s PDF format is another alternative to other document types, and can be read by a PDF reader that you can download free online.
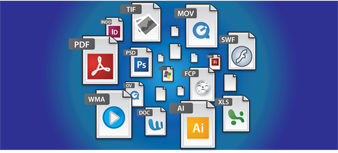
Graphics Formats

Graphics and drawing programs, such as Windows Paint, Adobe Illustrator, and Paint Shop Pro, are used to create, edit, and manage graphics files. Graphics can include clip art, web graphics, logos, backgrounds, illustrations, and other digital artwork. Popular graphic file formats include GIF, JPEG, BMP, TIFF, and PNG. Each program may also utilize its own distinct format, such as AI for Adobe Illustrator. Assign a common format, such as PNG, if you want to share the file with non-Adobe Illustrator users.
Photo File Formats

If you have a digital camera, you can take pictures and store them on your laptop, sharing them with others through e-mail or social websites, or saving them to flash drives and other backup media devices. Photo file formats are the same as graphics file formats: GIF, TIFF, PNG, and JPEG. Digital cameras also provide the RAW format, which produces images without file compression or the conversion process found with other formats.
Multimedia Formats
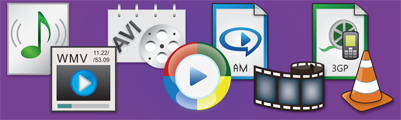
Music, movies, and video files are easy to identify with their file extensions. Music files use formats such as MP3, WMA, or WAV. Music files can also utilize AIFF or AU formats. Video files include the AVI, MP4, MPEG, WMV, or MOV formats. Movies you create with Flash, for example, can use the SWF format. When you open a multimedia file, Windows 8 automatically attempts to open the required app to play the file.
Other File Formats

As you view and create files on your computer, you are bound to encounter numerous other file formats. For example, Excel’s XLS spreadsheet format or PowerPoint’s PPT for presentations are common in the Microsoft Office suite of programs. If you are creating web pages, the HTML and XHTML formats are used. Compressed files are often stored in the Zip file format. Just remember, the type of format often dictates what program is used to read the file.
View Files and Folders
You can use File Explorer much like a digital filing cabinet, with folders to store and organize your files and programs. Each folder contains tools for searching, navigating, and organizing the files and subfolders within it. File Explorer contains four main folders, called libraries, for storing files: Documents, Pictures, Music, and Videos. The Documents library is where word processor files, spreadsheets, and web pages are stored by default. The Pictures library acts as a central repository for digital image files. The Music library is where audio files that you download or rip are saved. The Videos library stores video files. In previous versions of Windows, this feature was called Windows Explorer.
View Files and Folders

 Open File Explorer. From the desktop, click the File Explorer icon (
 ).
).
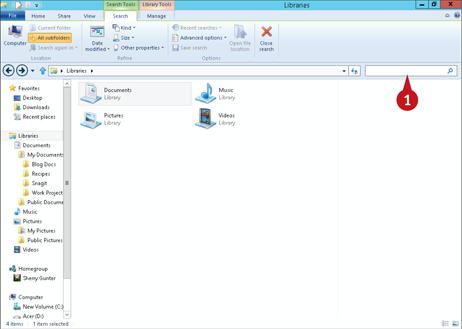
File Explorer opens with the main Libraries listed.
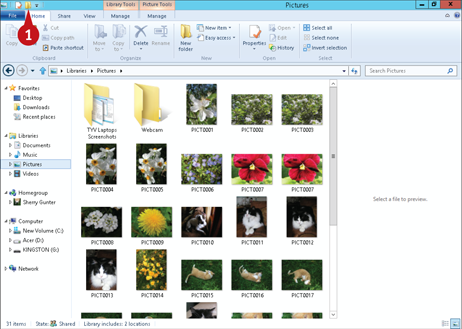
 Click Documents, Pictures, Music, or Videos.
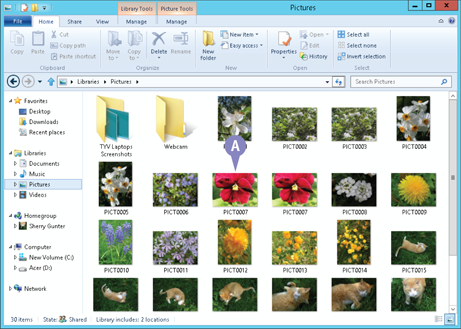
A File Explorer folder window opens, displaying the contents of the library you chose.
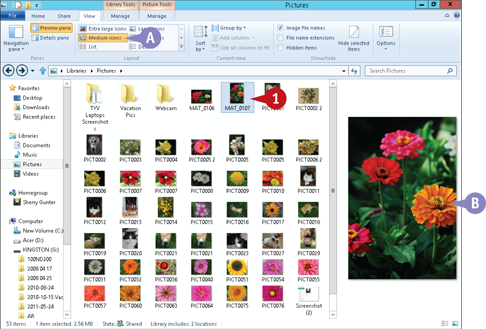
A In this example, the Pictures folder displays a list of picture files displayed as large icons in the File list.
Navigate Folder Windows
Folder windows in File Explorer contain several panes to make it easier to find the files you need. Folder windows also offer several options when it comes to how files are displayed in the File list — for example, as icons of various sizes, in list form with details such as size and date created, and so on. In addition, each folder window contains a Ribbon with various tabs of toolbar buttons for organizing, sharing, and burning files; creating a new folder; changing how files in the folder window are displayed; and getting help. A Search field is also present.
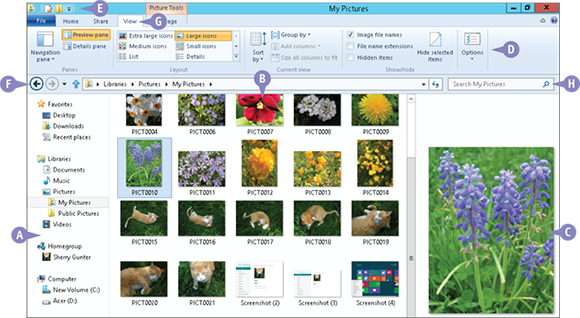
A Navigation Pane
This pane contains clickable links to other folders on your Windows system.
B File List
Files in the selected folder are listed in the File list.
C Preview Pane
When you click, or select, a file in the File list, a preview of that file appears in the Preview pane. (You will learn more about selecting files later in this chapter.)
D Folder Window Ribbon
Access folder and file options here. Note that specific options differ depending on what library is open.
E Quick Access Toolbar
This toolbar at the top of the window displays common toolbar buttons; you can edit these to suit the way you work.
F Navigation Arrows
Click the arrow buttons to move back and forth between open folders.
G Change Your View
Click the View tab to change the way in which you view items in your folder list and preview pane.
H Search Box
Use the Search box to find files in the current folder. You will learn more about searching for files later in this chapter.
Open Files and Folders
You can open folders and files using the File Explorer window. When you open a file from within File Explorer, Windows 8 automatically launches the application associated with that file, and then opens the file in that application’s window. For example, if the file you want to open is a rich text file, Windows 8 launches the WordPad application and then displays the contents of the file in the WordPad window. You can open the file in a different program if you choose, however.
Open Files and Folders
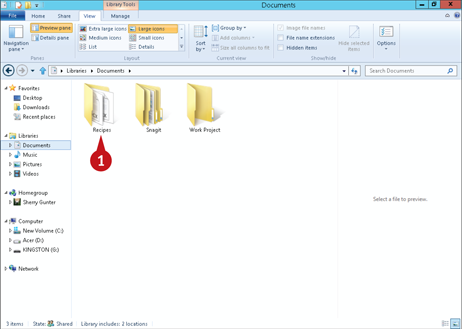
From File Explorer, double-click the folder that contains the file you want to open.
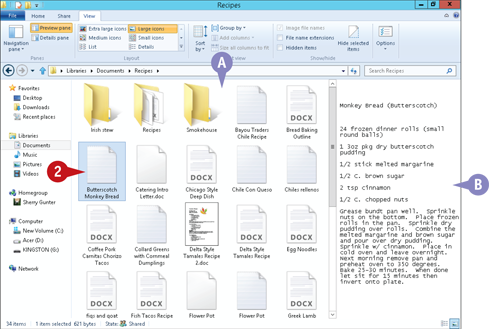
A The folder opens and its contents appear in the File list.
Double-click the file you want to open.
Windows opens the file in the default program.
B If the Preview pane is open, you can preview a selected file before fully opening the file.
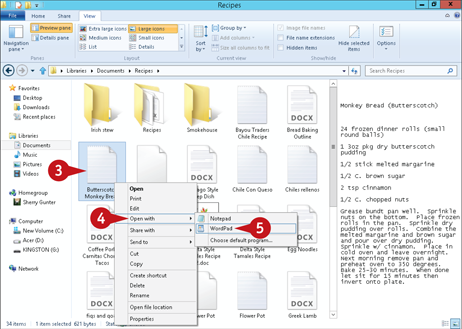
 Alternatively, to open the file in a different program, right-click the file.
 Click Open with.
 Click the program you want to use to view and/or edit the file.

C Windows opens the file in the program you chose.
Note: To change the program that Windows uses to open a certain type of file by default, select Choose default program from the Open With menu, click the program you want to use in the Open With dialog box, select the Always use the selected program to open this kind of file check box, and click OK.
Simplify It
How do I open files on external media?
Insert your CD or DVD and follow these steps:
Open the File Explorer window.
Click Computer.
In the Computer directory, double-click a drive to view its contents.
Open the folder containing the file you want to view.
Open the file.
Create a New Folder
File Explorer contains several predefined folders, or libraries, such as Documents, Pictures, Music, and Videos. In addition to these, you can create your own unique folders. Creating folders makes it much easier to keep your files organized. For example, you might create folders for each project you are working on to store all the files associated with each project in one easy-to-find location; or you might create a folder to store all your photographs from a recent trip in a designated subfolder that helps you clearly identify its contents.
Create a New Folder
With the folder in which you want to create the new folder open in File Explorer, click the New folder button ( ).
).
Note: You can also right-click a blank area of the list and choose New, Folder from the pop-up menu that appears, or click the New folder button ( ) found on the Ribbon’s Home tab.

A Windows creates a new folder with the default name, New folder, selected.
Type a descriptive name for the new folder and press  .
.
Select Files and Folders
You can use File Explorer to manage your files — for example, to copy, move, rename, delete, rate, and tag them. Before you can perform any of these actions on a file, you must select the file. That way, Windows knows exactly which file you want to work with. You can select files one at a time or select multiple files at once — useful, for example, if you want to move several files into a new folder.
Note that although the steps here cover selecting files, the technique for selecting folders is the same.
Select Files and Folders
Select a Single File
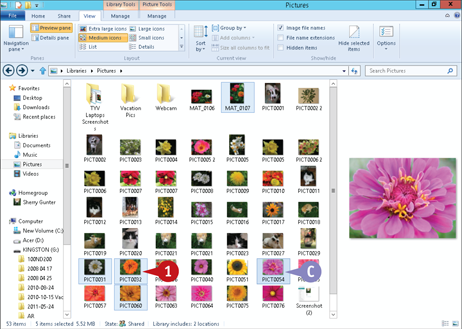
Click a file.
The file is highlighted in the File list, indicating that it is selected.
A In this example, the File list displays files and folders as medium icons.
Note: You can click the Ribbon’s View tab to change how files and folders are listed in the File list area.
B A preview of the selected file appears in the Preview pane.
Select Multiple Files
While pressing  , click each of the files you want to select.
C Each file you +clicked is selected.
Note: To select multiple files that are grouped together, click the first file in the group and, while pressing  , click the last item in the group. The first file, the last file, and all the files in between will be selected.
Note: To deselect all selected files, click an empty area in the File list. If you have selected multiple files but need to deselect only one, press and hold and click the file you want to deselect.
Move and Copy Files and Folders
Most likely, you will populate File Explorer with many files and folders over time. If you place a file in the wrong folder by accident, or simply create a new folder to store documents you have already created, you must move your files to the correct folder. In addition to moving files, you can copy them. Copying a file creates two versions of it — one in the original location and one in the new location.
Note that the steps for moving and copying files, covered here, are the same as the steps for moving and copying folders.
Move and Copy Files and Folders
Move a File
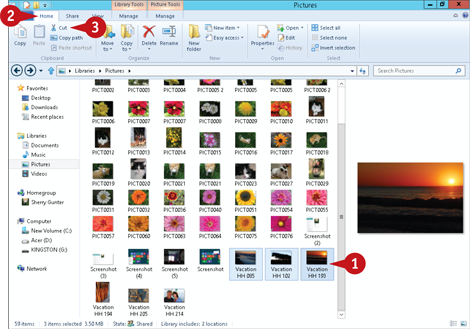
Select the file(s) you want to move.
Click the Home tab on the Ribbon.
Click Cut ( ).
).
Note: You can also click the Ribbon’s Move to ( ) button and choose a location from the drop-down list.
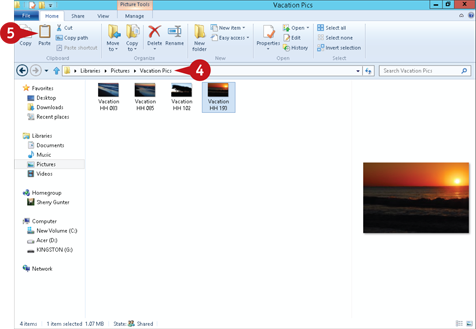
Open the folder into which you want to move the selected file(s).
Click Paste ( ).
).
The selected file(s) is moved from the old location to the new one.
Copy a File
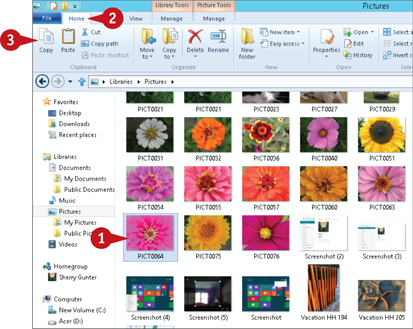
Select the file(s) you want to copy.
Click the Home tab on the Ribbon.
Click Copy ( ).
).
Note: You can also click the Ribbon’s Copy to ( ) button and choose a location from the drop-down list.
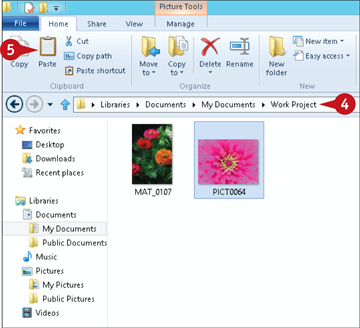
Open the folder into which you want to copy the selected file(s).
Click Paste.
A copy of the selected file(s) is placed in the new location.
Rename a File or Folder
Giving your files and folders descriptive names makes it easier to keep things organized. If a file or folder’s current name is not adequately descriptive, you can rename it. File and folder names can be as long as 255 characters, although the following characters cannot be used:
< > , ? : \ *
You should only rename files and folders that you have created yourself or have been given to you by others. Never rename Windows system files or folders, or files or folders associated with installed programs. Otherwise, your computer could behave erratically or crash.
Rename a File or Folder
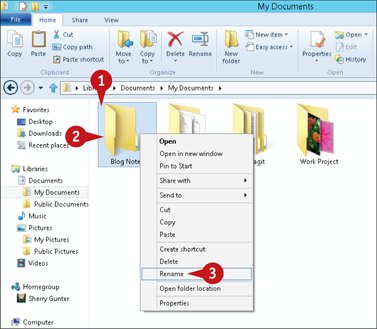
Click the file or folder you want to rename to select it.
Right-click the selected file or folder.
Click Rename from the menu that appears.
Note: If the Home tab is displayed on the Ribbon, you can click the Rename button ( ).
).
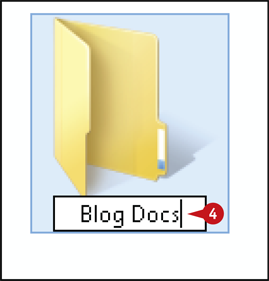
Windows selects the current filename or folder name.
Type a new name for the file or folder and press .
Windows renames the file or folder.
Compress a File or Folder
File Explorer enables you to compress, or zip, files and folders to save space. When you compress files and folders, you reduce the number of bytes they contain. Compressing files and folders is especially useful if, for example, you need to share several files or folders with others via e-mail. Uploading and downloading very large files is time consuming at best and impossible at worst. You might also compress files and folders to squeeze them onto a recordable CD or DVD. When a compressed file or folder is uncompressed, it is identical to the original, uncompressed file or folder.
Compress a File or Folder
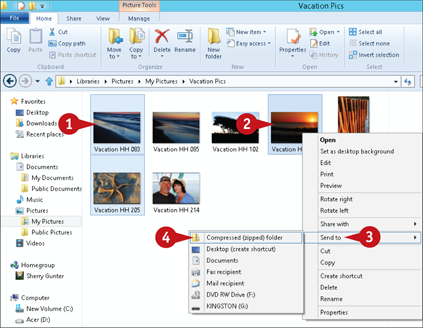
Select the file(s) or folder(s) you want to compress.
Right-click a selected file or folder.
Click Send to.
Click Compressed (zipped) folder.
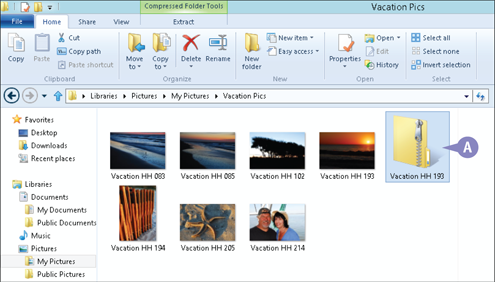
A Windows copies the selected files and/or folders, compresses the copies, and places them in a special compression folder (also called a Zip folder).
Note: You can rename a Zip folder just like you would any other type of folder or file.
Extract Compressed Files
Suppose you receive a compressed or Zip folder via e-mail or you have copied a Zip folder to a CD, and you need to access the files or folders it contains. To do so, you must extract the compressed files or folders from the Zip folder. The extracted items will be identical to the original versions, before they were compressed. When you extract items, you can specify the folder in which the extracted items should be saved. You can also instruct File Explorer to open the folder you choose in its own window after the extraction is complete.
Extract Compressed Files
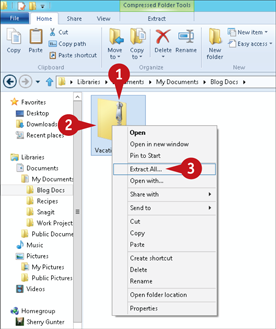
Select the Zip folder containing the files you want to extract.
Right-click the Zip folder.
Click Extract All from the menu that appears.
Note: You can also click the Ribbon’s Extract tab when a zipped file is selected and use the tools to work with zipped files.
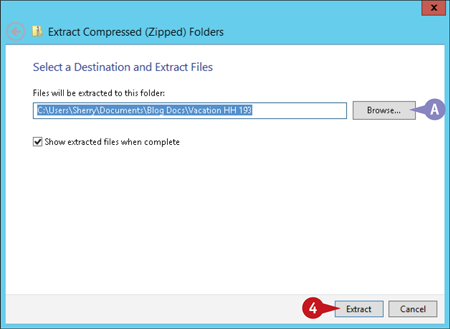
The Extract Compressed (Zipped) Folders window appears.
A You can click the Browse button to extract the files to a location other than the default.
Click Extract.
Windows extracts the files and/or folders into the folder you specified.
Search for Files and Folders
As you work with more and more files and folders on your computer, finding the one you need can become difficult. Fortunately, File Explorer offers a robust search function. If you have a general idea where the file or folder you are looking for is located — say, somewhere in your Documents folder — you can use the Search box found in the folder window to search for the file or folder. You can search using various criteria, including name, file type, author, date, even words or phrases that appear within the file (assuming you are searching for a text file).
Search for Files and Folders
Click in the Search box.
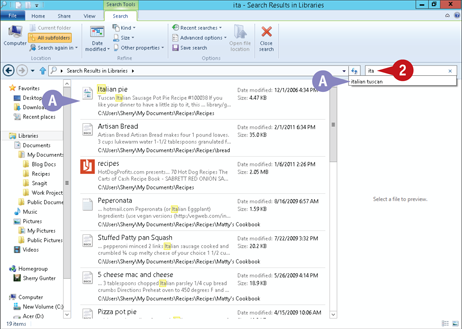
Type part or all of the file’s name, type, author, or other criteria.
A As you type, Windows displays files and folders within the current folder that match your criteria.
Delete a File or Folder
If you no longer need a file or folder, you can delete it. Deleting unwanted files and folders can help you avoid cluttering your computer. You should delete only files and folders that you create yourself or that others have given to you to avoid removing important system files. New to Windows 8, you can choose to permanently delete a file or folder from the Folders window, or you can remove it to the Recycle Bin, where it remains until the bin is emptied or until Windows removes the item to make room for other deleted items.
Delete a File or Folder
Delete a File or Folder
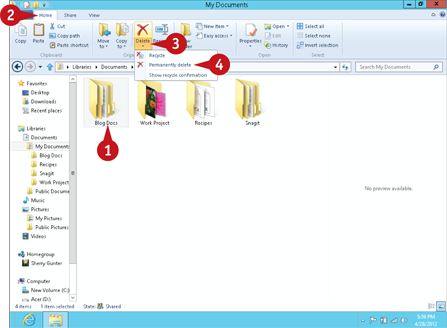
Select the file(s) or folder(s) you want to delete.
Click the Ribbon’s Home tab.
Click the Delete drop-down arrow.
Click an option:
Choose Recycle to move the file or folder directly to the Recycle Bin.
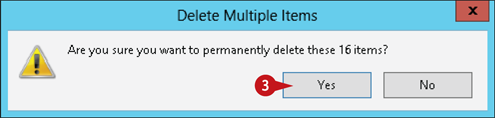
Choose Permanently delete to completely remove the file from your computer.

If you selected a permanent deletion, Windows prompts you to confirm the deletion.
Click Yes.
The file is deleted from the folder window.
Empty the Recycle Bin
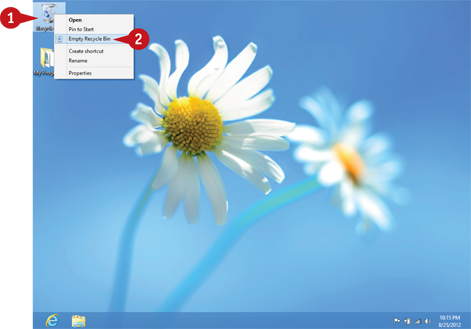
Right-click the Recycle Bin icon ( ) on your desktop.
Note: If you cannot see the desktop because you have program and/or folder windows open, click the Show Desktop button on the rightmost edge of the taskbar.
Click Empty Recycle Bin.
Windows prompts you to confirm that you want to permanently delete the files in the Recycle Bin.
Click Yes.
Windows empties the Recycling Bin.
Simplify It
How do I restore a deleted item from the Recycle Bin?
You can restore items you deleted through the Recycle Bin by following these steps:
Double-click the Recycle Bin shortcut icon () on the desktop.
The Recycle Bin window appears. Select the item you want to restore.
Click the Restore the selected items button in the window’s toolbar.