Chapter 16: Maintaining Your Laptop

To keep your laptop in good condition, you can follow some basic hardware and software maintenance procedures. You can utilize maintenance tools to optimize your laptop’s performance and keep your operating system up to date. Periodically performing a bit of housecleaning goes a long way toward keeping your laptop running smoothly.
In this chapter, you learn how to use the Windows 8 Control Panel to find a variety of tools for maintaining your laptop, including tools to help you back up your data, free up disk space, and defragment your hard drive.
Back Up Data with File History
Explore the Control Panel
The Windows 8 Control Panel acts like a master console of sorts. It serves as a launching point for performing many system-maintenance tasks, such as backing up your files, freeing disk space, defragmenting your hard drive, and more. You can find a variety of maintenance tools in the panel.
The main Control Panel window features several links. You click a link to access related tools or wizards. If you know the name of the tool you need to access but are not sure which series of links to click to access it, you can use the Control Panel window’s Search box to find it.
Explore the Control Panel

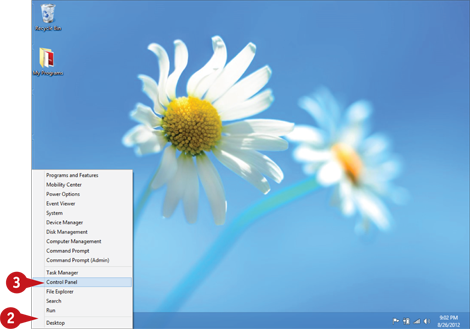
 Right-click the bottom-left corner of the screen.
Note: You can right-click the bottom-left corner from the Windows 8 Start screen or from the Desktop screen to view the same pop-up menu.
 Click Control Panel.
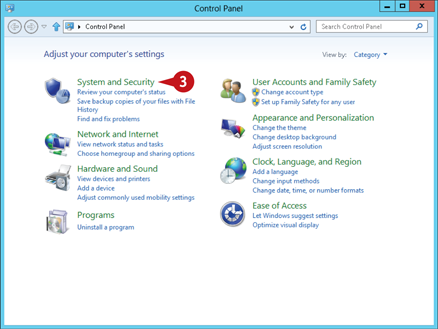
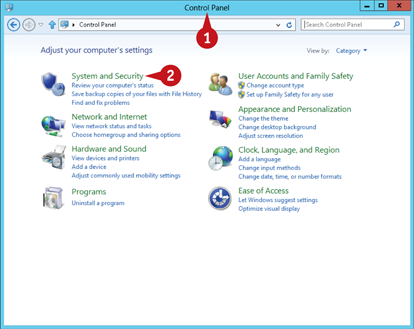
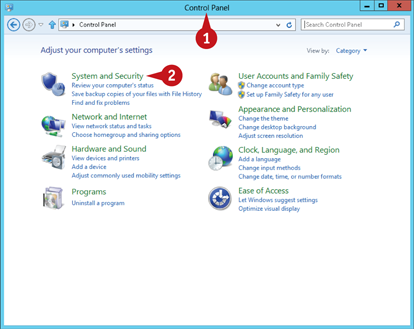
The Control Panel window appears.
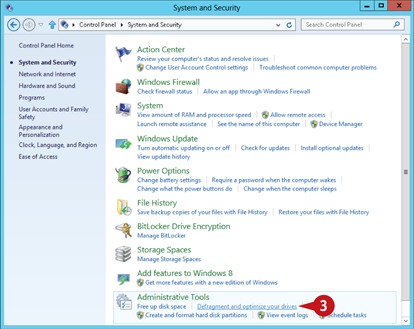
 To view maintenance tools, click System and Security.
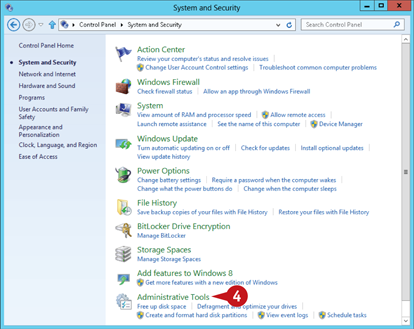
The Control Panel displays a further list of settings.
 Click Administrative Tools.
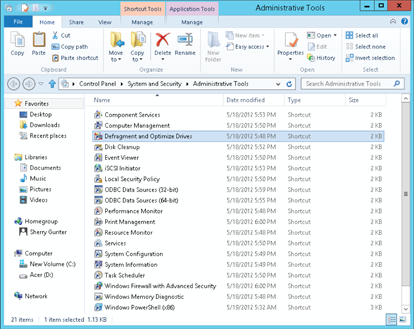
The Administrative Tools window opens with access to tools for freeing disk space, defragmenting your hard drive, and scheduling system tasks.
Update Your Operating System
Microsoft regularly releases updates for Windows 8 — that is, changes to the operating system designed to prevent or fix problems or to enhance security or performance. Windows 8 automatically checks for updates and installs those it deems essential. But there are additional, optional updates that Windows 8 does not automatically install; you should regularly view these updates and install them as needed.
You can also perform a manual update if Microsoft has released a new update but your system has not yet run its automatic-update operation. To download an update, your laptop must be connected to the Internet.
Update Your Operating System
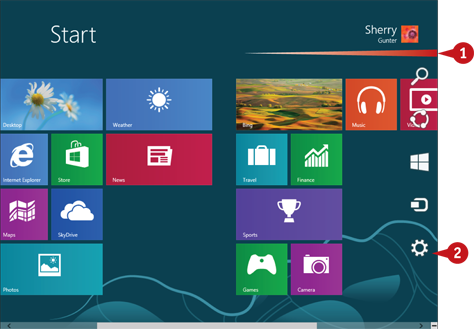
From the Start screen, swipe from the right edge of the screen or move the mouse pointer to the upper or lower right corner.
Windows displays the Charms bar.
Note: You can also press  +
+ to display the Charms bar.
Click Settings ( ).
).
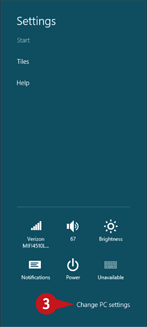
Click Change PC settings.
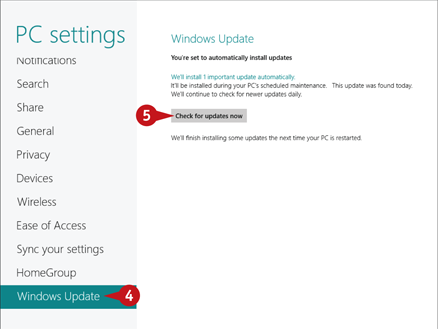
Click Windows Update.
 Click Check for updates now.
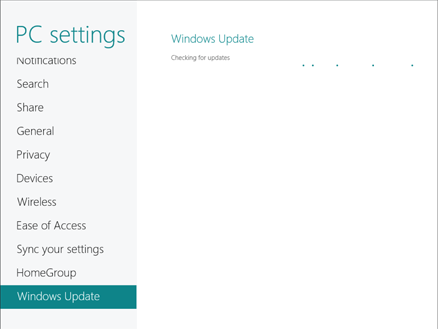
Windows checks for any updates. The process may take a few moments or a few minutes.
If updates are found, Windows downloads and installs any updates and informs you when the operation is complete.
Note: You may be prompted to restart your computer for the updates to take effect.
Back Up Data with File History
You can use Windows’ File History feature to back up files in your libraries. If a disaster such as theft, loss, breakage, or virus attack were to befall your computer, certain files, such as digital pictures, would be impossible to replace. Others, such as files used for work, would be at best extremely difficult to reconstruct. For this reason, you should back up your files — that is, copy them to an external hard drive, a flash drive, a CD, or a DVD. Wherever you save your backup, you should keep it in a safe location.
Back Up Data with File History
Connect the drive on which you want to save your backup to your laptop, or insert the necessary media.
Right-click the bottom-left corner of the screen.
Note: You can right-click the bottom-left corner from the Windows 8 Start screen or from the Desktop screen to view the same pop-up menu.
Click Control Panel.
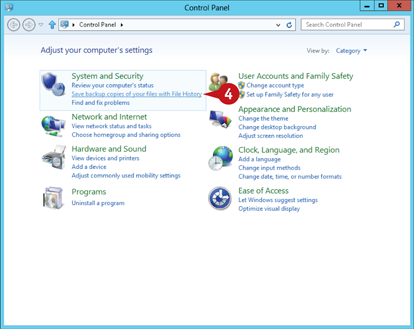
Under System and Security, click Save backup copies of your files with File History.
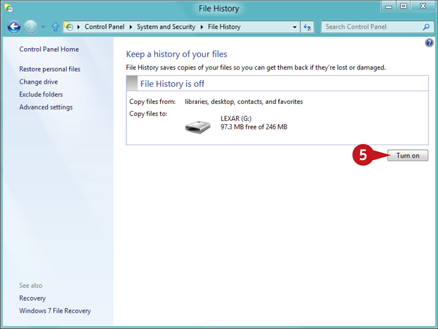
Click Turn on.
If you have a Homegroup set up on your laptop, Windows prompts you to recommend the same drive to other members; click Yes to continue.
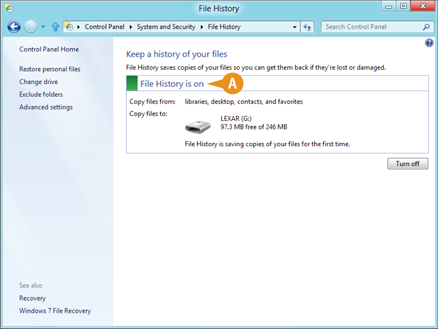
A The File History setting now appears as on and Windows 8 begins saving your data files.
Free Up Disk Space
In addition to storing files you create or save as you work on your computer, your laptop’s hard drive stores many more files that Windows 8 creates, changes, and saves automatically. Over time, you can end up with a gigabyte or more of unneeded files, consuming valuable space on your hard drive.
If your hard drive is low on free space, you can use the Disk Cleanup tool to find and remove these temporary files. This utility also empties the Recycle Bin. In fact, it is wise to run the Disk Cleanup tool regularly as part of standard disk management.
Free Up Disk Space
Open the Control Panel.
Note: You can right-click the bottom-left corner from the Windows 8 Start screen or from the Desktop screen to view the same pop-up menu and choose Control Panel.
Click System and Security.
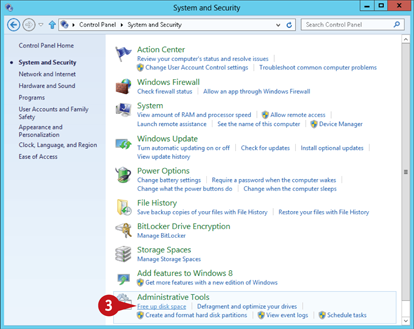
Under Administrative Tools, click Free up disk space.
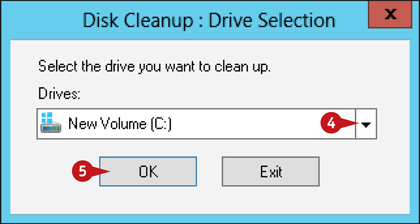
The Disk Cleanup: Drive Selection dialog box appears.
Click the Drives  and select the drive you want to clean.
Note: If you only have one drive, this dialog box will not appear.
Click OK.
Disk Cleanup scans your system to determine how much space can be freed.
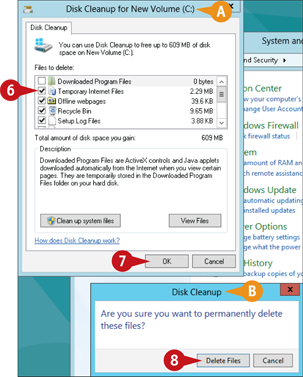
A When the scan is complete, the Disk Cleanup dialog box opens.
 Click the check box (
 becomes
  ) next to each type of file you want to delete.
 Click OK.
B Disk Cleanup prompts you to confirm the cleanup operation.
 Click Delete Files.
Disk Cleanup deletes the unnecessary files, freeing up disk space.
Defragment Your Hard Drive
When you save a file on your laptop, Windows writes the data to a sector on the hard drive. If the sector is too small to hold the entire file, the extra bits are saved in the next available sector. Over time, your files may become quite fragmented, with bits spread across several sectors on the drive, meaning when you open a file, it takes Windows longer to find all the various pieces. To solve this problem, you can run Disk Defragmenter. This reassembles the files on your hard drive such that each one occupies as few sectors as possible.
Defragment Your Hard Drive
Open the Control Panel.
Note: You can right-click the bottom-left corner from the Windows 8 Start screen or from the Desktop screen to view the same pop-up menu and choose Control Panel.
Click System and Security.
Under Administrative Tools, click Defragment and optimize your drives.
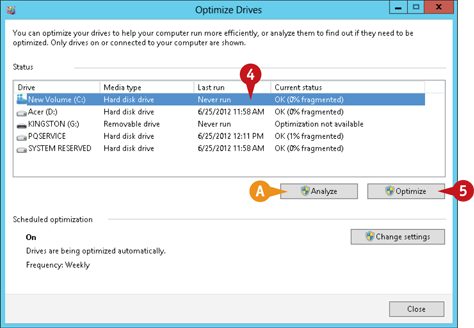
Windows launches the Optimize Drives utility.
Click the drive you want to defragment.
A Before defragmenting a drive, you can click Analyze to determine how fragmented it is.
To defragment the disk, click Optimize.
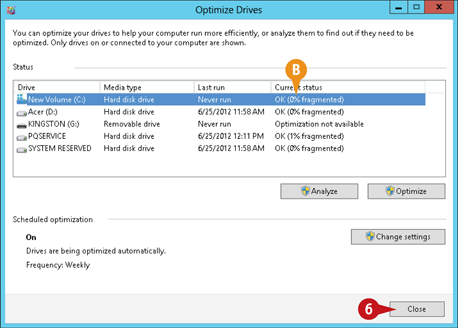
Disk Defragmenter defragments the disk. Note that the process can take several minutes or longer.
B When the operation is complete, the drive is shown as 0% fragmented.
Click Close.
Simplify It
Can I set up Windows 8 to defragment automatically?
Yes. In fact, Windows 8 is set up to defrag your hard drive automatically by default. You can change the settings by clicking the Change settings button in the Optimize Drives window. You can specify a frequency, such as daily, weekly, or monthly, and specify exactly which drives to defragment. Click the Frequency drop-down arrow () and make your selection. Next, click Choose and select the disks you want to defragment; click OK, and click OK again to exit. To forego automatic defragmentation entirely, deselect the Run on a schedule check box.