Water and light are primary elements that any plant needs to survive, and plants cannot photosynthesize without these elements. Photosynthesis is the process a plant uses to feed itself using the sun and water that it is given. The amount of water and light plants need varies with each species. The amount of light a plant gets varies with each home; not every home will have bright windows because the of the house’s positioning in relation to the sun, as well as where windows are located within the home. In a high-rise apartment building, for example, the units with windows that face south will get bright sun from morning to afternoon while the units that face west will get afternoon sun as long as trees or other buildings that block the sun do not surround the area.
Plants that love natural, outdoor light should be placed in a room where they can receive early morning sun, as well as light that comes during the evening. Other plants can thrive equally as well in artificially illuminated spaces, but caution must be taken when leaving plants under artificial lighting for more than 12 hours a day. Some plants, particularly those that bloom only during certain seasons, need to take a break from the photosynthesis process in order to produce the brightest flowers during their blooming periods.
Finding the direction sunlight enters a room may sound a little complicated at first, but it is really simple and explained in this chapter. In rooms or buildings where there is little or no natural light, artificial lighting is a viable and worthwhile option because some plants will grow under natural or artificial light. Lighting fixtures can be beautiful, modern components to any living space and environment, both at work and home. This chapter contains information that will help you learn more about the direction of light in the home and lists plants that thrive in artificial lights.
Water
Water is a vital element in plant life because it transports chemicals in the plants’ cells and moves nutrients upward from the root. Without proper moisture, plants lose their vitality, and they may die from lack of necessary nutrients. When this happens, the cells shrink, and the plant’s food supply diminishes. Smart gardeners shop for healthy plants and take a good look at stalks and leaves to make sure they are firm. Firm stems, leaves, and stalks are indicators of a healthy plant that has a strong potential to survive once it is removed from the plant store and situated into a new environment.
Weak stems, faded leaves, and soft stalks indicate poor plant health, which is the result of too much or too little water. The combination of too much or too little water with the wrong amount of sunlight results in a severe loss of needed nutrients. Solid, firm stalks, stems, and leaves are visual proof of proper nutrients and a good water supply. Undoubtedly, it takes practice and commitment to understand the water and temperature demands of individual houseplants. But it is fair to assume that when a human finds the air dry and cool, the plant and the plant’s soil also finds the air cool and dry.
Plants purchased from nurseries or other home gardening centers usually have directions and instructions for watering and the amount of light they need. The information usually is inserted on a tag in the soil, attached to the container, or on the plant’s stalk. There are two different classifications for watering requirements of plants: lightly moist and moderately moist.
• “Lightly moist” means the plant’s soil does not need to be wet or fully dry. Instead, the plant should absorb water so that its roots and soil are more damp than wet. Plants that are described as lightly moist must be watered frequently but delicately. The water must be distributed evenly throughout the plant container. Plants that come from tropical and temperate climates generally need to be kept lightly moist.
• Plants that are labeled “moderately moist” need moisture often. This group of plants, which typically come from tropical environments, includes most indoor flower-producing plants, most of which grow quickly and require a good deal of light.
There is no need to water the leaves of the majority of household plants. The roots gather water that travels upward to deliver moisture to the leaves. Watering the leaves of a plant may be a well-intentioned gesture, but it often results in unappealing, sickly looking brown spots on an otherwise healthy specimen. It is best to water the soil and allow the roots to transport the water to the plant’s leaves.
Once a gardener determines how to care for his or her plants properly, watering becomes a small task in the endeavor to preserve the plant’s good health and promote its growth. Interior gardeners discover early on that many plant species need more water from spring through summer. Plants that need more water in the spring and summer do not need much water during winter months. Many plants go through a period of dormancy or rest during winter. During this time, cooler temperatures place less demand on potting soil, so plants need less water and fewer disturbances.
Many resting plants are gathering strength as they prepare for springtime blooming. Plants speak loud and clear about their physical health. A wilting, withered plant with flimsy, brown edged leaves and soft stalks and stems is initiating conversation about its physical health. Plant owners must learn to read the signs their plants give. Drooping leaves, for example, indicate the plant’s physical needs are not being met.
When you water your plants, the goal is to keep the soil moist without drenching or drowning the roots or the soil. The surface soil of a plant should not become hard and dry due to lack of water. A drowned plant and a drought-stricken plant will both die with no hope of revival. Plants placed in windowsills, particularly windowsills where the sun peers through bright and hot, should be watered early in the day or in the evening when the sun sets. Plants that sit in windowsills with direct sunlight risk drying out and scorching if watered during hours that the sun is hottest.
Be thorough when watering because frequent, small doses of water do not benefit a plant; in fact it does the plant more harm than good. Small doses only moisten the surface, rather than deliver the water deep down below the soil’s surface where the rootlets grow. When watering a plant, the water should fall in different locations of the plant’s container so the water is distributed evenly to the roots. Unless directions state otherwise, the leaves of a plant do not need water. Usually only plants that thrive in humid conditions appreciate having their leaves misted.
After the roots receive water, it then travels up the stem and flows to the leaves. You can easily check to make sure your plant is receiving enough water. Gently remove the plant from the container after it has been watered and look at its roots. A plant that needs more water will have dried roots and the soil at the bottom of the container will be dry. A plant that has been overwatered has soggy, graying, and sometimes moldy roots. Looking at the roots gives you a good idea of how much water is needed to moisten the plant soil and the plant’s roots successfully. After inspecting the roots, place the plant back into the container or plant it in a new one.
Check plants once a week and rewater them when the top of the soil is dry. In the spring, plants need more water because they experience a new growth. Depending on the type of soil the plant is growing in, a thorough watering may not last long. All plants experience a period known as the growth period when the plant undergoes a growth spurt. The growth period also refers to the time of season when the plant is in bloom. During growth periods, plants use more water than usual, but two weeks after the growth period, the plant reverts to its regular water intake.
Older plants may not grow as fast as younger specimens, and when owners have their plants for years, they are aware of whether the plant needs a higher water intake during the spring months. As nature would have it, most plants bloom from spring through summer so most houseplants need much more water during this time than during the fall months. Plants that are flowering or blooming, as well as plants that need repotting, also need more water during those periods of change.
Water temperature
The water given to a plant should be room temperature so you do not shock or disturb the soil. Leaving water on a counter at room temperature for a day is a safe way to achieve equal water and soil temperatures. The watering can should not be left near a windowsill where the air tends to get cooler or hotter than the room’s actual temperature.
Watering while away
Summer vacations can be hazardous to a plants’ health. Ideally, a neighbor with a bit of a green thumb would be ideal, but if no one is available to help water your plants while you are away, an automatic watering apparatus may be ideal for the health and lifespan of the plants. You can do an online search for automatic watering systems and see which type will work best for you. Try Indoor Gardening Supplies (www.indoorgardensupplies.com) or The Happy Gardener (www.thehappygardener.info) to get an idea of available supplies and prices. Annette Pelliccio of The Happy Gardener recommends adding a Store n’ Feed Mat after repotting. The mat absorbs up to 4 cups of water at a time, and plants can take up water as they need it. This makes vacationing easy. Plus the mats provide organic plant food, which also eliminates worry especially over flowering plants that need an extra shot of fertilizer to rebloom.
Indoor Gardening Supplies also sells inexpensive and uncomplicated self-watering devices like self-watering pots and watering globes. Watering globes are available in gardening supply centers of stores such as Home Depot. Although tempting, it is never advisable to drench a plant with water before going away because drenching a plant might drown it.
Case Study: Why Water Matters
Carin Froehlich
Author, Laundry Wisdom: Instructions for a Greener and Cleaner Life
Perkasie, Pennsylvania
Carin Froehlich’s indoor gardening experience began in her childhood when she spent several summers working with her aunt and uncle. She also worked part time at a nearby nursery. She prides herself on her violets and orchids, and she said her favorite plant is the geranium.
“Watching a tiny little seed grow into a full plant still amazes me to this day,” Froehlich said. “The success that you continually receive for your efforts keeps you happy.”
Froehlich said watering plants is the most important chore in caring for these plants. Although most people who care for houseplants know too much or too little water can be lethal for plants, that is not the only problem water can cause. Perhaps one of the most important factors to keep in mind regarding water is the source of the water. Is the water from a well or is it public water? Luckily, those homeowners using well water to care for their plants will not have the same difficulty as those who use public water unless the homeowners use a water softener. (Salt, which is used in most water softeners, is poisonous to plants or trees.)
For those who use public water on their houseplants, the chlorine used in the water supply that is deemed safe for human consumption is actually lethal for plants. Even bottled water can be problematic for houseplants, although the reason for this is still unclear. Froehlich said the best way to prevent both of these water options from harming your houseplants is to fill watering containers and allow them to sit out overnight before watering plants. This allows the water to reach the ideal temperature and allows some of the residual chemicals to dissipate.
Light
Areas near windows are often the most convenient living spaces for houseplants. Light is crucial to plants because the amount of light a plant gets not only determines the amount of food it receives but also whether the plant will produce flowers in its blooming period. Plants need light in order to process their food and complete the photosynthesis process. Chloroplasts, which are the cells found inside leaves, absorb and change light into energy during a successful photosynthesis process. Leaves, stems, and flowers absorb light from the sun and store it away for the plant to survive. When plants do not receive enough light, no amount of fertilization and water will keep the plant alive. The location of windows in a home is the first and best way to understand what room a plant should be placed in so that it will grow to its maximum height and potential.
South-facing light
The sunlight that enters a home with south-facing windows will deliver the strongest and brightest spectrum of rays to a living space and the plants inside of it throughout the day. Southern exposure is the strongest light because southern-facing windows receive the sun’s rays from the time the sun rises until the sun sets. South-facing windows tend to be rather hot, so there is danger of scorching and drying out plants that are left in windowsills during the summer. Flower-producing plants are especially fond of sun and grow well in bright rooms with south-facing windows; these plants like direct light and appreciate the shift from full sun to evening shade.
East-facing light
Typically, windows facing east get the strongest dose of sunlight in the morning followed by long shadows and no sun later on in the day. East-facing windows are good matches for those plants that adjust well to low and moderate levels of light. If a plant that needs moderate sunlight is situated in a room with east-facing light, use artificial supplemental lighting. The photosynthesis process works best when plants receive eight full hours of light, but rooms with east-facing windows cannot provide that much light without additional artificial lighting.
North-facing light
Indirect sun from a north window provides a cool, shaded light that plants like ferns will survive in. North-facing windows provide enough sunlight to grow houseplants that thrive in low light, but in the winter, plants need supplemental artificial light, or need to be relocated to a space where the light is stronger. Plants that have an original habitat shaded by trees and cooled by rains appreciate northern-facing lights, but these plants still must be watched carefully in the winter months. In the winter, a room with north-facing sunlight may be cooled to as little as 55 degrees, which is beneficial to the hardiness of spring-blooming houseplants like cacti and other plants that need a break in the winter. Ideally, most homeowners would rather rest such plants outdoors rather than suffer harsh cold air in a northern exposure for the sake of spring blooms.
West-facing light
Windows that face west get the brightest sun in the early afternoon, and the light lasts until evening. The afternoon sun of a western window is strong and increases room temperatures, which make these environments good places for plants that thrive in sunny spaces and grow strong in warmer environments.
Dealing with over/underexposure of light
Plants that are overexposed to natural sunlight will lose their vibrant green colors and fade to pale, sickly yellows, similar to when a plant drowns or dries out. This loss of color indicates the plant has not been able to properly nourish itself, and overexposure to the sun prevented the plant’s roots from carrying water and nutrients to its leaves, stems, and flowers. Just as gardeners must learn the levels of moisture required to keep a plant healthy and happy, they must also study the amount of light individual plants require to thrive in living spaces where light is not always bright or direct.
Regardless of how much or how little natural light a room gets through windows, the light in a living space can be increased with reflective materials and decreased with shading objects, such as blinds or screens. Reflective materials can be as simple as the natural elements inside of a room, such as white paint and other light-colored walls that reflect light so well that rays bounce around the room. Rooms with reflective lighting materials will help larger plants grow not just in size but quality. You can use mirrors to illuminate and reflect both natural and artificial light in a room. A plant placed in front of a mirror located a good distance from the window will enjoy the strong reflection of natural sun rays that emanate from the window.
Using artificial light
Artificial lighting is a great alternative when natural sunlight is not available or strong enough to keep plants thriving. This lighting is effective when the light bulb’s intensity and the spectrum of wavelengths available are enough for plants to carry out its photosynthesis processes. You can use artificial lighting as a supplement to natural sunlight, and it may enhance the décor and appeal of a living or working space because many lamps and other lighting objects are stylish and sleek. When an interior space is shaded by outside factors, such as tall buildings or thick, leafy trees, the rays provided from artificial lighting will keep the plants fed and healthy. Plants will tell you if their artificial lighting is insufficient by the way they grow, or do not grow. Weak stems and leaves that are stiff with brown edges that fall off a plant are indicators that the plant does not have the nutrients it needs to survive and grow properly. The following are some examples of the different kinds of lighting available for houseplants.
Incandescent lights
Incandescent lights have warm, red rays that release heat and cannot be placed too close to the plant because the soil may dry out and kill the plant. Incandescent lights are more useful in the winter because they give plants the warmth and light similar to long summer days. One incandescent light suggestion is a 200-watt floodlight because it will supply the plant light it needs without drying out its soil.
Fluorescent lights
Although houseplants are not very fond of incandescent lights, they do well under fluorescent lights, which provide blue and green rays — the rays necessary for plants to manufacture food. They cost less and last twice as long as incandescent lights, which make them much more energy efficient.
Fluorescent lights are sold in various watts and wavelengths so they can be used alone or in addition to the natural sun in any given living space. Fluorescent lamps can sit closer to plants without burning or drying the plants or the soil, and there are several types of fluorescent bulbs on the market. There are long, tube fluorescents that are often found in offices, as well as special growing lamps that are usually sold as wide-spectrum and/or full-spectrum lamps. Full- and wide-spectrum lamps are the best substitutes for natural sunlight because the bulbs emit light in every range of color on the light spectrum, yet they only release a tiny amount of ultraviolet light. If you have a room that does not pull in enough natural sunlight, experiment with the distance between the lamp and the plants. Some plants can be as close as 1 ½ inches to a fluorescent light. Other plants that prefer medium to low light need at least 4 to 12 inches of distance from the leaves. Plants that have not been given much light should respond positively to the supplemental energy that artificial light sources provide.
Artificial lights kept on for 12 to 14 hours in a day will sufficiently substitute for natural sunlight for foliage plants. However, flowering plants need a lot more light, a total of 18 hours in a 24-hour time frame. The leaves of the plants provide excellent clues as to how much light a plant needs to survive. Light-colored leaves usually need much more sunlight than some of the plants with deep, waxy green foliage like the snake plant. Waxy, deep green leaves found on the snake plant and the weeping fig have more chlorophyll and do not need eight or more hours of sunlight to photosynthesize. Leaves that change colors during certain periods need intense light during certain seasons.
Now that you know more about the direction of natural light and the effect it has on a room’s temperature and lighting, you can make more informed choices about the type of containers you will need to grow healthy indoor plants. Container size, material, shape, and color all vary greatly because they serve different purposes. Plastic pots often have holes in the bottom and drain overwatered plants fairly well. They are cheap and easier to move unlike clay pots that are porous and absorb water on the sides. Clay pots are much heavier when wet and serve the houseplant and the plant owner best when kept still. Ceramic pots are often a designer’s or decorator’s choice because of the crafted designs and variety of colors.
Choosing Your Plant’s Container
Plants will grow in almost any waterproof container that has drainage holes for excess water. Urns, baskets, pots, kettles, cans, boxes, and wine casks, which are huge wooden barrels that store wine, are a few of the items available to house a plant. Containers are a plant’s primary home, but for some homeowners, plant containers can be a key element in interior design. If a unified space is the goal, then choose matching or identical plant containers.
In addition to considering these factors, consider the types of plants you plan to purchase. The plant’s size and growth needs are important to consider. Many plants will require repotting from time to time, but in nearly all situations, starting out with an appropriate pot size is critical for the plant’s growth and development. The first step is to consider the plant you want to display, and then consider the appropriate pot. A good estimate is to look at the root ball of the plant and to provide at least 3 to 5 inches of space around that root ball in all directions so there is space for the roots to grow upward, downward, and to each side.
Plastic
Plastic containers are common because they are inexpensive, and they lock and seal in moisture better than other containers. Plastic also endures the shipping process as the plants make their way from the grower to the market and then later to the gardener’s home. One handy feature of many plastic pots is a snap-on tray used for drainage. The snap-on tray is located underneath the actual plant container, holds excess water, and prevents water damage to floors and tables.
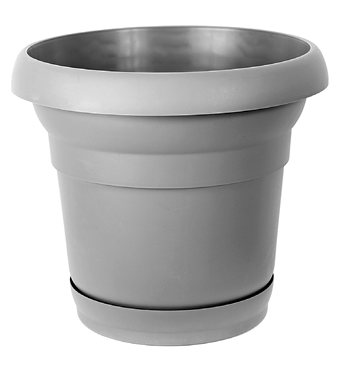
Plant containers come in all sizes and shapes. Some are oddly shaped, such as oblong planter boxes, which typically are used to situate plants comfortably in windowsills. Plastic pots come in a number of colors, and some are imitations of more expensive clay and ceramic containers. Another advantage of plastic is that it is easy to clean and care for, especially when the plant is larger.
Plastic pots with drainage holes are critical. Because plastic is not porous, a drainage method is critical because waterlogged plants can cause root rot. In addition, monitor the plant’s growth in a plastic pot. Because it is flexible, plastic can bend and crack if the weight within it is too much. Heavy plants, even with smaller root balls, should not be placed in plastic pots unless the plastic is thick enough to support it. Many of these pots will provide information on their bottoms about the appropriate size of plant to use within the pot, or the weight the plastic pot can withstand.
Clay
Many decorators feel that clay and ceramic planters possess a unique, sophisticated, and elegant beauty. Clay pots are common plant containers, and even the simplest clay pot is visually intriguing. The earthy tone of clay pots creates a strong and natural look when paired against a plant’s deep green and vivacious foliage. These pots are available in diameters as large as 24 inches or as small as just a few inches. Most are inexpensive compared to ceramic pots or other options.

Because clay containers are quite porous, they absorb water quickly so the soil in a clay pot dries quicker than it would if it were in a plastic container. The type of clay and whether it is glazed plays a role in this process. Some clay pots are more porous than others. Those that feel lighter, for example, often are more porous. If the pot is glazed, it is less porous and, therefore, will not allow evaporation to occur as easily as non-glazed pots.
Clay helps plants and their roots absorb air easily, which helps the plants grow a healthy stalk. Once a clay pot is filled with soil and water, it becomes heavy and vulnerable to cracking. Clay pots also need to be cleaned and sterilized because their porous nature makes them susceptible to harmful pests and disease.
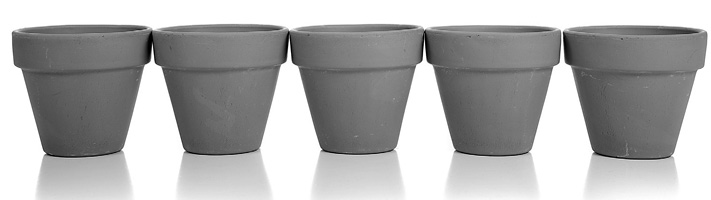
Terra cotta
Terra cotta is a type of unglazed ceramic clay. Terra-cotta containers are made of baked earth; they are inexpensive, brick colored, waterproof, and very popular as plant containers. They are usually for sale anywhere plant pots are sold. When placing a plant into terra cotta, monitor the soil’s moisture level carefully. Because the pot’s walls are porous, this can cause the soil to dry out quickly. The benefit of using a terra-cotta pot is it is more difficult for plants to become waterlogged. If you select this type of pot for your plant, soak the pot overnight prior to placing the plant within it. This helps to slow down the amount of moisture the pot extracts from the soil, which allows you to have more control over the soil’s moisture level.
A number of variations are available in these pots. You can purchase cylindrical containers or those pots meant for specific tasks, such as strawberry jars that have small openings along the sides to allow the strawberries to grow and spread properly. Italian terra-cotta pots are similar, but often have unique rims in various shapes. Some have beveled edges whereas others are wavy or have a rounded edge. Venetian terra-cotta pots are also widely available. These have a barrel shape to them and often have a band design along the sides. Yet another version is the Spanish terra-cotta pots that have an outward sloping side and often feature flared lips along the top. This particular type often has a thicker wall that offers more stability. These pots are available from 8 to 12 inches in diameter.
Another version of the terra-cotta pot is a three-legged pot. These pots have an elevated bottom, which helps to display the pot better. These range in size from 8 inches to 20 inches or more in some cases. Use these to display plants that are slightly larger or have longer span of leaves. Some are called bulb pans or seed bowls, which is a term that describes the size and shape of the types of plants to put in them. Seed bowls are smaller and excellent for starting out new plants from seed. These are often smaller, often no larger than 6 inches in diameter.
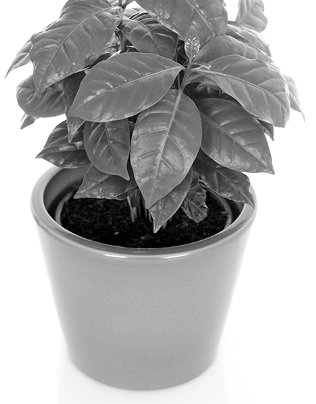
Ceramic or glazed pots
Ceramic planters, also known as glazed pots, are sold in a variety of finishes, textures, and glossy colors. Smaller plants tend to thrive inside of ceramic pots because most ceramic pots do not have draining holes. Like plants, ceramic containers are diverse and should be handled with care. Ceramic containers chip easily, so they should be placed in a permanent location and moved only when absolutely necessary. Ceramic pots do not tolerate cold and should not be left outdoors during the winter months. When compared to terra-cotta clay pots and plastic, ceramic containers are costly, but with proper care, ceramic can outlast the life of the plant. If you have a ceramic pot that is larger, and you want to use it for a plant, place the plant into a plastic or terra-cotta pot first and then place this into the ceramic pot. This creates the necessary drainage the plant requires to thrive.
Cachepots
When people include plants in interior or exterior design, the pot can make a big impact on the space’s look and feel. Although terra cotta and other types of pots are excellent options for plants because of their strength and ability to drain water away, many pots are very basic and less decorative. A solution to this is to use cachepots, which are decorative, rather than functional, pots that you can place plainer pots with drain holes into.
You can purchase cachepots virtually anywhere pots are sold, including many home garden centers. To use these pots, place a layer of pebbles or gravel at the bottom of the plain pot so there is a bit of space between the bottom of the cachepot and the plain pot to allow water to drain properly. Then, place the plain pot within the cachepot, and display where you would like to.
Cachepots come in numerous designs and color schemes. Some are brass and copper to add a luxurious look to a space, though most are not too expensive. Consider purchasing a porcelain cachepot for a higher value, more color, and often, more design features. Another option is a more natural teak or mahogany cachepot. These are high end and expensive, but may work well in rooms with these types of woods already in the space. Some cachepots have feet, similar to those found on the bottom of a bathtub, which add to the decorative elements of the plant. When buying a pot, you should consider the size and the weight of the plant. A well-made cachepot should last for years and, often, will outlive the plant itself.
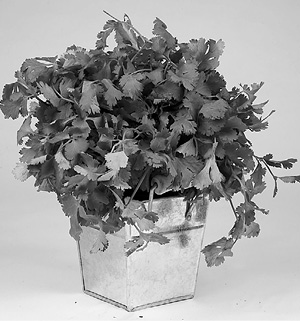
Metal pots
Metal containers are unique planting choices that fit well in both traditional and contemporary living areas and office spaces. Holes can be drilled into metal pots for draining and potting, but metal gets hotter faster than other materials, especially in a room with direct sunlight, and this could overheat the pot. In the winter, they cannot gather sufficient heat, and plants that normally tolerate cooler temperatures actually may experience a frost if not moved to a warm, lighted area. Still, the containers are fine if they are used in a room where the temperatures remain steady year round.
Bamboo and wood containers
Bamboo containers are rare and work best in spaces that are African or Asian themed. Bamboo pots need waterproofing with plastic sheets because bamboo is a delicate wood that needs protection from excess water. A bamboo pot can be waterproofed by lining the container with thin plastic, such as a plastic bag from the grocery store. Wooden containers are diverse decorating pieces. Like bamboo and even metal, wood containers can be painted or left in their natural state. Bamboo containers can be found at trendy stores like IKEA and Pier 1 Imports.
Using urns, tubs, and boxes
Urns can be a beautiful and formal option for displaying plants, or inexpensive and informal, depending on the material and style of the urn itself. Most will have a pedestal base or a footed bottom to elevate the plant off the ground by a few inches. Some are stone while others are fiberglass but have a faux wood look to them. Stone can be expensive, but fiberglass options can be inexpensive. Other options include bronze and concrete. Many interior designers use urns when the plant will be at eye level because this gives these planters more visual appeal. Select urns for flowering plants because the colors of the flowering plants can often look beautiful in this style of pot. When using pedestal urns, you should do so in larger rooms or even on patios. Because these are often very large, they can take up a larger amount of space and may dominate the look of the space, too.
Tubs are an option for many homeowners and businesses. These are round or hexagonal in shape. Some of these are wood, while others are stone or concrete. If you are purchasing wooden tubs, be sure to select varieties that are durable and have rotting protection. Those made from cypress or redwoods are naturally rot resistant and make good choices. Consider using Japanese soy tubs for an informal space, such as a living room. These are inexpensive but decorative. Another option is a Japanese porcelain tub. These tubs are often more ornate and glazed, whereas soy tubs are often more rustic. These are very luxurious and formal. Use them for more sophisticated plants, such as a jade plant, for a formal-looking display. Some tubs have drainage holes while others do not. If the tub does not have drainage holes, place a plain pot within to allow for drainage, similar to cachepots.
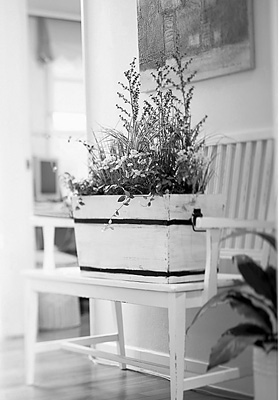
Boxes are yet another option for displaying plants. If you wish to grow indoor trees or shrubbery, these boxes can be a great choice for displaying them. These boxes, which are available in numerous styles, often complement the look of these larger plants because the wooden box will match well with the wooden trunks and stems of the plant. The box shape also creates a visual base for the larger plant within it. To ensure the box does not become too overpowering, top the soil with a layer of sphagnum or unmilled peat moss, commonly available at garden centers. Keep in mind that filled boxes can create a heavy pot. To move these, use a dolly or a wheeled trolley to allow you to move them properly.
Plant stands
Furniture stores carry attractive plant stands, pedestals, and other decorative pieces. Plant trolleys and dollies enable growers to move plants from room to room, either for light or decorating purposes. You also can use these dollies to move plants to ensure they receive the proper amount of heat and light in the winter and summer months. Dollies keep planted pots off the floor and prevent water damage and stains to floors and carpets.
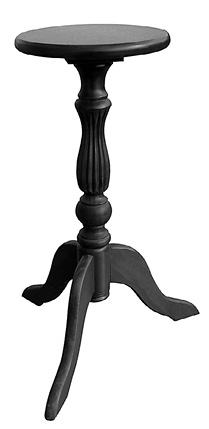
Most plant stands are wood, wrought iron, or plastic; they elevate plants to eye level and add interesting décor to the living space. Pedestals are a simple, yet elegant design idea. If pedestals are out of your price range, wooden barstools or stools with flat metal surfaces are good substitutes. Stepladders are also acceptable options.
Any grate-like stand or a platform display will provide plants with health benefits, too. These help air to get to the plants roots. In some cases, the stands allow for the branches of the plant to cascade downward, keeping them off the ground but still giving them room to grow. These stands can vary in the height of the actual stand, from as small as 1 foot to as large as 5 feet. Some stands display just one plant while others have shelves to accommodate as many as six to eight smaller plants.
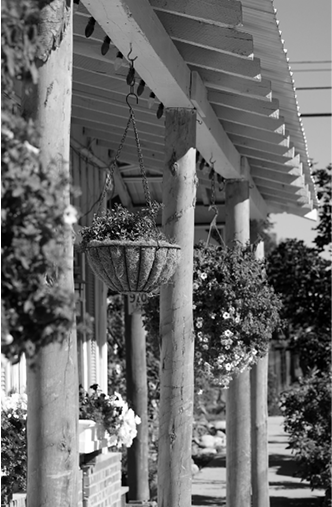
Hanging Baskets and Pots
A popular option for displaying plants is using hanging baskets or hanging pots. Hanging a plant from the ceiling or from the side of a doorway frame extending to the side of the door itself is a good idea, especially for plants that have longer branches or those that spread out. The pot will house the roots of the plant and soil, and the branches and leaves will come up out of the pot and hang over the edge, creating a beautiful display. This also provides the plants an easy way to grow without many restrictions. Those who have limited window space or tabletops near windows may be able to hang these plants from the ceiling in front of windows, or from the window framing.
These are available in various types of materials, including ceramics, baskets, and plastic. Using a woven basket with a plastic liner to catch water may be a good option, or you can use a plastic or wire basket and line it with peat moss before placing the plant within it. Whatever material you select for the hanging pots, be sure it offers a way to catch water. The soil will still need a way to drain off excess water to ensure that the water does not become stagnant.
Another aspect to consider with these baskets is the actual method of hanging them. This suspension needs to be strong and stable, especially if the plants or the pots are heavier. You can purchase chains that create a strong hold while also offering an appealing design feature. Otherwise, you can choose other types of roping for this process. Macramé hangers or woven ropes can also work well.
The hanger choice depends, in part, on the amount of weight it can support. The roping must not only be strong enough to support the plant, but it is also necessary to have a dependable attachment for the ceiling. One option for hanging the pot from the ceiling is to use a screw hook. When you purchase the hook, look at the size of the hook to ensure the roping you select will fit properly into the hook. A larger hook is recommended for larger plants, as it will hold more weight. Some hooks may provide weight information on the packaging. Otherwise, select a larger hook for plants weighing more than a few pounds. When placing the hook into the ceiling, consider the amount of support present in the ceiling. Look for a ceiling joist to screw the hook into for security. Otherwise, ensure there is plywood or another strong surface to install the hook into to ensure the screw threads can anchor properly. Do not depend on gypsum or any other type of ceiling panels, such as drywall, even for lightweight plants.
Another option to consider if you do not want to use a ceiling hook is to attach a hook to the wall. Wall brackets allow you to hang lightweight to moderate weight plants from the wall. Swinging arm brackets have an arm that swings outward or inward, giving you more flexibility on where the plant will actually hang. Attach these to the side of a window frame then rotate the arm. This will allow you to display the plant in front of the window. Fixed arm brackets, on the other hand, remain stationary; so only use these when you do not need movement. The stability and overall design are also things for you to consider. For heavier pots or baskets, select a thicker or larger bracket with larger screws. Consider the coloring and material for its attractive appeal in the space. To install these types of support, be sure to look for a wall joist or another strong material to anchor the brackets into for support.
A variety of plants work very well as hanging container plants, but for the best look, consider any type of cascading plant, or plants that trail. Ivies, for example, will cascade over the edge, creating a beautiful and natural display. Avoid hanging plants that need frequent attention because you will need to climb up to manage the plant. Other good varieties of hanging plants include rosemary, purple queen, and most types of ferns.
How to choose the right plant container and display
Whatever plant pot you purchase, remember that plants speak when they are uncomfortable, thirsty, and when they need to be repotted. Plants also change in appearance when they are not receiving enough light. When choosing a plant container, consider the soil and fertilization process. In addition to water and light, soil and fertilization are vital aspects of plant care and plant life because soil and fertilizers provide the daily nutrients that all plants need.
When choosing a plant’s container, select one that complements all of the needs of the plant, including its growth habits, its appearance, and its other needs, such as being elevated. If you are planting a bushy plant or a rounded plant, choose a dish-like pot with a rounded design. You may want to consider using more cylindrical containers if you are planting taller plants or those with more vertical growth.
The depth of the pot is important to consider in the selection process. Learn how the plant’s root system will grow. Some plants with shallow roots will do well in shorter pots. Those with longer roots need wider pots, even if the portion of the plant you see is small. Choose a container that can comfortably accommodate the plant’s root system. Avoid pots that are too large because they can dwarf the appearance of the plant, creating a visually unappealing look. Also, if there is too much unused soil in the container where roots are not developing, this can lead to soggy, unhealthy conditions for the plant.
The color of the container should make a difference, too. If you are using a pot that has neutral colors, this will allow the colors of the plant to come through well and be displayed prominently. This is a good option for vibrantly colored plants or plants that flower. For plants that are less spectacular in color, choose a more ornate planter that adds more visual interest to the space. Consider other elements in the room, too, to ensure the plant fits in. If you have a specific wood tone in the space, for example, select a wooden planter that complements or matches that wood tone.
Also, consider the surface you plan to place the pot on. If you are using pots with external drainage holes (as opposed to a pot like a cachepot), you may damage the surface of a tabletop or windowsill unless you place a tray or catch underneath the planter. You can often purchase plastic or terra-cotta trays to place under the plant that will match the pot. If you choose terra-cotta saucers to catch drainage, realize that these will absorb moisture and can damage wooden surfaces as a result. To remedy this, choose terra-cotta saucers with a glazed bottom.
As for displaying these plants, choose what works for your space as well as for the plant. Displaying on a tabletop or windowsill is an easy option if you have the space. If the plants need to be near a source of outdoor light, consider using a plant stand near a window. Another option is to use a hanging basket to display the plant. Many larger plants can sit on the floor in a cachepot or box for display. You can often choose a container from a range of colors and sizes to fit your tastes. Consider the interior surroundings and the plant’s particular shape to find the right blend of options. If you have trouble finding options in local garden stores, consider purchasing these plant containers from websites such as Amazon.com (www.amazon.com) and PlantContainers.com.