Vehicles, planes and trains
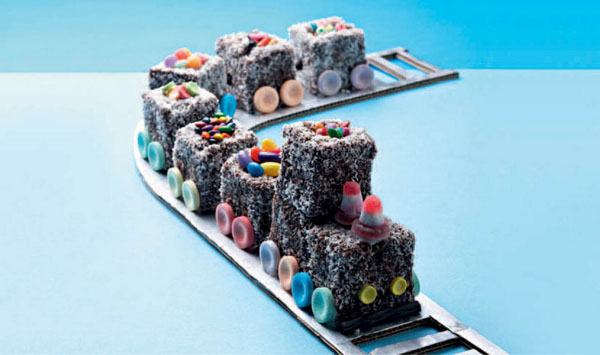
Lamington train
9 lamington squares (page 11, or store-bought)
glacé icing (page 8)
liquorice strips
round sweets for the wheels
2 sugared jelly rings
2 dome-shaped sugared jelly sweets
variety of small sweets
1 rectangular cake board
- Use 3 lamington squares to form the locomotive. Use glacé icing to stick 2 lamington squares together, and stick another one on top of the back square. Place the locomotive on the cake board (use glacé icing to secure it).
- Cut a square out of the top lamington, leaving a 1cm edge all round. Do the same with the remaining 6 squares, to form the carriages of the train.
- Cut the liquorice strips into pieces ± 3cm long. Press one end of a piece of liquorice into the back of the lamington locomotive and press the other end into another lamington, so it appears as if the train carriage is hooked to the locomotive. Repeat with the rest of the lamingtons to form the train.
- Using a little glacé icing, stick the round sweets to the lamingtons, so they resemble the wheels of the train. Stick 2 sugared jelly rings at the front of the locomotive and place 2 dome-shaped sugared jelly sweets on top of the jelly rings, to form the funnels.
- Finally, place a variety of small sweets on the locomotive and carriages.
MAKES 1 TRAIN
Tractors

40 mini Marie biscuits
glacé icing (page 8)
10 small Chomps or chocolate wafer biscuits
10 Tennis biscuits
10 marshmallows
20 filled round biscuits
10 Jelly Babies
10 liquorice pieces
- Using glacé icing, stick the mini Marie biscuits together in twos, and leave to set.
- Stick a small Chomp in the centre of each Tennis biscuit. Then stick a marshmallow on top of one end of the Chomp.
- Stick the filled round biscuits at the back of the Tennis biscuit and the mini Marie biscuits at the front, to form the wheels.
- Stick a Jelly Baby ‘driver’ to the front of the marshmallow.
- Stick a piece of liquorice at the front of the Chomp, to form the tractor’s funnel.
- Set aside until the icing sets.
MAKES 10
Marshmallow trains
10 rectangular wafer biscuits, cut in half
glacé icing (page 8)
10 whole wafer biscuits
20 marshmallows
30 small round flat sweets
40 round flat sweets
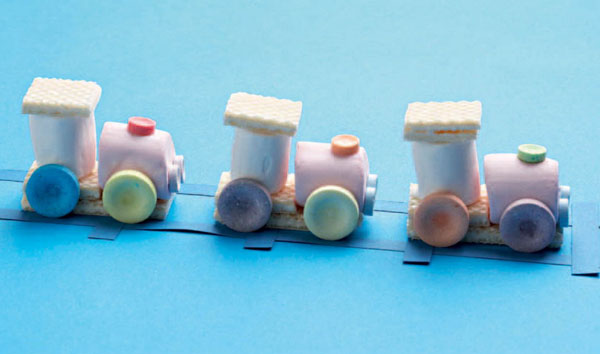
- Using glacé icing, stick half a wafer biscuit to one end of a whole biscuit.
- Stick 1 marshmallow upright on the half biscuit, and another half biscuit on top of the marshmallow.
- Stick the other marshmallow on its side at the front of the whole wafer biscuit.
- Stick 2 small sweets to the front of the marshmallow, for the headlights, and 1 on top, for the funnel.
- Stick 4 large round sweets to the sides of the biscuit, for the wheels.
- Leave to stand until the icing sets.
MAKES 10
Sports cars
10 finger biscuits
glacé icing (page 8)
20 Smarties
20 large round sweets
10 Jelly Babies
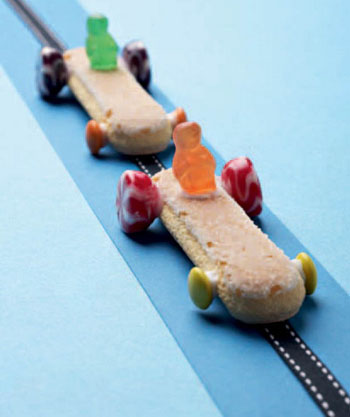
- Using small amounts of glacé icing, stick 2 Smarties to the front sides of the finger biscuit and 2 large round sweets to the back, for the front and back wheels.
- Cut the Jelly Baby in half and stick the upper body on top of the finger biscuit, so it looks like the driver sitting in the open cab.
- Leave to stand until the icing sets.
MAKES 10
F1 cars
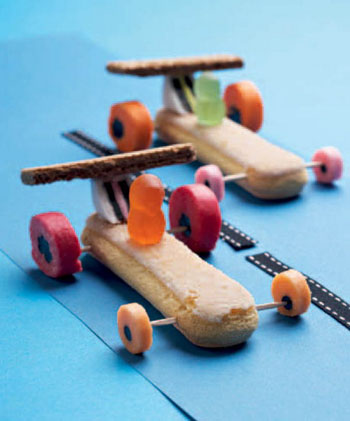
10 finger biscuits
20 cocktail sticks
20 mini round Allsorts
20 large round Allsorts
5 square Allsorts
glacé icing (page 8)
5 rectangular wafer biscuits
10 Jelly Babies
- Push cocktail sticks through the front and back of the finger biscuit. Skewer 2 round mini Allsorts onto the cocktail sticks at the front, and 2 large round Allsorts to the back, to form the wheels.
- Cut the square Allsorts diagonally in half to form 2 triangles. Use glacé icing to stick 1 triangle to the back of the finger biscuit. Cut the wafer biscuit in half lengthwise and stick one half on top of the Allsorts triangle, to form the spoiler of the car.
- Cut the Jelly Baby in half. Use glacé icing to stick the upper body to the finger biscuit, in front of the spoiler.
- Leave to stand until the icing sets.
MAKES 10
Jeep with trailer
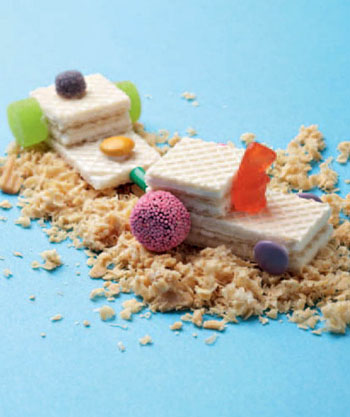
JEEP
20 rectangular wafer biscuits
glacé icing (page 8)
10 wafer biscuits (cut in two)
20 large round sweets
20 Smarties
20 Jelly Babies
10 small ring-shaped sweets
TRAILER
10 wafer biscuits (cut in two)
glacé icing (page 8)
10 whole wafer biscuits
20 round sweets
10 Smarties
10 Jelly Tots
10 oblong liquorice sweets
- For the jeep: Stack 2 whole wafer biscuits on top of each other, securing them with glacé icing. Then stack 2 half wafer biscuits on top of each other, and place them on the back of the whole biscuit, to form the cab.
- For the wheels, stick 2 large round sweets to the back of the biscuit and 2 Smarties to the front, using glacé icing. Cut the Jelly Baby in half and use glacé icing to position the upper body in front of the cab. Finally, stick a small ring-shaped sweet to the back of the jeep, for the towing hook.
- For the trailer: Stack 2 wafer biscuit halves on top of each other, using glacé icing, and place this on the back of the whole biscuit. Use glacé icing to attach 2 round sweets, for the wheels. Add the Smartie and Jelly Tot as shown in the picture. Cut off one end of the oblong liquorice sweet and stick the sweet to the front of the trailer.
- Leave to stand until the icing sets.
MAKES 10
Chocolate 4 × 4
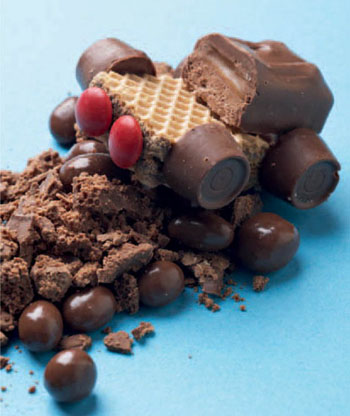
50 g plain chocolate
20 chocolate wafer biscuits
40 Rolo chocolate toffees
20 Smarties
5 mini Bar One chocolates, cut in half
- Melt the chocolate in the microwave, stirring often.
- Using some melted chocolate, stick 2 wafer biscuits on top of one another.
- Stick 4 Rolo toffees to the sides of the wafer biscuits, for the wheels, and 2 Smarties to the front, for the lights.
- Stick one half of a mini Bar One on top of the wafer biscuits, to form the cab.
- Leave to stand until the chocolate sets.
MAKES 10
Sailboats

5 wafer biscuits (cut in half diagonally to form 10 triangles)
glacé icing (page 8)
10 finger biscuits
10 Jelly Babies
square Allsorts
- Using glacé icing, stick 1 wafer biscuit triangle to one end of the finger biscuit, with the straight edge at the back, to form the mast and sail. Cut the Jelly Baby in half and stick the top half at the other end of the finger biscuit.
- Separate the square Allsorts into layers. Cut the outer coloured layers into triangles, and use glacé icing to stick 1 triangle to the top of the wafer biscuit, for the flag.
- Leave to stand until the icing sets.
MAKES 10
Aeroplanes
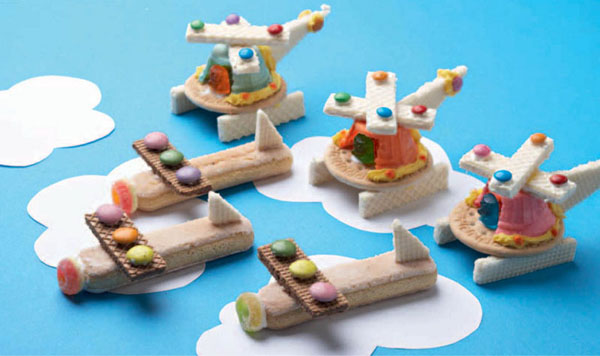
10 rectangular wafer biscuits
glacé icing (page 8)
30 Smarties
10 finger biscuits
10 sugared jelly rings
- Cut 5 of the wafer biscuits in half and cut the halves into triangles. Cut the other 5 wafer biscuits lengthwise in two. Using glacé icing, stick 3 Smarties on top of each long half. When the Smarties are secure, stick one long half on top of each finger biscuit, about one-third from the front, to form the wings.
- Stick 1 triangular wafer biscuit at the other end of the finger biscuit, to form the tail of the plane.
- Stick a sugared jelly ring to the front of the finger biscuit, to form the propeller. Leave to stand until the icing sets.
MAKES 10
Helicopters
10 edible cupcake cases
butter icing (page 8)
10 Marie biscuits
cake beads
10 Jelly Babies
25 rectangular wafer biscuits
± 60 Smarties
- Using kitchen scissors, cut away about one quarter of the cupcake case. Fill an icing bag with butter icing and pipe a semicircle onto the Marie biscuit, then set the cupcake case on top (positioning the open side of the cupcake case where there is no icing). Press cake beads into the edges of the icing, for decoration.
- Cut the Jelly Baby in half and use a little butter icing to stick the upper body to the Marie biscuit, inside the cupcake case opening.
- Cut 2 wafer biscuits in half lengthwise. Stick 2 halves across each other on top of the cupcake case, to form the rotors. Stick the other 2 halves, on their sides, to the base of the Marie biscuit, to form the skids.
- Cut 1 wafer biscuit in half diagonally and stick 1 triangle to the cupcake case to form the tail of the helicopter. Stick Smarties to the tail and the rotors as shown, for decoration. Leave to stand until the icing sets.
MAKES 10
Other ideas
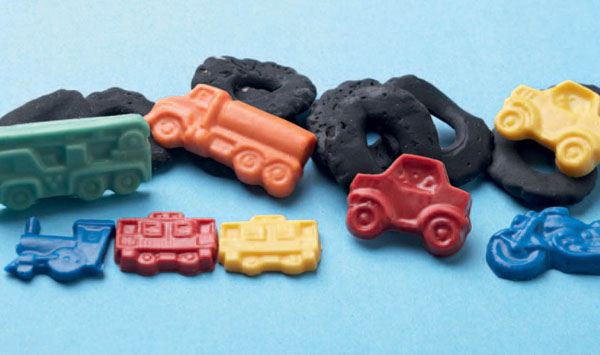
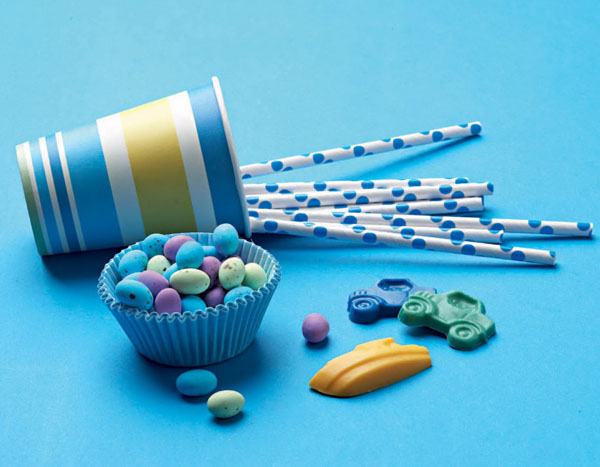
- Look for sweets and chocolates shaped like trains, planes, cars or ships, or make your own by melting coloured chocolate (see page 8) and setting it in vehicle-shaped moulds. Use these as table decorations or offer them as extra treats.
- Pile round black sweets on top of one another, to resemble car tyres.


