
Chapter 4
Once you’ve chosen an airfield and runway, tell the controller that if possible you want—trust me on this one for now—a 25-mile, straight-in approach, with a descent starting 3,000 feet above the airfield.
Say that you’d like to proceed to the vicinity of the airport but that you don’t necessarily want to land right away. As long as you have enough fuel, pretty much the worst thing you can do is rush into an approach before you’re ready. If you get to your destination with time to spare, the controller can give you a series of further vectors to keep you nearby, in safe airspace. Ideally, start the approach when you have at least one hour’s fuel remaining. Set a timer or ask the controller to do so.
Now use whatever spare time that leaves you to accomplish or rehearse some important pre-landing tasks.
Let’s start with the altimeters. A plane whose altimeters say it’s at 35,000 feet may in fact be quite a bit higher or lower than 35,000 feet. After all, an altimeter is only an air-pressure sensor, and air pressure varies with weather, time, and location.
At high altitude, it makes sense to set aside these local variations, and so pilots set their altimeters to a kind of global average of air pressure. At lower altitudes, in contrast, we need to know precisely how high we are. So we tune the altimeters to a local, very recent measure of air pressure, using a knob that’s typically on or near the altimeter itself. The controller will give you the current pressure setting at your destination. When you change the pressure setting, your altitude will appear to change, too, even though you haven’t climbed or descended. To quote my brother: “It’s some pretty crazy sh*t.” (At a quieter moment, you can follow a link on my website to The New York Times for an excerpt from my first book that explains this phenomenon in more detail.)
Before you start the approach, it’s also worth thinking about exactly how, later on, you’ll slow down for landing. The slower you’re going, the less runway you’ll use. Fly too slowly, however, and you won’t get enough lift from the wings. It’s too late to add on bigger wings, of course, so the next best thing is to extend panels called flaps (and similar devices called slats, but don’t worry about the difference) from the wings you already have (Figure 17):

Flaps expand a wing, change its shape, or both. When you fly on an airliner, you might notice the engines briefly getting quieter during the approach, followed by the whirring of the flaps as they are extended. That’s a good indication that you’re slowing down for landing. (Next, you’ll typically hear the engine noise rise again, as the pilots add power to maintain the new, lower speed.) Easy to spot from a window seat, flaps on airliners can be incredibly complex. I was utterly transfixed by them as a child. They seemed to be a highly technical but also joyful kind of expansion, a wing-spreading that to a ten-year-old, at least, was something like that of a bird.
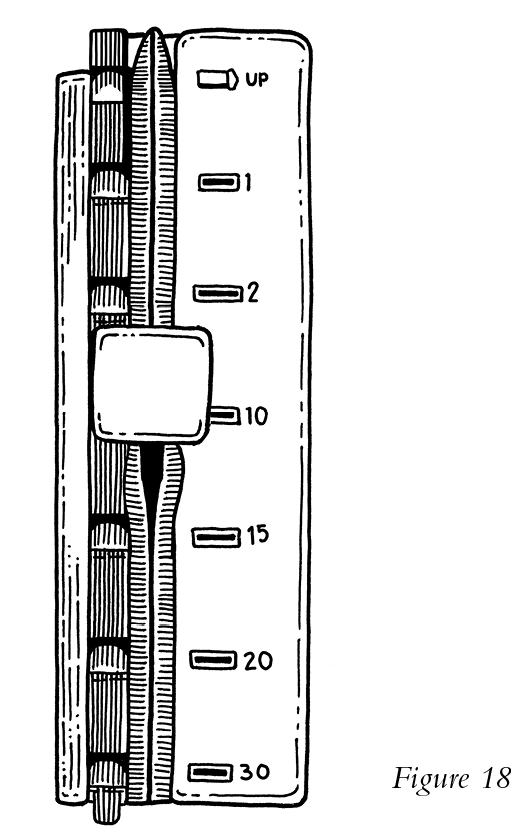
On most large planes the flap lever (Figure 18) is typically located on the center console, often to the right of the thrust levers. Or there might be a toggle switch, or a moveable bar between the seats that looks something like a car’s handbrake. The settings are measured in degrees, such as 5, 10, 20, or in simplified settings like 1, 2, 3, and FULL.
Generally speaking, flaps allow you to fly more slowly—just what we want for landing. They also reduce your maximum safe speed—think of it as your speed limit—which makes sense if you think of the force the flaps must absorb as they’re lowered further and further into all that fast-flowing air. On those planes that have a digital airspeed indicator, the colored zones that mark your maximum and minimum speeds should automatically move to reflect the limits for each new flap setting. Stay a good 10 knots above the minimum speed that’s typically marked in yellow. Keep in mind that, in order to lower the flaps to the next setting, you’ll need to already be below the maximum speed for that new setting. The maximum speed for each setting is usually displayed on a sign in the cockpit.
On many planes with a clock-style airspeed indicator, flap speeds are more straightforward. On the airspeed indicator (have a look back at Figure 10) you’ll see a white arc. The top (or highest) speed on that arc is the speed you must be below in order to lower the flaps for landing. The bottom (or lowest) speed on the white arc—which is lower than the bottom on the green arc, your previous minimum speed—becomes your new lowest safe speed once the flaps are extended.
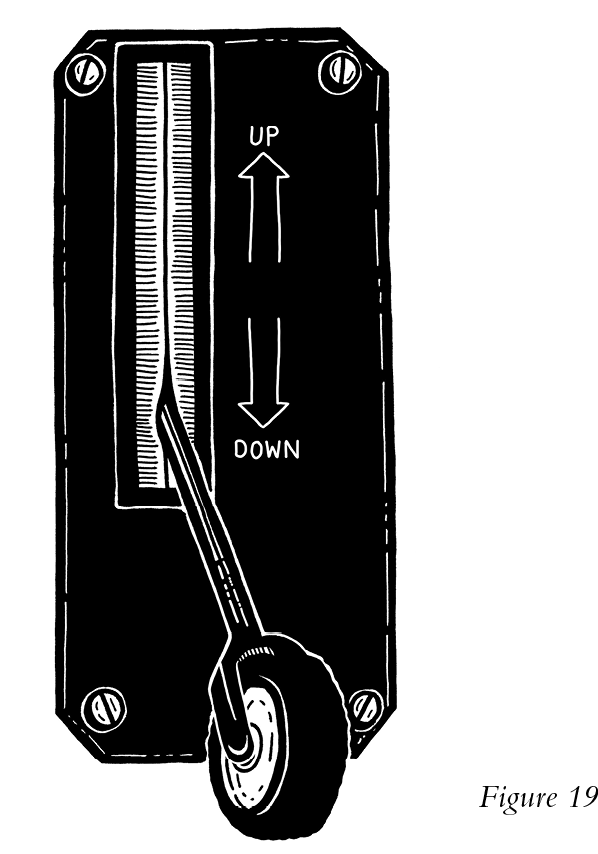
Before you start the approach, make sure you also know how to find the landing gear lever (Figure 19). If there is one, that is—some planes don’t have retractable landing gear. Look for a lever on the main console that might look as if it has a wheel on the end. (Coincidence? No.) Like the flaps, the landing gear has a maximum speed, usually posted near the lever or on the same panel as the flap speeds. A friend of mine finds it almost unbelievable that the lowering of the landing gear—a Nutcracker-caliber choreography of wheels (18 of them on a 747), the many panels that need to move out of their way, and all sorts of controls, sequencers, position sensors and locking mechanisms—is controlled by just one large and ridiculously simple switch. I agree.
Next, depending on how much time you have, and your type of aircraft, the controller (assisted, perhaps, by other pilots) may talk you through some further adjustments you need either to make now, or be poised to make later. It’s impossible to cover all the options here, but they might include the fuel-and-air mixture control, the carburetor heat, the alternate air, the propeller control, fuel tank and pump selections, anti-icing systems, as well as a number of settings that will help you slow down after you land: reverse thrust to redirect the power of the engines, autobrakes to automatically engage a preselected level of wheel braking, and speedbrakes to automatically deploy panels on the wings that will help lower the plane’s weight onto the wheels.
Finally, some tidying up (we’re professional aviators, after all, not Neanderthals, who, we must remember, never learned to fly). Clear away the empty cups of tea and anything else in the flight deck that’s not tied down. Make sure you can reach all the controls easily, including the rudder pedals, which you’ll soon need. Get your Aviator sunglasses ready if you think you’ll be landing into low sun (or if you just want to look timelessly stylish). And, while it may sound obvious, now is the perfect time to adjust your seat height and check that you can see over the dashboard.