SAUCES, RELISHES, AND PICKLED VEGETABLES (Salsas, Chiles, y Legumbres en Escabeche) 333
BREAD, SWEET YEAST ROLLS, AND WHEAT FLOUR TORTILLAS (Pan, Pan Dulce, y Tortillas de Harina) 365
DESSERTS, ICES, AND SWEETMEATS (Postres, Helados, y Dukes) 391
SEASONINGS AND OTHER COMMONLY USED INGREDIENTS 425 CHILES AND HOW TO PREPARE THEM 459 COOKING EQUIPMENT 485 SOURCES FOR MEXICAN INGREDIENTS 493 METRIC CONVERSION CHART 505 BIBLIOGRAPHY 507
DESCRIPTIONS OF COLOR PHOTOGRAPHS 509
ACKNOWLEDGMENTS
None of my books could have come into being without the help of many Mexican friends—housewives, cooks, teachers, restaurateurs, scholars, etc. — each of whom has contributed to my culinary education over the years in one capacity or another. A very special thank you to all of them; and to name a few: Hortensia Cabrera de Fagoaga, Ana Maria Guzman de Vazquez Colmenares, Livier Ruiz de Suarez, Maria Dolores Torres Izabal, Margarita Martinez de Porter.
My deep gratitude to my much valued editor and friend, Frances McCullough, who has held my hand through the pangs of book-birth on five occasions; also to the totally (unwittingly) British crew of Michael Calderwood, the photographer, and artist Susana Martinez-Ostos. Also to my painstaking copy editor Chris Benton (non-British). All were a joy to work with. A special thank you to Janet Long-Solis, whose doctoral thesis and subsequent book, Capsicum y Cultura—La historia del chilli, greatly enlightened me (and other recent writers on the subject) on the complexities of the culture and history of that most fascinating of plants.
My congratulations to the designer, Barbara Cohen Aronica, who made visual sense out of a highly complicated manuscript. My thanks and sympathy to my managing editor, Diane Shanley, and to my excellent and sorely tried proofreaders, Margaret Benton and Rose Ann Ferrick. And for all of his help
THE ART OF MEXICAN COOKING
on the botanical details, my appreciation to Alejandro de Avila. 1 would also like to express my gratitude to Harper &. Row for allowing me to use several recipes from my earlier books, albeit in a somewhat modified form.
Finally an acknowledgment of my debt to those wonderful cooks who, if judged by the excellence of their food, should all be published authors: the Annes, Augustins, Frans, Loises, Jerries, and Robertas, for they with others have kept my books alive and thriving. I should like to include for them a quote from Poppy Cannon (in her introduction to Aromas and Flavours by Alice B. Toklas):
“Little by little I began to understand that there can be value in giving a fine performance of another’s compositions . . . that an exquisite interpretation can he in its own way just as creative, just as imaginative as an invention.”
X
INTRODUCTION
f
This book devotes itself to the traditional popular foods of Mexico: those distinctive and delicious everyday dishes that for me sum up this remarkable cuisine. Even five years ago it wouldn’t have been possible to write this book—in terms of the sophistication of cooks and availability of ingredients. I’ve placed special emphasis on the necessity for the right ingredients and how to prepare them using traditional methods. Cooking techniques are not complicated—unlike many of those in the French cuisine, for instance—and they are the result of my 32 years of living, traveling, and learning in Mexico. My teachers have been women and men from all walks of life—some with little formal education—hut who share an immense appreciation of their regional foods and how they should he prepared to bring out the very special flavors and textures that make them authentic. This book does not pretend to be a definitive work, which would require many more years of study and several volumes, but rather a selection of particularly important dishes.
These popular, traditional foods are so regionally diverse, and so varied within those regions themselves, that they defy a cohesive, all-embracing definition. A certain homogeneity has indeed come about through improved transportation and other communications. But the basic differences remain, perhaps more because of the inability to reproduce the same chiles and herbs unique to one area in another (owing to climatic and topographical condi-
XI
THE ART OF MEXICAN COOKING
tions) rather than from the strong dictates of local cultures. They vary in levels of sophistication from those that are wild and gathered at random— often eaten raw—to dishes that call for a number of nonindigenous ingredients requiring more intricate methods of preparation. But while peasants and urban gourmets alike can lick their lips over a snack of grilled grasshoppers or a taco of colorm (coral tree) flowers with a sauce of grilled tunas (prickly pears), the peasants would go hungry rather than eat, say, a crepe of sauteed sweetbreads in a pulque/cream/pasilla sauce, or a chicken breast stuffed with cuitlacoche in a cream of squash flower sauce a la nouvelle. Nor would a Sonorense or Campechana necessarily delight in a chichilo negro from the Oaxacan coast, redolent of charred chiles and avocado leaves.
These foods, most of them unique to Mexico, can be seen at many different levels that do not necessarily coincide with the social or economic conditions of the consumers, and a taste for them varies little between large urban centers, provincial towns, and villages. There are the hunted or gathered wild and seasonal foods that I have mentioned in other books: iguana , armadillo, migrating ducks and doves ( canates and huilotas ), insects like chapulmes (grasshoppers from Oaxaca), jumiles, a type of beetle often eaten alive in Morelos, escamoles (ant larvae) from Hidalgo and neighboring states; colorm (coral) and yucca flowers, flowers and fruits of various cacti, wild greens and herbs like lamb’s-quarters ( quelite cenizo ) and wild anise ( anis del campo) among many, many others.
There are the hearty country meats, most often prepared by local experts on weekends for country markets and for the townsfolk whose dia del campo (day in the country) would hardly be complete without tacos of carnitas ..(browned pork) or pit-barbecued lamb with its accompanying stuffed stomach, montalayo, or pit-barbecued ox head in maguey leaves (picturesquely referred to as rostro, which means “face” or “countenance” in Spanish) with a rustic, rough-textured chile sauce and a bowl of the concentrated juices from the cooking pit.
The early morning brings women to the entrance of the marketplaces or to strategic street corners with their tamale steamers and earthenware pots of atole (corn-based gruel), and later on in the morning those who serve a restorative tripe soup, menudo, guaranteed to cure the worst of hangovers.
Many of the same cooks return later in the day with the street food of the evening— pozole (a pork and hominy soup/stew) or masa antojitos, sopes, quesadillas, enchiladas , etc.—made up while you wait for the charcoal under the comal to settle down to a healthy glow. Next would come the eating stands of the marketplaces with their Jong wooden tables and benches, akin to the cocinas econdmicas, modest little holes-in-the-wall that serve simple comidas to market and office workers and well-dressed aficionados alike. It will
xii
INTRODUCTION
be home-cooked, honest food: rice or pasta soups; unsophisticated stews of chiles, meat, and vegetables; or vegetable fritters in a tomato broth, all followed without fail by some soupy beans. It is the same food that might be served in more affluent homes, where more protein, richer sauces, and the regional touches of the household’s cook would undoubtedly be included.
Tourist hotels are finally catching on, and breakfast and Sunday lunch buffets of regional foods have become commonplace. Banquets for diplomats and other grand occasions have for the most part (with the great exception of those prepared by Seriora Mali Quijano and her famous mother) remained European in content.
Generally, and sensibly, the main meal, comida , is served anytime after two o’clock in the afternoon, after a sustaining mid-morning brunch ( almuerzo ), with a light supper to finish off the day’s eating—a hearty meal of rice and mole would be unthinkable just before going to bed.
The foods of regional Mexico are in a gastronomic world of their own, a fascinating and many-faceted world, but alas, far too many people outside Mexico still think of them as an overly large platter of mixed messes, smothered with a shrill tomato sauce, sour cream, and grated yellow cheese preceded by a dish of mouth-searing sauce and greasy, deep-fried chips. Although these do represent some of the basic foods of Mexico—in name only—they have been brought down to their lowest common denominator north of the border, on a par with the chop suey and chow mein of Chinese restaurants 20 years ago. These dishes can be wonderful when cooked with care and presented in their correct culinary context, but instead, they have been transformed into a cheap culinary “fix.”
On the other hand, to be fair there are some significant, positive changes going on across the United States as a small, but growing, number of specialty restaurants are attempting—and with no small measure of success—to change this image by presenting Mexican regional foods, interpreted in an American or southwestern style, with light adaptations and grilling as prominent features. Perhaps they have found the answer with this happy medium, for it is not always easy or even feasible to present the authentic day-to-day meals of a country and people so different in climate, temperament, and eating patterns from those of the United States, where sophisticated restaurant-goers and food writers are constantly in search of “something new" to satisfy their culinary curiosity. This is great in more ways than one, but I sometimes wonder just how much is being distorted or lost in this enthusiasm for the new 7 . Fredy Girardet says, “We must preserve our regional cuisines because they are our culinary foundations.” And Poppy Cannon, in her introduction to Aromas and Flavours by Alice B. Toklas, notes, “I began to comprehend a little the French resentment against change without reason (italics are mine). It
xiii
THE ART OF MEXICAN COOKING
began to dawn upon me that certain dishes like sonnets or odes cannot be brought into being without obeisance to classic rules and restrictions.” The talented young chefs in America today are creating some wonderful dishes— but also some culinary misalliances with Mexican ingredients. I’m sure it wouldn’t occur to them to put cilantro and jicama into their coq au vin or add pozole corn and cumin to desecrate their bouillabaisses. They’ve studied the French, Italian, and Chinese cuisines seriously but use Mexico’s exciting ingredients without due regard for the traditional cooking processes and balances that make a great Mexican dish, with its many-faceted or layered depths of flavor. It’s this depth and character that I find so often missing in these “new” dishes, and it’s one of the reasons I’ve included detailed instructions on techniques and ingredients. My aim in all my books is that expressed by a Finnish designer, Antti Nurimeineim: “I am interested in continuity and refinement. I want to perfect things, not always to make new ones.”
So often the new dishes hit only the high notes and miss the satisfying complexities altogether. For instance, a blended raw chile sauce tastes blatant, without the subtleties of, say, charring the chiles to round out the flavor. Nor should dried chiles be soaked endlessly or skinned and blended to a smooth, watery liquid. Colorful, yes, but the flavor is unidentifiable. They should be lightly toasted, as a general rule, soaked for the required time, and then blended to a specific texture with other balancing ingredients—without, for instance, the shocks of pineapple juice or chocolate in a table sauce. And cumin! Used in microscopic quantities in some Mexican cooked sauces, as it should be, it is pleasant, but added as it is con bravura in many southwestern-type recipes, it has a sweaty taste. And what about those beans, al dente and saltless to boot? Apart from being very gassy and innocuous, they bring to mind the admonition in a little cookbook written to the campesina (countrywoman): “If you eat beans, they should be well cooked and with salt.” (And it also gives this advice: "A little pig will bring pleasure to your home.”)
It is heartening to see the great increase in the availability of ingredients for these and other regional recipes across the country. Of course, the Southwest—especially California—and the Chicago area, still lead the way, catering to their large Hispanic populations. But to see a new food chain like the Tianguis markets in California (of Von’s parentage), for instance, devoting itself to the needs of those populations, with an increase in the variety of chiles, fresh produce, and staples, is a “happening” in the world of food. It will also make a large proportion of these recipes cookable; a few may be more difficult to reproduce but not to the aficionado, who in my experience will beg, borrow, grow, or mail-order in order to re-create faithfully the authentic flavors of this compelling and addictive food. I have no doubt that letters will soon be arriving to tell me about flourishing hoja santa bushes, American
XIV
INTRODUCTION
sweet potatoes being sun-seasoned in the Mexican style, or some little tricks to cultivate epazote the year round—not to mention the discovery of a homespun corn grinder for the nixtamal. It is for them and the other aficionados of honestly authentic Mexican food—wherever they may be in the world— that I have written this book.
NOTE ON COOKING TIMES
The cooking times given in the following recipes should be considered an approximate guide since actual cooking times will be influenced by a number of factors. Food cooks faster on a professional range or heavy counter-top burners with the same high gas pressure than on an ordinary domestic stove. Heavy pots and pans will transmit the heat more efficiently than lighter ones, while wider pans will reduce sauces faster than deep, narrow pans. Altitude is also important, since of course liquids boil at a lower temperature the higher the altitude.
In Mexico these factors also apply, of course. Mexican meat and poultry tend to be more compact than their American counterparts, so cooking times should be extended by about one third to one half.
NOTE ON SPANISH AND ENGLISH TRANSLATION
Although it’s inconsistent, for the sake of clarity and easy reference, in the recipes the Spanish title appears first while in all other cases the English appears first.
XV


CORN
(M aiz)
“With each rising of the sun man became more like the corn and with each moon the corn became more like man; and both began to take on the likeness of the Gods. ”
TORTILLAS AND TORTILLA DISHES
Tortillas de Mai'S (Corn Tortillas)
Lime (Cal)
Preparation of Dried. Corn and Making of Masa Equipment for Making Corn Tortillas The Tortilla Press The Corn Mill The Comal (Griddle)
Tortillas Made with Prepared Masa Tortillas Made with Quaker Masa Harina Methods for Reheating Corn Tortillas Totopos Fritos I (Fried Tortilla Pieces)
Totopos Fritos II (Fried Tortilla Pieces)
Totopos Salados y Fritos (Fried Salted Tortilla Pieces) Totopos Tostados (Crisp Baked Tortilla Pieces) Tostadas (Fried Whole Tortillas)
Raspadas (Thin, Crisp Tortillas)
Tortillas de Mai'z y Trigo (Corn and Wheat Tortillas) Enchiladas Placeras (Enchiladas Served in the Central Plaza) Enchiladas de Santa Clara Enchiladas Verdes (Green Enchiladas)
Enjococadas I (Tortillas in a Sauce of Cheese and Cream) Enjococadas II (Casserole of Chicken Tacos and Green Sauce) Salsa Verde (Green Sauce for Enjococadas II)
Tostadas de Apatzingan Flautas de Guadalajara Fillings for Flautas Polio Deshebrado (Shredded Chicken)
Rajas de Chile Poblano (Poblano Chile Strips)
Papas Guisadas (Potatoes with Tomatoes)
Picadillo Blanco (Ground Meat)
Tacos de Requesdn (Ricotta Tacos)
Efigenia’s Chilaquiles Chilaquiles de Tequila
Tortillas con Asiento (A Oaxacan Tortilla Snack) Enfrijoladas (Tortillas in Bean Sauce)
Entomatadas (Tortillas in Tomato Sauce)
Papadzules (Tortillas in Pumpkin Seed Sauce) Cross-reference:
Chilaquiles Tacos de Polio
Tortillas de Harina (Flour Tortillas)
“There was an intimate relationship between the Otomis (known as the Men of Corn and the first inhabitants of the central highlands of Mexico), a dependence, a symbiosis, a living together with bonds of affection between these two living beings: man and plant. Both grew on this earth to provide for one another: man laboring, planting, irrigating, and fertilizing the com. The com providing man with tortillas, tamales and atole.”
I
.1. t you have lived in Mexico as many years as I have, you will agree, romantic as the notion is. It is particularly true in the case of the small farmers, whose lives and activities center around the cultivation of their corn—even if it is just enough for the family’s consumption, para el gasto, as they put it. Planting, except in the case of nonseasonal irrigated corn, begins just before the rains start toward the end of May. Then the first longed-for rain eventually falls, and the corn sprouts and grows; there is the first weeding, la descarda, to be done. As the rains continue and the corn grows apace, new weeds spring up and thicken around the base of the corn, and the segundando, the second weeding, takes place. It is a backbreaking job for the laborer, who squats with his knees almost up to his chin, coaxing out the weeds with the tip of his curved machete so as not to hurt the young com plant. Then there is the fertilizing and afterward the anxious watch for mealybugs that burrow through the heart of the sprouting ears, until the first tender elotes (ears of corn) begin to form. In their green husks they are sold to be roasted over charcoal or the kernels shaved off for the fresh com tamales or atole (gruel). The corn silk is dried and made into a tea used as a remedio for the kidneys; the long, dark green leaves are cut from the stalk for wrapping the intricately bound corundas (triangular tamales in Michoacan); the plumelike flower at the top of the plant is shaken and the seeds collected to be toasted and ground for tamales de espiga (a specialty of eastern Michoacan), while the bulbous, silvery-skinned mushroom cuitlacoche that sometimes grows on the ears provides an epicurean treat.
THE ART OF MEXICAN COOKING
Then comes the long wait throughout the autumn as the corncobs dry out on the stalk. If the rains continue, the stalks are bent over so that the water will run from stem to tip of the fully sheathed corn husks. The dried ears of corn are harvested at the beginning of December, a time when the whole family will turn out with hemp slings over their shoulders in which to collect them. Once the corn is stored in rustic bins made of dried reed, the work is almost finished except for cutting and raking in the dried cornstalks for fodder for the cattle. According to the village or region, each and every one of these stages will be marked with a ceremony—blessing the crops, scaring away evil spirits, exhortations for rain, blessing the new corn, and then the harvest—all of them rooted in the pre-Hispanic customs and beliefs of the past.
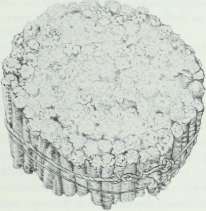
As work in the field slackens, the dried grains of corn are shaved from the cobs (one of the most rustic but efficient instruments for this shaving is the elotero illustrated on page 29, made up of tightly packed and tied old dry corncobs; I am told that it lasts for years) and stored in bags until needed for the next batch of tortillas. And as spring approaches, the stubble is burnt to ashes, the land tilled and left fallow until the advent of May, when the cycle begins all over again.
All kinds and colors of corn are grown, depending on local preferences and prejudices, climate and soil. Cachuazintle, broad white hominy (confusingly in Michoacan there is a small brownish com that goes by the same name), is used for pozole, or tamale flour. There are the medium-sized ancho (broad) corn and punteado, shaped like a thin, tapering tooth. All colors of the rainbow are represented: creamy and canary yellow, mauve, mulberry, greenish, or bluish-black (prieto). There is corn of variegated colors called pinto, and there are many shades in between. There is a plentiful choice for making exotic-colored tortillas and atoles. (These are not always in favor; I know of a small country restaurant near Jungapeo where capitalinos, people from Mexico City, walk out when they see tortillas of these multicolored corns, favoring the whitish, clean look of the ones they are expecting— although ironically the Mexico City tortillas are a dirty yellow, tough and leathery in contrast to Don Ignacio’s tender handmade ones.)
To sum up, the cooking of corn in Mexico with all its elaborations and ramifications is, and always has been, within the realm of the highest culinary art, beyond that of any other country.
CORN
TORTILLAS DE MAIZ (Com Tortillas)
“The tortilla would puff up as if alive, as if it wished to fly, as if Ehecatl [the Aztec God of Wind] had blown into it himself.”
Salvador Novo
I wrote at some length in The Cuisines of Mexico about the history and regional differences of tortillas (there are about 30 types in Oaxaca alone, according to the latest research on the subject), so I will not dwell on these aspects here. Suffice it to say that the corn tortilla was for centuries, and still is in the country areas, the sustaining bread of the Mexican people, with the exception of those in the northern states. In The Tortilla Book I mentioned its versatility: a wrapper for countless ingredients— tacos and enchiladas; a pasta— chilaquiles and dry soups; a scoop— totopos; a plate—a tostada; dried and ground to a flour, it is re-formed and made into antojitos or small balls for soups, to mention just a few of its uses.
The simplest food is always the most difficult to prepare, for there are no predominant flavors to mask bad or indifferent ingredients or the careless handling of those ingredients. The corn tortilla provides the best example of this idea that I know. The ideal tortilla is made of carefully selected dried corn; just the right amount of lime (calcium oxide) should be added to the cooking water—too much will make for a dull yellowish, bitter-tasting tortilla with an acrid smell. If the com is left too long over the heat, the dough will be sticky and impossible to make into tortillas.
Without doubt, a hand-patted tortilla is the best; it is soft-edged and tender. But as I have written elsewhere, the patting out of tortillas is a dying art, so one has to opt for the next best: those pressed out individually with a tortilla press and then cooked if possible on an earthenware comal (bakestone) over a wood fire. (I have described the alternative methods on page 11).
A superbly made tortilla almost melts as you bite into it and when properly stored lasts some time without drying out. But the perfect tortilla is hard to come by nowadays, even in Mexico City, let alone in the United States. In my teaching travels in the United States recently I have seen some excellent tortillas, especially in California, Detroit, and Chicago, and while Texas (particularly Houston) is improving, Arizona and the South still have a long way to go.
THE ART OF MEXICAN COOKING
WHAT TO LOOK FOR IN A GOOD TORTILLA
It should be of white corn (let’s forget blue for the moment), opaque, mealy, neither too thin nor too thick, and speckled with brown to give some indication that it is cooked (many look half raw).
TYPES OF TORTILLAS TO AVOID
• The much-touted American handmade ones (from San Francisco and elsewhere) that are far too thick and clumsy.
• Those dirty-yellow, bitter-smelling ones. Too much lime has been added to the cooking water.
• Tortillas that are too thin, transparent, and chewy, which means that wheat flour has been added to the masa.
• Tortillas made of blue cornmeal that crumble at a glance. The corn for the cornmeal has not been treated in an appropriate way for making tortillas.
• Frozen tortillas that turn out to he as stiff as cardboard.
With these criteria in mind, there are multiple good choices.
CHOICES OF TORTILLAS
• Buy good frozen tortillas (avoid those with additives).
• Buy good packaged tortillas from a supermarket or tortilla factory if you live in an area with a Mexican population.
• Buy frozen masa, now widely available in many Mexican markets, and make your own.
• Buy fresh masa from a tortilla factory and make your own.
• Buy dried corn and make your own nixtamal for the tortilb factory to grind and make your own tortillas.
• Do the above hut grind it yourself.
• Use Quaker Masa Harina, mix with water, and make your own.
Note: If you are buying fresh masa and making your own tortillas, the masa will probably be sold to you still hot in a tightly tied plastic bag. Undo it as soon as possible. Set aside what you want to use right away, divide the rest up into, say, four portions, weigh each portion, form into a flat cake (more convenient for storing), and wrap for the freezer with the weight clearly marked on it. Fresh masa tends to sour if left in the refrigerator for more than a day or two.
A final note: Sour masa will not hurt you. It just has a vaguely unpleasant taste and smell.
CORN
Lime (Cal)
This chemically pure lime, calcium oxide, is used in the preparation of dried corn for making tortilla and tamale dough. It is generally sold in rocklike lumps of varying sizes. To use it in this state, break off a piece about as large as a golf ball (once you have some experience you can estimate more accurately) and crush it down as much as possible. Sprinkle well with cold water. It will then start to slake, or burn as the Mexicans say, and it does just that. It starts to crumble with a slight sizzling noise, sending off a vapor. If you put your hand over the bowl you are using, you can feel the heat emanating from it. When the action has subsided, it is now slaked; stir again and pour the milky liquid through a strainer into the pot with the com and water (page 8). Take a taste of the water; it should have a slightly acrid taste or, as the Mexican expression goes, “grab your tongue.” If the water is very strong and bitter, add more cold water to dilute the corn water. If it is too weak, pour more water through the strainer containing the lime residue and try again.
Since one usually buys lime by the pound at the very least, it can be broken up into smaller pieces and stored in closed jars, but with time it will naturally slake on its own with the natural moisture in the air. It is still usable, although it will have broken down to a powder containing some small lumps. When you add water to it for the nixtamal, it will not burn.
Note: When handling lime, be careful not to get any near your eyes and always use a noncorrodible container for diluting it.
THE ART OF MEXICAN COOKING
Preparation of Dried Corn and Making of Masa (Nixtamal y Masa de M ai'z)
Nixtamal is the name given to dried corn kernels that have been cooked in a solution of lime and water. After this step, the kernels are ground to a fine dough called masa that is ready to be made into tortillas, antojitos, or some tamales.
CHOOSING THE CORN
When buying dried corn of whatever color or size, always make sure that it is not picado (perforated) by weevillike insects that burrow into the kernels, eating the starchy content inside. If the corn is already packaged, you can easily see this by a powdery residue at the bottom of the hag.
The kernels should he free of any musty odor—such an odor indicates that it has been stored in a damp place—which will affect the flavor of the tortillas.
PREPARATION
MAKES ABOUT 2 POUNDS OR PA CUPS MASA
1 pound (2V2 cups) dried com kernels
1 cup water
2 rounded teaspoons powdered lime (see page 7)
First run the dried corn kernels through your hands to pick out any small stones, pieces of chaff, etc. Rinse thoroughly in cold water and drain.
Put the rinsed corn into a pan and add enough water to come at least 1 inch above the surface of the corn. Stir 1 cup of water into the powdered lime (he careful of your eyes; it burns) and pour the mixture through a fine strainer into the pan, pressing out any soft lumps with the back of a wooden spoon and discarding the hard residue. Stir the corn well.
Set the pan over medium heat. As soon as the mixture heats up, the outer skin of the corn kernels will turn bright or dull yellow, depending on how much lime is used. Cook until small bubbles appear on the surface—the mixture should not boil. Lower the heat and continue cooking until the yellow skin can easily he sloughed off the kernels—test by rubbing a few kernels between your fingers. This should take about 15 minutes more. Set the corn aside in the warm liquid for at least 12 hours and up to 48. Drain, rinse in cold water—it is not necessary to rub off all the skins for this type of
CORN
masa —and send to the mill to he ground (see page 10 for additional information on grinding utensils).
The important thing to look for when making your own nixtamal is that the corn should not be overcooked, or it will make a tacky masa, practically impossible to handle for making tortillas.
Equipment for Making Corn Tortillas
TORT/L L A PRESS
The natural tortilla press is, of course, the hands, but the art of patting out a tortilla is dying. The second method, also handmade, is on the wane, too, except for a few isolated places in the low hot country. A ball of masa is pressed onto a piece of banana leaf—which has now almost totally given way to plastic—and patted out with one hand while the other turns the leaf in circular fashion to ensure that the tortilla will be round. Both these methods are rapid and carried out with amazing dexterity.
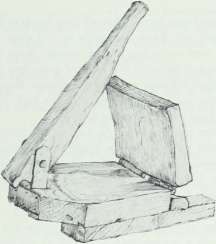
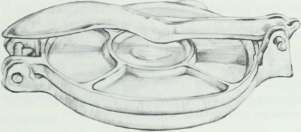
But with the modem age has come the tortilla press. The wooden press (illustrated on page 7) is certainly picturesque but is also clumsy and tends to slide around. By far the most efficient is the heavy cast-iron press made in Mexico; these vary in size—from 6 to 7 inches in diameter is a good size for general use. Care needs to be taken as they tend to rust, despite their noncorrosive paint finish. They need no curing, just a rinse. Be sure the plates are thoroughly dry before making the tortillas; you will also need a plastic liner for each plate so that the masa does not stick to the metal. The smallest (1 quart, although it seems too small) Alligator Baggie is my choice hands down—no zips and locks and fancy flaps. After being used (think ecologically) they can he wiped clean, folded, and stored with the press. After you use it, the press should also be wiped clean and dried thoroughly; place
THE ART OF MEXICAN COOKING
paper toweling between the plates to prevent any moisture from forming and corroding the metal.
There have been a couple of fancier presses made in the United States— one elegant enameled heavy one that seems to have faded from view and a sleek, light aluminum one, easy to clean but too light for the job, which tends to snap under heavy pressure.
CORN MILL (MOL I NO DE MAJZ)
In Mexico the only corn-grinding utensils for centuries were the black basalt metate (grinding stone) and the mano or metlapil (muller). Of course they are still used today in remote villages or when the electricity fails at the local country mill. The mxtamal is stone-ground at the country mill, although I have noticed some places in the southeast of the country where the mill is of metal—the resulting masa is much coarser.
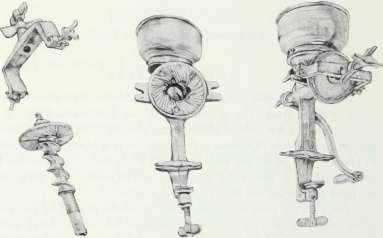
There are now small tortilh factories almost everywhere in the United States—there is even one in Alaska—and it is possible to go and buy masa if you want to make your own tortillas. However, for the dedicated do-it-yourselfers there are alternatives. You can prepare your own nixtamal (see page 8) and take it to the tortilla factory. Or you can buy a grinder like the one illustrated and grind your own corn. For that you must tighten the blades as far as possible, and even then the masa will be fairly coarse. This last method will require patience and a very strong arm.
CORN
COMAL OR GRIDDLE
The comal (the name comes from the Nahuatl word comalli) is a thin, circular “griddle” used for cooking tortillas. There are several types to choose from, as well as substitutes, depending on what is available where you live (if you travel to Mexico unencumbered, you can always bring the real thing back with you) and what sort of cooking facilities you have.
The traditional comal, still used in the villages for cooking over wood or charcoal (I use it over gas), is a disk of thin, unglazed earthenware. Before being used it must be cured, or the tortillas will stick to it. Dilute some powdered lime with cold water and stir to form a thin paste. Spread the cooking surface of the comal with a thick coating and place over the fire. When the white lime turns a cream color after it has dried out, brush off the excess powder, and the surface will be ready for cooking tortillas. Every time you want to use this type of comal for tortillas or masa antojitos the process will have to be repeated.
A heavy tin or light metal comal is the most commonly used in Mexico, often made with the recycled lids of old oil drums. It can be used over any type of fire, although it tends to warp when used over an electric burner. The advantage of this type of comal over the others that follow is its thinness, so that the heat cooks the dough fast, an important requisite for a tender tortilla. And also the heat can be adjusted quickly. A light rubbing with oil is all the curing that is needed. It can be washed with soap and water if messy, and any substances sticking to it can be scoured with a pumice stone. The important thing is to dry this comal thoroughly after washing as it rusts easily. A heavy iron griddle can be used quite successfully over gas or electricity, but it takes longer to transmit the heat to the dough, and the heat is not as easily controlled. Follow manufacturer’s instructions for curing.
A heavy frying pan with a black surface could be used, but you can burn your hands on the hot sides and the high heat will probably spoil the pan’s surface.
If you have one of those glass-topped stoves, you can make tortillas right on the surface, although 1 don’t know whether the manufacturer would approve!
For making good tortillas the surfaces to avoid are those highly polished metals—aluminum, stainless steel, Teflon, etc.—that reflect the heat. Your tortillas made in them will tend to be dried out, pale, and underdone.
Making a Tortilla by Hand
Knead the masa well until it is completely smooth. Moisten your hands with water. Take a small piece of dough and roll it into a ball about V /2 inches in diameter. Press it out a little between your hands and then begin
THE ART OF MEXICAN COOKING
patting it out and extending it with each pat first on one palm and then the other, turning your hands over as you do so, until you have a thin disk of masa with a smooth circumference, about 5 inches in diameter. (It takes about 33 pats to extend it, I am told—although I always lose count.)
TORTILLAS MADE WITH PREPARED MASA
MAKES 15 5-INCH TORTILLAS
1 V 4 pounds (about 2V 2 cups) prepared com tortilla masa (page 8), approximately water if needed
If the tortilla masa has been freshly made, it will probably be the right consistency for working immediately—a soft, smooth dough. If the masa has been sitting around and drying out a little, then add a very little water and knead until it’s smooth and pliable, not the slightest bit crumbly.
Divide the dough into 15 equal parts (each one should weigh just over 1 ounce) and roll into smooth balls about Wi inches in diameter. Place all but one of the balls under plastic wrap so that they do not dry out.
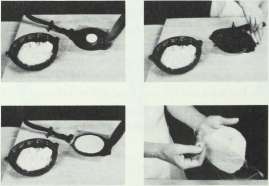
Heat an ungreased comal or griddle over a medium flame. Open up the tortilla press and place a small Alligator Baggie on the bottom plate. Place a ball of the dough on the bottom Baggie, a little off center toward the hinge rather than the pressing lever (it presses too thin on that side), and press it out with your lingers to flatten a little. Cover with the second Baggie and
CORN
press down firmly but not too fiercely (or the dough will be too thin and you will never be able to pry it off the Baggie in one piece). Open the press, remove the top Baggie, lift the bottom Baggie up in one hand, place the dough onto the fingers of your other hand, and very carefully peel the Baggie off the flattened dough. Do not try to peel the dough off the bag. Keeping your hand as horizontal as possible, lay the tortilla flat onto the comal. There should be a slight sizzle as the dough touches the surface of the comal. Leave for about 15 seconds; the underside will have opaque patches and be slightly speckled with brown. Flip the tortilla over onto the second side and cook for a further 30 seconds; the underside should now' be opaque and speckled. Flip back onto the first side again and cook for 15 seconds more. If you have done all the correct things and the comal is the correct heat, the tortilla should puff up, showing that the extra moisture has dried out of the dough. If the tortilla doesn’t puff up and it’s necessary in order to make panuchos, for example, then press it gently on the last turn with your fingers or a towel.
As the tortillas are made, they should be placed one on top of the other in a basket or gourd lined with a cloth to preserve the heat and keep them moist and flabby. They can also be wrapped in foil packages and frozen.
TORTILLAS MADE WITH QUAKER MASA HARINA
MAKES ABOUT 15 5-INCH TORTILLAS
2 cups (IOV 2 ounces) Quaker Masa Harina 1V 3 cups water, approximately 2 1-quart Alligator Baggies for pressing tortillas
Mix the masa hanna with the water and work well so that it is evenly distributed through the flour and forms a cohesive mass when pressed together. The dough should be of medium consistency, neither too firm nor wet and sticky.
Follow the instructions for making tortillas in the preceding recipe.
THE ART OF MEXICAN COOKING
Methods for Reheating Corn Tortillas
If you are cooking on a gas range or a wood or charcoal fire, simply throw the tortilla onto the grill and heat for a few seconds on each side. They may char a little, hut no matter—it adds great flavor and couldn’t be more authentic. But serve immediately; these won’t hold.
For a gas or electric range, wood or charcoal fire: heat a comal over the fire, place tortillas on it, and reheat for a few seconds on either side. Serve immediately, or they will harden.
If the tortillas have been made ahead, wrapped in foil packages, reheat them for about 20 minutes in a 325° oven. Or reheat them in a microwave oven: place a dozen or so in plastic wrap and heat for 30 seconds (approximately, as each oven varies), turning the package over and heating for another 30 seconds. Timing will also depend on the thickness of the tortillas.
If you are using frozen tortillas , it is better to defrost them first and then reheat them in one of the ways suggested above.
To add a little folklore to this more technical advice: I like to heat a pile of tortillas, en famille of course, following the method taught me by a Mexican artist/craftsman, Feliciano Bejar:
TO REHEAT A SMALL PILE OF TORTILLAS
This is the “kitchen” way of reheating tortillas, which can be done over a gas or electric burner or over an open grill. If they char a little around the edges, no matter; that adds flavor.
Place a tortilla on an open burner to heat for about 5 seconds (longer if it is a thick one) and turn over, putting another one on top; leave for a further 5 seconds, turn both over together, and place another one on top, continuing until the whole pile is heated. Wrap in a cloth and bring to the table.
A friend and great cook from Hidalgo, Senora Lara, once after a meal presented her guests with crisped tortilla halves sprinkled with salt. “Even if you think you have no room, eat it; it aids the digestion,’’ she said.
CORN
TORTILLA RECIPES
Tortilla Pieces (Totopos)
TOTOPOS FRITOS I (Fried Tortilla Pieces)
Small fried squares of dried corn tortillas , totopos are sometimes used as a crisp topping for a bowl of soup. In Mexico, they are used for frijoles puercos (page 181—Michoacan version) and Michoacan chilaquiles (page 31). They can also be tossed into a salad just before serving, added to melted cheese dips, scrambled with eggs, or just served by themselves as snacks. You can also make delicious totopos from whole-wheat flour or a mixture of com and wheat totopos (pages 17 and 18).
It is best to use a thin tortilla for totopos. Stack about 4 of them together and cut off the curved parts to form a large square. Then cut them again into small squares, about Vz inch. Spread them out on a rack to dry, in the sun, in an airy place, or, if you are in a hurry, in a 325° oven for about 40 minutes.
Heat about Vz inch of oil in a small pan (a large one uses too much oil) and fry the tortilla squares a few at a time—they will fry more evenly and more quickly if you don’t overcrowd the pan. Turn them over from time to time until they turn a deep golden brown—about 3 to 4 minutes (depending on the thickness of the tortilla). Transfer with a perforated spoon, briefly holding them over the pan to drain off some of the oil, to a double layer of paper toweling. Strain the oil and store in the refrigerator for another use.
When the totopos have cooled off, they can be used as suggested above; any left over can be frozen in an airtight container. Although they will remain crisp in the freezer, they need a little freshening up to look shiny and appetizing. There is no need to defrost them. Either heat them for about 5 minutes in a toaster oven or heat them in an ungreased frying pan with a lid so that you can toss them for a few seconds over fairly high heat.
TOTOPOS FRITOS II (Fried Tortilla Pieces)
When you’re presenting a large bean roll or dip, the totopos should be triangular to act as scoops. Cut each tortilla into 6 triangles and follow the procedure above.
THE ART OF MEXICAN COOKING
TOTOPOS SALADOS Y FRITOS (Fried Salted Tortilla Pieces)
If you wish to have salted totopos, make a solution of salt and water— about 3 tablespoons salt to 1 cup water—stirring until the salt has dissolved. Quickly submerge the tortilla pieces in the water, strain and shake well, and then immediately throw into very hot oil. It splatters a lot and no doubt breaks down your oil—hut it is for a good cause.
TOTOPOS TOSTADOS (Crisp Baked Tortilla Pieces)
If you wish to cut down on your fat intake, then prepare the totopos by toasting, not trying, the dried tortilla pieces. Cut the tortillas into the required size, dry them off, then crisp them and let them brown slightly in a 325° oven for about 40 minutes, turning them over from time to time. Cooking time will depend on the thickness of the tortillas.
TOSTADAS (Fried Whole Tortillas)
Tostadas, often erroneously called chalupas in the Southwest, are corn tortillas that have been fried flat until crisp. They are then topped with various ingredients dictated by regional likes and dislikes. It is best to have a not-too-thin tortilla for these, or your tostada may collapse at first bite and the topping fall all over the place. Oil to a depth of l A inch in the pan should be sufficient to fry the tostadas. They are pan-fried, not deep-fried, until crisp and a deep golden color. They should he eaten as soon as possible after frying; if not, they can be reheated in a 350° oven on a paper toweling-lined tray that will absorb some of the excess oil.
RASPADAS (Thin, Crisp Tortillas)
The raspadas of Jalisco, the totopostes of Chiapas, and the t layudas of Oaxaca all have one thing in common: while of slightly different sizes, they
CORN
are large, almost transparent, crisp-dried tortillas. In this condition they can he stored indefinitely and carried on long journeys, ready for toasting or frying to accompany a meal.
The raspadas are made in an interesting way. The cook begins by making a 6-inch tortilla in the normal way; she then lets it dry out, rather than take on color, on a huge, thin metal hot plate heated by gas. After about 2 minutes the bottom of the tortilla is dry enough for the uncooked top layer to be scraped off. This she does with a length of ‘/ 2 -inch metal tubing. As the dough is scraped off it forms a wrinkled oval shape referred to as a pachola — the same name given to the ground meat patties that are rolled off the metate. (You may wonder what happens to those uncooked layers of dough: in Tequila, there is always a pig or two hovering in the background to absorb that waste.)
The thin raspadas are now completely dried off on the second side, again without browning, for about 30 seconds. They are then cooled off and sold in the hundreds to the restaurants of Guadalajara and even sent far afield to homesick Jaliscienses.
TORTILLAS DE MAIZ Y TRIGO
(Corn and Wheat Tortillas)
MAKES ABOUT 11 5-INCH TORTILLAS
A considerable amount of wheat is grown in the colder central highlands of Mexico, and often in country marketplaces there you can find tortillas made with com masa mixed with an equal proportion of wheat. There is some debate as to whether this came about from taste or necessity, to spin out the com toward the end of the season, when it becomes infected with weevils. This mixture makes a slightly heavier-textured tortilla with an excellent taste.
Wheat that has been picked over and rinsed well is then sent along with the nixtamal (the corn cooked in lime water) to the mill, and they are ground together to make a fine masa. Since very few people have a mill that will crush the com and wheat together in a wet mix, or access to one, I have given an alternative method that works very well.
It is best to try to buy a rather roughly ground whole-wheat flour for this recipe—certainly not a brown pastry flour for instance.
You will need to press the dough harder in the tortilla press than for normal com tortillas; cooking time will be slightly longer as will reheating time.
THE ART OF MEXICAN COOKING
When you’re cooking the tortilla on the comal, the wheat in the dough tends to stick, so it may be necessary to grease the comal very lightly.
Vz pound (about 1 cup) prepared com tortilla masa (page 8)
% cup whole-wheat flour (see note above)
3 to 4 tablespoons water
Mix all the ingredients together and work well so that the flour is distributed evenly through the masa. The dough should he smooth hut fairly firm and pliable—add a little extra water only if necessary to obtain this consistency.
Cover the dough with plastic wrap and set aside for the wheat particles to soften for at least 2 hours in a cool place. If the weather is hot and humid and you are leaving it for a longer resting period, refrigerate the dough. But always bring it up to room temperature before making the tortillas.
Follow the instructions for making corn tortillas (page 12), but increase the cooking time by about 1 minute on each side and add a few seconds on the final turn.
Note: If you are starting from scratch with access to the right type of mill, prepare 1 part com and 3 /t to 1 part wheat berries.
Enchiladas
There are two main methods for cooking enchiladas: (1) frying the tortilla lightly, dipping it into a warm cooked sauce, filling, and rolling; (2) dipping a tortilla into a raw sauce, frying it, then filling and rolling. Detailed instructions for both methods are given in the following recipes.
CORN
ENCHILADAS PLACERAS
(Enchiladas Served in the Central Plaza)
SERVES 4 TO 6
These little enchiladas are served every evening in the main plaza of Xicotepec de Juarez in the northern part of the Sierra de Puebla that adjoins the state of Veracruz.
Traditionally a serving consists of 4 small—about 3 Vi-inch-— -tortillas. The tomato sauce should be of a consistency that thinly covers the tortillas. While the dish should he eaten the moment it is assembled, the component parts can he prepared ahead.
These enchiladas are sometimes filled with refried black beans instead of shredded meat, a good vegetarian dish.
Vi cup, approximately, melted lard or safflower oil for frying
16 3V2 -incfi or 12 4V 2 to 5 -inch com tortillas
m cups salsa de jitomate, Sierra de Puebla (page 339), hept hot
1 cup res desbebrada for Salpicon (page 298), hept hot
V* cup finely chopped w hite onion
(4 cup finely grated queso ariejo or Romano cheese
Have ready a tray lined with paper toweling.
Heat a little of the lard to cover the bottom of a frying pan and fry 2 of the tortillas at a time for about 5 seconds on each side, adding more lard as necessary. They should not become crisp around the edge; drain on the paper toweling.
Immerse the tortillas in the hot sauce for a few seconds. Fill each one with a scant tablespoon of the shredded beef, roll the tortillas up, cover with a little of the sauce, sprinkle with onion and cheese, and serve immediately.
THE ART OF MEXICAN COOKING
ENCHILADAS DE SANTA CLARA
SERVES 4 TO 6
This is one of many recipes given to me by Senora Hortensia Fagoaga. Although born in the Sierra de Puebla, she has had the opportunity of living in many parts of the republic and is keenly interested in good regional Mexican food. She has exceptional sazon (flavoring), as the Mexicans say, and has generously allowed me to cook with her and eat with the family on countless occasions.
The origin of the recipe is unknown, and she is not sure to which Santa Clara it refers.
While the sauce could be prepared ahead, the enchiladas should be eaten as soon as they are ready, or they will become soggy.
4 chiles anchos
1 cup water, approximately
1 garlic clove, peeled and roughly chopped
1 rounded teaspoon (or to taste) sea salt
2 large eggs
V2 cup, approximately, melted lard or safflower oil for frying
12 4% -inch com tortillas
V 2 pound queso fresco or a substitute (see pages 445—447), cut into 12 slices about inc hth icb
Have ready a tray lined with a double thickness of paper toweling.
Remove the stalks, if any, from the dried chiles , slit them open, and remove seeds and veins. Toast the chiles lightly by pressing them down onto a warm comal; the inside surface will turn an opaque tobacco brown. Remove and allow to soak in hot water for about 15 minutes or until reconstituted hut not mushy.
Put 1 cup of water, the garlic, and the salt into a blender jar and blend until smooth. Transfer the chiles to the blender jar with a slotted spoon and blend until the sauce is absolutely smooth—about 8 seconds. Break up the eggs with a fork and stir them into the sauce.
Heat enough of the lard to cover the bottom of a small frying pan. Before you begin frying, make sure that the oil is at medium heat; if it’s too hot and smoking, then the chile sauce will burn.
Dip one tortilla at a time into the chile sauce to cover it thickly and fry for about 10 seconds on each side. Using tongs and a spatula, carefully remove
CORN
the tortilla from the oil and drain on the paper toweling. The egg /chile sauce will look uneven and lumpy (that’s okay; all the more appetizing). Place a slice of the cheese on one side of the tortilla and double over—the cheese should begin to melt with the heat of it. Continue with the rest, adding lard as necessary and working as fast as you can, and serve immediately. Although the enchiladas are traditionally served alone, you could accompany this dish with a lightly dressed tomato and lettuce salad.
ENCHILADAS VERDES (Green Enchiladas)
SERVES 4 TO 6
Although there are many versions of this dish with slight regional differences, this recipe is more typical of the central area of Mexico, in and around Mexico City.
Although traditionally eaten at suppertime, enchiladas in fact make a great lunch dish accompanied by a salad, or with a light appetizer—like ceviche — they make a substantial main course for dinner.
Enchiladas without exception must be eaten the moment they are assembled, or the tortillas tend to become soggy.
THE SAUCE
1 pound (about 22 medium) tomate verde, busks removed, rinsed
2 chiles serranos, stalks removed, rinsed
1 garlic clove, peeled and roughly chopped 1 tablespoon lard or safflower oil A cup chicken broth sea salt to taste
THE REST
Vi cup safflower oil, approximately, for frying 12 com tortillas
IV 2 cups polio deshehrado para tacos (page 218) y 2 cup finely chopped w hite onion V 2 cup creme fraiche or sour cream % cup queso fresco
Have ready a warm serving dish into which the enchiladas will just fit in one layer, or individual plates, and a tray lined with paper toweling for draining the fried tortillas.
Put the tomate verde and fresh chiles into a saucepan, barely cover with
THE ART OF MEXICAN COOKING
water, and bring up to a simmer. Continue simmering until the tomates are just soft—about 8 minutes. Remove from the heat, drain, reserving l A cup of the cooking water, and transfer to a blender jar. Add the garlic and reserved cooking water and blend until smooth.
Heat the lard in a frying pan, add the sauce, and cook over medium heat, stirring from time to time, for about 5 minutes. Add the broth and salt to taste and continue cooking until the sauce has reduced to about 2 cups— about 5 minutes more. Set aside, but keep hot while you prepare the enchiladas.
Heat about 2 tablespoons of the oil in a frying pan, immerse one of the tortillas, holding it down in the oil with a spatula for about 1 minute, turn it over, and fry on tbe second side for about 30 seconds—the tortilla should be well heated through but not crisp. Drain on the paper toweling while you continue with the rest of the tortillas, adding more oil as necessary. Dip one of the fried tortillas into the green sauce, spread a little of the shredded chicken across the center, add a sprinkling of onion and a little cream, roll up, and place on the warmed dish. Continue with the rest of the tortillas. Pour the remaining sauce over the enchiladas, spread with the remaining cream, sprinkle with more of the onion and the cheese, and serve immediately.
ENJOCOCADAS I
(Tortillas in a Sauce of Cheese and Cream)
SERVES 6 TO 8
I was introduced to this dish for the first time by a good friend and wonderfully intuitive cook, Senora Livier Ruiz de Suarez, who was bom in Valle de Juarez, a rich dairy-farming area on the borders of Michoacan and Jalisco. She has most generously spent countless hours traveling with me and teaching me about the very diverse regional cooking of Michoacan.
The word enjococadas means tortillas immersed in jocoque—jocoque can mean soured milk, cream, or yogurt in other areas, but here it refers to the cream skimmed off raw milk that has been left at room temperature overnight. It is collected over a period of several days and stored in an earthenware jug. It has a pleasant acidity, and although very thick, it is often whipped lightly before being used on uchepos (page 86) or corundas (page 70).
This is a very unusual and delicate-tasting dish depending totally on the quality of the tortillas —which should be freshly made and rather thin—and an excellent creme fraiche, which should be used instead of the jocoque. While the
CORN
cheese traditionally used is the salty, rather grainy anejo or cotija, I prefer to use a rather dry queso fresco.
Enjococadas are usually served as a “dry soup” or first course hy themselves, but they could well serve as a main dish—and a vegetarian one at that—with a lightly dressed salad.
Traditionally, enjococadas are assembled and then immediately reheated in a fireproof dish that is gently shaken over the flame. An oval copper gratin dish would be ideal for this, hut an alternative is to put them into an ovenproof dish and cover it loosely with foil so that the cream does not dry up.
1 am sorry, but there is nothing you can do in advance; this is last-minute, pan-to-mouth food.
V4 cup safflower oil, approximately
12 th in com tortillas (see note above)
2 cups creme fraiche
1V4 cups finely grated queso anejo or queso fresco (see note above)
3 A cup finely chopped w bite onion, approximately
Heat oven to 350° (if using alternative method).
Have ready a flameproof or ovenproof dish into which the rolled tortillas will just fit in one layer and a tray covered with two layers of paper toweling.
Heat enough of the oil to cover the bottom of a small frying pan and fry the tortillas one by one, adding more oil as necessary, until they are soft and well heated through but do not become crisp around the edge. Drain on paper toweling. Meanwhile, in another pan heat the cream until it bubbles and reduces for about 5 minutes. Immerse each tortilla in the hot cream, put about 1 tablespoon of the cheese and a little of the onion across the center of each tortilla, roll them up, and place side by side on the bottom of the dish. Pour over the remaining cream and the rest of the cheese and shake the pan over the heat until the enjococadas are well heated through and the cream is just bubbling (or heat in the oven for about 10 minutes). Serve immediately.
THE ART OF MEXICAN COOKING
ENJOCOCADAS II
(Casserole of Chicken Tacos and Green Sauce)
SERVES 6 TO 8 JIQUILPAN, MICHOACAN
This absolutely scrumptious recipe was prepared for me by the famous Mexican artist and craftsman Feliciano Bejar. It comes from his native Jiquilpan, in the northern part of Michoacan, which is a rich dairy-farming area.
It is really a rich casserole (although 1 hate that word as it has too many sloppy connotations in Mexican-American food) of layered tacos filled with chicken and chorizo/egg filling, with green sauce and cream. It is a meal in itself and is best served with a very lightly dressed salad. While all the component parts can be prepared ahead, the final assembling and baking of the dish have to be done at the last minute, or the tortillas will become soggy and disintegrate.
The size of the baking dish is important: it should be at least 2 inches deep and large enough to accommodate two layers of 10 small tacos —about 9 inches by 9 inches is ideal.
The layers of tacos should just be covered with, not drowned in, the sauce and generously but not too thickly topped with cream.
V 3 cup safflower oil, approximately, for frying
20 5-inch com tortillas
IV 2 cups thick creme fraiche
2 cups well-seasoned polio deshebrado para tacos (page 218), warmed through
2 cups chorizo/egg filling (page 320), warmed through
2 cups salsa verde (recipe follows), warmed through
Heat the oven to 375°. Have ready a tray covered with two layers of paper toweling.
Put a little of the oil into a small frying pan—it should be about Vs inch deep—and heat. When the oil is hot hut not smoking, immerse a tortilla until thoroughly warmed through and softened, about 10 seconds, but do not allow the edge to become crisp. Drain on paper toweling and repeat until all the tortillas have been fried.
Meanwhile, heat the cream and allow to bubble and reduce for about 5 minutes. Immerse one of the tortillas —the cream should lightly coat it. Fill with the chicken, roll, and set onto a warmed dish. The second tortilla may be filled with the chorizo tilling. Continue immersing in cream and filling a total of 10 tortillas —alternately with chicken and chorizo —to form the first layer. Spread with 1 cup salsa verde and a little of the remaining cream. Continue
CORN
with the second layer until all the tortillas have been used up. Top with the remaining sauce and creme fraiche and bake in the top part of the oven until bubbling, about 15 to 20 minutes. Serve immediately.
SALSA VERDE PARA ENJOCOCADAS II (Green Sauce for Enjococadas II)
MAKES 2 CUPS
This simple sauce can also be used for corundas (page 70).
1 pound tomate verde (about 22 medium)
3 (or to taste) chiles serranos, stems removed 1 garlic clove, peeled and rou gbly chopped 1 */2 tablespoons safflower oil sea salt to taste
Remove the papery husks from the green tomatoes and rinse briefly. Put into a saucepan, cover with water, and add the chiles. Bring the water to a simmer and cook for about 10 minutes. Remove the pan from the heat and let the tomatoes and chiles sit in the water for about 5 minutes longer.
Transfer the tomate verde and chiles with a slotted spoon to a blender jar, add the garlic, and blend until smooth (no extra water should be necessary).
Heat the oil in a frying pan, add the sauce, and cook over fairly high heat, stirring from time to time, until the sauce has reduced—about 3 to 4 minutes. Season with salt as necessary.
THE ART OF MEXICAN COOKING
TOSTADAS DE APATZINGAN
On a recent trip to the hot country of Michoacan I came across the perfect tostada. Apatzingan is a thriving agricultural center where a lot of street eating goes on, especially in the open-air Mercado de Aguates. It opens early in the morning and has a brisk trade with menudo and tamales, progressing through the day with pork stew served with morisqueta (boiled rice) and antojitos of various types (despite the great heat), ending with the evening pozole.
The crowd was thinning out as we arrived one evening to search out local food. We stopped at a tostaderia, specializing as its name implies in tostadas. They were not exceptional. We tried a bit of this and that but were still hungry when we returned to the hotel. In the dining room we saw people eating most impressive tostadas piled high with various layers, including one of very luscious-looking shredded pork.
The tostadas were made of very large com tortillas that had been fried crisp (you can toast them crisp in the oven to avoid so much grease; see page 16 ) and topped with the following layers:
a thin layer of frijoles rejritos (page 180) a thick layer of finely shredded lettuce
a thick 1 ayer of came de puerco cocida y deshebrado (page 248)
2 tomato slices
2 tablespoons sour cream or creme fraicbe some thinly sliced radishes
sliced white onions, wilted in lime juice as for cebollas encurtidas para tatemado
(page 364)
2 tablespoons Michoacan tomato sauce (page 340) a sprinkling of grated queso anejo or Romano cheese
And served on the side for those who like it more picante:
salsa de chile de arbol (page 344)
You will need both hands and a liberal supply of paper napkins.
CORN
FLAUTAS DE GUADALAJARA
Flautas (flutes) are the large crisp-fried tacos of Jalisco. The tortilla used is usually about 6 to 7 inches in diameter. When they are freshly cooked, the telita, or top layer that puffs up, is removed, leaving a very thin tortilla.
Various traditional fillings for flautas follow. A large spoonful is put along the center of the tortilla; then it is tightly rolled, secured with a toothpick, and fried in lard or oil until quite crisp and a deep golden color. After being drained on paper toweling they are served on a bed of shredded lettuce seasoned with lime juice, thin slices of radishes, about 2 tablespoons of salsa de plaza (page 348), and, if available, Tamazula sauce (see page 346), but it is not absolutely necessary.
This is pan-to-mouth food. Fbutas must he filled, fried, and eaten right away, or they become tough.
Fillings for Flautas
POLLO DESHEBRADO (SHREDDED CHICKEN)
MAKES ABOUT 114 CUPS TO FILL 6 FLAUTAS
2 tablespoons melted lard or safflower oil
3 tablespoons finely chopped whole onion
V 2 pound (about 1 large) tomato, unshinned, finely chopped 2 chiles serranos, cut into rounds 2 cups polio deshebrado para tacos (page 218) sea salt to taste
Heat the lard in a frying pan. Add the chopped onion, tomato, and fresh chiles and fry gently for about 5 minutes, stirring the mixture from time to time so that it does not stick to the pan. Add the shredded chicken and salt and continue cooking until the mixture is well seasoned and almost dry.
THE ART OF MEXICAN COOKING
RAJAS DE CHILE POBLANO (POBLANO CHILE STRIPS)
MAKES ABOUT 1 HEAPED CUP TO FILL 8 TO 10 FLA UTAS
3 tablespoons safflower oil 3 tablespoons finely chopped w bite onion 1 cup prepared rajas (see page 471) of chile poblano Vz pound (about 1 large) tomatoes, finely chopped, unpeeled sea salt to taste
8 heaped tablespoons crumbled queso fresco
Heat the oil in a frying pan, add the onion and chile strips, and fry gently until the onion is translucent. Add the tomatoes and salt and continue cooking until the sauce has reduced and is well seasoned—about 8 minutes.
Fill the flautas with the rajas, and before rolling add a good tablespoon of the cheese.
PAPAS GUIS AD AS (POTATOES WITH TOMATOES)
MAKES ABOUT 1 HEAPED CUP TO FILL 8 FLAUTAS
This sounds too simple for words, but it is delicious.
Vz pound (3 medium) cooked red bliss potatoes, unpeeled 3 tablespoons me ltedl ard or safflower oil 3 tablespoons finely chopped w bite onion
Vi pound (about 1 small) tomatoes, roughly chopped, unpeeled sea salt to taste
Mash the potatoes roughly with their skins—they should have some texture.
Heat the lard in a frying pan, add the onion, and fry gently until translucent, about 3 minutes. Add the tomato and cook over medium heat, stirring and scraping the bottom of the pan, for 3 minutes more. Add potatoes with salt to taste and cook until the mixture is almost dry and well seasoned.
CORN
PICADILLO BLANCO (GROUND MEAT)
MAKES ABOUT 2 CUPS TO FILL ABOUT 1 DOZEN FLAUTAS
V 2 pound ground beef, medium-fine grind with some fat 3 tablespoons finely chopped w hite onion
Vi pound (about 1 small) tomatoes, finely chopped, unpeeled V 4 cup roughly chopped Italian parsley sea salt to taste
Spread the meat over the bottom of an ungreased heavy frying pan and cook over low heat until the fat starts to exude; this will take about 10 minutes, and it will be necessary to stir the meat from time to time and scrape the bottom of the pan to prevent sticking. Add the chopped onion and cook for 3 minutes longer over medium heat. Add the tomato, parsley, and salt and cook until the mixture is fairly dry—about 8 minutes.
29

THE ART OF MEXICAN COOKING
TACOS DE REQUESON (Ricotta Tacos)
MAKES 6 TACOS
This is a most unusual recipe that was given to me by one of the old families of Patzcuaro. The contrast of textures and the taste of sharp sauce against the rather bland ricotta are surprising and quite delicious, the perfect vegetarian snack. They must be eaten right away, or they will become leathery.
THE SAUCE
J /3 cup fresh lime juice
sea salt to taste
Vs cup finely chopped radishes
1/4 cup finely chopped w hite onion
1 chile peron, hlack seeds removed and roughly chopped, or any hot green chile, chopped with seeds 1 tablespoon roughly chopped cilantro
THE TACOS
1 cup drained and lightly salted ricotta cheese 6 thin 5-inch com tortillas 6 toothpicks safflower oil for frying
Have ready a tray lined with a double thickness of paper toweling.
First make the sauce. Put the lime juice and salt into a glass bowl, mix in the rest of the ingredients, and leave for at least 30 minutes to marinate. This should make about 1 cup.
Spread 1 tablespoon of the ricotta over half of each tortilla. Fold over and secure with a toothpick.
Put oil to a depth of l A inch in a large frying pan and heat. When hot but not smoking, add a few of the tacos and fry, turning once until they are a golden color and quite crisp. Continue with the rest, adding oil if necessary.
Drain the tacos well on paper toweling and remove as soon as they are cool enough to handle. With a toothpick, ease them open and insert about 2 tablespoons of the sauce. Serve immediately; they cannot wait.
CORN
EFIGENIA'S CHILAQUILES
SERVES 4 MICHOACAN
Making a dish of chilaquiles is a simple and delicious way of using up stale tortillas, any leftover sauce, and some cheese. It is a national dish, and while ingredients and methods do vary from region to region, they do not vary that much. They are served mostly at brunch time, almuerzo, with eggs or grilled meat, accompanied by refried beans. This is Mexican soul food . . . and beware, it is addictive! This is how Efigenia, my housekeeper, prepares them, and while it is a very simple recipe, much will depend on the quality of the corn tortillas, the ripeness of the tomatoes, and the richness of the cream used.
34 pound (about 2 medium) tomatoes, broiled (see page 450)
2 chiles serranos, broiled (see page 472)
2 garlic cloves, peeled and roughly chopped sea salt to taste
V 3 cup safflower oil, approximately
6 large com tortillas cut into 1 V^-inch squares and dried overnight
V* cup finely chopped w bite onion
2 heaped tablespoons roughly chopped epazote
V 3 cup crumbled queso fresco
V 3 cup sour cream or creme fraiche (optional)
Have ready a tray lined with two layers of paper toweling.
Blend together the tomatoes (unskinned), fresh chiles, garlic, and salt to taste. Set aside.
Heat about half the oil in a frying pan and fry some of the tortilla pieces until slightly crisp and a pale gold color. Remove and drain. Fry the rest of the tortilla pieces, adding more oil as necessary.
Drain off all hut 2 tablespoons of the oil from the pan, return the fried tortilla pieces, add the sauce, and stir well over medium heat for about 2 minutes.
Sprinkle the onion and epazote over the top, cover, lower the heat, and cook, shaking the pan from time to time to prevent sticking, for about 8 minutes. By this time the onion should be transparent and the tortillas softened but not mushy. Sprinkle with the cheese and cream and serve immediately.
THE ART OF MEXICAN COOKING
CHILAQUILES DE TEQUILA
SERVES 4 TO 6
This recipe comes from an old Tequila family. Although now the chilaquiles are made with a tomato sauce, the daughters of the family tell me that they used to he made with the large, red, smooth-skinned chilacate used so much in Jalisco.
(I suggest using a dried Anaheim or New Mexican chile as a substitute.) Chilaquiles are generally eaten for brunch, often to accompany eggs or broiled meats.
6 large chilacates or a substitute (see note above)
2 cups water (to cover)
2 garlic cloves, peeled and rou gbly ch opped
V 2 teaspoon (or to taste) sea salt
V 3 cup melted lard or safflower oil, approximately
3 cups dried com tortilla squares or diamonds (about 15 small tortillas)
THE GARNISH
>A cup finely chopped w bite onion
V 3 cup finely crumbled queso adohera (in Jalisco), queso a tie jo, or Romano cheese
Remove stalks from the dried chiles, wipe with a damp cloth, slit open, and remove seeds and veins. Put the water into a saucepan, bring to a simmer, add the cleaned chiles, and simmer for 5 minutes. Put 1 Vi cups of the cooking water into a blender jar, add garlic, salt, and chiles, and blend as smoothly as possible. Pass the sauce through a fine sieve or strainer (the chile skins are very tough), pressing down well. Discard the chile debris and set the sauce aside.
Using a heavy 10-inch frying pan (ideally), heat about one third of the oil and fry one third of the dried tortilla pieces over medium to low heat until they are a light golden brown, remove with a slotted spoon, and drain on paper toweling. Add a little more oil and proceed with the rest of the tortilla pieces, one third at a time, adding more oil as necessary.
When you have finished frying, drain off all excess oil, return the tortilla pieces to the pan, add the sauce, and cook over fairly high heat until the sauce has reduced—about 8 minutes. Adjust seasoning, sprinkle the top with the onion and cheese, and serve immediately.
Note: The sauce should be of medium consistency, neither too dry nor too soupy. Add a little more water if necessary during the blending or cooking time to adjust.
CORN
TORTILLAS CON ASIENTO (A Oaxacan Tortilla Snack)
SERVES 1
Walking along the streets of Oaxaca any hour of the day or evening, you are likely to see women on the sidewalks selling what resemble turnovers made of large, soft tortillas. They are, in fact, the large, white, soft tortillas called blanditas doubled over and toasted in the pork drippings that seep through the dough.
As you bite into them they are textured and picante, rich and luscious all at once, the heartiest tortilla snacks that I know of.
Try to find really large (7- to 8-inch) com tortillas for this recipe, hut if they are not available, use the normal-sized ones, reducing the filling slightly so that it does not ooze out and scorch on the comal or griddle.
This snack lends itself to many innovations; they can be prepared ahead of time and taken on a picnic to he toasted on the barbecue grill or on a griddle over an open fire.
1 5V2- to 7-inch com tortilla
1 rounded tablespoon asiento (see Ingredients, page 275)
1 tablespoon frijoles fritos Oaxaquenos (see Filling, Tamales Je Frijol, page 75)
a thin layer of finely shredded cabbage
1 tablespoon crumbled queso fresco
1 V 2 teaspoons (or to taste) salsa Je chile pasilla Je Oaxaca (page 342) or other hot ch ile sauce
Spread the tortilla with the asiento and the rest of the ingredients in layers. Set on a hot comal or griddle for about 2 minutes, until it is well heated but not crisp. Double the tortilla over and press the edges together very firmly. Toast the tortilla for about 2 minutes on each side or until crisp and eat with your hands using a large paper napkin to protect your clothes.
THE ART OF MEXICAN COOKING
ENFRIJOLADAS (Tortillas in Bean Sauce)
SERVES 4 TO 6
A typical Oaxacan dish, enfrijoladas are served for almuerzo, the Mexican brunch, accompanied hy broiled or fried tasaja, air-dried beef, or as a main meal with polio con oregano (page 220).
If avocado leaves are not available, either fresh or dried, then add epazote — not a substitute but an acceptable alternative. While the bean sauce may be prepared ahead and stored or even frozen, the frying of the tortillas and the assembly of the dish should be done at the last minute before serving; preparing ahead and reheating will produce a sad, soggy mess.
THE BEAN SAUCE
2 tablespoons lard or safflower oil
V 2 medium white onion, thickly sliced
2 chiles de arhol, left whole, stems removed
a small hunch of tender avocado leaves or 5 large mature leaves or 4 hahy stems of epa 2 ote (see note above)
5 small garlic cloves, charred and peeled (see page 439)
V2 cup water
3 cups black frijoles de olla (page 179) wi th th eir broth sea salt to taste
THE REST
V 4 cup safflower oil, approximately 12 5V 2 to 6 -inch com tortillas 1 medium white onion, cut into fairly thick rings % cup crumbled queso fresco
rajas con limon (page 359) or chiles jalapefios en escaheche (page 356)
First make the sauce. Heat 1 tablespoon lard in a frying pan, add the Vi onion and dried chiles, and fry over medium heat until slightly golden. Transfer with a slotted spoon to a blender jar, reserving the lard. Hold the bunch of avocado leaves over an open flame or place on a hot comal and let them sizzle and singe slightly. Crumble the leaves, but not the thick stalks and veins, into the blender jar. Add the garlic and water and blend until smooth. Gradually add the beans and their broth and blend until smooth— you may have to do this in two batches, adding a little water to make the blades work efficiently.
Add a second tablespoon of lard to the pan and heat. Stir in the bean puree and cook over medium heat, stirring and scraping the bottom of the
CORN
pan from time to time to prevent sticking, until thickened and well seasoned— about 8 to 10 minutes. Adjust salt. Set aside and keep warm, covered, or the bean puree will form a crust on top.
Meanwhile, heat the l A cup oil in a small frying pan and fry the tortillas one at a time for a few seconds on each side until well heated through—they will probably puff up—but not crisp around the edge. Drain the tortillas on paper toweling.
Reheat the bean sauce, which may have thickened too much. Test by immersing a tortilla; the sauce should lightly cover it. If it is too thick, add about Vi cup hot water and stir until smooth. Bring to a simmer, immerse the tortillas one by one in the sauce, and fold into four. Sprinkle each serving with onion rings and cheese; serve the pickled chiles on the side.


THE ART OF MEXICAN COOKING
ENTOMATADAS (Tortillas in Tomato Sauce)
SERVES 4 TO 6
Entomatadas are a popular dish in Oaxaca for almuerzo, brunch, accompa-nied by some broiled air-dried beef, called tasajo. They are really simple enchiladas, but the tortillas are folded into four, and the tomato sauce has decided Oaxacan characteristics.
This dish lends itself to many interpretations for a light meal, accompanied by some broiled chicken or meat and a salad. It is best to use large com tortillas, if available, so that they can be folded more easily.
The sauce may he prepared ahead, but the frying of the tortillas and assembly of the entomatadas should be done at the last moment, or the dish will turn into a soggy mass of indistinguishable elements.
THE SAUCE
2 tablespoons safflower oil V 2 medium w bite onion, thickly sliced 4 small garlic cloves, peeled 2 whole allspice
2 chiles serranos (see page 4Yl) or chiles de agua (see page 463), broiled (optional)
V 2 cup cold water
1 V 2 pounds (about 3 large) tomatoes, broiled or stewed (see pages 450 an d 451)
3 small leafy stems of epa 2 ote sea salt to taste
THE REST
V 4 cup safflower oil, approximately 12 5'/ 2 - to 6-inch com tortillas 1 medium white onion, cut into thick rings %• cup crumbled queso fresco
a small bunch of tender, flat-1 eaf parsley, tom into small sprigs
First make the sauce. Heat 1 tablespoon oil in a frying pan, add the onion and garlic, and fry over medium heat, stirring from time to time, until they are slightly golden. Remove the onion and garlic with a slotted spoon and put into a blender jar with the allspice, optional fresh chiles, and water and blend until smooth. Gradually add the unpeeled tomatoes and blend until smooth—you may have to do this in two batches. Add another tablespoon of oil to the pan in which the onion was fried and heat well. Add the sauce, the epazote, and salt to taste and cook over fairly high heat, stirring and scraping
CORN
the bottom of the pan until slightly thickened and well seasoned—about 10 minutes. Set aside and keep warm.
Heat l A cup of oil in a small frying pan and fry the tortillas one by one for a few seconds on each side until well heated through—they will probably puff up—but not crisp around the edge. Drain the tortillas on paper toweling.
Reheat the sauce, which may have thickened too much. Test by immersing a tortilla; the sauce should lightly cover it. If too thick, then add about Vs cup of water and bring up to a simmer. Immerse each tortilla in the sauce and fold into four as for enfrijoladas. Sprinkle each serving with a few onion rings, crumbled cheese, and a few small sprigs of parsley—serve immediately.
PAPADZULES (Tortillas in Pumpkin Seed Sauce)
MAKES 12 PAPADZULES TO SERVE 4 TO 6 YUCATAN
A dish of well-made papadzules —from the Mayan words “food for the lords”—is as fascinating to taste as it is beautiful to look at: the rolled tortillas covered with a pale green sauce, the vivid accent of color given by the tomato sauce, and then the pools of green oil—squeezed from the pumpkin seeds— that add depth and sparkle to the whole. Papadzules could hold their own in any international gastronomic display.
Because this dish relies on few ingredients, they must be of the highest quality to allow you to appreciate the delicacy of flavor—although this concentrated pumpkin seed sauce is quite an acquired taste.
It is rare to find this dish well executed commercially because none but the most exacting cooks will bother to extract the oil that gives the toque final (special finishing touch), for appearance and contrast of flavor.
Although all the component parts of this dish may be prepared ahead, the final assembly will have to be done at the last moment, especially the sprinkling of the oil, which should be done seconds before serving, or it will sink back into the sauce.
The dish is usually served warm as a first course by itself.
Although it’s relatively simple to execute there are some points to watch:
When toasting the pumpkin seeds, toss or stir constantly; they should swell and turn a slightly different color, but do not allow them to brown, or the sauce and oil will be brownish instead of green. Do not grind them to a flour; they should still have a texture, although slight.
THE ART OF MEXICAN COOKING
Add the broth gradually; you may not need Vi cup, depending on the freshness of the seeds.
Take care when heating the sauce; keep the heat low and keep stirring and scraping the bottom of the pan. If the heat is too high, the sauce will stick to the pan and become grainy. If that happens, put the sauce back into the blender with a little warm water and blend briefly.
21/2 cups water
2 large leafy stems of epazote (no substitute)
1 scant teaspoon (or to taste) sea salt
V 2 pound (about 1% cups) bulled raw pumpkin seeds
12 freshly made com tortillas, kept hot
5 bard-cooked eggs, shelled, roughly chopped, and salted to taste
1 cup salsa de jitomate Yucateca (page 341)
2 additional large hard-cooked eggs, whites and yolks separately chopped finely, for garnish
12 epa 2 ote leaves, for garnish (optional)
Have ready a warmed, not hot, serving dish onto which 12 rolled tortillas will fit with a little space around them for the extra sauce.
Put the water, epazote, and salt into a pan, bring to a simmer, and continue simmering for about 5 minutes. Set aside and keep hot. Spread the pumpkin seeds over the bottom of a heavy frying pan and toast them over low heat, tossing and stirring until they swell up and turn a more intense green, about 3 minutes—but do not allow them to brown. Spread onto a large plate to cool. When cool, put a small quantity at a time into an electric spice grinder and grind for about 5 to 6 seconds to a fine but textured consistency. Turn out onto a plate with a slight ridge around it.
Measure out l A cup of the hot epazote broth. Sprinkle the ground seeds with a little of the broth, kneading them together until they form a crumbly paste—you may not need all the broth. (If you add too much water, you will get a pale green sauce instead of a darkish green paste. If that should happen, you will have to add some more ground seeds and knead the mixture well.) Almost immediately the paste will take on a shiny surface; keep on kneading and squeezing. Tip the oil into a small container. If you have resolve, you should be able to extract between l A and Vs cup.
Strain about 1 Vi cups of the hot broth into a blender jar, crumble the paste into it, and blend until smooth. Return to the frying or other heavy pan and stir in the remaining broth. Heat the sauce over very low heat, stirring and scraping the bottom of the pan almost continuously, until the sauce thickens slightly. Dip one of the tortillas into the broth; it should coat the tortilla well. Put a little of the chopped egg across the middle of the tortilla and
CORN
roll it up loosely on the serving dish. Continue with the rest of the tortillas. By the time you have finished the sauce will have thickened, so add a little more warm water it necessary and pour the remaining sauce over the papadzules. Pour the tomato sauce in a thick band in the middle of the papadzules, sprinkle with bands of white and yolk of the extra eggs, and decorate with the extra epazote leaves. Last of all, decorate with small pools of the green oil. Serve immediately.
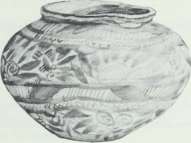
ANTOJITOS OF CORN MASA
Chalupas (“Canoes”)
Quesadillas M olotes
Chorizo y Papa (Chorizo and Potato Filling) Came Deshebrada (Shredded Beef Filling) Molotes Oaxaquenos (Oaxacan M olotes) Sopitos Colimenses (Little Sopes from Colima) Tlacoyos Cazuelitas
Polkanes (“Snake's Head” Snack)
Pintos
Chochoyotes (Small Dumplings) Panuchos
As the last rays of the sun make long shadows of the buildings and dusk begins to fall, many a Mexican street comer comes alive. It is like watching a play as the crowd steals on silently, the main figures carrying charcoal braziers and comals, followed by a string of children with buckets of masa and water, small bowls with fillings to be reheated, sauces and chopped onion, cilantro and chiles. The buckets and bowls in brilliantly colored plastic, each with its blue enamel spoon, are the hallmarks of the modem Mexican kitchen. The air is filled with the unmistakable smell of resinous pine (ocote) that suddenly bursts into flame and sets the charcoal smoking. It is not long before the comal is sizzling with oil and the first antojitos are patted out and coaxed into shape—round, oval, thick, thin, stuffed, or mixed with beans . . . whatever the local specialty may be. These are picadas from Jalisco, tlacoyos from Hidalgo, garnachas from Veracruz, gordas from the Bajio, sopes, pelliscadas pintos, pinched up at the edge or in the middle—an infinity of shapes and flavors.
These antojitos (little whims) are snacks made of com tortilla dough. Sometimes they’re served at the beginning of the midday meal, but they are mainly considered evening food and at their best when eaten with the fingers, standing up, in the company of others, and if it isn’t in the street, eaten in the kitchen with everything hot from the stove.
CORN
CHALUPAS (“Canoes”)
MAKES 12 CHALUPAS
No, they are not flat and fried; those are tostadas. And no, they did not originate in California. C halupas, ovahshaped masa snacks, are named for the small canoes, chalupas, that have been used since pre-Columbian times in the waterways between the chinampas , the floating gardens of Xochimilco.
Chalupas are regional antojitos, found only in and around Mexico City, as far away as Puebla.
There are two methods of forming chalupas, depending on whether you like your dough thin or thick.
Like other masa snacks, they should be trimmed and eaten as soon as they are cooked; otherwise they tend to become heavy and tough.
34 pound (IV 2 cups) prepared com tortilla masa (page 8)
melted lard or safflower oil for reheating (optional)
2 Alligator Baggies for pressing tortillas
THE TOPPING
IV 2 cups polio deshehrado para tacos (page 218), warmed
34 cup salsa verde cruda (page 336)
6 heaped tablespoons finely chopped w hite onion
6 tablespoons finely crumbled queso fresco
Work the masa well until it is soft and smooth. Divide it into 12 equal portions and roll each into a ball about 1 !4 inches in diameter. While you work with one, place the rest under a damp towel or piece of plastic wrap to prevent the masa from drying out.
Set an ungreased comal over medium heat.
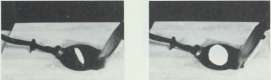
Roll one of the balls into a thin cylinder about 3 inches long. Open the tortilla press and line it with Baggies as you would for making tortillas (page 12). Place the cylinder on the bottom Baggie and press down with the top plate of the press, but not too hard, so that the masa is pressed out to a thin
THE ART OF MEXICAN COOKING
oval shape. Lift up the bottom Baggie. Place the dough on the fingers of your other hand and peel off the Baggie (just as in making tortillas) and place the dough carefully onto the hot comal. Leave it there until the underside of the dough is patchily opaque—about 1 minute. Remove it from the comal and pinch the dough around the edge to form a low rim. Replace the chalupa on the comal and cook on each side for another 1 or 2 minutes, until the dough is cooked through and lightly speckled with brown spots. Trim, add toppings, and serve immediately (see below), or when all have been made, heat them through in a lightly greased pan, smearing a little lard over the surface of the chalupa, before topping them.
Shaping Chalupas, Method 2
Take one ball of the dough and roll it into a bobbin shape (see photo). Make a deep impression in the center with your index finger to form a canoelike shape. Cook it on an ungreased comal for about 5 minutes on bottom and top and then a further 1 minute on each side. The dough should he opaque and speckled with flecks of brown.
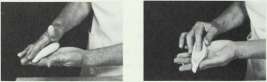
Place enough melted lard in a frying pan to cover the bottom and reheat the chalupas briefly on all sides—they should not become crusty and brown—then trim and serve.
For lack of space on top of chalupas made following method 2, a generous half portion of the topping ingredients should be sufficient.
42

CORN
QUESADILLAS
MAKES 12 4V4-1NCH QUESADILLAS
In many places quesadillas have degenerated since I first went to live in Mexico; they were never a doubled-over flour tortilla with melted cheese inside. They are, in fact, an empanada of com masa filled with one of the fillings given below. While the more traditional cooks still cook them on a lightly greased comal, when made commercially in large numbers they are fried crisp in oil or lard.
Like other antojitos of this type, they should be served the moment they come off the heat; otherwise they will be tough. They are served without a sauce or other topping and make a great accompaniment to a bowl of soup.
lard or safflower oil for the comaI
3 A pound (IV 2 cups) prepared com tortilla masa (page 8)
2 Alligator Baggies for pressing masa
Heat the comal or griddle over a medium heat and grease it lightly.
Work the masa well with your hands for a few moments, until very soft and smooth. Divide it into 12 pieces and roll each into a ball about VA inches in diameter. While working with the first ones, keep the rest under a damp cloth or plastic wrap to prevent the masa from drying out.
Press out one of the balls to a diameter of about 4'A inches in the lined tortilla press as if making a tortilla (page 12). Remove the top Baggie, put one tablespoon of the filling (see below) on one half of the dough, double the other side over the filling, and press the edges of the dough together.
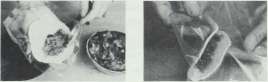
Cook on the comal until the underside of the dough has become opaque and speckled with dark brown spots—about 5 minutes. Turn the quesadilla over and cook on the second side for 5 minutes. When properly cooked, the masa will have a slight crust on the outside and be soft but not raw on the inside. Serve immediately.
THE ART OF MEXICAN COOKING
Fried Quesadillas
If you prefer to have crisp fried quesadillas, heat the oil, or better still melted lard, to a depth of about !4 inch. Fry to a deep golden color, about 2 to 3 minutes on each side. Drain on paper toweling and serve immediately.
Fillings for Quesadillas
1. The most traditional of fillings is a strip of queso Oaxaca, or string cheese, a strip of peeled fresh chile poblano, and one or two epazote leaves. For 12 quesadillas you will need about 6 ounces of cheese, 12 strips of chile, and 12 epazote leaves.
2. l '/2 cups flor de calabaza (page 150), when in season
3. 11/2 cups cooked cuitlacoche (page 168), when in season 4- 1 1/2 cups hongos al vapor (page 164)
5. 1 Vi cups chorizo y papa (page 46)
MOLOTES
MAKES 12 MOLOTES SIERRA DE PUEBLA
M olotes —there is no good translation for the word in this context—are small fried bobbins of masa, filled with shredded meat, or chorizo cooked with potato. They are eaten hot and plain, without sauce.
While the molotes may be filled and shaped ahead, they should be kept under a damp towel or plastic wrap so that the masa does not form a hard crust on the outside. They are served as soon as they come out of the pan; if they have to stand around or be reheated, they become tough.
V 2 pound (1 cup) prepared com tortilla masa (page 8)
2 tablespoons softened lard
1 teaspoon (or to taste) sea salt
2 Alligator Baggies for pressing masa
came deshebrada or chorizo y papa (recipes follow)
V 3 cup, approximately, melted lard or safflower oil for frying
CORN
Mix the masa, lard, and salt together until you have a smooth, pliable dough that does not stick to your hands. Divide the dough into 12 pieces, rolling each into a ball about 1 to l l A inches in diameter; cover with a damp cloth or plastic wrap. Line the tortilla press with Baggies.
Roll one ball at a time into a cylinder about 2 l A inches by V\ inch. As if you were making tortillas (page 12), press the dough out lightly to form an egg shape about 4 inches long. Remove the top Baggie, lift the bottom Baggie, and transfer the dough to the upper part of the right or left hand, whichever way you work. Carefully peel off the Baggie. Place 1 tablespoon of the filling down the center of the dough, then press the edges together, covering the filling completely. Roll the dough between your hands (lightly grease your hands if dough is sticking to them) and form the filled dough into a bobbin shape (see photos).
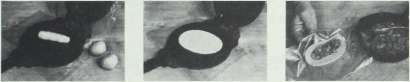
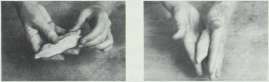
Continue with the rest of the dough, placing the formed molotes back under the damp cloth while the lard is heating. Heat the lard in a small frying pan (the lard should be about 1 inch deep) and fry the molotes a few at a time, turning them over until they are an even, deep gold color and cooked through—about 3 minutes on each side over medium heat. Then increase the heat and allow them to fry for a minute or so more to become a very deep brown color. Drain on paper toweling and serve immediately.
45
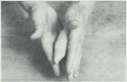
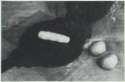
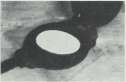
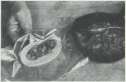
THE ART OF MEXICAN COOKING
CHORIZO Y PAPA (CHORIZO AND POTATO FILLING)
MAKES ABOUT 1 LOOSELY PACKED CUP TO FILL 12 MOLOTES
1 tablespoon lard
2 ounces (1 small link) chorixo
V\ pound (about 2 small) red bliss potatoes, diced and cooked
sea salt to taste
Heat the lard in a small frying pan. Skin and crumble the chorizo, discarding the skin. Fry over very low heat until the fat has rendered out of the chorizo and it is just about to become crisp. (If the chorizo you are using is very fatty, you may want to drain off some of the excess fat, leaving just enough to fry the potato.) Add the potato, mash roughly into the chorizo, and cook over slightly higher heat for about 3 minutes. Taste for salt.
CARNE DESHEBRADA (SHREDDED BEEF FILLING)
MAKES 1 WELL-PACKED CUP TO FILL 12 MOLOTES WITH PROBABLY A LITTLE LEFT OVER FOR A COUPLE OF TACOS
2 tablespoons melted lard or safflower oil
2 tablespoons finely chopped w bite onion
3 (or to taste) chiles serranos, finely chopped
V4 pound (about % cup) ripe tomatoes, finely chopped
1 cup came deshebra da (the meat) for Salpicon de res (page 298)
sea salt to taste
Heat the lard in a medium frying pan. Add the onion, fresh chiles, and tomatoes and fry over fairly high heat for about 3 minutes, turning the mixture over from time to time to prevent sticking. Add the shredded beef, mix well, and continue cooking until the juice of the tomatoes has been absorbed. Taste for salt. When the beef is shiny and just beginning to fry—in about 5 minutes—remove it from the heat and keep warm.
CORN
MOLOTES OAXAQUENOS (Oaxacan Molotes)
MAKES 12 MOLOTES
The mobtes from Oaxaca are virtually the same as the ones given in the previous recipe; the masa and filling are the same, but in Oaxaca they are served differently.
1 was shown a different way of forming them in Oaxaca. The dough is pressed out to a thin disk in the tortilla press. The molotes are then formed and fried
in the usual way. Each molote is served on a romaine lettuce leaf, the top spread with a little black bean paste and sprinkled with crumbled queso fresco. Salsa de chile pasilla de Oaxaca is passed separately.
V 2 pound (1 cup) prepared com tortilla masa (page 8)
2 tablespoons softened lard
1 teaspoon (or to taste) sea salt
2 Alligator Baggies for pressing masa
V 3 cup, approximately, melted lard or safflower oil for frying
chorizo y papa (page 46)
12 romaine lettuce leaves
3 A cup frijoles fritos Oaxaquenos (see Filling, Tamales de Frijol, page 75)
6 tablespoons crumbled queso fresco
salsa de chile pasilla de Oaxaca (page 342)
Mix the masa, lard, and salt together until you have a smooth, malleable dough that does not stick to your hands. Divide the dough into 12 pieces and roll each into a ball about 1 to VA inches in diameter. Cover with a damp cloth or plastic wrap to prevent them from drying out.
Press out one of the balls of dough in the tortilla press, following the instructions for making tortillas (page 12). Remove the top Baggie and put a small spoonful of the filling across the center of the dough. Lifting up the bottom Baggie, with dough, etc., begin to roll the dough off the Baggie so that it covers the filling well. Then (greasing your hands lightly if necessary) roll into a tapered cylinder shape, just like a bobbin. Place under the damp cloth and form the rest of the molotes.
Heat the lard or oil (it should be about Vi inch deep) and fry a few of the molotes at a time—they should not touch in the pan, or they will not brown properly. Turn them over from time to time until they are a deep golden color. Drain on paper toweling and serve as suggested. They should be eaten immediately as the dough tends to get tough if held.
THE ART OF MEXICAN COOKING
SOPITOS COLIMENSES (Little Sopes from Colima)
MAKES 24 2'/2-INCH SOPITOS
Sopes are one of the popular snacks of central Mexico; they are small cakes of corn masa, pinched up around the edge when half cooked to form a rim— presumably to stop the sauce from running off the edge. These sopitos, or little sopes, have a different topping and sauce from those prepared elsewhere.
Senora Yolando Alcaraz, who gave me this recipe, was brought up in Colima. An avid cook, she has seriously studied her regional food, particularly that which is traditionally served for fiestas, banquets, and baptisms.
According to Senora Alcaraz, these small antojitos should be about the size of the top of a water glass (about 2Vi inches in diameter). The sauce made to go on them is unusual because it is fairly thin, diluted with pork stock, and not fried or reduced.
THE MEAT TOPPING
1 pound very finely ground pork, with some fat left on
Va cup finely chopped w hite onion
1 whole allspice, crushed
4 peppercorns, crushed
1 whole clove, crushed
1 garlic clove, peeled and finely chopped
sea salt to taste
4 cups pork hroth (page 248) or lightly salted water
THE SAUCE
1 pound (ahout 22 medium) tomate verJe
2 chiles de arhol, lightly toasted, stems removed, crumbled 2 cups reduced pork hroth (page 248)
sea salt to taste
THE SOPITOS
IVa pounds (ahout 2 J /2 cups) prepared com tortilla masa (page 8) or 2 cups masa harina mixed with approximately IV 3 cups warm water 2 Alligator Baggies for pressing masa
THE FINAL TOPPING 1 cup finely chopped w hite onion 1 cup finely sliced red radishes
3 cups closely packed, finely shredded cahhage, soaked 1 hour in 3 cups lightly salted water mixed with Va cup fresh lime juice 1 cup finely ground queso afiejo or a substitute (see pages 444—445)
CORN
The Meat Topping
The meat should be finely ground. Have the butcher pass it twice through the grinder or process it in a food processor, adding the rest of the ingredients except the broth and processing until well incorporated.
Divide the mixture in half and roll each portion into a large ball.
Heat the pork broth or lightly salted water, and as it comes up to a simmer add the meatballs. Cook over gentle heat for about 20 minutes. Remove from the heat and let the meatballs sit in the water for a further 10 minutes. Remove and drain. Return the broth to the saucepan and reduce to 2 cups over high heat.
Crumble the meat with your hands or in a molcajete (Senora Alcaraz says the stone enhances the flavor) and set aside in a warm place.
The Sauce
Remove the husks from the t ornate verde, rinse, put into a pan, cover with water, and cook until tender but not falling apart—about 10 minutes, depending on size. Drain, discarding the cooking water.
Put the drained tomates, crumbled dried chiles, and broth into a blender jar and blend for a few seconds, until almost smooth. Set aside and keep warm.
The Sopitos
Work the masa well with your hands, adding a little more water if necessary to make it smooth and pliable. Divide the dough into 12 pieces and make 2 1-inch balls of each piece. Cover those already made with a damp cloth to prevent them from drying out. Using a tortilla press and Baggies as for making tortillas (page 12), flatten the dough out to make a disk about 3 inches in diameter. Place on a well-greased comal for about 3 minutes on the first side or until the dough is opaque and speckled with brown, then flip them over to cook for about 2 minutes on the other side.
Press the masa up around the edge to form a shallow ridge and return it to the comal for a minute or 2 longer. The masa should still be moist but not raw. Serve each sopito topped generously with about 1 tablespoon shredded meat, a little chopped onion, and a few radish slices; smother with shredded cabbage, sprinkle with cheese, and finish off with about 2 tablespoons sauce. Serve immediately.
Note: Sopitos can be served “soft” as above or, after cooking on the comal, fried in lard until very slightly crisp on the outside.
THE ART OF MEXICAN COOKING
TLACOYOS
MAKES 12 TLACOYOS
Tlacoyo is the Nahuatl name for this oval-shaped antojito of com masa filled with mashed cooked beans or other pulses. They are made in slightly different forms in the states of Mexico, Puebla, and Hidalgo. While they are generally cooked on a well-greased comal, they can also be fried in lard.
These particular tlacoyos are made of white masa , while perhaps the most spectacular ones of all are those made on the sidewalks of the villages around Toluca on market days: thick oval shapes of blue masa, about 5 inches long, with a wide yellow hand of mashed dried fava beans in the middle. While tlacoyos can he prepared ahead, they tend to toughen while waiting around.
V 2 pound (1 cup) prepared com tortilla masa (page 8), not too damp 2 tablespoons softened lard 1 teaspoon (or to taste) sea salt
1 cup dried black, white, or fava beans, cooked and mashed or refried
lard for greasing comal or frying tlacoyos
H /4 cups salsa de tomate verde, cocida (page 337)
6 tablespoons finely chopped w hite onion, approximately 6 tablespoons grated queso aiiejo or a substitute (pages 444-445), approximately
Mix together the masa, lard, and salt and work until you have a smooth, malleable dough that does not stick to your hands. Divide the dough into 12 balls about IV 2 inches in diameter. Line the tortilla press with the Baggies. Roll the balls into cylinders (see photo, page 41) about 2Vi inches by 1 inch and press out with a tortilla press or with your hands to an oval shape about 3 V 2 by 3 inches. Place 1 tablespoon of the mashed beans along the center of the dough, press the edges of the dough together to cover the filling, and gently flatten the shape between your hands to form an oval shape.
To cook the tlacoyos on a griddle: Liberally grease the surface of the comal with lard, taking care that the fat does not slide off into the flame. Place some of the tlacoyos on the griddle and cook over medium heat for about 4 minutes on each side—when cooked, the surfaces should be opaque and speckled with brown while the inside is still moist but not raw.
To fry the tlacoyos: Heat Vi cup of lard in a small frying pan and fry the tlacoyos a few at a time until very lightly golden with a tender crust on the outside and moist but not raw inside. Drain on paper toweling.
Heat the green sauce. If it has thickened while standing, add a little
CORN
water to dilute to a medium consistency that lightly coats the hack of a wooden spoon. Just before serving, immerse the tlacoyos for 1 minute, no more. Put them on the plates with a little more sauce on top and sprinkle with onion and cheese.
CAZUELITAS
MAKES 12 CAZUELITAS SENORA BERTA G. DE MORALES DORIA
Cazuelitas are from the northern state of Nuevo Leon. These delicious little snacks have been so named because they are formed to resemble small cazuelas, the Mexican earthenware cooking casseroles. There they accompany the “dry soup” rice course. They make a wonderful hors d’oeuvre, albeit a very filling one, because you really cannot stop after the first. Cazuelitas may be filled with either chorizo or zucchini cooked with tomato, both with grated cheese on top. Like so many other masa antojitos, they must be eaten the moment they are fried, although they can be formed ahead and kept under a damp towel or plastic.
about V 2 pound (1 scant cup) prepared com tortilla masa (page 8)
Vi pound (about 2 small) red bliss potatoes, cooked with their skins
V 3 cup grated Chihuahua cheese or medium-sharp Cheddar
sea salt to taste
lard or safflower oil for frying
Put the masa into a bowl and crush the potatoes with their skins into it. Add the cheese and salt to taste and mix well—the dough should be lumpy but soft and pliable. Add a little water if it seems dry. Divide the dough into 12 pieces and roll into balls about IV 4 inches in diameter. Take one of the balls, press your thumb into the middle to form a well, and gradually work the dough out into a flared cup—or cazuela —shape. The dough will be about l A inch thick around the sides and slightly thicker on the bottom.
Put enough melted lard or oil into a frying pan to measure about Vi inch deep. When hot, carefully put the cazuelitas into it face down and fry for about 5 minutes, then turn them over and fry for about 8 minutes or until they are crusty and a deep golden color. The dough inside the crust should be soft but not raw. Drain on paper toweling, fill, and serve immediately.
Fillings for Cazuelitas
Vi pound chorizo, skinned, crumbled, and fried, plus l A cup finely grated Chihuahua cheese or 1 Vi cups calabacitas guisadas (page 152)
THE ART OF MEXICAN COOKING
POLKANES (“Snake’s Head ” Snack)
MAKES 10 POLKANES
Polkan is the Mayan word for the head of a snake—these little snacks consist of tortilUi dough wrapped around beans, chives, and toasted pumpkin seeds and formed like a snake’s head. They are then fried and served with tomato sauce. They make perfect “grazing” food and are vegetarian to boot. Of course, if you are not up on your snakes, make them into any form; that of molotes (page 44) might be the best.
In Yucatan fresh ibis, flattish tender beans, are used hut could be adequately replaced by small lima beans. Unhulled pumpkin seeds and a flat-leaf chive called cebollina in Yucatan are used. They should be eaten as soon as they are made, or they will turn leathery.
V 2 pound (1 cup) prepared com tortilla masa (page 8)
4V§ teaspoons flour V 2 teaspoon (or to taste) sea salt lard or safflower oil for frying
2 Alligator Baggies if you’re using a tortilla press V 2 cup cooked lima Leans
rounded V 4 cup ground toasted unhulled pumpkin seeds
3 tablespoons finely chopped chives sea salt to taste
1 cup salsa Je jitomate Yucateca (page 341)
Mix the masa with the flour and salt. Divide the dough into 10 pieces and roll each into a ball about 114 inches in diameter. Cover all but the ball you are going to use with a damp cloth so that the dough will not dry out. Heat lard to a depth of Vi inch in a small pan over low heat.
Using either your hands (see photos) or a tortilla press, as for molotes, press the ball of dough out to a disk about 3 l A inches in diameter. Put a few beans, ground pumpkin seeds, chives, and a sprinkling of salt in the center, then fold the dough over and all around, covering the filling completely. Form into snake’s heads or what you will and fry until golden brown and crisp all over—about 7 minutes. Drain on paper toweling. Serve immediately with a little of the sauce.
CORN
PINTOS
MAKES 12 PINTOS
Pintos are a favorite antojito around Xicotepec de Juarez in the Sierra de Puebla. Black beans are used almost exclusively in the area, and they should be cooked but still whole and not mushy (not al dente beans, please!); salt, and nothing else, is added toward the end of the cooking time.
The tortilla masa should not be too moist. It can be mixed with the rest of the ingredients ahead of time, but the pintos should be eaten the moment they are made or, like other masa snacks, they will become tough in reheating.
34 pound (IV 2 cups) prepared com tortilla masa (page 8)
3 tablespoons softened lard
1 teaspoon (or to taste) sea salt
2 Alligator Baggies if you’re using a tortilla press
3 / 4 cup frijoles negros de olla (see note above and recipe, page 179)
1V4 cups salsa de jitomate, Sierra de Puebla (page 339), kept hot
6 tablespoons finely chopped w bite onion
3/4 cup finely grated queso anejo or Romano cheese
Heat an ungreased comal over medium heat. Mix the masa with the lard and salt to make a smooth, pliable dough. Carefully mix in the beans, taking care not to break them up. Divide the dough into 12 pieces and roll each piece into a ball about l’/z inches in diameter. Press out the ball in a tortilla press (page 12) or between your hands to make a thickish tortilla about 3 Vi inches in diameter.
Place several of the pintos on the comal and cook over medium heat for about 5 minutes. (If the comal is too hot, the dough will be burned on the outside and raw inside.) By this time the dough should be opaque and slightly browned and come easily from the surface of the comal. Turn the pintos over and cook for 3 minutes longer. Remove the pintos from the comal and, when cool enough to handle, press the dough up to form a slight ridge around the circumference. Pass each pinto through the warming sauce and serve immediately, putting a little more sauce on the top and sprinkling it with the onion and cheese.
Note: As an alternative, serve the pintos topped with chile macho (page 360) and sprinkled with cheese and onion as above.
THE ART OF MEXICAN COOKING
CHOCHOYOTES (Small Dumplings)
MAKES 18 HA-INCH DUMPLINGS (THEY GROW IN COOKING) OAXACA
Chochoyotes, or chochoyones (called ombligitos in Veracruz), are small dumplings with a deep indentation in the middle that are cooked in soups, stews, or beans in Oaxaca. A siento, the dark, fatty residue from making chicharron, is usually used for making them, but since it is difficult to obtain, unless you live in Oaxaca or make friends with a chicharron maker, the substitute suggested should he used.
V 2 pound (1 cup) prepared com tortilla masa (page 8)
2 heaped tablespoons asiento or a substitute (page 275) sea salt to taste
Mix all the ingredients together and divide the dough into 18 equal pieces. Roll each piece into a small ball about 1 inch in diameter. Then (see photo), taking one of the balls in the palm of one hand, press a well in the center—but not through the dough completely-—with the index finger of your other hand and rotate until you have a circular shape on the outside, with the dough about Vi inch thick in the well. Set aside and continue with the rest of the balls.
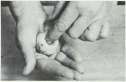
To cook, carefully place the chochoyotes in the simmering broth, sauce, or beans, push down gently to cover as much as possible, and cook for about 15 to 20 minutes.
CORN
PANUCHOS
MAKES 12 PANUCHOS YUCATAN
The popular evening snacks in Yucatan are panuchos; they are rich but wonderful. A slit is made in a puffed-up tortilla to form a pocket; it is stuffed with black bean paste and a slice of hard-cooked egg, fried, and then topped with chicken in escabeche or other shredded meats or used with shark ( pan de cazon, page 210) and liberally strewn with soused onions. In fact, they lend themselves to many innovations. As with any masa antojito, they are much better fried in lard, but oil can be substituted.
You can prepare them ahead up to the point of stuffing and then fry and top them at the last moment. After being stuffed they can even be frozen.
about Vl pound (1 scant cup) prepared com tortilla masa (page 8)
12 rounded tablespoons frijoles colados y fritos a la Yucateca (page 186)
12 slices bard-cooked egg
lard or safflower oil for frying
1V2 cups shredded polio en escabeche rojo (page 238) or any shredded meats or shark, approximately
IV 2 cups ce hollas en escabeche (page 363)
Divide the masa into 12 pieces and roll each into a ball about 1(4 inches in diameter. While you work with one, keep the rest under a piece of plastic wrap or a damp towel to prevent drying. Follow the instructions for making a tortilla (page 12), making sure that it puffs up. If it doesn’t look very promising, then press the dough very lightly with a towel. It should then puff up enough at least to make a slit about one third of the way around the edge of the dough on the side that has puffed up.
Put a very full tablespoon of bean paste into the pocket that has been formed, then a slice of egg. Press down and continue with the rest. Alternatively, cook all the panuchos, cutting the skin for the pockets and then filling them all together.
Heat the lard in a medium frying pan. Have ready a tray lined with a double layer of paper toweling. Heat the shredded meat and have the onion rings at hand. Put one or two of the panuchos flat in the frying pan and fry for a few minutes on each side until golden and the edge is slightly crisp. Drain first over the pan and then on the paper toweling. Top with plenty of the shredded meat and soused onion rings and serve immediately, just as they are, with nothing else.
TAMALES
M asa Refregada Specially Prepared for Tamales Textured Corn Flour for Tamales Tamale Wrappers
Steamers and Preparing Them for Tamales General Recipe for Making Masa and Assembling Tamales M asa para Tamales Colados (Dough for Y ucatecan Strained Tamales) Tamales Colados (Yucatecan Strained Tamales)
Corundas (M ichoacan Triangular Tamales)
Sopa Seca de Corundas (Casserole of Corundas)
Tamales Costenos (Chicken Tamales from the Coast)
Tamales de Frijol (Bean Tamales)
Dzotobichay (Yucatecan Chaya Leaf or Swiss Chard Tamales) Tamales de Acelgas (Swiss Chard Tamales)
Tamales de Pescado, Tamaulipas (Fish Tamales from Tamaulipas) Tamales de Flor de Calabaza (Squash Flower Tamales) Uchepos (M ichoacan Fresh Corn Tamales)
Sopas de Uchepos
Sopa de Uchepos (Casserole of Fresh Corn Tamales)
Tamales de Elote y Miel (Fresh Corn and Honey Tamales) Tamales Canarios (Canary Tamales)
The tamales of Mexico warrant a study of their own, so varied are their shapes, wrappings, ingredients both rare (alligator tail) and mundane (chicken), flavors, and textures. A delicate tamale made with care is a gastronomic delight.
There are tamales of the thinnest masa —a mere film of dough is spread on the banana leaf—like those of mole from Oaxaca, and of the thickest, gelatinous masa, like the colados from Yucatan, the puffy white ones from central Mexico, and the rough-textured sacahuil, either savory or sweet, from the Huasteca. But most of these differences depend on the way in which the corn is prepared for the masa.
Many coastal areas use an ordinary tortilla masa for making their thin tamales wrapped in banana leaves, while the thicker ones wrapped in corn husks are usually made with corn that has been refregado, cleaned of all the transparent skins, and less finely ground. As you will see, the dough for
CORN
tamales colados (page 68) is very different again. The corn is not cooked, just soaked with lime, then the dough is strained and cooked with lard and water to make a fine, gelatinous masa. The corn used for the Huastec sacahuil, as well as that used for the Oaxacan barbecue, is just broken up, martajado, while in the hot country of eastern Michoacan, masa of dark corn is left to sour overnight.
The word tamal, tamale in English usage, covers more than one suspects. In fact, it refers to anything wrapped and cooked in a com husk: small fish or embryo frogs seasoned with tomato and chile; a pasty mess of wild cherries; a spongy wheat flour dough flavored with the toasted and ground seeds of the corn flower, resembling Chinese steamed buns and called a tamal de espiga; spongy yellow ones made of rice flour and butter stuffed with raisins, known as canarios (resembling British steamed pudding); and so on.
Tamales, with few exceptions, are usually served alone—no sauce, no topping. The exceptions are mostly in Michoacan: corundas, unfilled, and uchepos are served with sauce and cream, and the tamales on the Michoacan/ Jalisco border, served as they are with a tomato sauce and crisp vegetables, would make the central Mexican purist frown.
There are some marked regional differences in the preparation of masas, or doughs, for tamales. The most highly esteemed ones in the central area around Mexico City are white and spongy, made from specially prepared flour for which the recipe follows. Several years ago a commercially made and distributed tamale flour of high quality was on the market in Mexico. Now that has disappeared, and a totally inferior yellow one is being touted to the unknowing. Why can’t commeal be substituted? Because it is too granular, and the parched com has not undergone the soaking in a lime solution that gives it a special quality and flavor.
Substitutions in the following recipes will be suggested where feasible and acceptable.
THE ART OF MEXICAN COOKING
MASA REFREGADA SPECIALLY PREPARED FOR TAMALES
MAKES ABOUT 3'A POUNDS MASA
Tamales made with the following masa are not as spongy as those made with flour hut are spongier than those made with tortilla masa. Each recipe will indicate which should be used.
Put the corn into a stainless-steel or enamel pan. Cover with cold water and set over low heat. Dilute the lime in 1 cup of water and add to the pan, pressing out the lumps through a fine strainer. Stir well. The skins of the corn kernels will almost immediately turn bright yellow. Bring the corn up to a simmer—about 20 minutes. Remove from heat, cover the pan, and set aside overnight or for about 8 hours.
The following morning, strain the corn and put into fresh water, rubbing it through your hands to remove the yellow skins. Strain and cover with fresh water and repeat the rubbing process. It will take about 4 or 5 changes of water and about half an hour’s work to rub off all the yellow skins, leaving the corn white. Drain well and grind or send to the mill to be ground to a textured dough, not as fine as that for tortillas. The masa can be used at once or frozen and stored for future use. It should keep for several months.
2 pounds dried w bite corn
21/2 quarts cold water, approximately
5 teaspoons powdered lime (see page 7)
corn

CORN
TEXTURED CORN FLOUR FOR TAMALES
MAKES ABOUT 1 POUND, 10 OUNCES
The whitest, spongiest tamales of central Mexico are made of a textured flour of ground hominy. This flour is still available in and around Mexico City and sold loose in some grocery stores. (There used to be an excellent brand that was widely distributed by Nabisco, but I have not seen it around in recent years. Avoid at all costs the very inferior packaged yellow type of flour masquerading as tamale flour.) However, if you have the patience and access to a (dry) grain mill, you can always make your own. You could make it in quantity and keep it in a hermetically sealed container in the refrigerator; it should keep well for several months.
The nearest substitute for this flour would be white grits that have been more finely ground.
2 pounds dried whole hominy or white com
2 x /2 quarts cold water, approximately
5 teaspoons powdered lime (see page 7)
Put the corn into a stainless-steel or enamel pan. Cover with cold water and set over low heat. Dilute the lime in 1 cup water and add to the pan, pressing out the lumps through a fine strainer. Stir well. The skins of the corn kernels will almost immediately turn bright yellow. Bring the corn up to a simmer—about 20 minutes—and continue to simmer for about 7 minutes longer. Cover the pan, remove from the heat, and set aside for about 1 hour. Strain corn and put into fresh water, rubbing it through your hands to loosen the yellow skins. Strain and cover with fresh water, repeating the rubbing process. It will take about 4 or 5 changes of water and about half an hour’s work to rub off all the yellow skins, leaving the com white.
Spread the com out on a fine-mesh wire rack to dry, turning it over from time to time. If it is put into the full sun, it will take about 2 days to dry, but you can also put it into a very low oven, or in an airy warm place, or near an electric fan and dry it out in less time, for about 1 day.
Grind to a textured consistency like fine grits or cornmeal—take care not to overgrind to a powder. Pass through a fine sieve to extract all the tough pedicels that remain after the grinding.
Use immediately or store in a cool place as suggested.
THE ART OF MEXICAN COOKING
TAMALE WRAPPERS
The choices are: corn husks fresh and dried, banana leaves, corn leaves, and reed leaves.
Fresh Corn Husks
Fresh green husks are used to wrap tamales made of fresh corn, tamales de elote, uchepos in Michoacan, cuichis in northern Veracruz (green com tamales in the United States), or by whatever name they are known. These tough green leaves provide an effective, colorful, and waterproof covering for the tamales and add their own special flavor to the dough. For these you will need to find fresh field corn (sweet com does not contain enough starch), neither too young nor too starchy and dry; when you dig your nail into the kernel, a milky juice will spurt out. Buy them with their sheath of leaves still intact, and if possible buy a few extra leaves to replace any torn ones and to line the bottom of the steamer and cover the stacked tamales. Before attempting to remove the husks, cut around the base of the leaves as close to the stem as you can, but still permitting you to unfurl the leaves with their cupped bases intact (see photo, page 86). Rinse well in cold water (they may have some residues of insecticides on them), shake dry, and stack overlapping in a line. They are now ready to use. The only example 1 know of where they are first blanched is for making uchepos de cuchara , a recipe not given in this book.
Dried Corn Husks
Dried corn husks bought in the Mexican markets, or given me by my neighbors who grow their own corn, are left whole with the cupped leaf base intact. This makes the wrapping of a tamale much easier than when using the neat, cut-off leaves commercially packed in the United States. If you’re using the latter, the top edge has to be folded down and secured with a tie. I know that often the top is left open by cooks in the United States, but there is always a danger that the condensed steam will get in, and come to think of it, I have never had a decent tamale cooked that way. If the corn husks are thin and pliable, they need only to be immersed a few moments in water, shaken dry, and then used. If they are tough and brittle, you will have to soak them for about 15 minutes. Again, shake them dry or pat them dry on a thick towel and stack them as illustrated for fresh corn husks, in equitant fashion, overlapping so that they can be separated easily when the business of filling tamales starts. If they are needed, ties for tamales may be made by stripping the
CORN
husks into narrow strands and then soaking them for about 10 minutes for greater strength and flexibility.
Banana Leaves
There are many aficionados of Mexican food living in the southwestern part of the United States who can, for most of the year, grow banana leaves for tamales (not to he confused with bird of paradise leaves, which are poisonous). If you have a choice, cut those that are newer, a lighter green, and more tender as opposed to the coarser, darker ones. Lay the leaf flat and with a very sharp knife cut one side of the leaf off the hard central rib (see photo below). But always begin at the top of the leaf and cut with the grain as opposed to starting at the base, which is against the grain and will tear the leaves. Discard the rib and cut up the leaf into the required sizes. Notice that the underside of the leaf is smooth—that is the side you always spread the dough on, as opposed to the upper side of the leaf, which is slightly ridged. At this point the pieces of leaf are not flexible enough to wrap around a tamale, so they have to be wilted, which is best done over an open, high flame (or if you have an electric stove, get the burners very hot). Draw a piece of the leaf slowly across the flame—you can see it changing color and becoming flexible— then turn it over and do the same thing again, moving it around so that it is evenly wilted. A tender leaf should take about 4 seconds on the first side and 2 seconds on the second, while a tougher one should take about 5 to 6 on the first side and 3 on the second. But be careful not to burn the leaf, or you’ll have to start again with more.
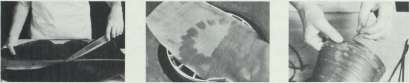
Set the pieces of leaf out to cool, because if you try to spread the tamale masa onto it while it is still hot, the masa will run, and all your beating will have been to no avail. I know of a woman who makes tamales costenos commercially, and she ties all the banana leaf pieces together and boils them in water for about 30 minutes. This may be simpler and quicker in the end, but there is a distinct loss of the flavor that would normally be imparted to the dough.
When I was cooking in Yucatan, I was told by a Mayan cook to be sure to
61
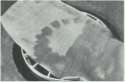
THE ART OF MEXICAN COOKING
cut leaves only from the platano manzano plant. I forgot to ask her why, but mention it as a gastronomic curiosity and have relegated the information to the files of esoterica.
If you need ties for your tamales colados, for instance, wilt extra pieces of leaf and then shred them across the width, along the grain, into narrow strips. Tie two or three together to make ties of about 20 inches.
For the many who do not have fresh banana leaves on hand, neatly packed frozen ones from the Philippines are now on sale in most Asian and some Latin American markets. They are dark green and tough, presumably picked to withstand the freezing and storage, but they are perfectly adequate— much more so, in fact, than the browned, sorry-looking ones often sold in Puerto Rican markets around New York. These leaves, after defrosting, need to be wilted for a longer time—5 seconds or more—on each side before they are pliable enough to wrap the tamales snugly.
Corn Leaves
The long leaves of the corn plant, as distinct from the husks, are used for the intricate wrapping of corundas —the typical five-pointed sextahedron shape of a first-class six-sided corunda in Michoacan. The tough, uneven base of the leaf should be cut off, the leaf rinsed and shaken dry. With the center rib still attached, they are wound, rather clumsily, around the corunda dough; or, flattened and bent into short lengths, they are used to support the flat, disk-shaped corundas of the eastern part of the state. But, more expert yet, by pulling the center rib, starting at the center of the leaf (see photo, below), and this is important, you will have two soft strips of leaf. Held together at the base, they are cunningly wound around a lump of corunda dough. Don’t worry; there’s an easier method of wrapping it into a simple triangular shape, and both methods are illustrated in photos (page 7). Not only does the leaf serve as a wrapper; it also imparts a delicate flavor to the dough.
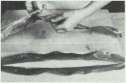
CORN
STEAMERS
It took me an inordinately long time to realize that the conventional steamers, Chinese or otherwise, are not suitable for the efficient cooking of a dense mass of tamales: they take forever except in small quantities. And, since tamales generally freeze well (except where indicated) and setting up for them is a fairly elaborate business, it is not worth making fewer than 20 at a time.
The Mexicans are masters of steaming and have been since pre-Columbian times. Today the little old ladies who dispense tamales at an early hour daily outside practically every marketplace in central Mexico use a steamer improvised from a square, shiny alcohol can, about 18 inches high, with a homemade wire rack near the bottom. Although there is very little water in the bottom, it never seems to evaporate much with the solid mass—at least 100 tamales —stacked closely, hut not squeezed, into the space above.
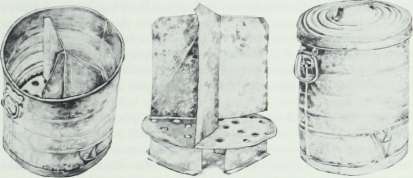
Steamers like the one illustrated are sophisticated by comparison. While this one was factory-made in one of the big cities, any local hojalatero (tinsmith) in a smaller town or village will be happy to oblige and make a fair, if somewhat rustic-looking, copy. The steamer is well designed, practical, and efficient. It is also used as a labor-saving barbacoa for lamb, goat, or mixiutes (seasoned meat wrapped in the tough membranous skin of the maguey leaf), and steaming meat in it simulates in texture, if not wholly in flavor, the pit-barbecued meats of Mexico.
In some areas of northwest Mexico tamales are actually boiled, and the giant sacahuil of the Huasteca is cooked in an adobe oven, but elsew’here some sort of improvised arrangements are made for steaming the tamales. The Mayan cooks I knew, when making the tamales colados in great number, put to use every pot and pan in the kitchen, deep or shallow, w-ith broken bits of
THE ART OF MEXICAN COOKING
the thick hanana leaf stems laid across the water to hold the tamales and anything flat serving as a lid. If you want to improvise, the important thing is a deep pot, metal rather than earthenware for speed of cooking, with a rack set just above the level of the water. You should have a lid or pot to fit tightly on top and something heavy to rest on it to prevent steam from escaping.
Preparing the Steamer
The level of the water you put into the bottom of a commercial steamer is often indicated hy the manufacturer. However, if you are improvising, first look at the expected cooking time of the tamales; if it is short, say 1 hour, you will not need the same depth of water as for those that take IVi hours to cook. It may take a hit of guessing at first.
It is important to remember that the water must be boiling by the time you put the assembled tamales into the steamer and that the water must never go off the boil, or the tamales will be heavy. Always keep a pot of boiling water at hand just in case. Drop a coin or two into the water; you can then tell when the water comes to the boil, and when their jiggling around and rattling ceases, you will know that the water is dangerously low or going off the boil because the heat is too low. Just above the level of the water, set a rack on which the tamales are going to sit and put in a couple of layers of com husks—or banana leaves, whichever you’re using with the tamales —to line the rack. There should also be enough of these to place over the top of the stacked tamales when the steamer is finally packed. I put a terry-cloth towel over the top of the leaves to absorb the condensation and—something I have seen only recently—a heavy plastic hag (not the thin Saran Wrap) stretched over the top of the tamales and tucked down around the edge. This ensures that as little of the steam as possible is allowed to escape, thus concentrating the heat and providing for more efficient and even cooking. Finally you’ll need a lid, which should be weighted down with the heaviest practical object you have in the kitchen—I use an ancient mnlcajete.
Stacking the Tamales in the Steamer
Once the steamer has been assembled and is ready, it should he put over low heat so that the water is boiling by the time the tamales are ready to he packed in. Tamales with a very soft, hatterlike mixture are usually laid flat or slightly inclined so that the dough does not slip to the bottom of the husk. Some cooks allow the bottom layer of these tamales to “set” first—about 10 minutes—before stacking the rest on top of them. The only trouble is that you cannot go ahead and till all the husks; if you do, in the case of uchepos the
CORN
mixture will separate, and the canarios will flatten out. Flattish tamales, like those of fish and costenos, wrapped in banana leaves, are always laid in horizontal layers—without the cooking of the first layer—and so are the bulkier colados.
The tamales de flor de calabaza and others like them wrapped in dried com husks are stacked upright, also in layers, and care must be taken not to crowd them too much, or there will be no room for the dough to expand.
Testing for Cooking Time
To test a tamale to see if it is done after the specified cooking time has elapsed, remove a small part of the plastic and towel covering them and lift one out with tongs (without letting the water go off the boil), helped along with a spatula so that you are not left with an empty husk in the tongs and a collapsed tamale making a mess over the rest of them. Open up the leaf. The dough at the edges should come cleanly away from the leaf or husks and appear completely set.
If you are not going to serve the tamales at once—when they are at their best—allow them to cool off before packing loosely in foil (not plastic bags, since they tend to collect moisture) and keep in the refrigerator for no more than 2 days; after that they should be frozen, because the masa tends to dry out.
When reheating a small quantity, put them in a shallow steamer—I use a vegetable steamer in a shallow pot—with boiling water for about 5 minutes. For a large quantity I use the conventional steamer. Take care not to steam them too long, or they will become watery and lose their flavor. To reheat tamales that have been frozen, do not defrost, as they become too watery; put them frozen into a steamer with boiling water.
Tamales colados do not freeze well. They tend to become very sloppy on top, and the chicken becomes tasteless and stringy when reheated. However, if you have to, put them still frozen into a 350° oven in loose foil packages for about 20 minutes or until well heated through.
TAMALES COLADOS (Yucatecan Strained Tamales)
Tamale making in Mexico is a high art, and the leading example of that art is without doubt the tamales colados of Yucatan. They rank first in complexity of flavor, texture, and technique. The last time they were made for me at a friend’s house there were at least 12 members of an extended family in the kitchen, not counting the children. Six pounds of masa were used, every suitable table from the large rambling house was brought into the
THE ART OF MEXICAN COOKING
kitchen for the “assembly line,’’ and every pot and pan was converted into an improvised steamer. By the time the tamales were ready the news had spread like wildfire, and yet another eight people had appeared. If making them had been short work, the disposal of them was even faster, as a steaming pile of colados were gone in a flash. Those who had eaten five or even eight loosened their belts or discreetly stretched out their achiote-stained huipiles to hide their swelling stomachs, and there was a lot of burping and nodding in the heat of that Yucatecan afternoon.
These are rich and filling and wonderful, but don’t attempt to make them alone or for a hundred guests. It is a labor of love, a gastronomic adventure and culinary exercise par excellence.
The masa, which is strained (hence the name colado), is made in an unusual way, and that method follows for the purists; they can also be made, less delicately, with ordinary tortilla masa and can come in a poor third with masa harirut.
TRADITIONAL METHOD FOR PREPARING CORN FOR TAMALES COLADOS
MAKES ABOUT 2 3 A POUNDS MASA
5 cups water
1 heaped tablespoon powdered lime (see page 7)
2 pounds dried w Kite com
Put the water to boil in a stainless-steel or enamel (not aluminum) pot. As it is heating, add the powdered lime through a fine strainer, pressing out the small lumps. As soon as the water is boiling, add the corn, stir well, turn off the heat, cover the pot, and leave the corn to soak overnight.
The following day, drain the corn and rinse in fresh water. Then rub the corn through your hands as if you were washing clothes until as many as possible of the (now) yellow skins are removed—this is laborious and can take up to 25 minutes. Then grind the corn as finely as for tortillas (see page 10).
CORN
COOKED MASA FOR TAMALES COLADOS
MAKES ENOUGH MASA FOR ABOUT 28 TAMALES
2V2 pounds masa refregada (page 58) or prepared com tortilla masa (page 8)
4 cups water
2 teaspoons sea salt, approximately (to taste)
1 cup melted lard
Put 2 pounds of the masa and the water into a bowl, reserving the rest of the masa, and rub between your hands until all but the very small lumps have dissolved. Pour through a fine strainer, pressing out the lumps with a wooden pestle or bean masher, into a heavy, wide pan. Discard the debris—called xixito (shishito) in Mayan, a much more romantic word. Put the pan over medium heat, add the salt, and continue cooking for a few minutes; the mixture will start to thicken at the bottom of the pan. Keep stirring and scraping the bottom of the pan until the whole masa takes on body. At that point start adding a little of the lard, stirring until it is all absorbed before adding more, and continue adding little by little until it is all absorbed and the mixture is thick and shiny. Keep stirring until it becomes hard work and as you stir the mixture holds its shape. This whole process should take 15 to 20 minutes. Turn the masa out onto a tray with sides or a roasting pan and spread evenly so that it is Vi to 3 /» inch thick. Set aside to cool and “jell.” When firm, cut into 28 rectangles or squares.
THE ART OF MEXICAN COOKING
TAMALES COLADOS
(Yucatecan Strained Tamales)
THE CHICKEN FILLING
1 3- to 3V2 -pound chicken, cut into 8 pieces 1 small head of garlic, unpeeled and charred (see page 439)
1 teaspoon crumbled dried Yucatecan oregano or p2 teaspoon ordinary dried oregano
3 tablespoons recado rojo (page 428)
1 tablespoon bitter orange juice or vinegar Vi teaspoon freshly ground black pepper sea salt to taste
THE ACHIOTE-FLAVORED GRAVY 1 cup masa reserved from preceding recipe 1 V 2 tablespoons flour
3 cups reduced broth fr om cooki n g chicken
Put the chicken pieces into a pot and barely cover with water. Add the garlic cloves, oregano, achiote paste diluted with the juice, pepper, and salt; bring to a simmer. Continue simmering until the chicken is just tender— about 25 minutes. Strain and set the chicken aside to cool off. Return the broth to the pan and reduce over high heat to 3 cups.
When the chicken is cool enough to handle, strip the meat from the bones and shred coarsely together with some of the skin—makes about 31/2 cups. Set aside.