We've been drawing some primitives until now, but Canvas provides us with many more primitive rendering methods. We'll briefly cover some of them, but first, let's first talk about the Paint class as we haven't introduced it properly.
According to the official definition, the Paint class holds the style and color information about how to draw primitives, text, and bitmaps. If we check the examples we've been building, we created a Paint object on our class constructor or on the onCreate method, and we used it to draw primitives later on our onDraw() method. As, for instance, if we set our background Paint instance Style to Paint.Style.FILL, it'll fill the primitive, but we can change it to Paint.Style.STROKE if we only want to draw the border or the strokes of the silhouette. We can draw both using Paint.Style.FILL_AND_STROKE.
To see Paint.Style.STROKE in action, we'll draw a black border on top of our selected colored bar in our custom View. Let's start by defining a new Paint object called indicatorBorderPaint and initialize it on our class constructor:
indicatorBorderPaint = new Paint();
indicatorBorderPaint.setAntiAlias(false);
indicatorBorderPaint.setColor(BLACK_COLOR);
indicatorBorderPaint.setStyle(Paint.Style.STROKE);
indicatorBorderPaint.setStrokeWidth(BORDER_SIZE);
indicatorBorderPaint.setStrokeCap(Paint.Cap.BUTT);
We also defined a constant with the size of the border line and set the stroke width to this size. If we set the width to 0, Android guaranties it'll use a single pixel to draw the line. As we want to draw a thick black border, this is not our case right now. In addition, we set the stroke Cap to Paint.Cap.BUTT to avoid the stroke overflowing its path. There are two more Caps we can use, Paint.Cap.SQUARE and Paint.Cap.ROUND. These last two will end the stroke, respectively, with a circle, rounding the stroke, or a square.
Let's quickly see the differences between the three Caps and also introduce the drawLine primitive.
First of all, we create an array with all three Caps, so we can easily iterate between them and create a more compact code:
private static final Paint.Cap[] caps = new Paint.Cap[] {
        Paint.Cap.BUTT,
        Paint.Cap.ROUND,
        Paint.Cap.SQUARE
};
Now, on our onDraw() method, let's draw a line using each of the Caps using the drawLine(float startX, float startY, float stopX, float stopY, Paint paint) method:
int xPos = (getWidth() - 100) / 2;
int yPos = getHeight() / 2 - BORDER_SIZE * CAPS.length / 2;
for(int i = 0; i < CAPS.length; i++) {
    indicatorBorderPaint.setStrokeCap(CAPS[i]);
    canvas.drawLine(xPos, yPos, xPos + 100, yPos,
    indicatorBorderPaint);
    yPos += BORDER_SIZE * 2;
}
indicatorBorderPaint.setStrokeCap(Paint.Cap.BUTT);
We'll have a result similar to the following image. As we can see, the line is slightly shorter when using the Paint.Cap.BUTT stroke Cap:

Also, as we saw before, we set the AntiAlias flag to true on the Paint object. If this flag is enabled, all operations that support it will smooth the corners of what they are drawing. Let's compare the differences with this flag enabled and disabled:

On the left, we've the three lines with the AntiAlias flag enabled, and on the right, we've the same three lines with the AntiAlias flag disabled. We can only appreciate a difference on the rounded edges, but the result is smoother and nicer. Not all operations and primitives support it and might have an impact on performance, so we need to be careful when using this flag.
We can also draw multiple lines using another method called drawLine(float[] points, int offset, int count, Paint paint) or its simpler form drawLine(float[] points, Paint paint).
This method will draw a single line for each set of the four entries into the array; it would be like calling drawLine(array[index], array[index + 1], array[index + 2], array[index +3], paint), incrementing the index by 4, and repeating this process until the end of the array.
On the first method, we could also specify the amount of lines to draw and from which offset we start inside the array.
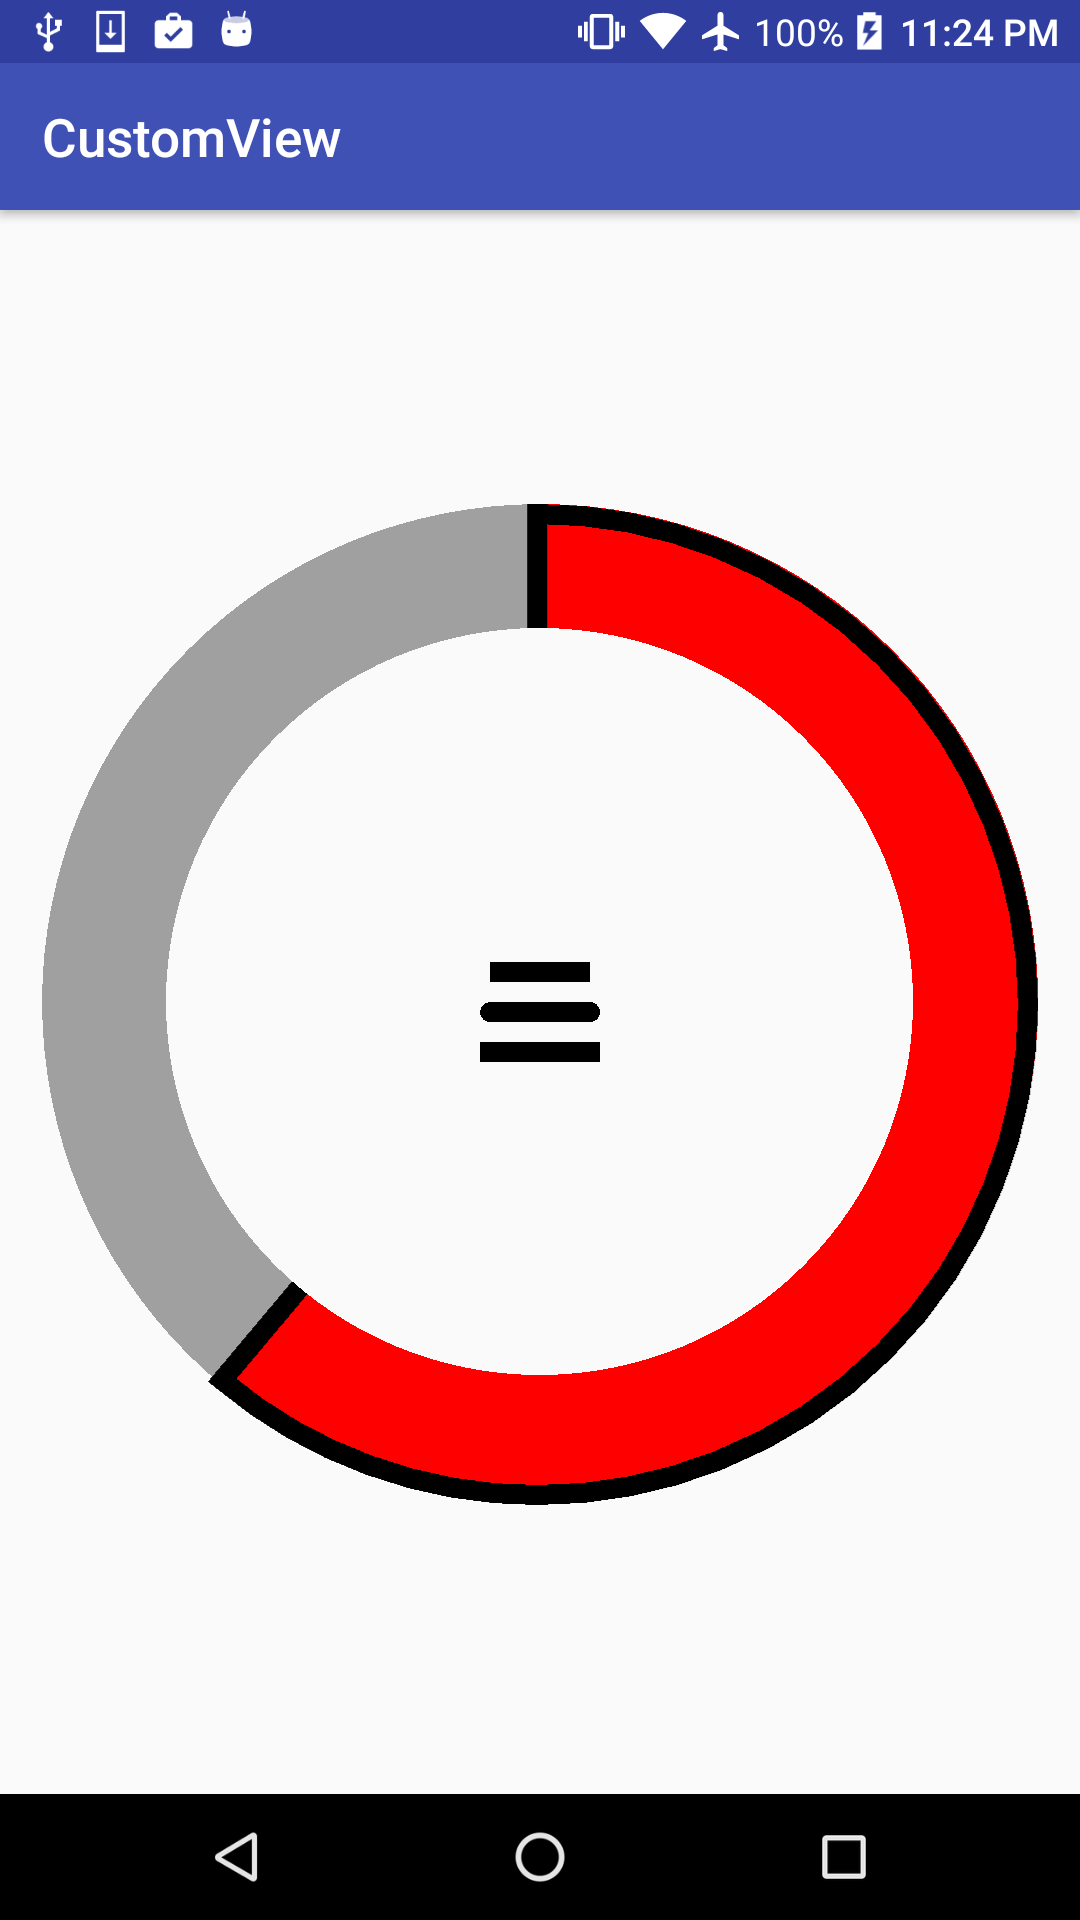
Now, let's go to the task we had and draw the border:
canvas.drawArc(
       horMargin + BORDER_SIZE / 4,
       verMargin + BORDER_SIZE / 4,
       horMargin + circleSize - BORDER_SIZE /2,
       verMargin + circleSize - BORDER_SIZE /2,
       0, selectedAngle, true, indicatorBorderPaint);
It's simply drawing the same arc, but with this new Paint. One small detail: as the border width grows centered from where it's drawing the stroke, we need to reduce the size of the arc by BORDER_SIZE /2. Let's see the result:
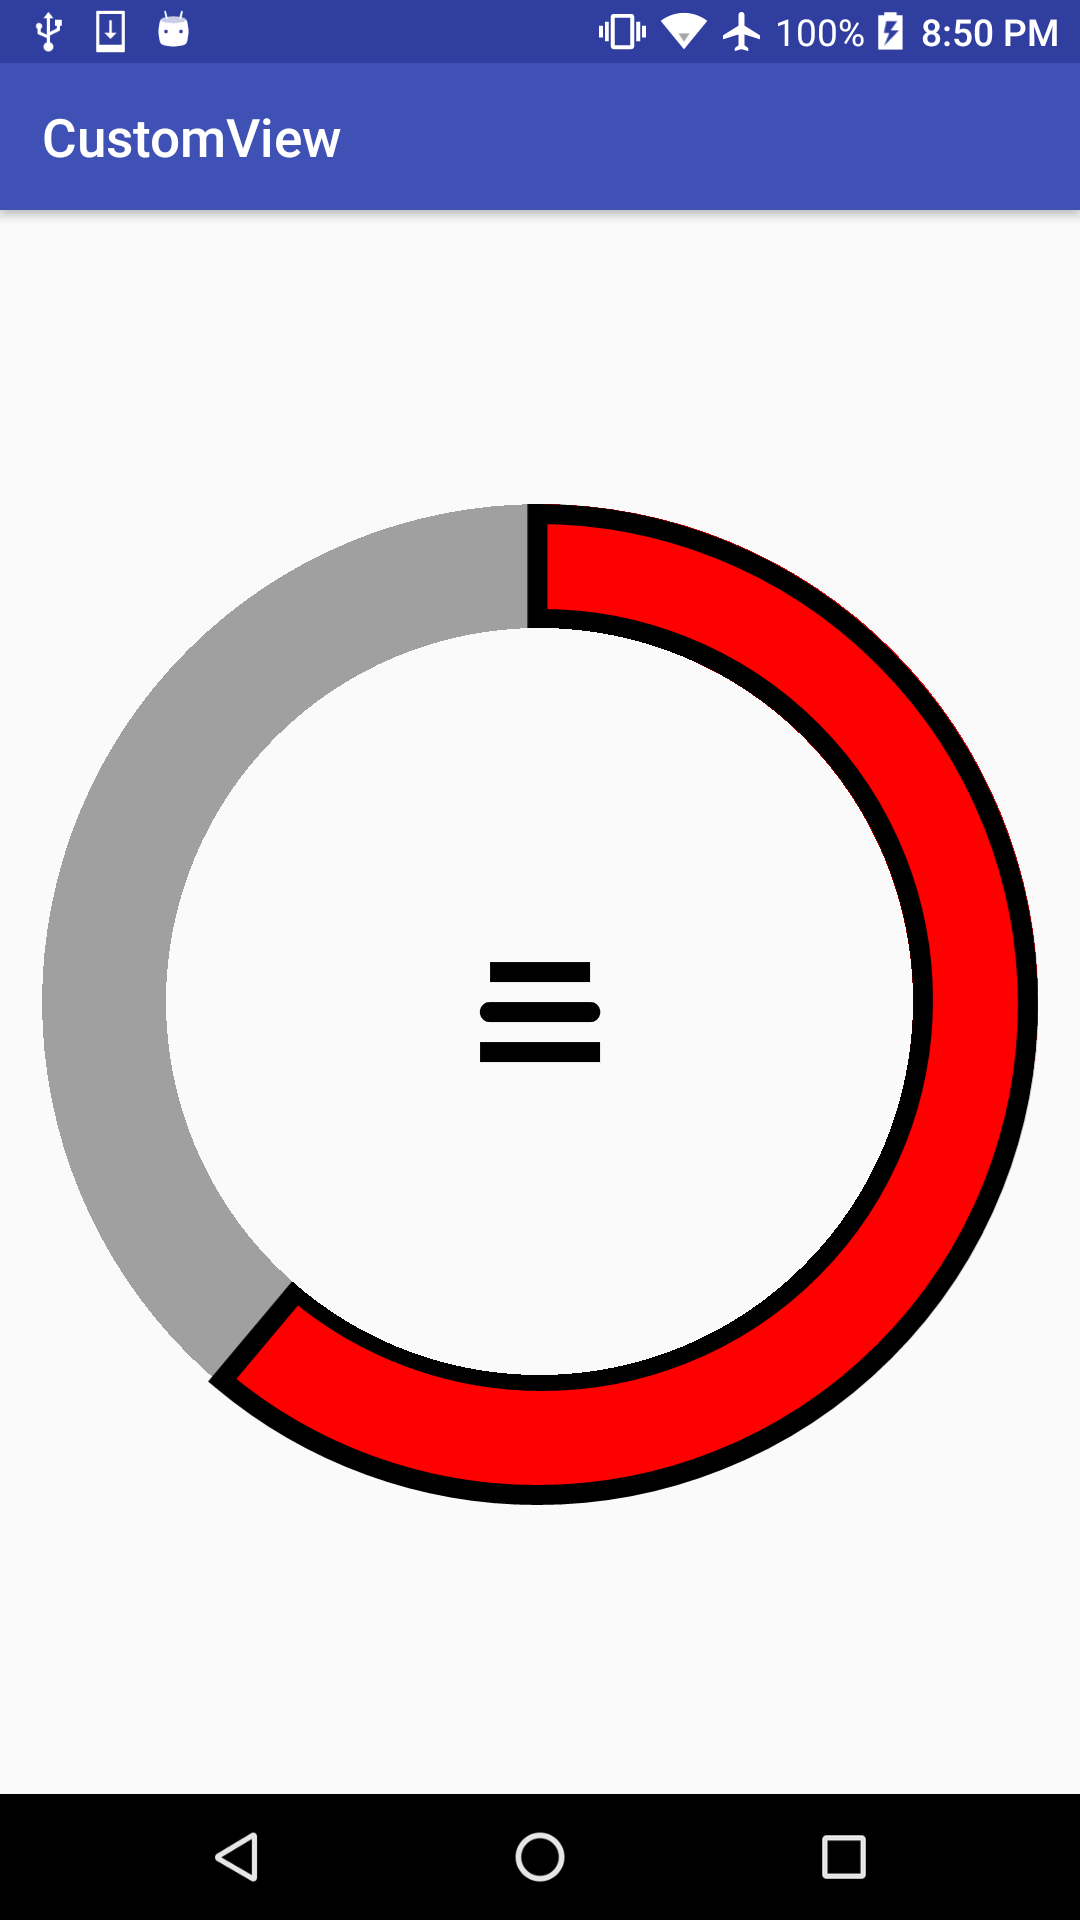
We're missing the inner border, but that's normal because, if we remember from our previous chapters, that part is there because we're clipping it out, not because drawArc is drawing it that way. We can do a small trick to draw this internal border. We'll draw another arc with the size of the clipping area, but just the stroke:
canvas.drawArc(
       clipX - BORDER_SIZE / 4,
       clipY - BORDER_SIZE / 4,
       clipX + clipWidth + BORDER_SIZE / 2,
       clipY + clipWidth + BORDER_SIZE / 2,
       0, selectedAngle, true, indicatorBorderPaint);
Here, we've applied the same logic with the border size, but the other way around: we draw the arc slightly bigger instead of smaller.
Let's see the results:
We've mentioned earlier in this book, but it's important not to create new Paint objects in the onDraw() method or basically, in any method that will be called every time a frame is drawn. We might be tempted as, in some cases, it feels convenient; however, avoid the temptation and create the objects in the class constructor or just reuse the objects. We can change the Paint class instance properties and reuse it to paint with different colors or with different styles.
Find the entire source code of this example in the Example13-Paint folder on the GitHub repository.
We'll be playing more with the Paint object and its properties, but now, let's move to drawing more primitives.