
Simple Ladybug
The ladybug has such a distinctive look that the addition of superfluous appendages like legs might distract from its color pattern. For this model, much of the effort is in creating the spots that lie along the wings. You might notice that these spots are formed from sizable flaps. This is to allow these spots to reach the middle portion of the wings.
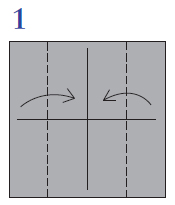
Begin with the primary display color side facing down. Fold in half in both directions. Unfold. Valley fold the sides in to meet at the center.
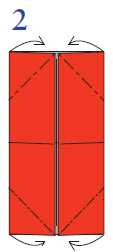
Inside reverse fold the four corners.
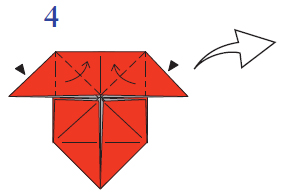
Spread out the top by folding down while reaching in and opening up the paper in the back. Swivel up the flaps at the bottom by reaching in and lifting the inside layer.
Squash fold the top flaps.

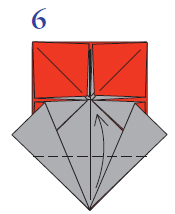
Valley fold the single top layers outward.
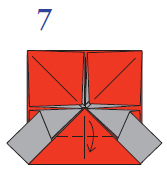
Valley fold the bottom tip up.
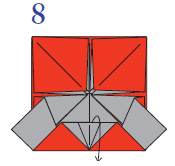
Valley fold the tip of the top flap down.
Unfold the fold made in step 6.
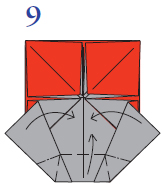
Fold back up while folding in the sides. Look to the next diagram for the shape.
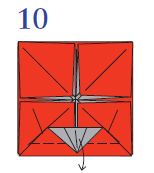
Pull down as far as possible.
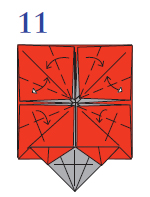
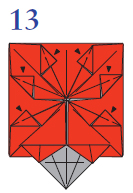
Valley fold and pre-crease where indicated. Note from the symbols which folds are also unfolded.
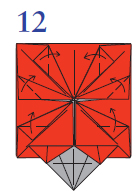
Make valley folds.
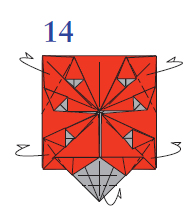
Make squash folds.
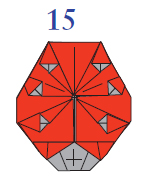
Round model with mountain folds.
The completed Simple Ladybug.
