How do I keep my watercolours looking fresh?
Preventing watercolour paintings appearing laboured and overworked will maintain their vitality and freshness. Ideally, watercolours should be impressions of the moment, capturing the spirit of a subject and, irrespective of the actual time taken, they should give the impression of not having taken too long to produce. To use a musical analogy, watercolours could be thought of as the soloists compared to oil paintings being the equivalent of the full orchestra. But, like music, watercolours can also be moody and atmospheric, combining gentle, quiet passages with powerful and vigorous accents.

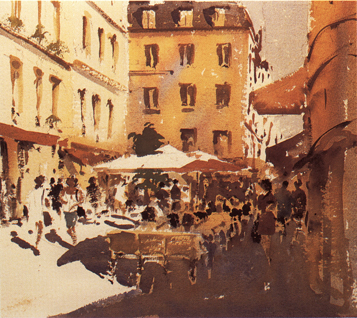
Parisian Side Street
31 × 35 cm (12 × 14 in)
Allowing colours to bleed together on the paper will create more lively surfaces. I painted each of the three building facades with a variety of pure colours using a wet-in-wet approach, varying the amount of water in the washes to suit the lighting condition.
Clean materials are an obvious basic essential in keeping watercolours fresh, so make sure that your colours are freshly laid out in an orderly manner in your palette with any residue of earlier painting sessions removed from your brushes.
As a rule, adopt a painting position that will allow you to work without too much restriction. Standing at an easel or table rather than sitting down will enable you to work freely at arm’s length and will facilitate stepping back for an occasional longer view of your work. Holding the brush more towards the end of the handle will encourage a less hesitant approach, in preference to holding it nearer the tip, as when writing. Always work with the largest brush that you can. Be bold, and be prepared to take some risks.
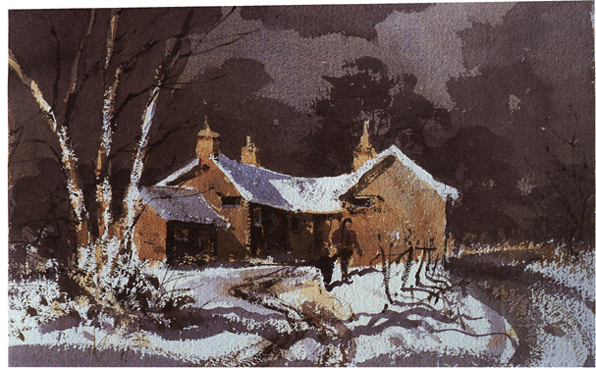
Winter Scene
35 × 50 cm (14 × 20 in)
This painting was produced by the overlaying method. To build up the dark moody sky I laid in three separate washes, beginning with Burnt Sienna, which I also laid over the walls of the buildings, followed by a purple made from French Ultramarine and Light Red, followed by a final wash of Neutral Tint warmed with a touch of Alizarin Crimson. I allowed each under layer to dry completely before applying the next. Touches of these washes were also laid in other parts of the painting.
The usual method of first sketching out the general features of your subjects should only ever be seen as a guide for the subsequent painting process, and here a loose drawing should suffice. In architectural subjects a layout drawing will need to be accurate, with the various features drawn to obey the rules of perspective etc. However, beware making an over-detailed layout drawing. It can be restrictive and can reduce the painting process to merely filling in the spaces in the drawing. A completed painting can therefore finish up looking rather static and lifeless.
How colour is applied is the main determinant to watercolours retaining their freshness and appeal. To avoid passages of muddy, stale colour, often brought about by too much intermixing, limit your palette mixes, to begin with at least, to a maximum of two colours at a time. Where you want colours to bleed and blend together in a wet-in-wet approach, lay them in against each other on the paper as pure colour. Use the minimum number of brush strokes, rather than applying the paint in the manner of decorating the living room walls. This will allow your colours to run together, settling naturally into the paper, and they will look clean when they have dried. Bear in mind, however, that colours will continue to settle until completely dry, so avoid retouching still-damp passages.
Watercolours are produced as either transparent or more opaque colours, but using only transparent colours will not necessarily prevent muddiness. In the traditional method watercolour washes are applied one on top of the other to build up tone and colour, but too much overlayering will impair the transparency and, as a result, the colours will appear ‘dead’. To reduce this effect limit overlayering to a maximum of three washes. It is also important that the under layers are completely dry before overpainting, otherwise they will lift during subsequent applications of paint and muddiness will result. You might find it helpful to use a hairdryer to speed up the drying time.
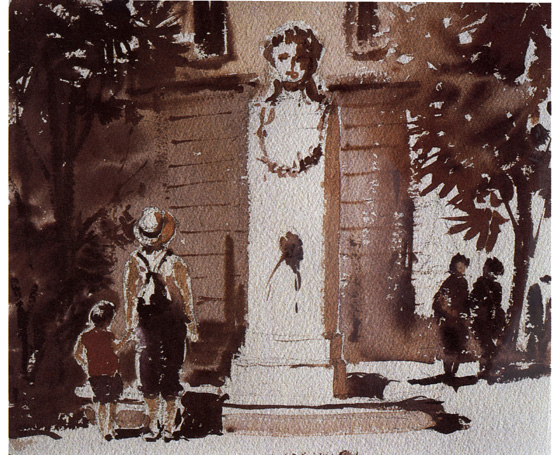
Statue, St Germain, Paris
31 × 35 cm (12 × 14 in)
Analogous colour mixes are a means of altering the mood in a painting. Here I used red as the key primary colour, which I played off against more neutral mixes made from the adjacent secondaries of orange and purple. This gave an overall red colour cast to the whole image.
Alternatively, paintings can be produced in a more direct method. Here the aim should be to apply colour passages at the correct tonal value in one application, without the need for further adjustment, painting parts of the image like pieces in a jigsaw puzzle. This requires a bold, confident approach. If you are at all uncertain about the distribution of lights and darks, one or two preliminary roughs to establish the main tonal values will be a helpful guide. When the first colour washes are applied they will always appear to be too dark because you will be judging their value against the white paper. So, until all the white paper is covered, you will not be able to tell whether the tonal values of colour passages are right; some additional overpainting may be needed at the end.
Strong contrasts can also be incorporated to help make paintings appear fresh, and it is important with both methods to preserve the lightest lights as white paper from the outset. Try to avoid using too much masking fluid. When the fluid is removed it has a tendency to give a hard-edged line (unless this is the effect you want), which can appear too dominant in the final stage.
Having considered the effects of colour application, let us now consider how the choice of individual colours can be used to invigorate a painting. Since harmonious colour arrangements rarely occur by chance, fresh, lively paintings will have a well-thought-out colour structure.
Accepted colour theory suggests that two complementary colour combinations (opposites on the colour wheel), will appear well balanced. Alternatively, analogous or harmonious mixes (colours chosen from the sides adjacent to a single colour on the colour wheel), will produce a dominant colour key in a painting. For more subtle or muted effects you could use a limited palette of secondary colours. Remember, too, that earth colours will give more natural versions of primary colours.
Touches of pure colour can be introduced to add energy and vigour to a painting to highlight more important elements of the subject, particularly when contrasted with areas of neutral greys. Pearly greys mixed from complementary colours will have more vitality than diluted tube greys or black.
A useful starting point might be to choose just two or three base colours from which most of your mixes can be made. Individual touches of other pure colours can then be included as visual accents or highlights. Unless done within the context of an overall colour structure, extra touches of pure colour should not be relied upon to brighten up an otherwise lifeless image. The very opposite is usually the best course of action. If your paintings have a tendency to look dull and lifeless, first try reducing the number of colours you are using.
Shadows are fundamental to achieving the feeling of light in paintings. Retaining life in shadowed and shaded areas will also help to prevent paintings looking dull.
Shadows, though areas of negative light, are very rarely devoid of colour. As a rule they tend to be darker and cooler versions of the colour on which they are cast, with their density dictated by the strength of the lighting. Shaded surfaces will take in reflected light, so usually they will not be as dark as the shadows they cast. When painted too light they will appear weak and unconvincing; too dark and they will look like solid objects. When the overall tonal values of the lights and darks are balanced, paintings will appear to shine.
Freshness and vitality can also be achieved by allowing elements of a painting to remain understated. Just as it is not necessary to paint every leaf on a tree, the least important elements can be subordinated by merely suggesting their forms, allowing the viewer to fill in the missing parts. This simplification can enhance the feeling of space and distance and will help to draw attention to the main focus in an image.
Finally, being clear at the outset about what you want a painting to say is essential to knowing when it is finished. Try to reduce any tendency to fiddle with areas of paintings in an attempt to neaten them up. If you feel unsure about whether a painting needs more work, put it away for a few days; then look at it again in a mirror and you will see it in a fresh light.
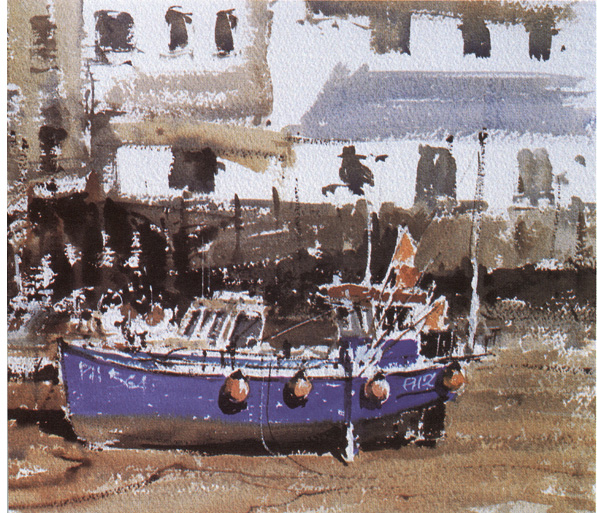
Blue Boat, Polperro
31 × 35 cm (12 × 14 in)
Paintings done in the direct method require a bold approach. Having loosely pencilled in the main forms I began by painting the boat, laying in single applications of colour that I attempted to match to the correct tonal value of the subject. I carefully painted round those areas that were to remain as white paper, and rendered the background buildings with loosely described softer forms to keep them visually in the distance.
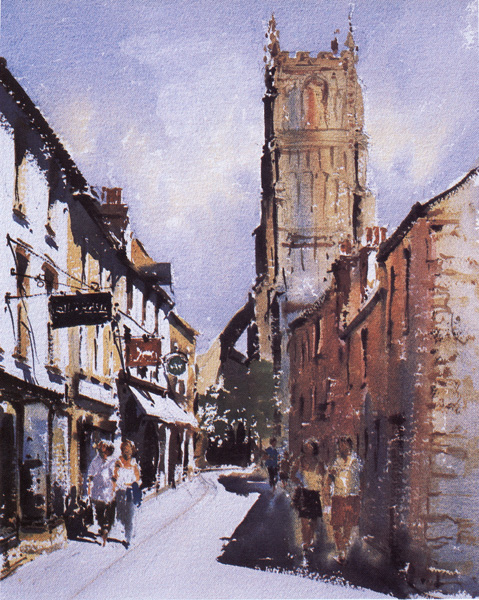
Quiet Street, Cirencester
50 × 35 cm (20 × 14 in)
Retaining life in the shadowed areas of paintings is essential. I first washed in several pure colours over the shaded areas of the picture, allowing them to bleed together, covering the buildings, ground shadow and figures. Then I laid a second wash over the shaded faces of the building, cutting around the shapes of the figures and strengthening the ground shadow. Finally, I drew in the darker shapes of the windows and refined the figures themselves.
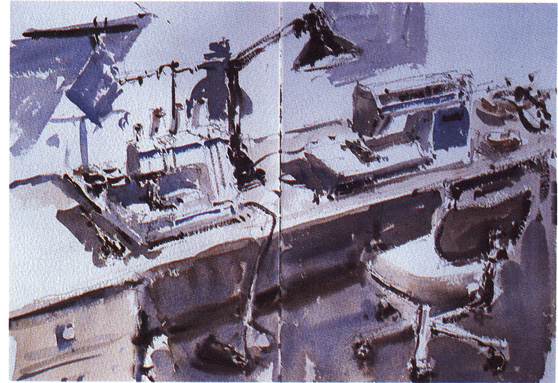
Sewing Room
30 × 42 cm (12 × 161/2 in)
Understating the forms helps to give a subject vitality. Even mechanical objects, which at first glance might not be thought to be interesting, can, in this way, be given visual appeal. I used a simple two-colour complementary mix of Burnt Sienna and French Ultramarine together with strong tonal contrasts, which enabled me to give the subject matter additional strength.