First let's open a terminal and cd into the directory we created in the first recipe,
$ cd micro
Next we'll generate the application skeleton using the express command-line tool (which we installed with express-generator), and then use standard --fix to conform the code to our lint rules:
$ express --view=ejs ./webapp
$ cd webapp
$ standard --fix
This will create a skeletal web application using EJS templates in a new directory called webapp.
The ejs module provide EJS templating capabilities. To learn more about EJS and template engines see the Adding a View Layer recipe in Chapter 7, Working with Web Frameworks.
We'll also create a few files, and add an additional dependency:
$ touch routes/add.js views/add.ejs
$ npm install --save --no-optional restify
We'll be using express for the web application, and restify (in this case) to create a RESTful client. To install the rest of our dependencies (as specified in the package.json that was generated by express-generator) we run:
$ npm install
Once this has completed we can run the application with the following:
$ npm start
If we now point a browser to http://localhost:3000 we should see a page rendered by our application, as in the following screenshot:

Now that we have our web application skeleton it's time to wire it up to our microservice.
Let's begin by creating a route and a frontend to interact with our service.
We'll start with routing.
The webapp/routes/add.js should look like so:
 const { Router } = require('express')
 const restify = require('restify')
 const router = Router()

 router.get('/', function (req, res) {
   res.render('add', { first: 0, second: 0, result: 0 })
 })

 router.post('/calculate', function (req, res, next) {
   const client = restify.createStringClient({
     url: 'http://localhost:8080'
   })
   const {first, second} = req.body
   client.get(
     `/add/${first}/${second}`,
     (err, svcReq, svcRes, result) => {
       if (err) {
         next(err)
         return
       }
       res.render('add', { first, second, result })
     }
   )
 })

 module.exports = router
Next we need to create a template to provide users of the app with access to the service.
Let's make webapp/views/add.ejs look as follows:
<!DOCTYPE html>
 <html>
   <head>
     <title>Add</title>
     <link rel='stylesheet' href='/stylesheets/style.css' />
   </head>
   <body>
     <h1>Add it up!</h1>
     <form id='calc-form' action='/add/calculate' method='post'>
       <input type='text' id='first', name='first'
         value=<%= first %>></input>
       <input type='text' id='second', name='second'
         value=<%= second %>></input>
     </form>
     <button type="submit" form="calc-form"
       value="Submit">Submit</button>
     <h2>result = <%= result %></h2>
   </body>
 </html>
We then need to update the file webapp/app.js to wire in the template and route. Near the top of webapp/app.js, underneath where the other routes are required we can insert the following line: var add = require('./routes/add'). Finally towards the bottom of the webapp/app.js file, we'll mount our add route at the /add path with the following line: app.use('/add', add).
Now it's time to test our application and service together!
We open up one terminal and start our adding service:
$ cd micro/adderservice
$ node service.js
Then we open a second terminal and start the webapp:
$ cd micro/webapp
$ npm start
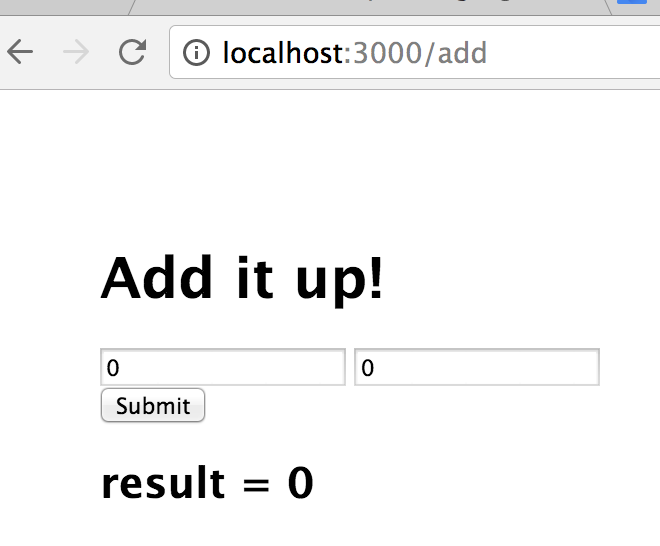
Now that we have our webapp and service running, let's open a browser and point it to http://localhost:3000/add.
This will render the template that we created previously and should look as follows:
We should type a number into each of the input fields and hit the calculate button to verify that the service is called and returns the correct result.
For instance, typing 1 in the first input, and 2 in the other and pressing the Submit button should produce a response as shown in the following screenshot:
