AND YOU CAN EASILY GET STRESSED out when viewing expensive apparatuses online or in your local home-brew shop. Here’s my advice on what you need to get started.
SAMPLE SHOPPING LIST FOR YOUR FIRST BATCH OF CIDER:
• 2 five-gallon glass carboys
• 1 siphon
• 1 hydrometer
• 4 bungs to fit the carboys
• 4 airlocks
• One Step cleaning solution
• iodophor sanitizing solution
• 1 yeast packet
• 1 wine thief
• 1 carboy cleaning brush
• 1 funnel
TO BUY AFTER YOUR CIDER IS READY TO BOTTLE:
• 3 cases of twelve-ounce bottles
• bottle caps
• bottling bucket
• bottle capper
• bottle “tree” for drying bottles
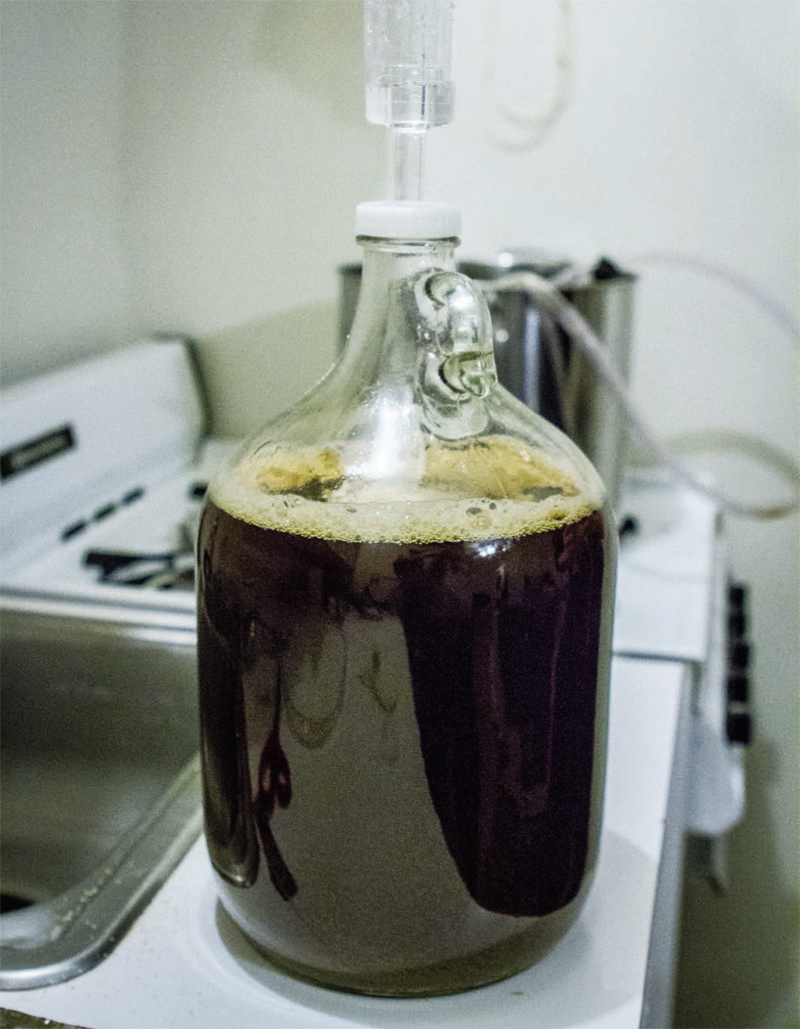
The classic glass carboy does more than store pennies; it’s actually the most common home cider choice for fermentation and maturation. Carboys are relatively cheap and easy to find, and they’re fairly easy to clean.
If you do decide to get one, make sure you also buy a special brush that can be bent to clean the inside.
The drawbacks: they can be bulky to store while not in use, and they’re obviously breakable. Plastic carboys have become more popular, and they’re a good choice as well.
My pick? If you can find them, I really like plastic, bucket type fermenters. They come in many sizes and are very affordable, and they’re easy to clean since you have complete access to the inside. I also like that, after they’ve been cleaned and dried, they’re easy to stack and they take up very little space.
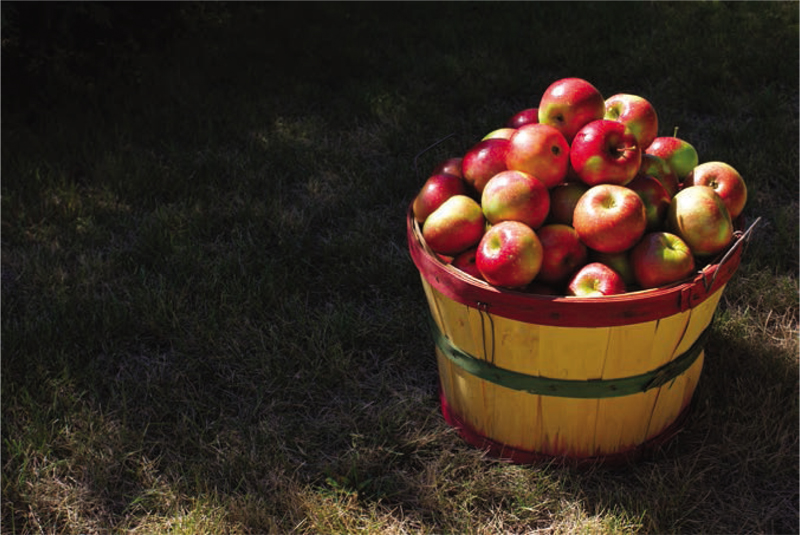
And they come in handy sizes, like the one I use the most, my thirty-liter fermenter. I also use them for cleaning small parts by filling them with cleaning or sanitizing solutions, and I’ve even been known to take them with me when I pick apples! Plus, they come in handy as stools when you turn them upside down. I’d like to see you try that with a carboy!
Barrels are another option, and one that is growing in popularity, as this method adds another layer of depth of flavor.
Sourcing and Using Wood Barrels
While they’re likely impractical for most home cider makers, barrels can reap great rewards if you have the space, the ability to clean them, and the luck to source them. Here are a few tips I’ve picked up over the years. For our purposes, I’m referring to a full-size, fifty-one-gallon barrel. Smaller barrels are easily picked up at most home-brew stores, usually in five or ten gallon sizes.
SOURCING BARRELS: Brand new oak barrels are very expensive and – unless you’re a serious hobbyist – probably best left alone. Also, a new oak barrel can have a very strong oak presence, possibly more than you really want. If a commercial cider maker uses a new barrel, they’ll usually have a batch from an older barrel to blend the new batch with, in order to dial back the strong oak flavor.
Rather than using a new barrel, a better solution is to source an already used one. Local distilleries and wineries are excellent places to start. If you want to keep your cider one-hundred percent gluten free, avoid using anything that has had beer in it.
I’ve been very lucky to live in an area with many wineries and distilleries. White wine barrels don’t do much for me, but several commercial makers use them often. However, red wine barrels can add some interesting flavor, plus some color, to a lighter cider.
My personal preference is to find used spirit barrels. I’ve had a lot of luck with rum, gin, and whiskey barrels over the years. If you look at the current marketplace, you can see how many more spirit barrel-aged ciders there are out there than wine barrel-aged varieties. A spirit barrel adds an intense flavor, one that I find compliments cider more than wine flavor does.
Commercial cider makers can sometimes get barrels for free. We often trade products for them and mention the donating company in our advertising for the cider. It’s a win/win for both producers.
However, expect to be charged for used barrels. You’ll likely pay around one or two hundred dollars a barrel. Remember, a winery or distillery is not a barrel store. So if you get a barrel from them, they’re doing you a favor. Unless you create a good relationship with them, keep in mind you’re probably on a long list of people wanting the barrels, including commercial producers in your area and others just wanting to cut them up for planters. Be cool, and you may just score a barrel. I’m usually on a wait list myself, since there are many other breweries and cider makers around that want the same barrels I do.
Also, you should know there’s a season attached to wine, so don’t walk into a winery at the beginning of harvest expecting to score a bunch of barrels! Wineries also use their barrels longer than a distiller, so don’t be surprised to hear “no” a lot.
And finally, I would strongly encourage you NOT to get a barrel from “some dude.” When you buy a barrel from a pro, you know it was properly stored and cared for. Otherwise, you run the risk of ruining an entire batch.
USING BARRELS: Ok, you got your hands on a cool-looking barrel. Now what?
A few things to keep in mind:
When not in use, you’ll always want to keep the barrel hydrated. If you don’t, the wood will dry out, and the barrel will fall apart. On a full-size barrel, you only need about ten gallons of water to do the trick. If you store it for a long time, make sure to occasionally add water, because you’ll lose some over time.
When you first fill your barrel, either with cider or water, don’t freak out if a little leaking occurs. Nine times out of ten, once the barrel is completely rehydrated, it will seal back up and the leaking will stop. Ask whoever you got the barrel from how it was stored, and when it was last used. They may suggest you rehydrate the barrel before use; in that case, you’ll completely fill the barrel up with water for forty-eight to seventy-two hours.
The best-case scenario is: you get a barrel that’s ready to go, and you have cider ready to mature or ferment in the barrel. If this is the case, you’ll need to make sure you have your space ready. You’ll also need to have your barrel rack in place. Barrel racks are steel racks that usually hold two barrels. They cost around a hundred bucks, and they allow the barrel to be stored above the floor, so you can easily spin it around to drain it after use. Home brew shops likely won’t carry these, you’ll need to go to a winery supply shop, order one online, or – if you’re lucky – buy one from the same place you got your barrel from. If you’re thinking about building something on your own, keep in mind the weight of a full barrel. Furthermore, according to some metal-working friends of mine, you likely won’t save any money by making your own.
The barrel should be in a spot with easy access to water, a place where you can drain a lot of liquid. It’s great if you have a pump to get nearly every last drop out, but if you’re relying on a siphon instead, getting all the water or cider out will be tricky. At some point you’ll want to spin the barrel and drain it; it could still hold a few gallons. In other words, make sure the space you’ve selected can get messy and wet!
When I get a barrel from a professional, I put my cider straight in, assuming it doesn’t have to be rehydrated. I assume the barrel has been kept up – that it’s ready to fill and always has been. But what do I do with the barrel once I’m done?
After the barrel’s been drained and rinsed out, the easiest way to handle it is to burn a sulphur strip inside the barrel, with the barrel sealed up. This should kill all the nasty bacteria left over. But be warned – it’s stinky! Most home brew shops with a bit of wine stuff may have sulphur strips, otherwise you get can them online pretty cheaply.
Once this is done, put in about ten gallons (no more) of water to keep hydrated during storage. Roll the barrel every two or three weeks, so the whole barrel stays hydrated.
When you get ready to use the barrel again, drain all the water, rinse, re-sulphur strip it, then fill it with cider.
Remember, even with all the best precautions and attention to detail, barrels are not perfect vessels. But if you decide to try a barrel out, and everything goes right, you’ll likely be quite happy with the results.
I know a lot of cider makers at home who’ve chosen not to get a hydrometer.
Can you make cider without one? Yes.
Should you? No.
There is no other way, short of sending your cider to a lab, to measure your ABV, or to know when fermentation is done. Hydrometers don’t cost much, and they’re super handy. One tip: make sure to buy a separate beaker for your hydrometer, instead of using the case they come in. Also, know that you will likely break it at some point. It just happens.
How do you use a hydrometer? Glad you asked!
To use it is to know it. A hydrometer measures the specific gravity of liquids – in our case, the measure of soluble solids and sugar in the cider. Water, for example, has a specific gravity of 1.000. The more solids, or sugars, the higher the number – and the higher the potential alcohol you’ll get.
Hydrometers are calibrated to measure accurately at sixty degrees Fahrenheit. If your juice is above or below this temperature, you’ll need to use the correction chart, commonly purchased with the tool or easily available online.
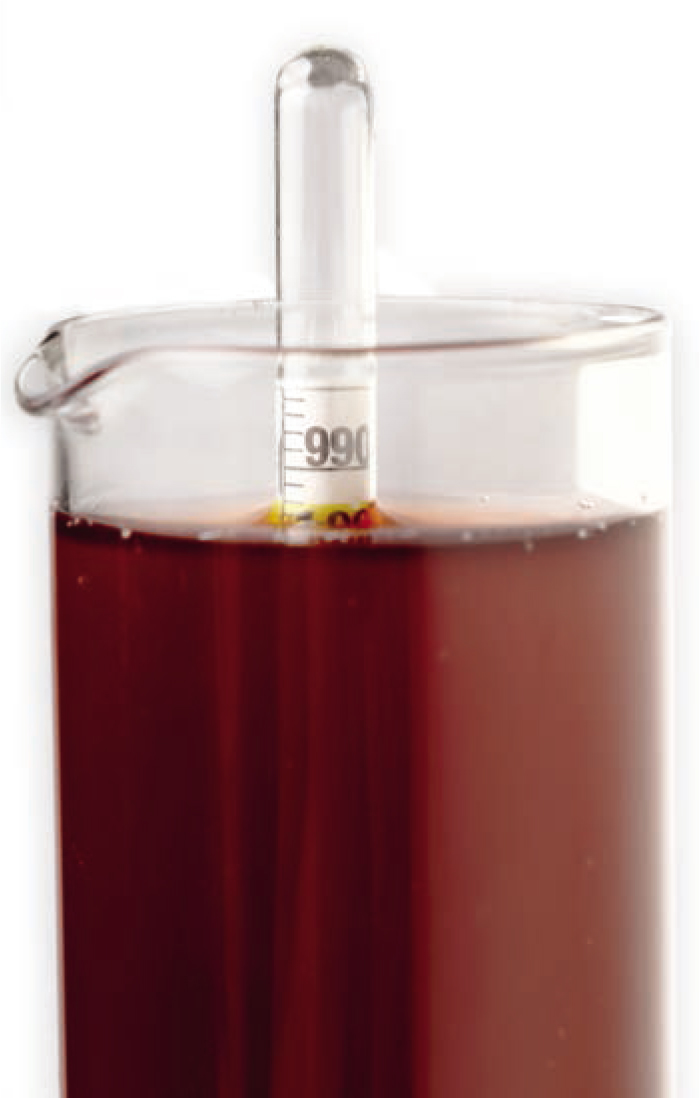
Take note of your initial measurement, and figure out what level the alcohol will be at if you go completely dry, measured at 1.000. To measure accurately, fill the beaker with cider from your batch. On a flat, level surface, fill until the hydrometer starts to float on its own. Spin it a bit to get rid of any bubbles, and to ensure that the hydrometer doesn’t stick against the beaker. Take the reading, and note it.
When you stop fermentation, either at the point where the cider is completely dry or when you decide to rack the cider and stop fermentation, take your final reading. Subtract the numbers and multiply by 131, and this will give you your percentage of alcohol. For example, if your initial juice is 1.054, and you end at 1.000, your cider is about 7.074 ABV.
You can easily use an online calculator or an app to figure this out as well, compensating for any temperature difference above or below sixty degrees.
Wine Thief
A wine thief is a common tool that allows you to take a sample of juice easily, without disrupting the cider too much. You lower the thief into the juice and pull out a small sample for testing or tasting. I made cider for a long time without one, and this cheap tool has changed my life. It’s the handiest way to taste your cider if you don’t have a sampling valve – just make sure you sanitize the wine thief before sticking it into your cider.
Thermometer
The standard stick-it-on-the outside thermometer is cheap, but not super accurate. But it’s fine for starting out, though you may want to get one with a probe for a more accurate reading. You’ll also need one if you decide to use powdered yeast, to ensure you can bring the water to the proper temperature.
Most home cider makers, myself included, didn’t start out working with a pH meter or pH strips. But I use a pH meter all the time now for commercial cider making, and I find it to be a useful and necessary tool. Monitoring pH levels is crucial for making sure your acid level is where you want it to be. With experience you can decide if you need to balance your acid levels by taste, but strips are cheap, and they’ll ensure that you get better results. But make sure you get the right range of strips, as there are different ranges for different purposes. You’ll want a narrow-range strip for cider, between 2.8 and 4.6 pH.
pH meters are cool too, but they cost a lot more, and you always have to make sure you’re using the proper buffer solution and cleaning solutions. It really comes down to how precise you want to be for your home batches.
Airlocks and Bungs
I recommend owning at least two airlocks for every each vessel. They can break easily, and it’s always nice to have some clean airlocks and bungs around for quick changes. Make sure to buy the right size bung for your vessel of choice. For example, one- and three-gallon carboys often have differently sized openings than a five gallon carboy. Airlocks are universal, but bungs are not. Buy an assortment and store them, because they will come in handy . . . usually on a Sunday when the home-brew shop is closed!
An important rule: cleaning chemicals are not sanitizers, and sanitizers are not cleaning chemicals. You wouldn’t wax your car before washing it, right?
There’s a product on the market that I really like called “One Step.” It claims it can be used as a single solution for both cleaning and sanitizing, but I always use a sanitizer after. One Step can be used to clean most of your equipment, except for kegs. It’s easy to find at most any home-brew shop, and it’s fairly affordable.
Remember, it’s important with One Step, or with any product, to read the instructions, measure the product carefully, and pay close attention to temperature and contact time.
Sanitizer
I use a sanitizer called iodophor. It’s an iodine-based sanitizer, and a little goes a long way. Again, it’s very important to read the instructions included with the product, or with any other sanitizer. Like One Step, iodophor is very easy to find. And unlike other products on the market, iodophor doesn’t have any of the common foaming issues that I’ve encountered with other products. But don’t think that the more you use, the more you’re sanitizing! Also, be aware that sanitizers in general use cold to slightly warm water, never hot.
You’ll need some sort of siphon to rack your cider. Auto-siphons work great and will do for the average home cider maker. If you decide to make bigger batches at some point, you can move up to a pump, but for anything less than fifty gallons a siphon will work fine.
Pumps are a whole other conversation. They can be very expensive, and though they’re fun toys, a home cider maker will probably never need one.
When you go to clean your siphon, the easiest way is to completely submerge the tube, or better yet, to make a solution of cleanser and sanitizer and siphon the solution through it into an empty vessel.
Bottling Equipment
If you decide to bottle your cider, you’ll need certain equipment. I’m assuming you don’t want to invest a lot of money in a fancy, expensive counter-pressure bottler. For commercial purposes, purging the oxygen out of the bottle before filling is necessary to increase shelf stability, but for home purposes it’s not needed.
The basics you’ll need are: bottles of your own choice, bottle caps, a capper, and a bottling bucket.
I also suggest a bottle-drying rack. They tend to take up a bit of space when not in use, but are extremely handy for letting your bottles air-dry after they’ve ben sanitized.
You can also be savvy and use flip-top bottles, but make sure you completely sanitize and clean the areas around the seal of the cap. Also, you’ll want to replace the whole cap after a few uses. I’ve received a few home-bottled gifts where I could visually see that the home cider maker did not take care to clean the cap. This lack of attention unfortunately ruined the cider inside.
Also, I would avoid using anything that has had questionable liquid in it, or anything with a screw top. However, feel free to reuse bottles in order to help save money. Ask your friends to save bottles for you as well.
Make sure you know the diameter of the bottles you’re using, as there is a slight size discrepancy between Euro bottles and American-style bottles. Though the difference is slight, it’s enough to matter. Both kinds of caps are available in home-brew stores, but make sure you have the right one on hand. Twenty-nine millimeter caps are usually for Euro style bottles, while the more common twenty-six millimeter fits American-style glassware.
I often read that bleach is OK to use for cleaning and sanitizing. And it is . . . but I still caution against it. For cleaning your bottles, I strongly recommend you use cleaners and sanitizers meant for home or commercial brewing. Bleach, if used incorrectly, can leave a detectible odor and taste in your final product. If you absolutely must use bleach, it’s even more important to air-dry the bottles completely before filling them with the cider you worked so hard to make.
Kegging Equipment
If you decide to keg instead of bottle, you’ll need some special equipment. For me, kegging at home was a changing point. Instead of sanitizing a bunch of little bottles, you only need to clean one keg. Also, I could try the cider from time to time in small amounts, without opening a whole bottle.
Yes, the money you would need to invest up front for the equipment is higher. Plus, you need to have access to hot water to keep the keg clean. But if you have a kegerator and want to make the jump, kegging is a great way to go.
Let’s talk about the keg itself. For home users, corny kegs, also known as soda kegs, are the way to go. They’re easy to open, clean, and inspect. Plus, they’re easily found through your local home-brew shop, or you can often locate a used one on Craigslist. They generally run from twenty-five to forty-five dollars apiece.
You’ll also need to get a product called Powdered Brewery Wash, or PBW. It’s relatively easy to find, and unlike other keg cleaning agents, which are packaged for commercial cider makers, PBW comes in smaller packages for home users. The big thing with this product is it needs hot water to work, and it requires at least thirty minutes of contact time with the container. After that, the container is rinsed with more hot water, and then the keg must be sanitized. So, if you don’t have access to five gallons of hot water, kegging may not be for you.
You’ll also want a kegerator of some sort, be it a store-bought one or an old-fashioned one made from an old fridge. Most home-brew shops sell kegging kits that come with the necessary hoses, regulator, and CO2 tank.
It may seem overwhelming and feel like a lot of money at first, but once you’re set up you’ll only need minimal maintenance over the years, such as more CO2, replacement gaskets, and upkeep of your cider lines.
If you decide to set up a kegerator but don’t want to tackle it yourself, ask your favorite bar owners who cleans their beer and cider lines. Often, whoever does it for them will do some side work in this area, and they may be willing to help you out.
After bottling your cider a few times, you may be interested in switching to kegging. Kegging offers some pros and cons.
PROS: With kegging, there’s considerably less to clean and fill. If you’re filling, say, a case of twelve-ounce bottles, with twenty-four to a case, you’ll have to sanitize, fill, and cap all of those bottles individually, and they’ll only hold just over two gallons of cider. Sure, it’s fun for a while, but if you invest in some five-gallon kegs, you can fit a whole five-gallon carboy full of cider into one container! And you’ll only have to clean that one vessel.
Drink what you want. Want to see how your batch is aging? Or maybe just want to drink a half pint before bed? Having a keg around allows you to test and enjoy as little as you want without opening up a whole bottle.
No bottle bombs. Maybe you have a batch that you added a bit of sugar to at the end, and maybe it decided to go into a secondary fermentation. With kegs, you don’t risk having bottles explode— at best making a mess, and at worst causing injuries. Kegs can hold more pressure, and while it is possible for them to burst, it’s unlikely.
Fill your own growlers. Once the keg is tapped, you can become your own growler-fill station, and take these larger jugs with you to parties, camping, or to the beach! Growlers also provide a neat way to pull off mini-batches and experiment with different flavors. Wonder what a cider made with those strawberries in your yard would taste like? Without sacrificing a whole batch, you can pull off a growler and go nuts!
When you fill a keg, you can force carb it, getting a consistent amount of carbonation into your cider without adding priming sugar, which is far less precise.
CONS: You’ll have a higher initial cost. To start kegging, you’ll need a kegerator of some sort, a CO2 tank, a regulator, and a collection of hoses for pouring your cider. But these things will last a long time, and filling a CO2 tank is pretty cheap. Most home brew stores will do it for you.
When you have bottles, it’s easy to visualize how much of your batch you have left. But it’s tough to judge how many pints you have left in a keg. It’s no fun to be enjoying pints on a hot day and then bang, you blow your keg.
Kegs aren’t perfect. You’ll eventually need to replace certain parts, like the gaskets around the lid and the washers around the in-and-out heads.
Hot water is absolutely necessary for cleaning kegs. You’ll also need special cleaning agents to make sure the kegs remain well-suited to holding cider. These cleaning agents (such as PBW) are only used for kegs and other stainless steel equipment, so they can’t be used for bottles or other equipment you already have.
When not in use, kegs take up a lot more space than a few boxes of bottles. Also, you’ll obviously need to have enough space to have a kegerator, or a repurposed refrigerator.
All in all, if you have the space and the means for the upfront cost, kegging is an excellent way to store and share your cider. Sure, the next guy may have a fancy label for his home brew bottles, but you, my friend, have your cider on draft!