Chapter 11. Sound and Music
Audio can be one of the most important parts of a game’s experience, and Unity has a wide range of tools for both simple and complex setups. In this chapter, we’ll discuss both the basics of how to get audio working in your scenes and more advanced ways to control how your game sounds.
Warning
Sound and music is far, far more important than you might suspect. Don’t leave out sound, music, and audio in your game.
As with other chapters, this chapter is far from an exhaustive collection of recipes covering literally everything you might ever need to do with audio in Unity. Instead, we try to cover the things that, as game developers, we find ourselves implementing over and over again, game after game.
11.1 Playing Sounds
Solution
To play an audio clip, you first need an audio file to play. If you already have one in mind, drag and drop it into your project.
Tip
If you need sound effects for your game, there are places where you can find some for free. Kenney.nl has a decent collection of public-domain sound effects; community sites like Freesound have a wider range of both material and quality. You can also create your own; Bfxr is a free app for Windows and Mac that generates retro-style sound effects.
Once you’ve added the audio asset to your project, configure how Unity imports it by selecting it and looking at the Inspector (Figure 11-1). Unity supports .aif, .wav, .mp3, and .ogg audio. It also supports the tracker formats .xm, .mod, .it, and .s3m. Unity will convert audio into the format that you specify.

Figure 11-1. The import settings for an AudioClip asset
Once you’ve imported your audio clip, it’s ready to be played. In Unity, audio is played from AudioSource components attached to game objects. To create one, follow these steps:
-
Open the GameObject menu and choose Audio → Audio Source. A new game object will be created, with an
AudioSourcecomponent attached.Note
You can also add an
AudioSourcecomponent to an existing object by selecting the game object, clicking the Add Component button at the bottom of the Inspector, and choosing Audio → Audio Source. -
Once you have an audio source, you attach the audio clip that you want to play by dragging the asset from the Project tab into the AudioClip slot (Figure 11-2).
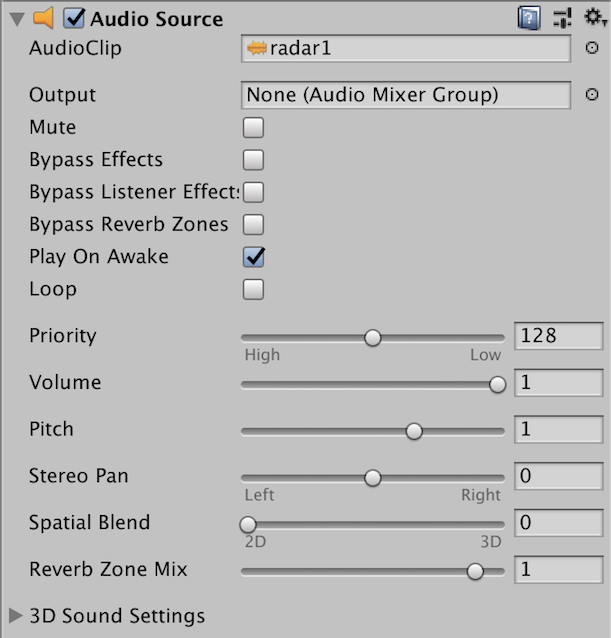
Figure 11-2. The Inspector for an AudioSource component
-
Play the game. The audio will begin playing.
Tip
You can configure whether an audio source begins playing when the object first becomes active by enabling the Play On Awake option.
Discussion
The player’s speakers or headphones play audio when an AudioSource componentthat’s currently playing audio is in range of an AudioListener component. When you create a new scene, the main Camera object that’s included in all objects comes with an AudioListener component attached.
Note
You should only have one AudioListener in the scene at a time. If you have more than one, Unity will warn you, and only one of them will work.
11.2 Setting Up a Mixer
Solution
You can manage the volume levels of different groups of audio sources by creating an audio mixer asset and setting up groups in the mixer. You can configure an audio source to route its audio to a specific group; each group can have its own volume level and effects.
To create an audio mixer, follow these steps:
-
Create an audio mixer asset by opening the Assets menu and choosing Assets → Create → Audio Mixer. A new audio mixer asset will be created; rename it to whatever you like. (“Audio Mixer” is common; you might not need more than a single mixer in your game.)
-
Double-click the new asset. The Audio Mixer panel will open (Figure 11-3).
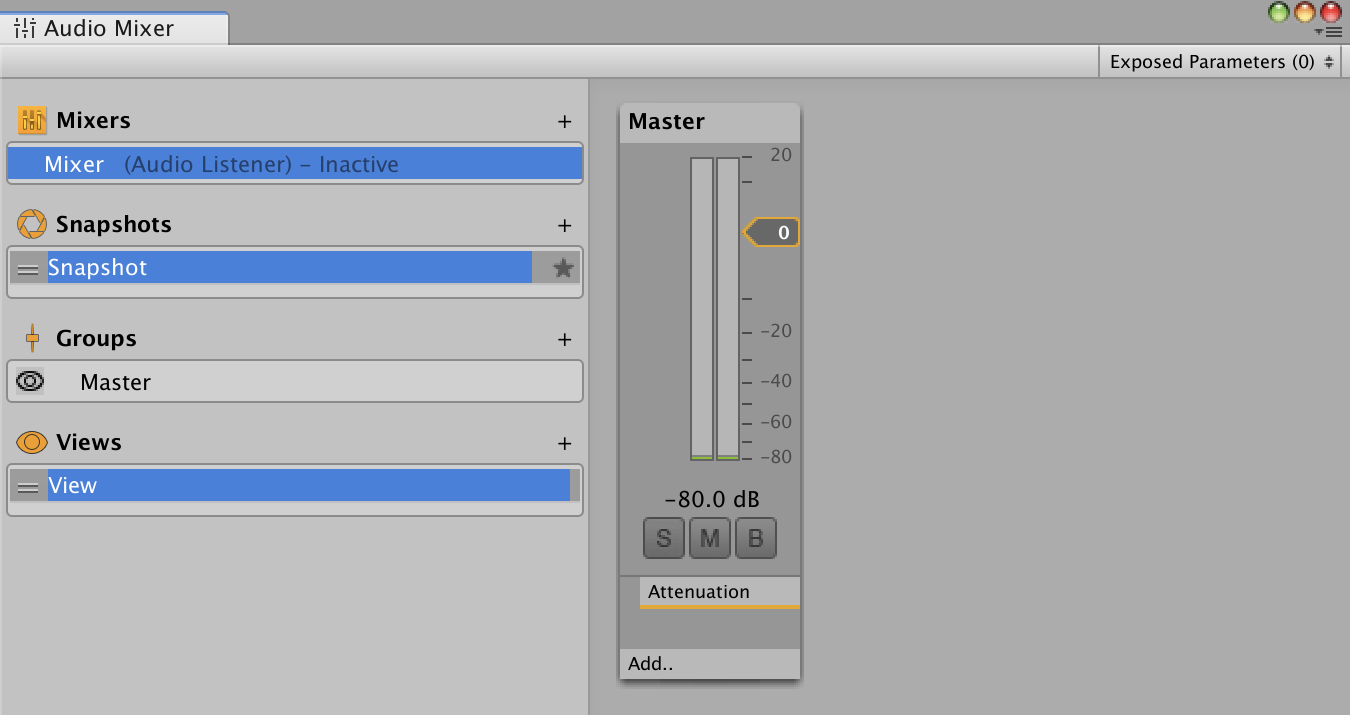
Figure 11-3. The Audio Mixer panel
-
The audio mixer manages a collection of groups. Groups have a volume slider and can have effects attached to them; they can also have children, which means that changing the volume of their parent affects the volume of its children. There’s always one group, called Master; all other groups are children of Master.
-
Create a new group by clicking the
+button at the right of groups. (For example, you can create a group called Music, and another called Sound Effects.) -
Finally, to make use of the groups you’ve created, you can route an audio source to a group. To do this, select the audio source, and drag and drop the mixer group from the Group list in the Audio Mixer panel onto the audio source’s Output slot. Any audio played by the audio source will be sent to the mixer group.
Discussion
In addition to the volume level for each group, you can also selectively control which groups are active:
-
The M (“mute”) button mutes the group.
-
The S (“solo”) button mutes all other groups.
-
The B (“bypass”) button disables effects (discussed in Recipe 11.3).
11.3 Using Audio Effects
Solution
You can modify the way that audio is processed by the audio system by adding audio effects, which can filter the frequency ranges of the sound, apply reverb, and more.
You can set up effects in three different places: an audio mixer group, an audio source, or an audio listener.
Effects on an audio source or an audio listener are components, just like other non-audio components such as renderers or physics colliders. To add an effect on an audio source, select the game object that contains the audio source you want to modify, and click the Add Component button. Click Audio, and select an effect you want to add. The component will be added, and any audio played by the audio source will be modified by the filter (Figure 11-4).
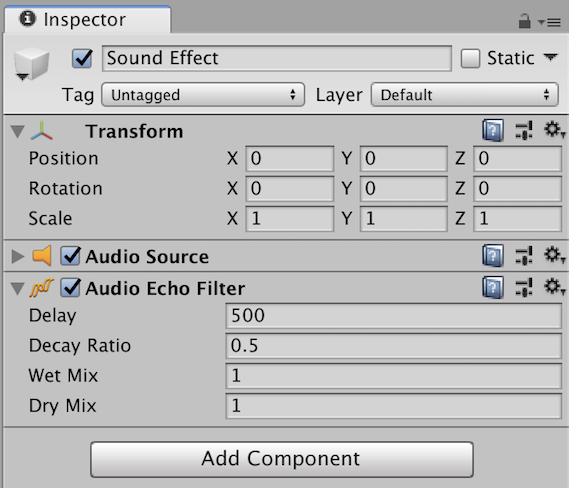
Figure 11-4. An audio effect component, attached to a game object that has an audio source
To add an effect on an audio listener, the process is identical, except that the effect will modify any audio received by the listener (see Figure 11-5).
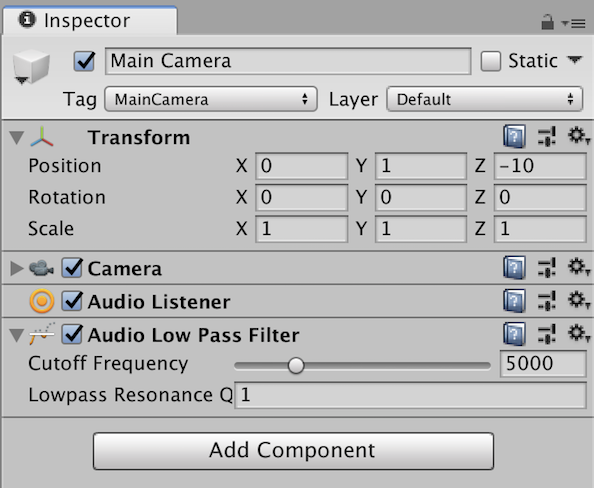
Figure 11-5. An audio effect component, attached to a game object that has an audio listener
Tip
The ordering of the components is important, because it controls the order in which the effects are applied to the audio.
In addition to adding effects to audio sources and listeners, you can also add effects on groups in the mixer by following these steps:
-
If you don’t already have one, create a mixer group by following the steps in Recipe 11.2.
-
Underneath the mixer for your group, click Add and select an effect.
-
Select the effect underneath the group.
Tip
The B button in a mixer group bypasses effects, temporarily disabling them.
Discussion
There’s a huge variety of audio effects available, and each one can be configured to support the effect you’re after. Some of the most useful include:
-
The Reverb effect allows you to simulate how sound echoes around a space.
-
The Low-Pass Filter effect cuts out high frequencies, and creates a muffled sound.
-
The Compressor filter reduces the dynamic range between the quietest and loudest parts of a sound, which means that the audio tends to sound like it’s at a more consistent level.
11.4 Using Send and Receive Effects
Solution
Use Send and Receive effects on your audio groups:
-
First, set up at least two mixer groups on an audio mixer, by following the steps in Recipe 11.2.
-
Add a Receive effect on the mixer group that should receive the audio, by clicking the Add button at the bottom of the group.
-
Add a Send effect on the mixer group that should send audio. Your groups should now look something like Figure 11-6. Once you’ve added a Send effect, you need to set up where it sends its audio to.
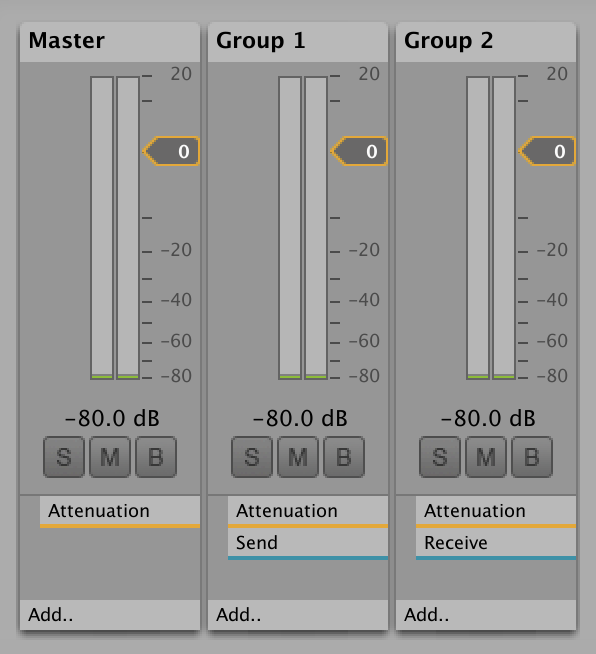
Figure 11-6. An audio mixer, with a Send effect on one group, and a Receive effect on another
-
Select the Send effect, and in its Inspector, set the Receiver to the Receive effect you added (Figure 11-7).
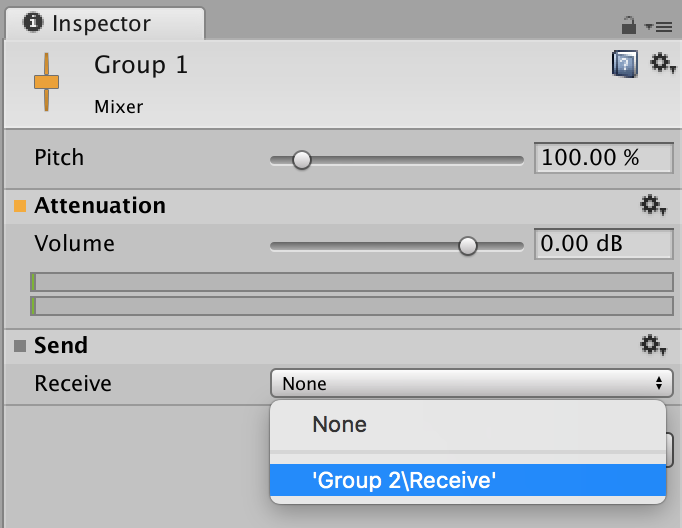
Figure 11-7. Configuring a Send effect to send audio to the specified Receive effect on another group
-
Play the game, and play some audio through the group that has the Send effect. The audio will also play through the group that has the Receive effect, and will be modified by any effects on the receiving group.
Note
By default, the Send effect is set to the lowest level. You’ll need to increase the send level in order for any audio to be sent to the receiver.
Discussion
Send and Receive effects aren’t hugely useful on their own, since all they do is duplicate an audio signal. They become useful when you want to have finer control over how audio is routed, and when you want to apply audio effects that make use of multiple audio signals at the same time.
Some effects act as their own receivers—you don’t need to add a Receive effect on them as well. For example, the Duck Volume effect (discussed in Recipe 11.5) can act as a receiver.
11.5 Ducking
Solution
A “ducking” effect is one in which the level of one signal causes the level of another to lower. To implement this, you add a Duck Volume effect on the group that should lower its volume, and add Send effects to the groups that should trigger the volume lowering.
For example, imagine that you’ve got a mixer group that plays music and another that plays speech, and you want to automatically lower the music volume when speech is playing:
-
Set up at least two mixer groups on an audio mixer by following the steps in Recipe 11.2. Name one mixer Voice, and the other mixer Music.
-
Set up two audio sources; make one send to the Voice group, and the other send to the Music group. Attach whatever audio clip you like to each source; make the source that’s sending to Music loop.
-
Select the Music group, which should lower its volume when Voice is playing, and add a new Duck Volume effect.
-
Select the Voice group, which should cause the Music group to lower its volume, and add a Send effect.
-
Select the Send effect, and set its Receiver to the Duck Volume effect.
-
Increase the send level to maximum (that is, 0 dB).
You’re now ready to test:
-
Play the game. You won’t hear much of an effect yet; you’ll need to tune the setting to figure out what values to set.
-
Make the Voice source play its sound; for example, you can use a script to control the audio source (see Recipe 11.7).
-
Select the Duck Volume effect, and click the “Edit in Playmode” button at the top of the Inspector.
-
As it’s playing, adjust the Threshold slider to control at what point the ducking takes effect.
Discussion
You can also configure the Ratio and Knee parameters to adjust how the Duck Volume effect modifies its volume; additionally, the Attack Time and Release Time settings give you control over how quickly the effect is applied, and how long it takes for it to go away.
11.6 Using Multiple Audio Zones
Solution
Use a reverb zone to create areas of your game that apply different reverb settings to your audio listener. Reverb zones distort the sound heard by a listener depending on where the listener is within the zone, and are used when you want to gradually apply an ambient effect to a place as the player enters it.
To create one, follow these steps:
-
Create a new reverb zone by opening the GameObject menu and choosing Audio → Audio Reverb Zone.
-
Position the new zone in the area where you want the reverb to apply.
-
Click and drag the points on the two spheres to set the minimum and maximum radius of the effect (Figure 11-8).
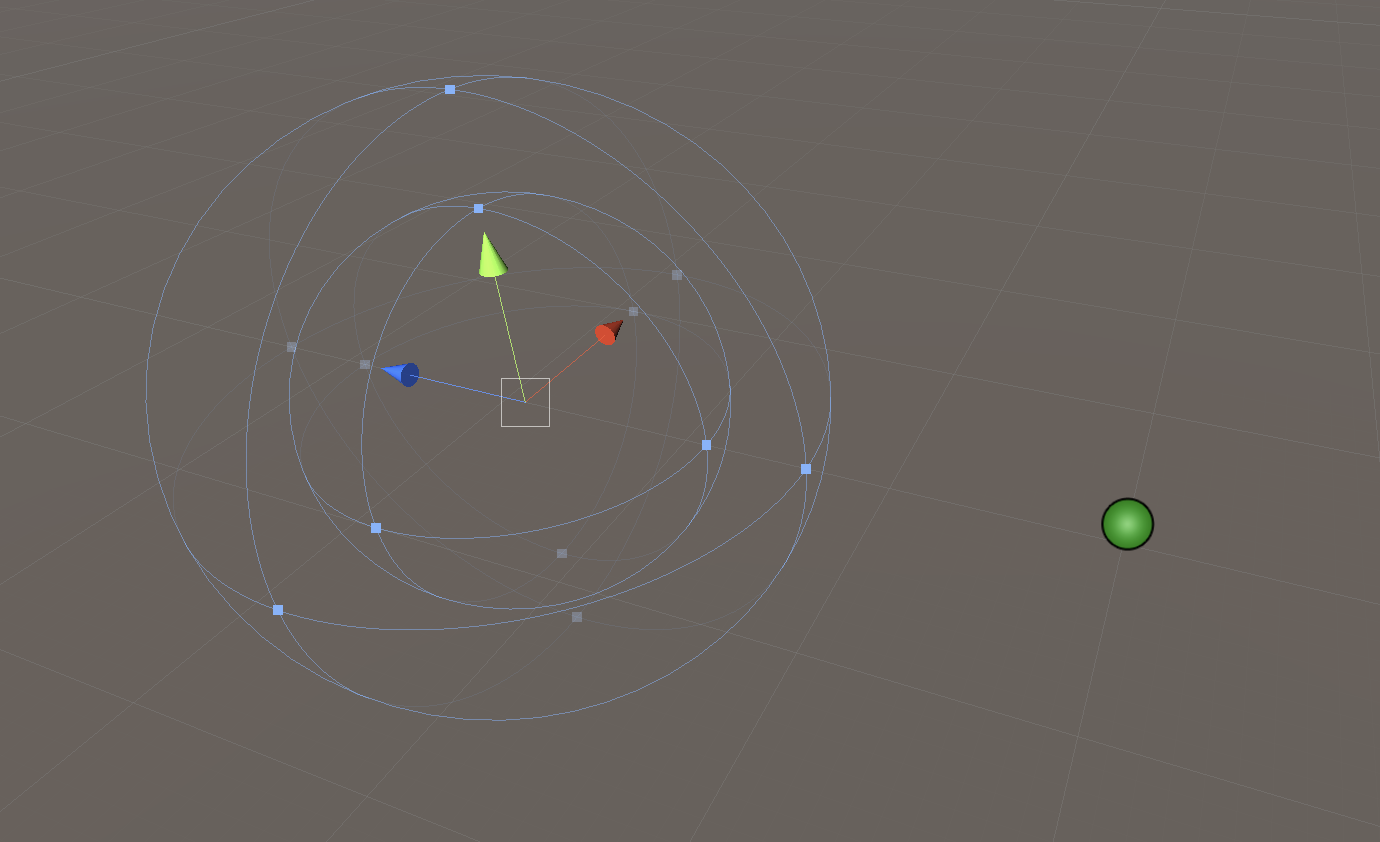
Figure 11-8. The Audio Reverb Zone in the scene
-
In the Inspector (Figure 11-9), select what kind of effect you want to apply. There’s a wide range of presets, including concert halls, caves, padded rooms, and everything in between.
-
Play the game and move the camera into the reverb zone. As you enter the zone, the effect will begin to apply to any audio being received by the audio listener.

Figure 11-9. The Inspector for an Audio Reverb Zone
Discussion
If you set the Reverb Preset to Custom, you can modify the individual reverb settings, and create a reverb effect that more precisely suits your needs.
11.7 Playing Audio Through Code
Solution
Use the Play, PlayDelayed, PlayOneShot, and Stop methods on an AudioSource component to control an audio source:
// Play the AudioClip that's currently setsource.Play();// Play the AudioClip with a delay, measured in secondssource.PlayDelayed(0.5f);// Play a specified AudioClip; the volume scale is optionalsource.PlayOneShot(clip,0.5f);// play at half volumesource.PlayOneShot(clip,1f);// play at full volume// Stop playing the current clipsource.Stop();
Discussion
It’s often useful to be able to play an audio clip that you only know the identity of during gameplay, because it means that you can set up an audio source with the appropriate volume level and audio mixer group at design time, and then have control over the sound itself during gameplay.
11.8 Using a Sound Manager
Solution
Create a system that allows other parts of your code to request that a sound effect be played. The code given in this class is a simple example, but it’s designed to be a base from which you can add the specific features you need for your game.
This system works by defining an asset of the SoundEffect as a ScriptableObject class that contains references to audio clips. The AudioManager, which is a singleton, has a list of these SoundEffect assets, and can be asked to play one of them by passing the name of the effect. A random clip that’s attached to the SoundEffect asset will be selected, allowing for some nice variation. The effect can be played either at the same position as the listener, or a position in the world can be passed as a parameter, and the selected audio clip will be played there.
Tip
For more information on ScriptableObject, see Recipe 2.12.
Note
This script makes use of a singleton class, which we discuss in Recipe 2.7. Follow the steps in that recipe before you continue with this one.
To begin building this, we’ll start by defining the SoundEffect asset:
-
Create a new C# script called SoundEffect.cs, and put the following code in it:
// An asset that contains a collection of audio clips.[CreateAssetMenu]publicclassSoundEffect:ScriptableObject{// The list of AudioClips that might be played when// this sound effect is played.publicAudioClip[]clips;// Randomly selects an AudioClip from the 'clips' array,// if one is available.publicAudioClipGetRandomClip(){if(clips.Length==0){returnnull;}returnclips[Random.Range(0,clips.Length)];}}Tip
In a real game, you might want to exclude the most recently playing random sound from the next result, just to make the game feel like it’s more interesting than it actually is!
-
Create
SoundEffectassets by opening the Assets menu and choosing Create → Sound Effect. Name the new asset whatever you like. -
Select the new asset, and in the Inspector, drag and drop the audio assets you’d like to use for this sound effect (see Figure 11-10).
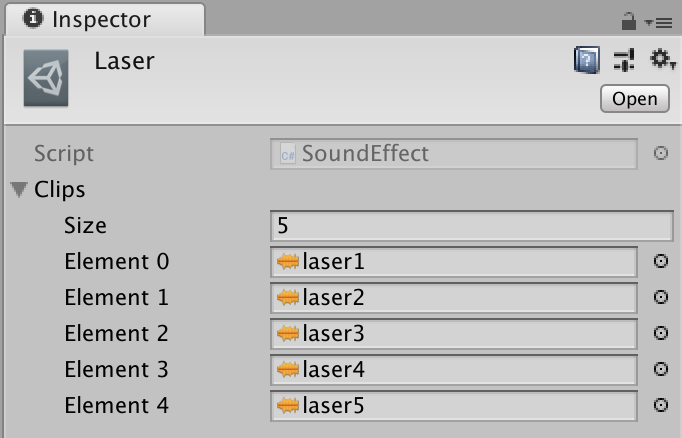
Figure 11-10. The Inspector for a SoundEffect asset, with a collection of audio clips added to its list
Next, we’ll create the AudioManager class itself:
publicclassAudioManager:Singleton<AudioManager>{// The list of references to SoundEffect assets.publicSoundEffect[]effects;// A dictionary that maps the names of SoundEffects to the objects// themselves, to make it faster to look them up.privateDictionary<string,SoundEffect>_effectDictionary;// A reference to the current audio listener, which we use to place// audio clips.privateAudioListener_listener;privatevoidAwake(){// When the manager wakes up, build a dictionary of named sounds, so// that we can quickly access them when needed_effectDictionary=newDictionary<string,SoundEffect>();foreach(vareffectineffects){Debug.LogFormat("registered effect {0}",effect.name);_effectDictionary[effect.name]=effect;}}// Plays a sound effect by name, at the same position as the audio// listener.publicvoidPlayEffect(stringeffectName){// If we don't currently have a listener (or the reference we had// was destroyed), find one to useif(_listener==null){_listener=FindObjectOfType<AudioListener>();}// Play the effect at the listener's positionPlayEffect(effectName,_listener.transform.position);}// Plays a sound effect by name, at a specified position in the worldpublicvoidPlayEffect(stringeffectName,Vector3worldPosition){// Does the sound effect exist?if(_effectDictionary.ContainsKey(effectName)==false){Debug.LogWarningFormat("Effect {0} is not registered.",effectName);return;}// Get a clip from the effectvarclip=_effectDictionary[effectName].GetRandomClip();// Make sure it wasn't nullif(clip==null){Debug.LogWarningFormat("Effect {0} has no clips to play.",effectName);return;}// Play the selected clip at the specified pointAudioSource.PlayClipAtPoint(clip,worldPosition);}}
Finally, we’ll create the singleton instance, and add the audio clips we want to be available:
-
Create a new game object by opening the GameObject menu and choosing Create Empty. Name the new object “Audio Manager.”
-
Select the new object.
-
Drag and drop the AudioManager.cs script onto the Inspector.
-
Add the
SoundEffectasset that you created into the Effects list (Figure 11-11).
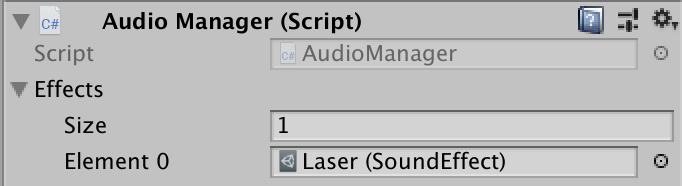
Figure 11-11. The inspector for an audio manager, with a SoundEffect asset added to its list
You’re now ready to trigger sound effects from your code. For example, if you created a SoundEffect named “Laser,” you’d trigger it like so:
// Play a sound called "laser" at the same place as the listenerAudioManager.instance.PlayEffect("laser");// Play the same sound at the originAudioManager.instance.PlayEffect("laser",Vector3.zero);
Discussion
As with any singleton, you’re making a tradeoff between ease of initial development and increased software complexity. See the Discussion of Recipe 2.7 for more details.