We will need to create four files and download a file for the gateway code. We will also download and install Thonny if it is not already installed on your computer:
- In your browser, navigate to the GitHub location for uPyLoRa (https://github.com/lemariva/uPyLoRaWAN) and download the library.
- If you do not have Thonny installed on your computer, navigate to www.thonny.org and download and install it.
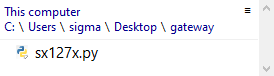
- Create a folder on your computer called gateway and copy and paste the sx127x.py file from the uPyLoRa library into the folder.
- In Thonny, under the This Computer section, navigate to the gateway folder you just created (you may need to select View | Files to see it):
- Open up the sx127x.py file and scroll down to find the default_parameters variable.
- Change default_parameters to match the parameters set in the lora variable in the loramessage.py file from the Writing the application edge code section. For North American LoRa transmission, default_parameters appears as follows:
default_parameters = {
    'frequency': 915E6,
    'tx_power_level': 2,
    'signal_bandwidth': 125E3,
    'spreading_factor': 12,
    'coding_rate': 4.5,
    'preamble_length': 8,
    'implicit_header': False,
    'sync_word': 0x12,
    'enable_CRC': False,
    'invert_IQ': False
     }
- With MicroPython microcontrollers, the boot.py file is the first file that is run when the microcontroller starts. We will need a Wi-Fi connection to the internet for the gateway layer. The boot.py file is the perfect place to put the Wi-Fi connection code. Open up Thonny and click on File | New. Paste in the following code and save the file as boot.py. You will need to provide your router's SSID (network name) and password (keep the quotes for both):
def do_connect():
    import network
    sta_if = network.WLAN(network.STA_IF)
    if not sta_if.isconnected():
        print('connecting to network...')
        sta_if.active(True)
        sta_if.connect('<<Your SSID>>', '<<PASSWORD>>')
        while not sta_if.isconnected():
            pass
    print('network config:', sta_if.ifconfig())

do_connect()
- We will need a file to read the LoRa messages from the edge device and a file to send MQTT messages to our CloudMQTT broker. We'll start with the LoRa messages. Create a new file in Thonny called LoRaMessage.py and paste in the following code:
from machine import Pin, SPI
from sx127x import SX127x

class LoRaMessage:

    def get_message(self):
        device_pins = {
            'miso':19,
            'mosi':27,
            'ss':18,
            'sck':5,
            'dio_0':26,
            'reset':14
        }

        device_spi = SPI(baudrate = 10000000,
                polarity = 0, phase = 0, bits = 8,
                firstbit = SPI.MSB,
                sck = Pin(device_pins['sck'], Pin.OUT, \
                          Pin.PULL_DOWN),
                mosi = Pin(device_pins['mosi'], Pin.OUT, \
                           Pin.PULL_UP),
                miso = Pin(device_pins['miso'], Pin.IN, \
                           Pin.PULL_UP))

        lora = SX127x(device_spi, pins=device_pins)
        print("Waiting for LoRa message.....")

        while True:
            if(lora.received_packet()):
                payload = lora.read_payload()
                status=str(payload)[18:-1]
                return (status)
- Be sure that the pin numbers in device_pins match your microcontroller's LoRa connections. Now, let's create the code for MQTT messages. Create a new file in Thonny called HeaterStatus.py and paste in the following code. You will need the values from your CloudMQTT instance:
from umqtt.robust import MQTTClient

class HeaterStatus:

    def update(self, status):
         client = MQTTClient(client_id="gateway",
         server="<<CloudMQTT server name>>",
         user="<<CloudMQTT username>>",
         password="<<CloudMQTT password>>",
         port=<<CloudMQTT port number>>)

         client.connect()
         client.publish("heater_enabled",status)
- With the LoRa and MQTT code taken care of, we need a Python file to stitch the code together. Create a new file in Thonny called main.py and paste in the following code:
from LoRaMessage import LoRaMessage
from HeaterStatus import HeaterStatus

message=LoRaMessage()
heater_status=HeaterStatus()

while True:
    status=message.get_message()
    heater_status.update(status)
- We should now have five files in our project. If you haven't already done so, plug the ESP32 microcontroller into a USB port on your computer. In Thonny, select Run | Select interpreter. From the drop-down menus, select MicroPython (ESP32) and the port in which the ESP32 microcontroller is connected to on your computer. If you have not already flashed MicroPython onto the ESP32, you may do so by clicking on the Open the dialog for installing or upgrading MicroPython on your device option:
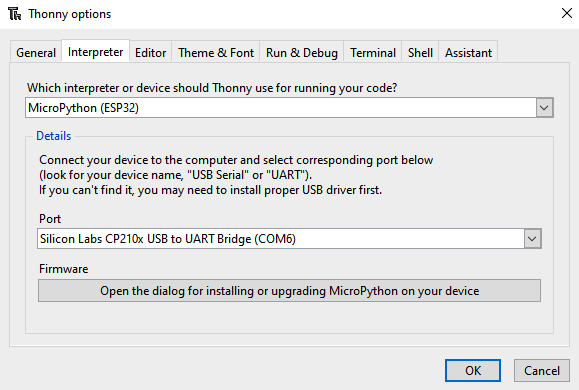
- Click on OK. You should see the cursor of the REPL (>>>) under the shell. Type in the following simple command to verify that the REPL is working properly:
print("Testing...")
You should see the word Testing... printed below.
- Now it's time to upload the gateway files to the ESP32. Select all of the files under the This computer section, and then right-click and select Upload to /:
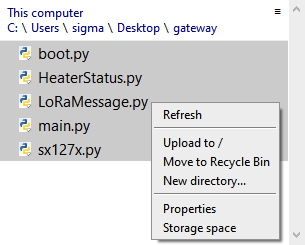
After a few seconds, the files should be seen on the ESP32.
Now that we have the files loaded onto the ESP32 gateway, let's take a look at how it all fits together.