The following are the steps to be performed:
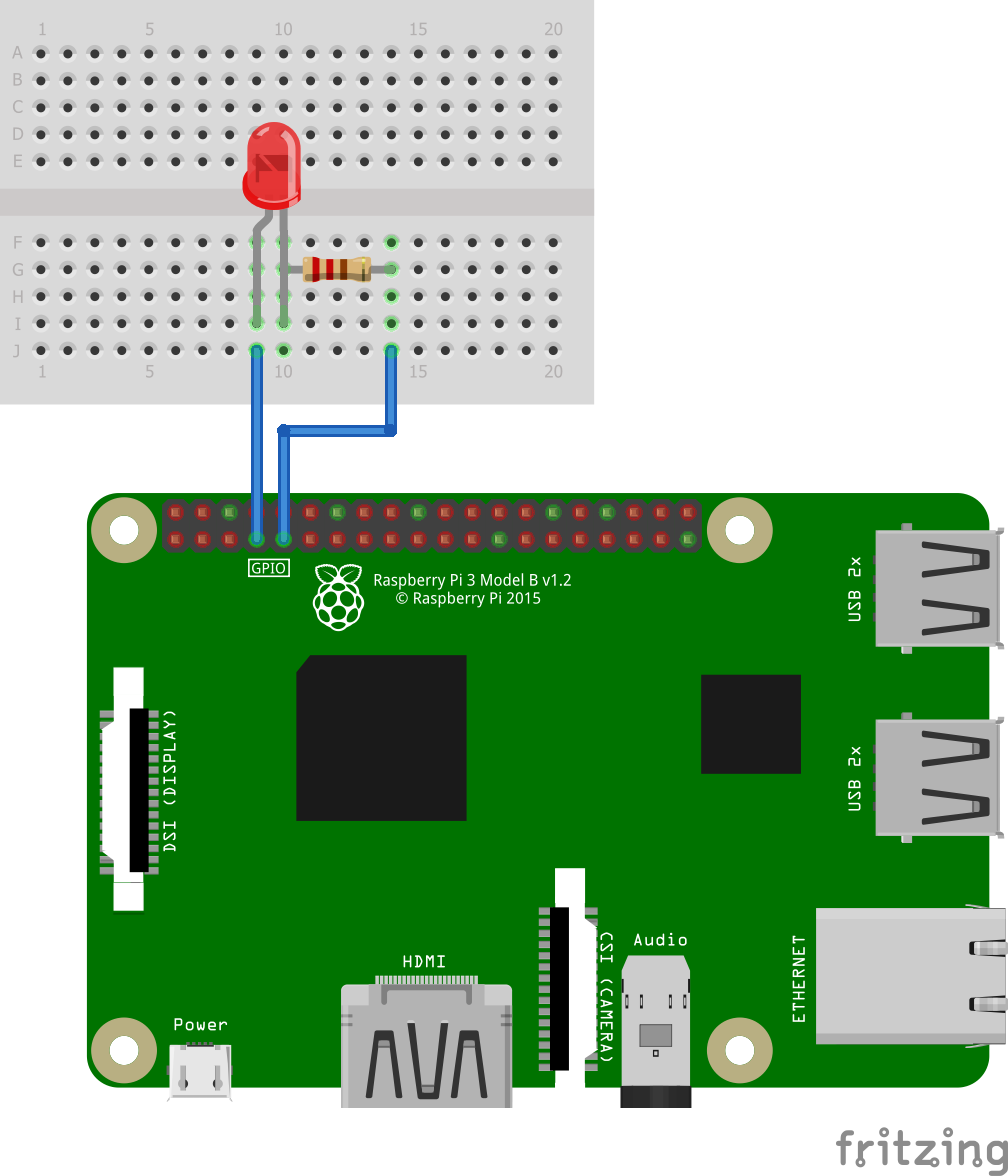
- Wire the Raspberry Pi with the resistor and LED using GPIO 4 and GND. Be sure to connect GPIO 4 to the positive end of the LED (the longer leg):
- The next step is to install the OpenCV library onto our Raspberry Pi. At the time of writing this book, the only way I could get the library installed on my Raspberry Pi was by building it by following the steps from https://pimylifeup.com/raspberry-pi-opencv/. For Raspberry Pi Desktop users (refer to the previous tip), installing OpenCV is a simple as using the Manage packages tool in Thonny and searching on opencv-python and installing it. Please use the method suitable for your setup.
- We will use Thonny to write our code. Open up Thonny from the main menu in Raspbian and create a new file; name it face_detect.py and type in the following code (the picture of the face, the dog, and the cascade file should be in the book's GitHub repository):
import cv2
from gpiozero import LED

image = "face.png"
#image = "dog.png"
cascade_file = "haarcascade_frontalface_default.xml"
alarm = LED(4)

cascade = cv2.CascadeClassifier(cascade_file)
image = cv2.imread(image)
gray = cv2.cvtColor(image, cv2.COLOR_BGR2GRAY)

face = cascade.detectMultiScale(
    gray,
    scaleFactor=1.1,
    minNeighbors=5,
    minSize=(30, 30),
    flags = cv2.CASCADE_SCALE_IMAGE
)

if len(face):
    print("Found a face!")
    alarm.blink()
    for (x, y, w, h) in face:
        cv2.rectangle(image, (x, y), (x+w, y+h), (0, 255, 0), 2)
    cv2.imshow("Face found", image)
else:
    cv2.imshow("Found this", image)

cv2.waitKey(0)
cv2.destroyAllWindows()
alarm.off()
- Run the code by pressing F5. Verify that the LED starts blinking and a window pops up with the face surrounded by a green square:

- Press any key on the keyboard to shut down the window and stop the LED from blinking.
- Modify the code so that the image of the dog is used instead of the human face by commenting image = "face.png" (that is, adding # at the beginning of the code) and removing the comment (#) from image = "dog.png":
#image = "face.png"
image = "dog.png"
- Run the program again and verify that the LED doesn't blink and that the picture of the dog pops up without a green square:

What we have done here is create an alarm when a face is detected. We could easily change the pictures for a video feed from a USB camera and create an alarm whenever a human face is detected by the program. The blinking LED in our example replicates a message call to the outside world. We could change this for an MQTT call to an external server, for example, to be alerted remotely. This example shows the true power of using the edge as the picture is processed in seconds. Significant time would be added to the process if the picture had to be sent to a remote server and that is assuming a strong and quick connection to the internet.
Now that we can see that the Raspberry Pi may be programmed to spot human faces, let's review the code to get a further understanding.