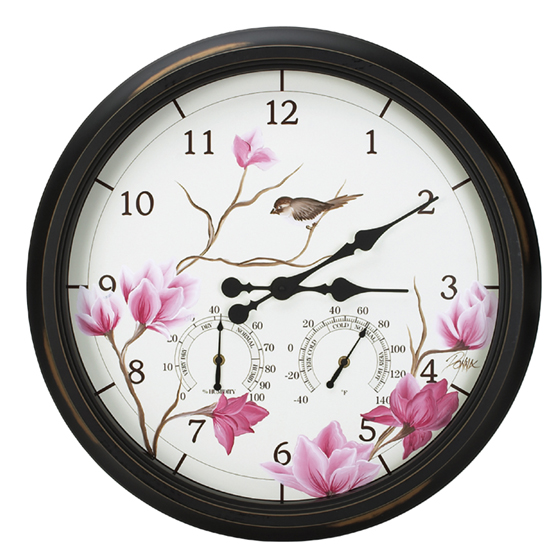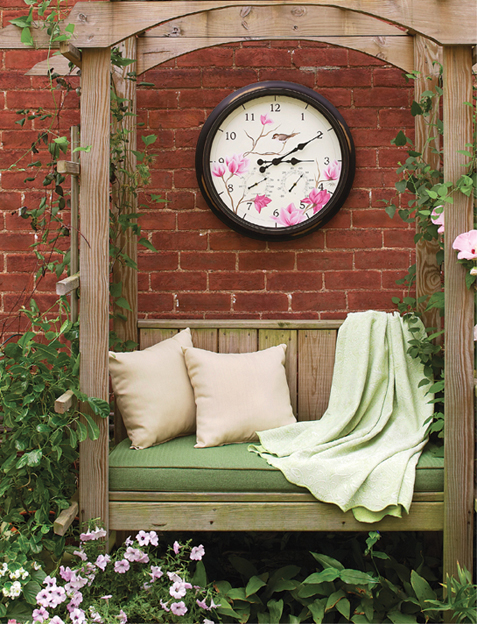
A beautifully painted clock like this one can make a strong decorative statement in areas such as covered porches, sunrooms and patios. The design is simple—just some pink magnolia blossoms and a little brown sparrow—but the large size and bronze-toned metal frame of the clock make it a memorable and impressive accessory for your outdoor decor. Because the clock face is protected under glass, you can use regular acrylic paints, but I would keep it out of direct sunlight to prevent heat buildup behind the glass. Also, the delicate colors of the flowers will show up better if it’s not in the glare of bright sunlight. If you don’t have room for a large clock such as this one, a smaller round one will work just as well—just reduce the overall size of the design or cut back on the number of magnolia blossoms you paint.
3⁄4-inch (19mm) flat
nos. 2 and 10 flats
no. 2 script liner
Large round clock with bronze finish metal frame
FolkArt Floating Medium

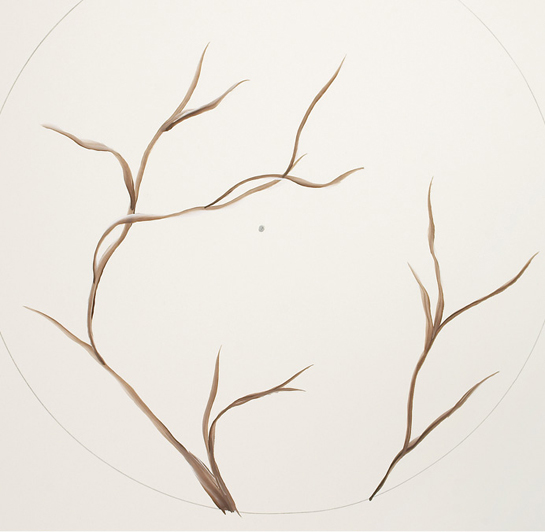
1. Branches. Double-load a 3⁄4-inch (19mm) flat with Burnt Umber and Wicker White. Stay up on the chisel edge and paint the magnolia tree branches within the circle of the round clock face for placement of the design. Here we’re painting on a plain surface so the design is easy to see and you’re not distracted by the clock’s numbers and gauges.
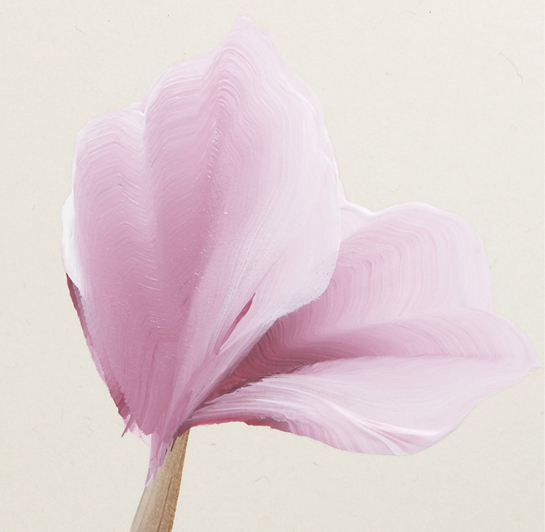
2. Magnolia bud. Double-load a 3⁄4-inch (19mm) flat with Berry Wine and Wicker White. Paint the back two petals of the flower bud, keeping Wicker White to the outside. Start with the side petal, then lay the upright petal over it. These petals are painted similarly to a wiggle-edge leaf.

3. Magnolia bud. Flip the brush so the Berry Wine side is to the outside, and paint the back side of the bud’s front petal. The contrast between the darker pink and the light pink brings this petal to the front.
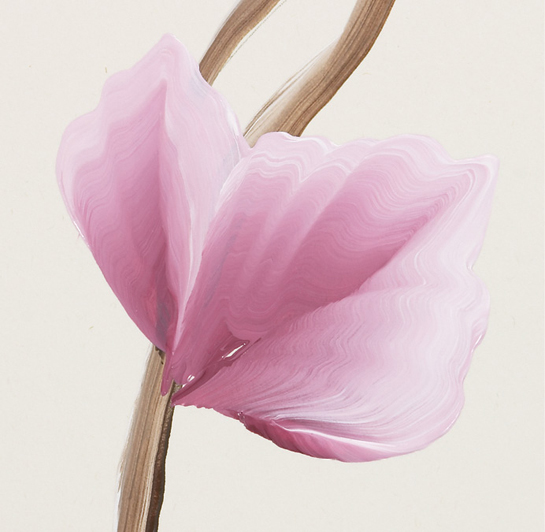
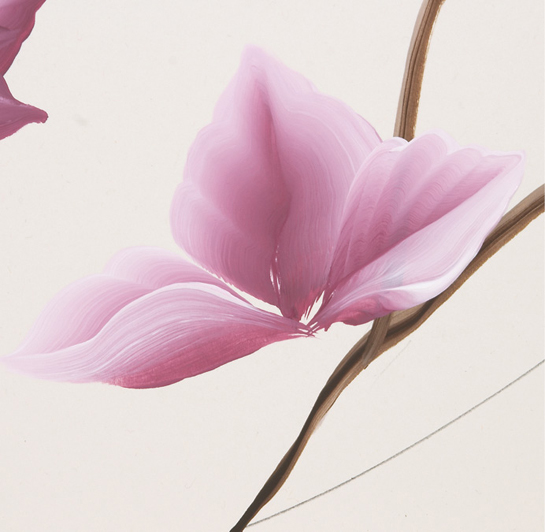
4. Opening blossom. On the opening blossom located beneath the bud you just painted, start with the back two petals. Double-load a 3⁄4-inch (19mm) flat with Berry Wine and Wicker White. Keep the Wicker White to the outside.
5. Middle petals. Using the same brush and colors, paint the next layer of three petals; start these petals lower so you can still see the tops of the back petals. Pick up more Wicker White to create the lightest edges on some of the petals.
Q: When you paint flowers, where do you get your ideas? What are you inspired by?
A: When I’m looking for a new flower to paint, I study the photos in floral reference books, gardening magazines and seed catalogs. Sometimes I take my own pictures with a digital camera to get closeups of the flowers as well as the leaves. Most of the time when I paint a flower, I am going for an effect rather than trying to make it anatomically perfect in every detail. I prefer to work from a picture rather than an actual flower. This is because a picture is flat and one dimensional, and so is a painting. I use color, highlighting and shading all in one stroke to differentiate one petal or layer from another instead of mixing lots of colors.
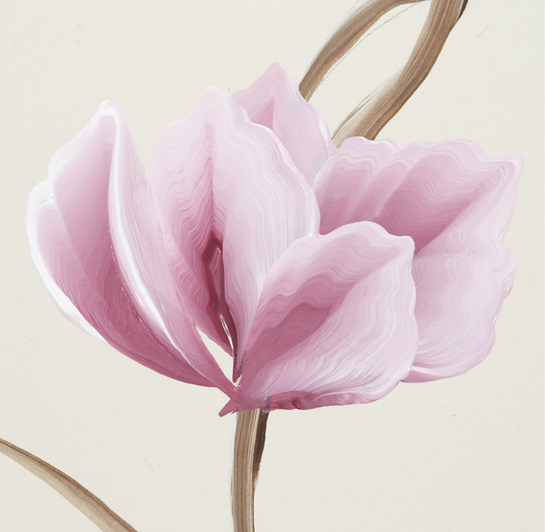
6. Turned-edge petal. In front of the petals you just painted in Step 5, paint a petal with one turned or curled edge. Using the same brush and colors and keeping the Wicker White to the outside, paint the first half of the petal, wiggling and sliding up to the tip. As you slide back down the other half, pivot your brush to the left to bring the white side of the brush over and across the front.
7. Drooping petal. Finish with a petal that droops off to the right side. Attach the blossom to the branch with Burnt Umber and Wicker White chisel-edge strokes.

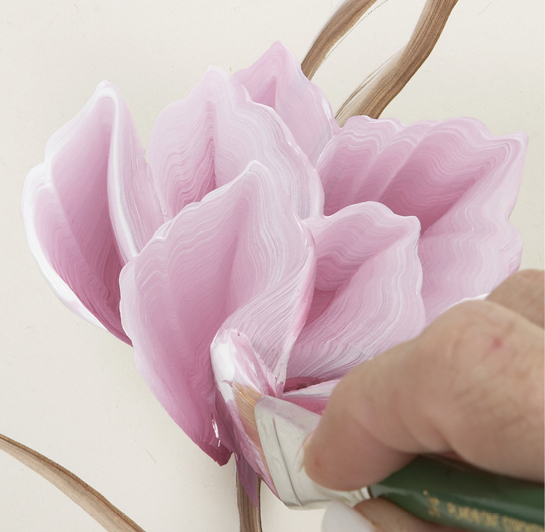
8. Detail lines. Detail the magnolia petals and deepen the shading at the base of the petals with inky Berry Wine on a no. 2 script liner.

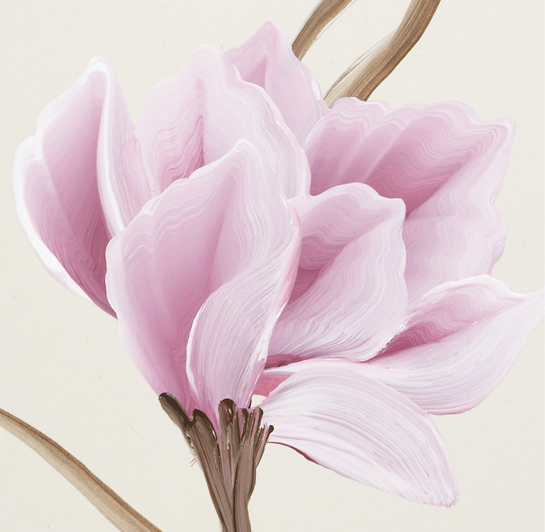
9. Dark pink magnolia. The dark pink magnolia, located at the bottom of the clockface below the bird, is painted the same way as the blossom you just painted. To get the dark pink color, keep the Berry Wine side of the brush to the outside edges of the petals.
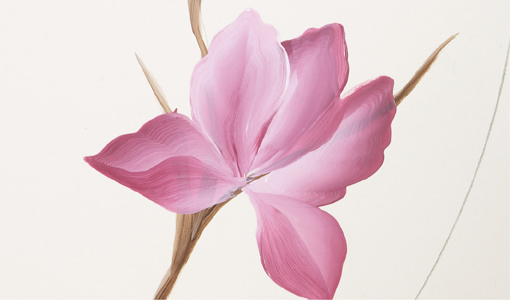
10. Fully open magnolia. To begin the fully open light pink magnolia to the right of the dark pink one, double-load a 3⁄4-inch (19mm) flat with Berry Wine and Wicker White and start with the two back petals. Keep the Wicker White side of the brush to the outside. Add a curled petal to the left. Paint the back half of the petal first, then overlap it with a smooth horizontal stroke from base to tip, keeping the Wicker White to the top edge of the petal.
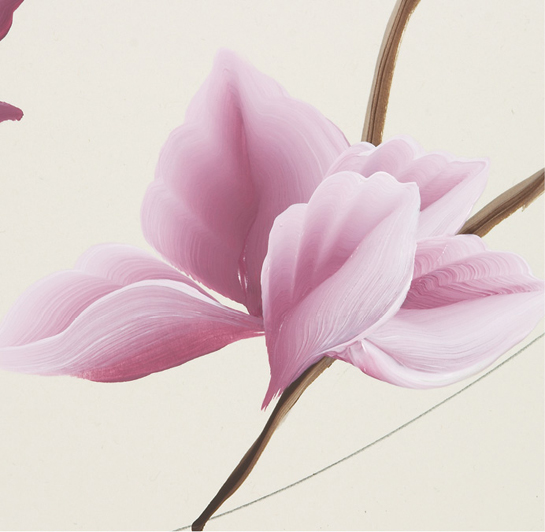
11. Middle petals. Add another layer of two more petals to the right, one laying sideways and one more upright.
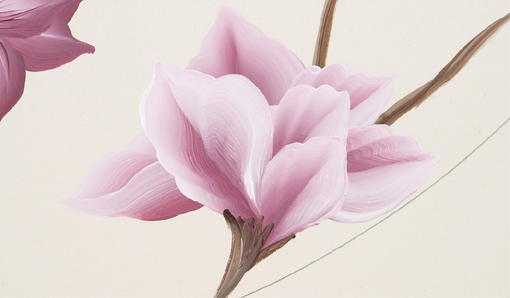
12. Final petal layer. Add the final two petals to the light pink open magnolia, then attach the blossom to the branch with chisel-edge strokes of Burnt Umber and Wicker White.
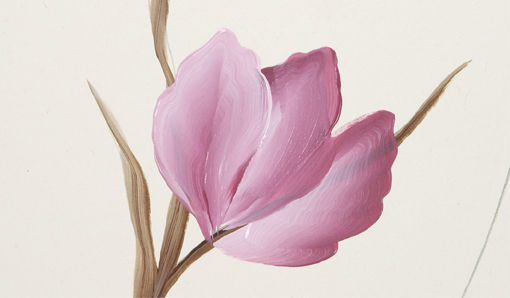
13. Largest magnolia. The final dark pink magnolia blossom is at the 4 o’clock position on the clockface. Start with two dark pink back petals: keep the Berry Wine to the outside. Work a little more Wicker White into the brush and paint the lighter petal in front.
14. Side petals. Turn your brush so the Berry Wine is to the outside and add two hanging petals at either side of the back petals.

15. Final magnolia petal. Paint a dark pink upright petal in front to complete the blossom. Load a no. 2 script liner with inky Berry Wine and paint the detail lines at the base of the petals to shade them. Finish with a stem of Burnt Umber and Wicker White.
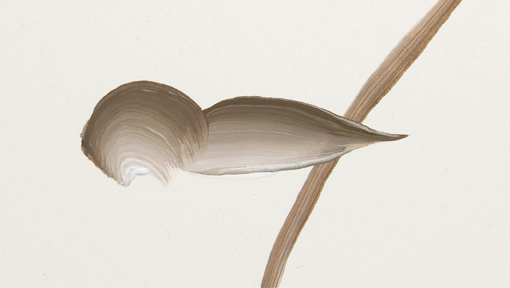
16. Bird’s head and back. The little brown sparrow is painted entirely with Burnt Umber and Wicker White double-loaded on a no. 10 flat. Use a half-circle stroke for the head and a long, smooth stroke for the back.

17. Cheek and belly. With the same colors and brush, turn the brush so the Wicker White is on the outside edge. Paint the cheek and belly with short choppy strokes pulled out to the end to get a feathery effect.
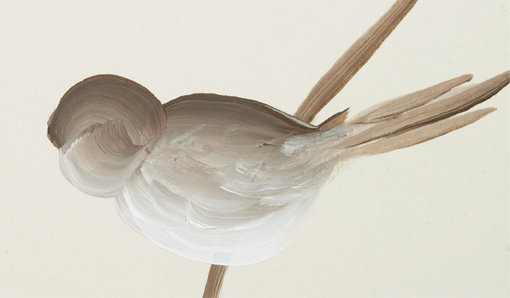
18. Tail feathers. Paint the tail feathers starting with the longest one and tapering down on both sides. Don’t curve these strokes; keep them straight. Tail feathers are always straight.

19. Wing. Add a few more shorter feathers to the tail. Stroke the wing with one smooth motion from neck to tail, keeping the Burnt Umber to the top.
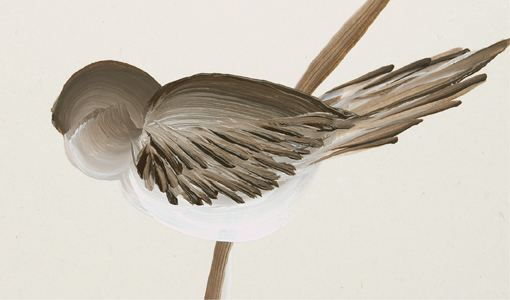
20. Wing feathers. Pull short chisel-edge strokes of Burnt Umber starting at the outside edge and layering inward.
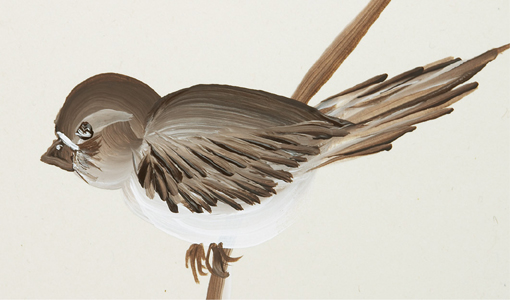
21. Feet, eye and beak. Load a no. 2 script liner with inky Burnt Umber and paint short curving lines for the feet. Double-load a no. 2 flat with Burnt Umber and Wicker White and work in a lighter brown where the eyes are. Add the beak with the Burnt Umber side of the brush. With a no. 2 script liner add the eye with Burnt Umber. Add highlights to the eye, face and beak with Wicker White on a no. 2 script liner.