
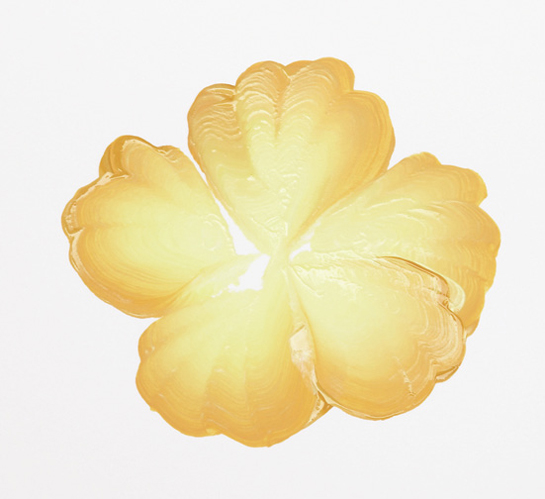
1. A five-petal flower is a series of teardrop strokes all started from the same center. To layer them, start with a cluster of three or four teardrop strokes.

2. Then paint a complete five-petal flower overlapping the first set of strokes. To make a large cluster for hydrangea blossoms, continue painting three-, four- and five-petal florets that overlap each other.
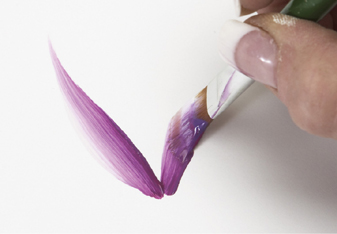
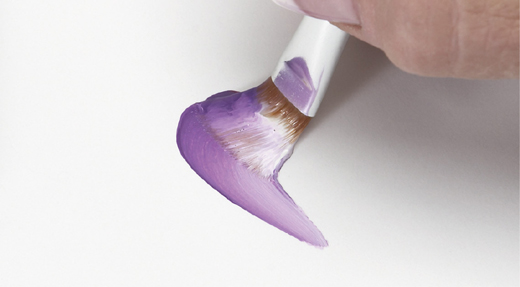
1. Double-load a flat brush. Start at the base of the petal, lean down on the chisel and start sliding up towards the tip.

2. As you stand back up on the chisel, twist the brush in whichever direction you want the petal to turn.
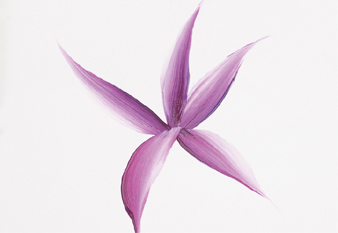
3. This is how a flower made up of long, pointed petals looks. This is a great stroke for making orchids or lilies or any flower with long, slender petals that radiate out from the center.
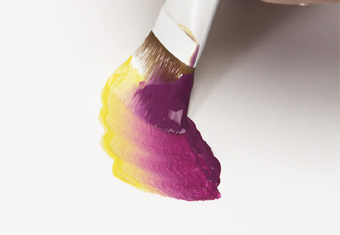
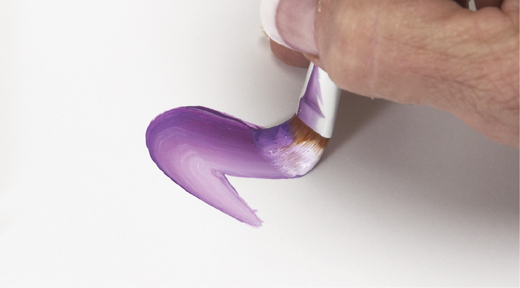
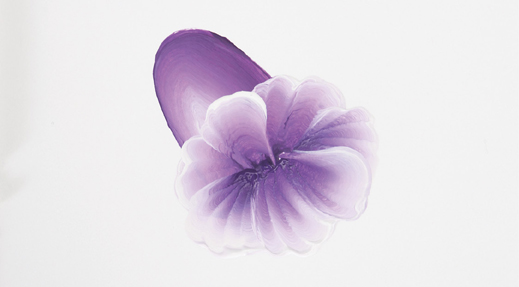
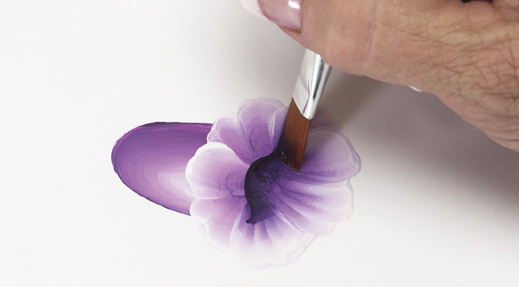
1. Petals with a ruffled side edge are found in many different flowers such as irises, parrot tulips, and orchids. To begin, double-load a flat brush with your two petal colors. Start at the base of the petal, push down on the bristles and wiggle up.
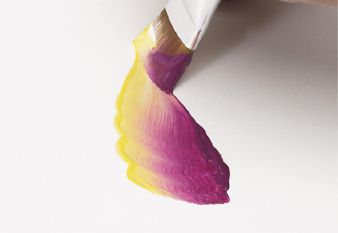
2. Stop wiggling the brush as you near the tip. Slide smoothly the rest of the way to the tip and lift back up to the chisel edge. This will give the tip its pointed shape.
3. Without turning or lifting your brush from the surface, reverse the direction of the bristles and begin leaning down on them. Compare the position of the bristles in this photo with the bristles in Step 2.

4. Apply more pressure on the brush as you start to slide smoothly back down to the base of the petal.
5. Lift back up to the chisel edge to end the stroke at the base of the petal. Notice that the darker side of the brush is in the same position as it was when you started the stroke.
Here’s a quick tip for adding interest to a petal or leaf. Outline one side of it with a darker shade. Load a script liner with inky paint and pull a smooth line following the shape from base to tip, lifting off to come to a point.
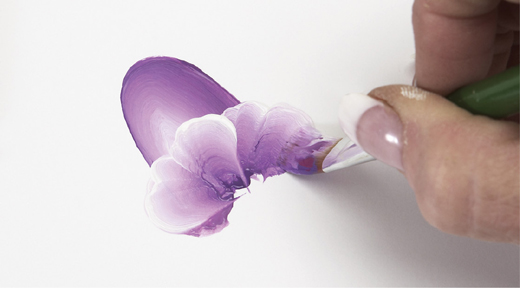
1. Double-load a flat with Yellow Ochre and Wicker White. Start on the chisel and wiggle out a few times to paint a single petal.

2. Slide back to the pointed base and lift back up to the chisel.
3. Paint a series of ruffled-edge petals all radiating outward from a center point. Turn your surface to make painting easier.

4. Dot the center with Fresh Foliage on the tip end of the brush handle.
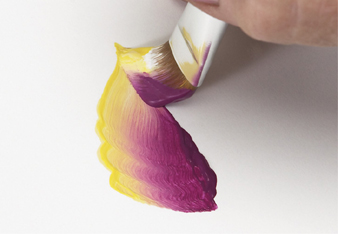
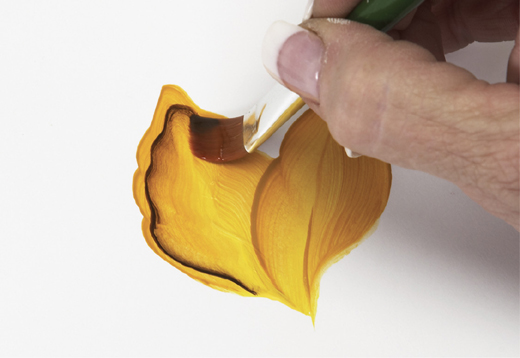
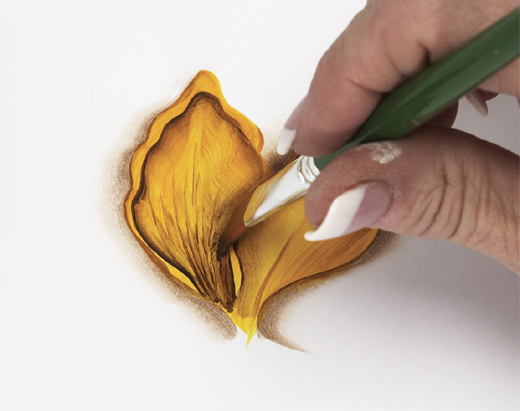
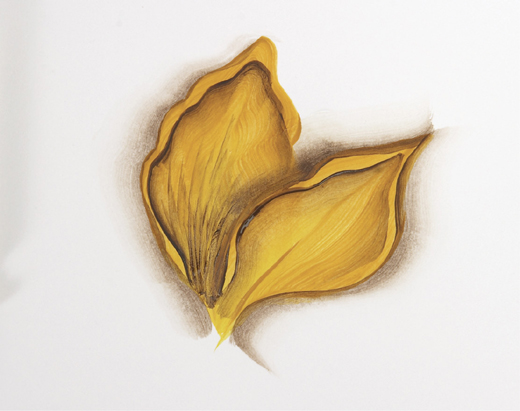
1. Begin by painting the base of the trumpet. Double-load a flat brush. Keeping the darker side of the brush to the outside, stroke upward toward the base of the trumpet, watching the outer edge as you stroke.
2. Pivot the brush at the base of the trumpet and slide back down the other side. Lift back up to the chisel. Don’t worry about filling in the center—it will be covered by the next strokes.
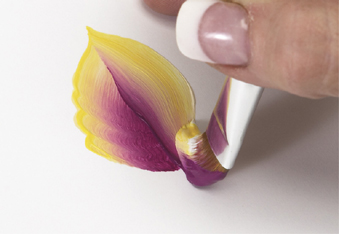
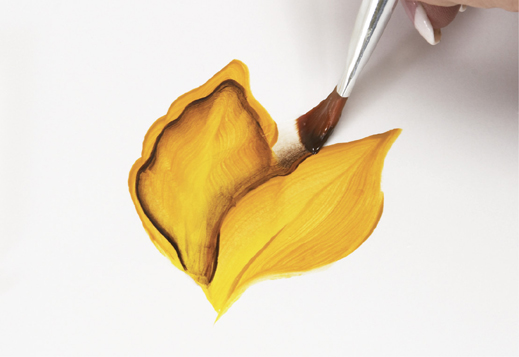
3. Double-load your flat brush again with the same colors, but this time turn the brush so the lighter side is to the outside edge. Add the upper part of the ruffled opening with a series of little shell strokes.
4. Continue with little shell strokes for the lower part of the ruffled opening, turning your work so it’s easier to stroke and keeping the lighter side of the brush to the outside edge.
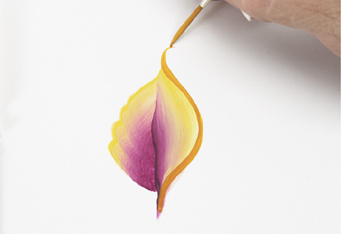
5. To shade and deepen the throat of the trumpet, load a flat brush with floating medium, then side-load into your darker paint color. Start your stroke on the left and pull across to the right side, creating a wavy shape that is pointed on both sides and wider in the middle.

6. Using the chisel edge of the same brush, pull little streaks out from the shading onto the lower part of the ruffled petals. Keep the upper edge of the shaded area sharp and distinct to create the illusion of depth to the trumpet.
1. Float-shading is an easy way to give shape and dimension to your flower petals. I use this technique when painting magnolia blossoms and other cupped flower petals. Let your petals dry, then load a flat brush with floating medium and side-load into Burnt Umber. With the Burnt Umber side of the brush next to the edge of the petal, paint along the inside edge as shown. This gives the effect of the petal’s edge turning inward.
2. To separate the upper petal from the lower one, load a flat brush with floating medium and side-load into Burnt Umber. With the Burnt Umber side of the brush next to the outside edge of the lower petal, paint along the petal’s edge as shown. Continue shading all around the petal to separate it from the background.
3. Float-shade around the left side of the back petal to separate it from the background. Using the same brush, pull little chisel-edge streaks upward from the base of the petal to deepen the shading within.
4. The key to successful float-shading is to load your brush properly and to follow along the edges of the petal or leaf you are shading. If your shading seems too dark, you can always pick up more floating medium on your brush and soften the shading.
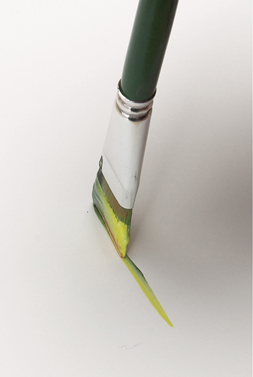
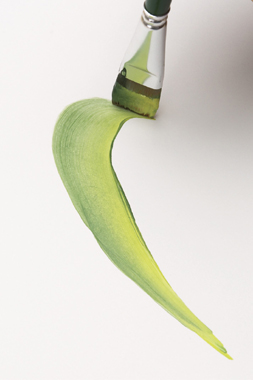
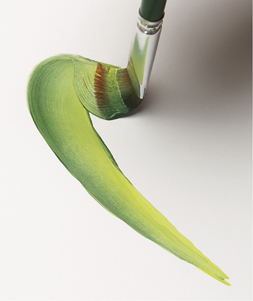
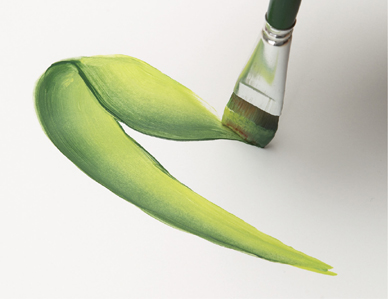
1. Double-load a flat brush with a darker green and a lighter green or yellow. Touch the chisel edge of the brush to the surface to make two guidelines for the start and end of the one-stroke leaf.

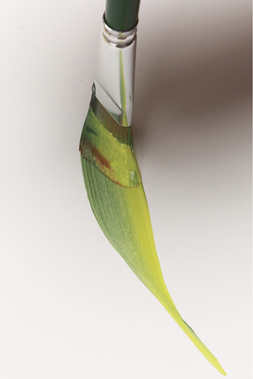
2. Place the chisel edge on the left guideline and press down on the bristles so the flat of the brush is laying on the surface.
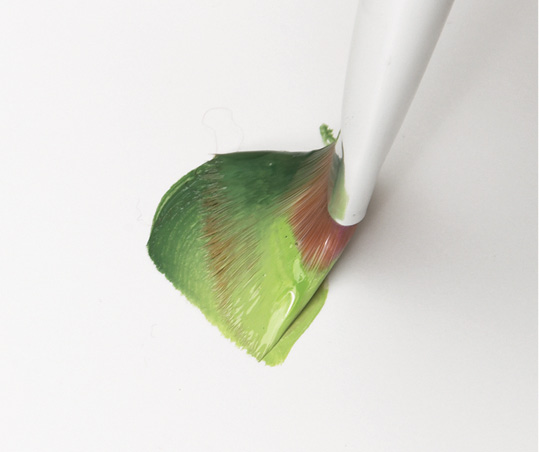
3. Turn the darker green side of the brush slightly so it is parallel with the right guideline.
4. Slide forward at the same time as you release the pressure and lift to the chisel, ending the stroke at the right guideline.

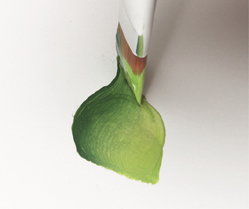
1. Double-load a flat brush with green and yellow. Begin at the base of the leaf and stroke with the flat of your brush to make the wide part of the leaf.
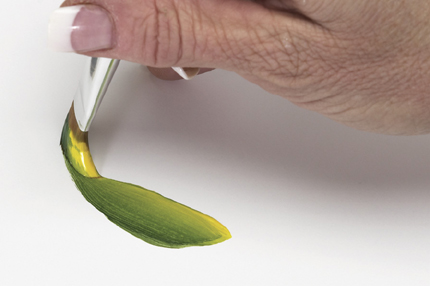
2. Twist the brush in your fingers so the green side of the brush is leading, and pull to the tip, lifting to the chisel as you go.

3. Pull a stem partway into the center of the leaf using the chisel edge of your brush.
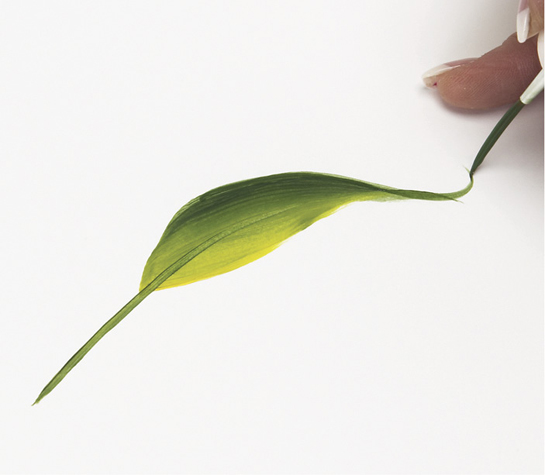
4. As an added touch, try outlining one side of the leaf. Load a script liner with inky green paint and pull a line up the entire side of the leaf from base to tip. This will redefine that edge.
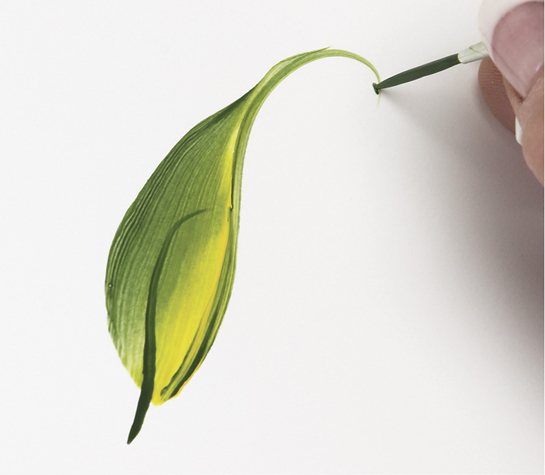
5. Here’s a variation on the long, wide leaf. Outline the yellow side of the leaf from base to tip with inky green paint and a script liner. Extend the tip into a long, graceful curve.
1. This leaf has one edge that is smooth and one edge that is scalloped. Double-load a flat brush with a dark green and a yellow. Paint the scallop-edge side of the leaf using the flat of the brush and leading with the green side.

2. Lift back up to the chisel and slide smoothly the rest of the way to the tip.
3. For the other half of the leaf, turn the brush so you are leading with the yellow side. Stroke smoothly upward from the base, putting pressure on your brush at the base and releasing pressure gradually as you stroke upward.
4. Slide smoothly to the tip, lifting back up to the chisel.
5. Finish by pulling a stem halfway in to the center of the leaf, using the chisel edge of the brush and leading with the yellow side.

1. Double-load a flat brush with dark green and yellow. Start at the base of the leaf. Apply pressure to the flat of the brush and wiggle up to the tip of the leaf, turning the green side of the brush slightly towards the tip.
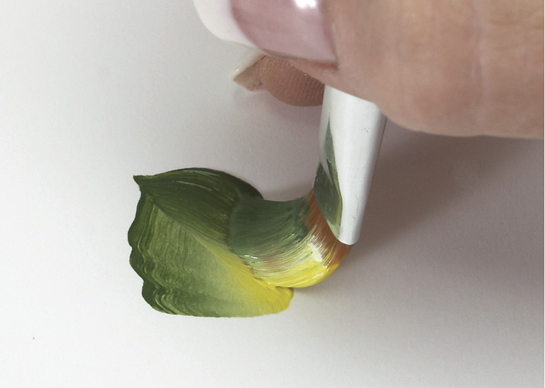
2. Reverse the direction of the bristles without lifting your brush off the surface. Apply pressure and slide smoothly back down to the base.
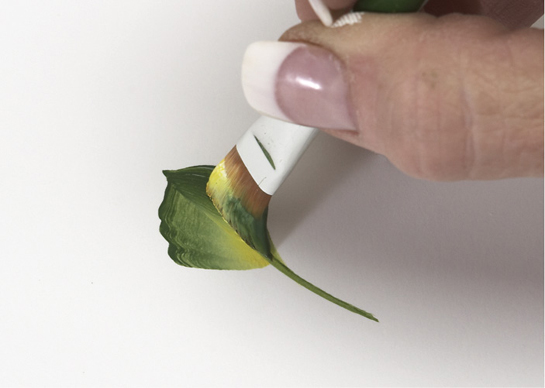
3. Pull a stem halfway in to the center of the leaf, using the chisel edge of the brush and leading with the yellow side.
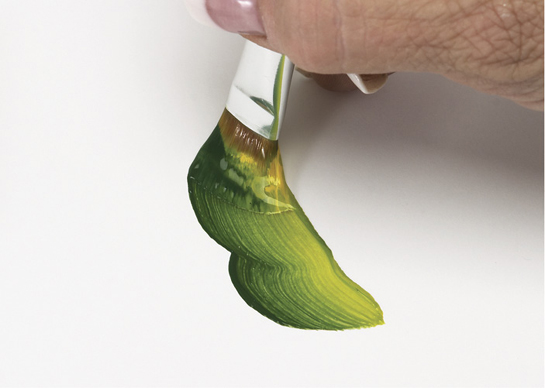
1. The long pointed leaves that surround spring-flowering tulips often fold over on themselves as they age. Here’s how to achieve that look with one smooth motion. Double-load a large flat brush with a dark green and a lighter green. Start by pulling the stroke upward from the base, staying up on the chisel edge and leading with the darker green side of the brush.
2. Press down on the brush to widen the stroke as you slide the brush at a slightly diagonal angle.
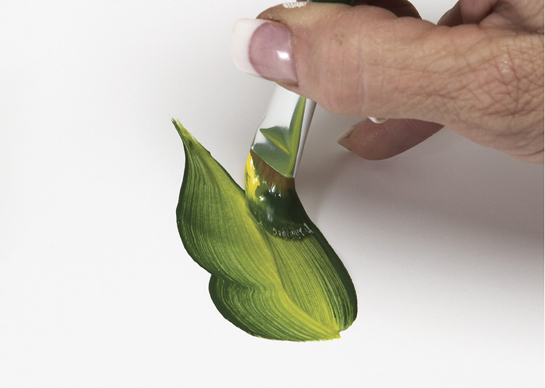
3. Make a gently curved hook at the top, then lift up to the chisel and turn, reversing your direction.
4. Press down again on the bristles to widen the stroke.
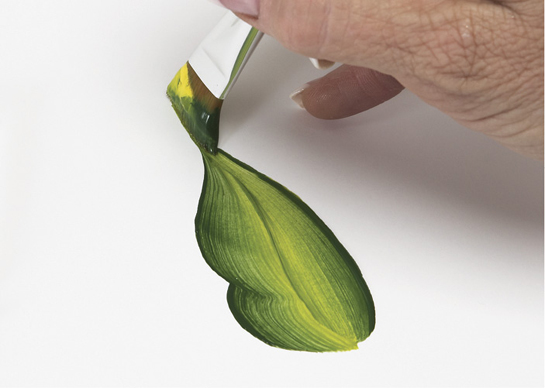
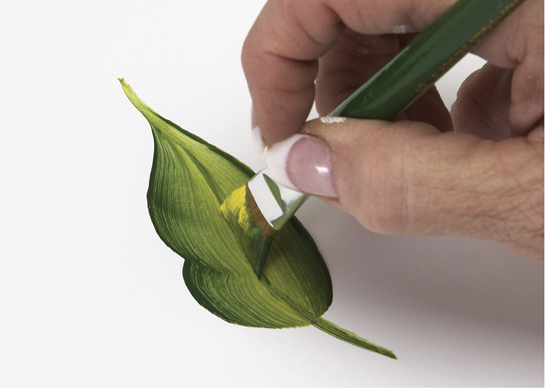
5. Slide down, then lift back up to the chisel and slide to the tip. To delineate the leaf edge, turn your brush so the dark green side is to the left and re-stroke the folded-over part of the leaf.
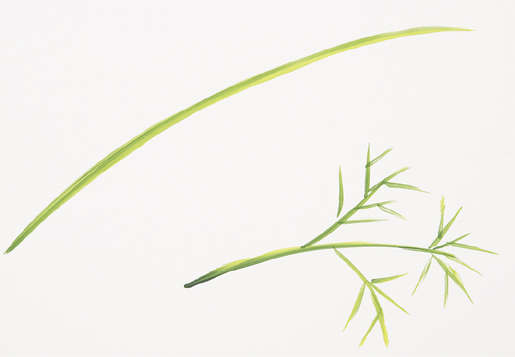
1. There are two kinds of ferns I like to paint as fillers for my floral compositions. One has wider leaves that are close together along the stem. The other fern has airy, lacy-looking fronds with tiny leaflets. For both ferns, start by painting a long curving stem, staying up on the chisel edge and leading with the lighter color. On the lacy fern stem, add smaller branches that have even smaller branches attached to them.
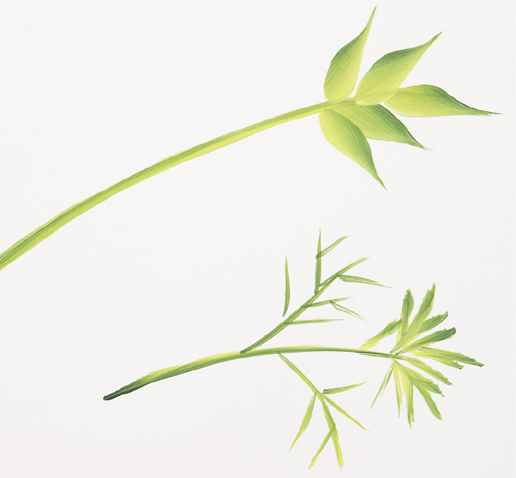
2. On the wide-leaf fern, add two rows of one-stroke leaves. On the lacy fern, the tiny leaves are painted using short, light chisel-edge strokes, pulling inward toward the stems.
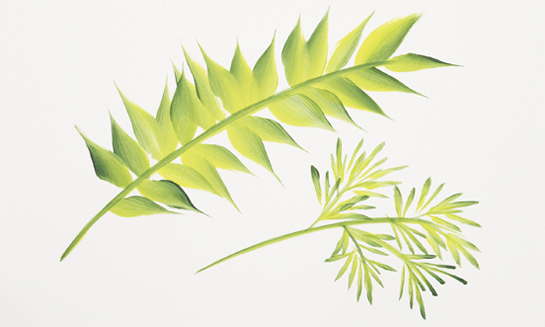
3. When the wide-leaf fern is finished, pull a new stem up the center to clean up the edges. Finish the lacy fern with more leaflets to fill in the frond.
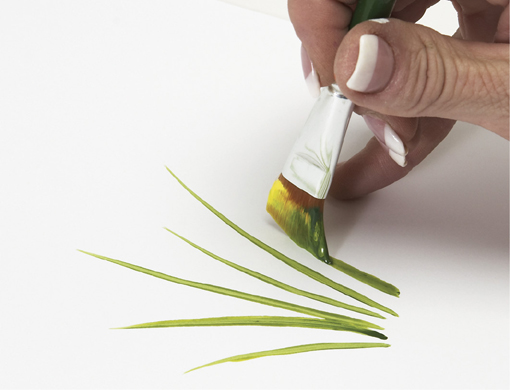
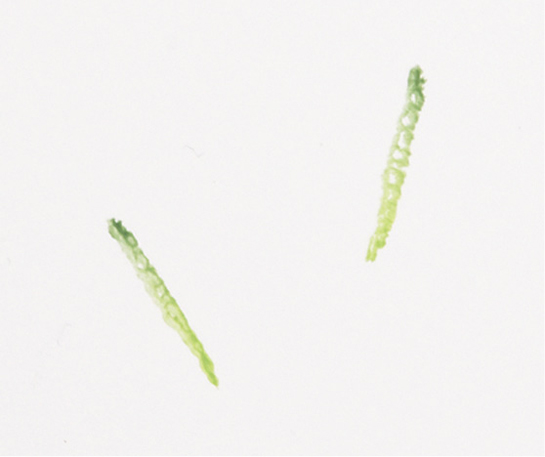
1. Grass blades of varying heights and thickness are quick and easy to paint with an angular brush. Load a dark green onto the toe of the brush, and a light yellow onto the heel. Stroke upward, leading with the heel (the yellow side) and dragging the toe. Stay up on the chisel and lift off at the tip of each grass blade to create a point.

2. Double-loading the angular brush makes it easy to shade and highlight each blade of grass in one stroke.
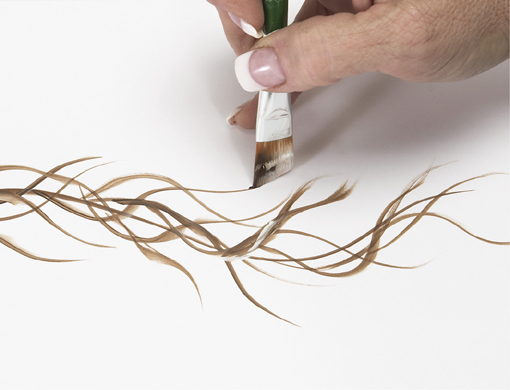
Vines and grapevines are also easy to paint with an angular brush. Load Burnt Umber on the toe and Wicker White on the heel. Starting at the left, paint the main vine with a gently curving line, leading with the heel (the Wicker White side) and dragging the toe. Stay up on the chisel edge. For the crossing vines, always start at the main vine and pull smaller, curving vines across from one side to the other.
Continue pulling shorter vines, weaving back and forth over the main vine as you go. Don’t do too much—keep your grapevines light and airy.