FIDDLY DETAILS A
Timbre
Timbre is so difficult to define in conversational terms that even one of the technical definitions used by professional musicologists is completely upside down:
“Timbre: Everything to do with a musical note that is not its pitch, loudness, or duration.”
The timbre of an instrument is its distinctive voice, and the reason why it’s difficult to describe is that it’s made up of several components, including:
1. How long the note takes to get going, and the changes in quality of the note during its “start-up” phase. (A flute note starts rapidly; a low trombone note starts more slowly with a sort of “blooming” effect.)
2. What the note sounds like after it’s started. (A mid-range flute note sounds clear and pure; the same note on a clarinet sounds richer and more complex.)
3. How the sound of the note changes as it dies away and how quickly it fades. (A harp or xylophone note can take several seconds to fade away unless the player stops the vibration, while a violin or flute note generally dies away in less than a second.)
Every note has a start-up phase, a middle phase, and a dying-away phase, and these are all different, depending on which instrument is playing. So to understand timbre, we need to understand each one of these phases.
First of all we’ll look at the most obvious part of the sound, the middle phase: what the note sounds like after it’s started.
Let’s have another look at those tracings of the repeating pressure patterns produced by different instruments:
| flute | 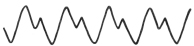 |
| oboe | 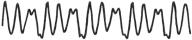 |
| violin |  |
Just by looking at the patterns here, we can work out three characteristics of these pressure waves:
1. We know that musical notes are made up of repeating patterns of up-and-down pressure, and each pattern here repeats—so they are musical notes.
2. The overall length of a single pressure cycle is the same in each case:
| flute |  |
| oboe |  |
| violin |  |
Since they all have the same cycle time, they all have the same pitch.
3. The pressure waves are all approximately the same height—which means that these notes are of a similar loudness.
Even though we might be listening to the same note played at the same loudness, we can easily discern whether that note is coming from a flute, an oboe, or a violin because the instruments have different timbres. As we’ve seen, the only difference among these three tracings is the detail of the rises and falls of pressure within each complete cycle. These details are the key to the differences in timbre among these instruments.
When specialists in musical acoustics (and other interested parties such as ourselves) want to discuss different timbres, they can’t just restrict themselves to saying things like “Well, that clarinet pattern is a hell of a lot lumpier than the flute one.” So it’s fortunate that there is a useful method of breaking down these complicated repeating patterns into simpler components. To see how it works, let’s have a look at how some musical synthesizers imitate real instruments—from clarinets to electric guitars.
The simplest synthesizer notes are made from a pressure wave that goes smoothly up and down in pressure like this:
This is called a “pure tone.” It is a musical note, but it’s a fairly boring one,* and it doesn’t sound anything like a real instrument. To make synthesizers sound more like real instruments, you need to add several pure tones together in order to produce more complicated combinations. As you can see in this very simple addition of two waves, things can get complicated quite quickly.
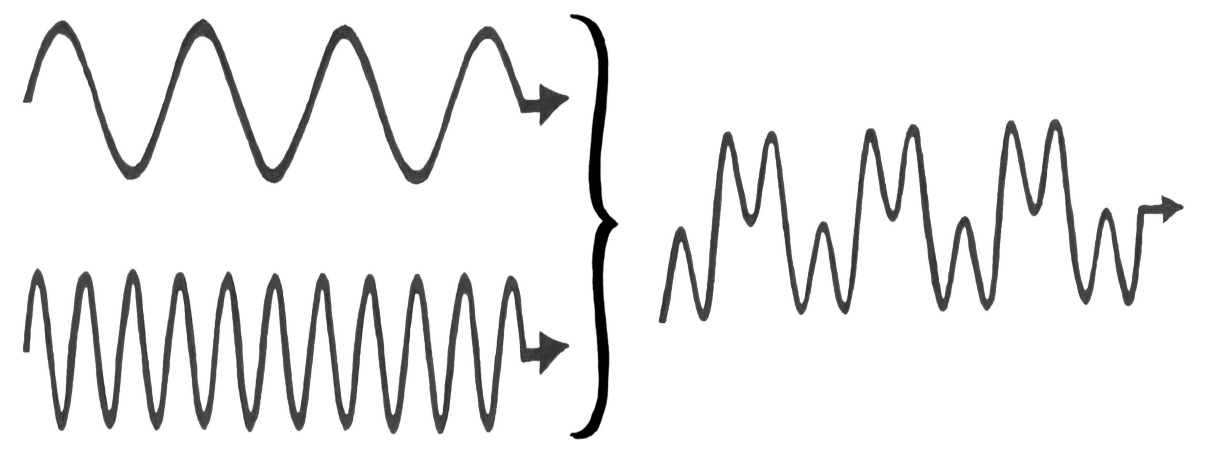
By adding several pure tones together, you can eventually produce an almost exact copy of the wave shapes of real instruments. The flute is one of the simplest wave patterns to copy, which is why early 1970s synthesizers had lots of different flute-like sounds. It took a lot more experimentation before they had a good oboe sound.
But you can’t just add any two pure tones together. In this example, I picked a pure tone with a particular cycle time and added a pure tone with one third of that cycle time, meaning that three waves of the second pattern fit exactly into a single wave of the original pure tone. If I’d picked a note in which three-and-a-bit waves of the second note fit into one cycle of the first, then the combined pattern wouldn’t repeat exactly each time, and without a repeating pattern we wouldn’t have a clear note. We’d have some other kind of noise—which could be anything from an impure-sounding note to a hiss.
Here’s what it looks like if you add a “three-and-a-bit” pure tone. You can see that the nice repeating pattern has been disrupted:

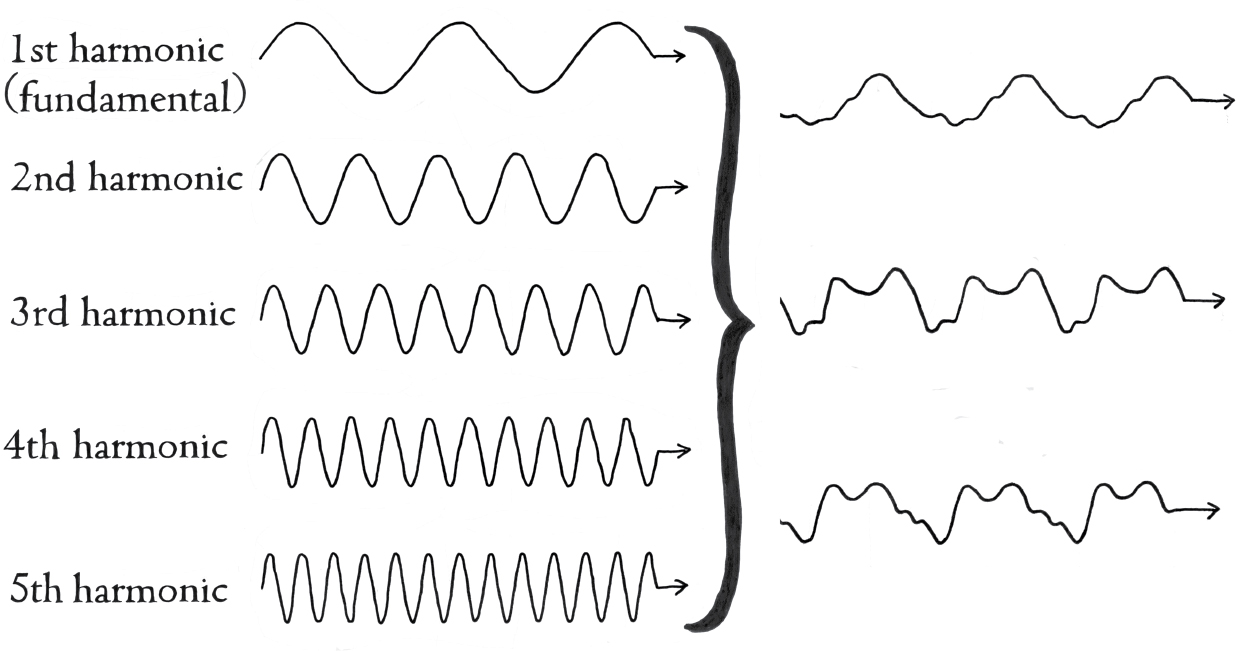
If you want to start adding pure tones together to make notes, you’ll need to follow a simple recipe. First, start with your pure tone of choice. Now you can add on:
The pure tone with half this cycle time.
The pure tone with one third of this cycle time.
The pure tone with one quarter of this cycle time.
The pure tone with one fifth of this cycle time.
And so on. But be careful: only fractions with a 1 on top are allowed.
For those of you who prefer to work in frequencies, this is exactly the same as saying that the only ingredients you are allowed are:
A pure tone with a certain frequency
The pure tone with twice that frequency.
The pure tone with three times that frequency.
The pure tone with four times that frequency.
The pure tone with five times that frequency.
We’ll stay with the word “frequency” from now on because notes are most commonly identified by their frequency—and it’s easier to discuss the relationships between multiples (five times, four times, etc.) than fractions.
So, how do combinations of pure tones replicate the timbres of different instruments?
Tones with frequencies that are simple multiples of one another are called harmonics. The lowest tone in the group, which all the others are related to, is called the fundamental frequency, or first harmonic. The pure tone with twice that frequency is the second harmonic, and so on. The basic idea is that any complex note from a real instrument can be replicated by adding different loudnesses of the various harmonics into the mix.
In the case of the 440 Hz note of the flute, oboe, and violin, the harmonic frequencies are:
440 Hz, 880 Hz, 1320 Hz, 1760 Hz, 2200 Hz, and so on.
We can think of any synthesized note as being produced by a sort of choir in which each choir member sings a single harmonic frequency and the combination of all these frequencies gives us the overall sound of the note.
For the 440 Hz A:
Choir member 1 sings at 440 Hz.
Choir member 2 sings at 880 Hz.
Choir member 3 sings at 1320 Hz.
And so on…
The individual choir members all sing with different loudnesses depending on what instrument is being copied. For example, on a flute, choir member 1 is the loudest, member 3 is the next loudest, and members 2 and 4 (and all the other even numbers) are extremely quiet. On an oboe, the loudest choir member for this note is number 3, followed by 2, 1, and then 4. These different “harmonic choir loudness mixes” give each type of instrument an individual acoustic flavor that is its timbre.
It’s also worth bearing in mind that the contribution of the voices to the note changes on any instrument, depending on whether the note is high or low, loud or quiet. For example, the relaxing timbre of a quiet, low saxophone note is quite different from an anxious, loud, high note on the same instrument—because the various choir members have changed their contribution to the note.
Pure tones are very difficult to produce naturally, and we generally need electronics to generate them (although tuning forks produce almost pure tones). Real instruments don’t produce a collection of individual pure tone harmonics that are then consolidated into a complicated wave pattern for each note. The fact that real instrument wave shapes can be described as “this much of that harmonic and that much of another harmonic” is just an interesting way of describing what’s going on and comparing notes of different timbres.
Let’s look at what actually happens in, for example, the case of an acoustic guitar during the course of a single note.
The start-up phase
First of all a string is plucked; it is pulled to one side and then released. It then vibrates backwards and forwards at a certain frequency. Let’s say we’ve picked a string length and tension suitable to give us a frequency of 110 cycles a second (110 Hz). This vibration is passed on to the bridge of the instrument (the thing that attaches the strings to the body of the guitar). The next part of the start-up phase is that the vibration spreads out from the bridge, and the body of the guitar starts to tremble. Any type of vibration that can remain “in step” with the 110 Hz to and fro of the string will be allowed to continue vibrating, but any other type of vibration will quickly die out. (Any vibrations that can’t keep in step with 110 Hz tend to get muddled up from one cycle to the next and quickly lose their identity.)
Toward the end of the start-up phase, the sound of the note gets louder, as the vibrations spread to involve more areas of the guitar body, and purer, as all the vibrations that couldn’t keep in step with 110 Hz fade away.
The middle phase
Once the note is established, the string, the bridge, the body, and the neck of the instrument are all vibrating in step with the overall frequency of 110 Hz. With the guitar as a whole vibrating like this, there is no chance that the overall vibration could be a simple, pure tone. We therefore get a complicated repeating wave pattern typical of the shape of a wooden acoustic guitar. This is the timbre of a guitar vibrating at this frequency. If you change the shape of the guitar or the material it’s made of, then you change the timbre. This means of course that even two supposedly identical guitars have slightly different timbres—because the wood is never identical and there are lots of tiny differences, such as exactly how much glue was used to make them and so on.
The dying-away phase
As the vibrating string loses energy, the vibration changes (just as it did when it gained energy during the start-up phase). Less and less of the guitar is involved in the vibration, and eventually the feebly vibrating string can only pass on energy to the part of the guitar body closest to the bridge. Finally the string stops vibrating and the note dies away completely.

All notes on acoustic instruments are like this. During the start-up phase the initial vibration is passed on to the rest of the instrument. During the middle phase the instrument carries out a complicated three-dimensional vibration based on the cycle time of the fundamental frequency, and in the final stage the note dies away. During this cycle the shape of the repeating pressure wave being produced undergoes various changes—and the timbre of the instrument is built up not just from the sound of the note in its middle phase but also from the details of the progression from start-up to fade-out. In fact, as far as instrument recognition is concerned, the start-up phase of a note is often as important as the middle phase. As I explained in my book How Music Works, if you record an instrument playing a note and then remove the first few milliseconds, you will have an extremely difficult time trying to identify the instrument involved. If you’re interested in hearing an example of this effect, just visit my website howmusicworks.info and look for the How Music Works CD, track 2: Can you guess what this instrument is?
One final point I’d like to make about timbre is that on most instruments the musician has some control over the quality of the sound. For example, a guitarist can pluck the strings close to the bridge, which produces a more twangy, aggressive timbre, and flute players can change the shape of their lips to produce a more breathy sound. Techniques like this alter the “choir mix” of the timbre and are often used to enhance the emotional content of a piece or to make repetitive music more interesting.