Chapter 4
Managing Power
Get ready to . . .
One of the big differences between a desktop computer and your laptop is that your laptop can run off of a battery as well as a wall outlet. Battery life, or the length of time it takes your laptop battery to run out of juice, is getting better all the time — some recent laptop batteries get as many as 12 hours on one charge. A recent comparison by Laptop Magazine found a few models that stayed the course for as many as 20 hours. Consider avoiding laptops that get as little as a couple of hours of battery life.
For that reason, it’s important that you understand some tools that Windows 10 provides to help you manage your laptop power so you can take a day trip or survive a power outage, including these:
- Adjusting settings for your display that deal with the screen brightness (a brighter screen uses more power), how frequently your screen automatically dims to save battery charge, and so on.
- Changing how much time lapses before your laptop automatically goes to sleep — a state that uses minimal power but keeps the currently open documents and programs active (and, therefore, quickly available to you).
- Choosing a power plan, which has preset timings for actions such as dimming your screen or putting your computer to sleep.
- Creating a customized power plan by choosing settings you want.
- Defining power button functionality gives you some control over what happens when you press the laptop’s power button or close the lid.
 If you’re happy to accept predetermined power settings, I suggest you just skip the first few tasks in the chapter and go straight to the later task, “Choose a Power Plan.”
Change How Quickly the Computer Goes to Sleep
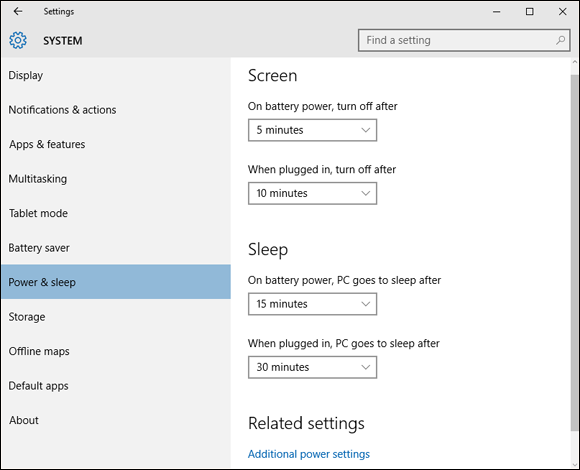
- After a certain period of inactivity, which you can specify, your computer goes to sleep, saving battery power. Click the Start button and then click Settings ⇒ System ⇒ Power & Sleep. The window shown in Figure 4-1 appears.
- In the Sleep settings, click the arrow in the field labeled On Battery Power, PC Goes to Sleep After.
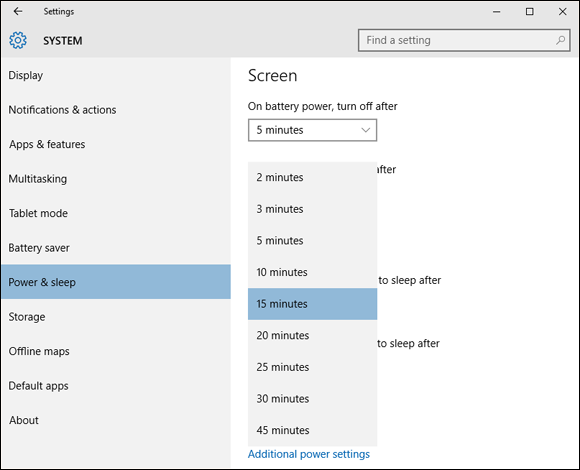
- From the drop-down list (see Figure 4-2), select a setting for when the computer automatically puts itself to sleep. A smaller interval saves battery power, but it might disrupt your work. Choose a setting according to your preferences.
- Click the Close button in the upper-right corner to close the window.
Change How Quickly the Display is Turned Off
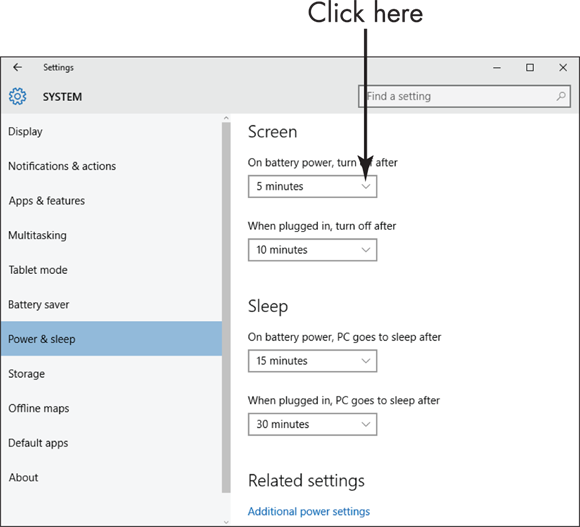
- You can also set up an interval of inactivity, after which the display is turned off. Click the Start button and then click Settings ⇒ System ⇒ Power & Sleep.
- Under Screen settings (see Figure 4-3), click the arrow in the On Battery Power, Turn Off After field.
- From the drop-down list, select a setting for when the computer automatically turns the display off. A smaller interval saves battery power.
- Click the Close button to close the window.
Change the Display Brightness
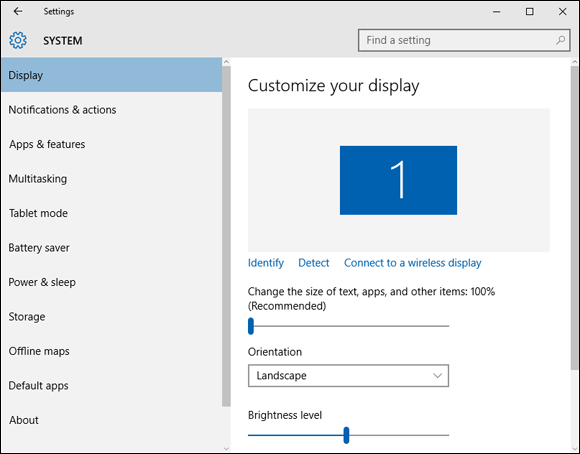
- Click the Start button and then click Settings ⇒ System ⇒ Display.
- In the resulting window (see Figure 4-4), click and drag the Brightness Level slider to make the screen brighter or dimmer. A dimmer screen saves battery power, but too dim a screen could be hard on your eyes.
- Click the Close button to close the window.
Turn On Battery Saver
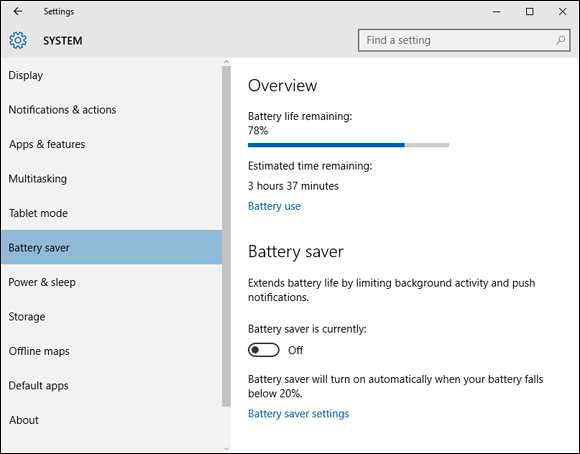
- If you know battery charging will not be available for several hours, you can turn on Battery Saver mode. This setting extends battery life by limiting background activity. In the Start menu, click Settings ⇒ System ⇒ Battery Saver.
- In the resulting window (see Figure 4-5), click the Battery Saver On/Off button to On.
- Click the Close button to close the window.
Choose a Power Plan
- From the Start menu, click Settings.
- In the Settings window that appears, click System ⇒ Power & Sleep ⇒ Additional Power Settings.
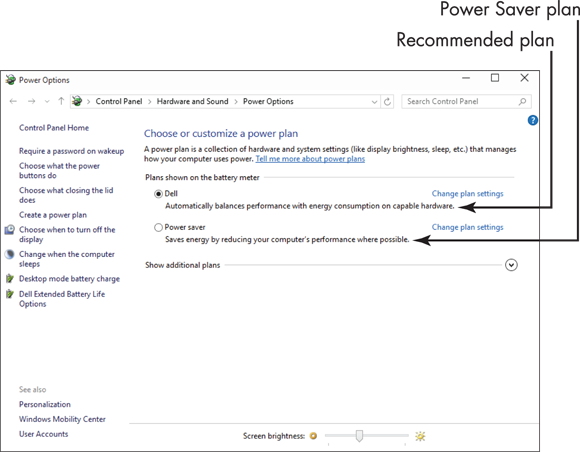
- In the Power Options dialog box that appears (see Figure 4-6), click the radio button next to a plan to select it. Note that there might be a laptop manufacturer’s power plan among your selections. You can display a High Performance plan by clicking the arrow to the right of Show Additional Plans. A higher-performance setting will never put the computer to sleep and will have a brighter screen setting. The Power Saver plan shown in Figure 4-6 causes your computer to go to sleep more frequently and dims the screen brightness. If you run your laptop on a battery frequently, the Power Saver plan is your best bet.
- Click the Close button to close the dialog box.
Create a Customized Power Plan
- If the preset power plans don’t appeal to you, you can modify one and save it as your own customized power plan. In the Start menu, click Settings ⇒ System ⇒ Power & Sleep ⇒ Additional Power Settings.
- In the Power Options dialog box that appears, click the Create a Power Plan link on the left side.
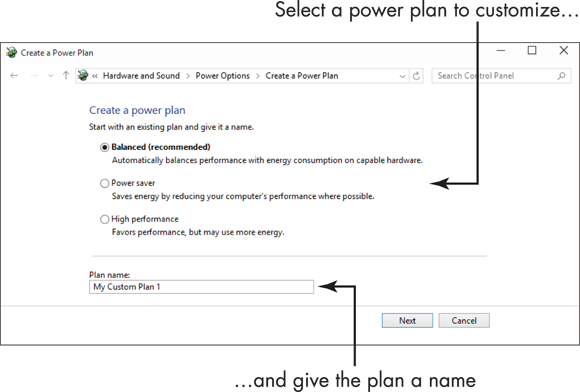
- In the Create a Power Plan dialog box that appears (shown in Figure 4-7), select the preset plan that is closest to what you want to create.
- Enter a name for the plan in the Plan Name text box and click Next.
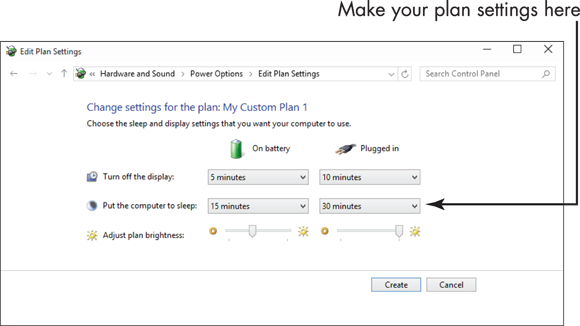
- In the Edit Plan Settings dialog box that appears (see Figure 4-8), make settings for how the laptop power functions when plugged in or running off the battery. (See the earlier tasks in this chapter for information about changing display settings and changing how quickly the computer goes to sleep.)
- Click Create to create your new plan. Windows returns you to the Power Options dialog box with your new plan added to the list of power plans. Click the Close button to close the dialog box.
Define Power Button Functions
- You can control what happens when you press the Power button, close the computer lid, or press the Sleep button (if your laptop offers one). In the Start menu, click Settings ⇒ System ⇒ Power & Sleep ⇒ Additional Power Settings. The Power Options dialog box appears.
- In the Power Options dialog box, click the Change What the Power Buttons Do link.
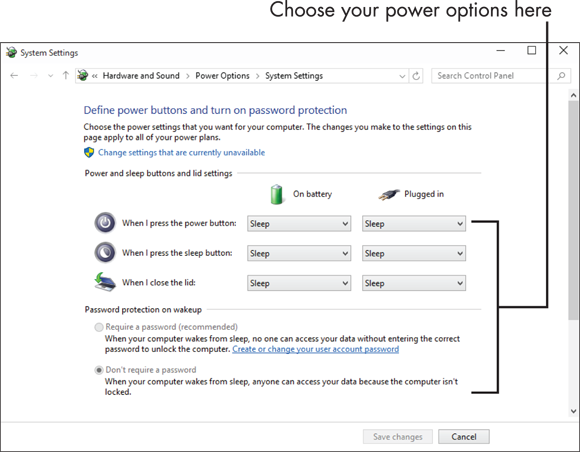
- In the System Settings dialog box that appears (see Figure 4-9), click the When I Press the Power Button or When I Close the Lid fields in the On Battery column. The options that appear include
- Do Nothing: Does nothing. You guessed that, right?
- Sleep: Essentially pauses your computer, leaving your open programs and documents intact, held in your computer memory. When you awaken your computer, it comes back almost immediately, ready for you to work. Sleep draws a small amount of power.
- Hibernate: Saves open programs and documents on your computer hard drive and then turns off your computer so you’re not using any power. If you’ll be away from your computer for a while but want to return to the items you had opened before quickly, Hibernate is a good choice. Hibernate is usually the default action when you close a laptop lid. Hibernate requires you to log on again when you revive your computer by pressing Enter, clicking the power button, or using your mouse.
- Shut Down: Closes any open programs and powers down your computer. You have to turn the power on again to use it — no programs or documents are open when you turn the laptop on again.
- Turn Off the Display: Turns off your display while leaving all programs running and documents open. Because your display is one of the main power users in your laptop, this could be a good choice if your laptop is handling a task, such as a large file download, that doesn’t need input from you.
For security, consider using the Require a Password setting in the System Settings window (find this setting in the window shown in Figure 4-9) to require that a password be entered to access your computer.
You can also use the System Settings window to define the power button functions that apply when you have your laptop plugged in to a power source. These are listed in the column to the right of the On Battery power settings.