Chapter 23
Maintaining Windows
Get ready to . . .
All the wonderful hardware that you’ve spent your hard-earned money on doesn’t mean a thing if the software driving it goes flooey. If any program causes your system to crash (meaning it freezes up and you have to take drastic measures to revive it), you can try a variety of steps to fix it. You can also keep your system in good shape to help avoid those crashes. In this chapter, you find out how to take good care of your programs and operating system in these ways:
- When a program crashes, you can simply shut that program down by using Windows Task Manager. This utility keeps track of all the programs and processes that are running on your laptop.
- If Windows isn’t responding, sometimes it helps to restart in Safe Mode, which requires only basic files and drivers. Restarting in Safe Mode often allows you to troubleshoot what’s going on, and you can restart Windows in its regular mode after the problem is solved.
- Use the System Restore feature to first create a system restore point (a point in time when your settings and programs all seem to be humming along just fine), and then restore Windows to that point when trouble hits.
- You can clean up your system to delete unused files, free up disk space, and schedule maintenance tasks.
Shut Down a Nonresponsive Application
- If your laptop freezes and won’t let you proceed with what you were doing, press Ctrl+Alt+Delete on your keyboard.
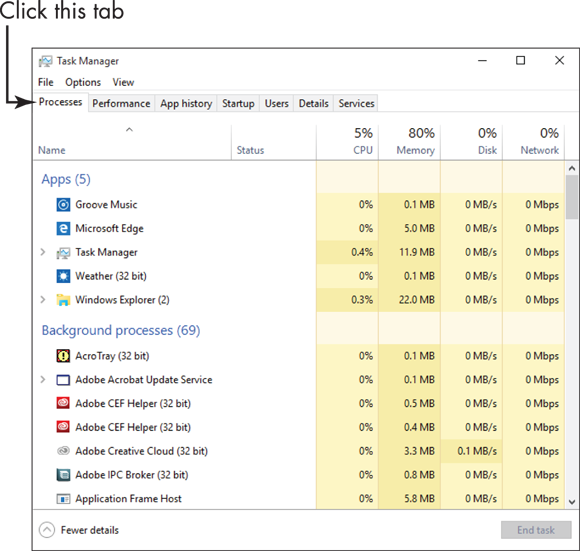
- In the Windows screen that appears, click Task Manager.
- In the resulting Task Manager dialog box, click More Details, click the Processes tab (see Figure 23-1), and then select the application that you were working in when your system stopped responding.
- Click the End Task button.
- The app shuts down. Click the Close button to close Task Manager.
 If pressing Ctrl+Alt+Delete doesn’t bring up the Task Manager, you’re in bigger trouble than you thought. You might need to press and hold your laptops’s power button to shut down. Note that some applications use an AutoSave feature that keeps an interim version of the document that you were working in. You might be able to save some of your work by using the auto-saved version. Other programs don’t have such a safety net, and you simply lose whatever changes you made to your document since the last time you saved it. The moral? Save, and save often.
You may see a dialog box appear when an application shuts down that asks if you want to report the problem to Microsoft. If you say yes, information is sent to Microsoft to help it provide advice or fix the problem down the road.
Create a System Restore Point
- You can back up your system files, which creates a restore point you can later use to return your laptop to earlier settings if you experience problems. Enter Create a restore point in Cortana’s search field and then press the Enter key on your keyboard.
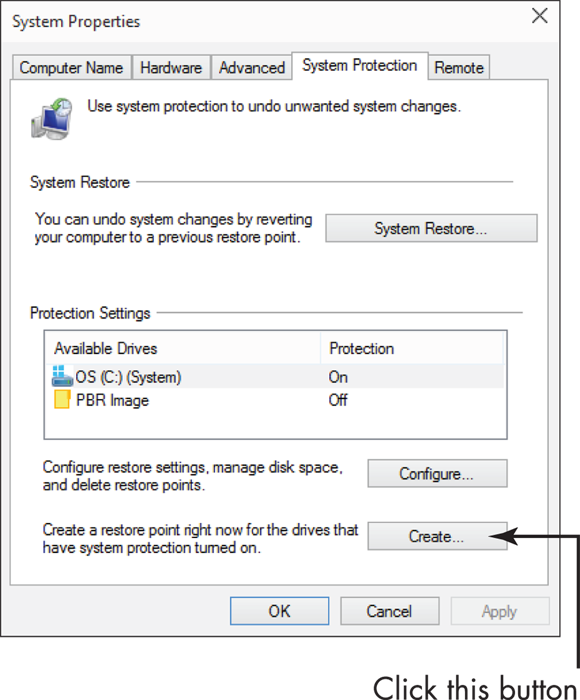
- In the System Properties dialog box that appears (see Figure 23-2) on the System Protection tab, click the Create button.
- In the System Protection dialog box that appears, enter a name to identify the restore point, such as the name of a program you are about to install, and click Create.
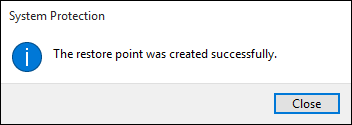
- Windows displays a progress window. When the restore point is created, the message shown in Figure 23-3 appears. Click Close to close the message box and click the Close button to close the System Properties dialog box.
Every once in a while, before you install a piece of software or make some new setting in Windows, if things seem to be running just fine create a system restore point. It’s good computer practice, just like backing up your files, only you’re backing up your settings. Once a month or once every couple of months works for most people, but if you frequently make changes, create a system restore point more often.
Restore Your Laptop
- Enter System restore in Cortana’s search field and then press Enter.
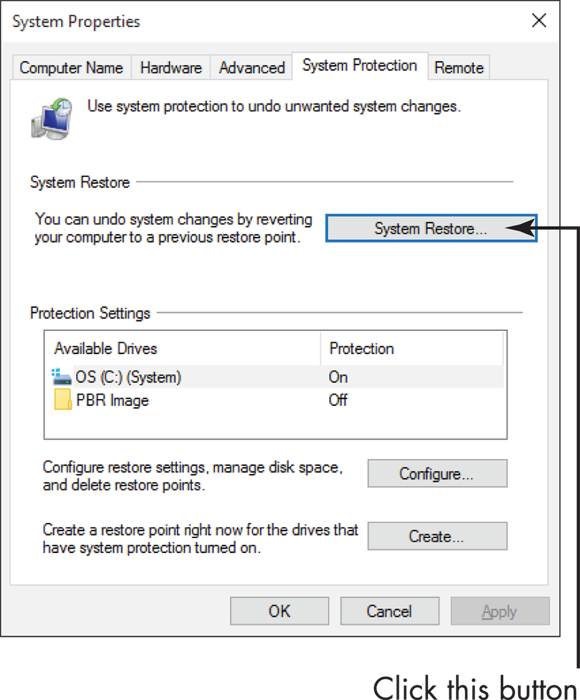
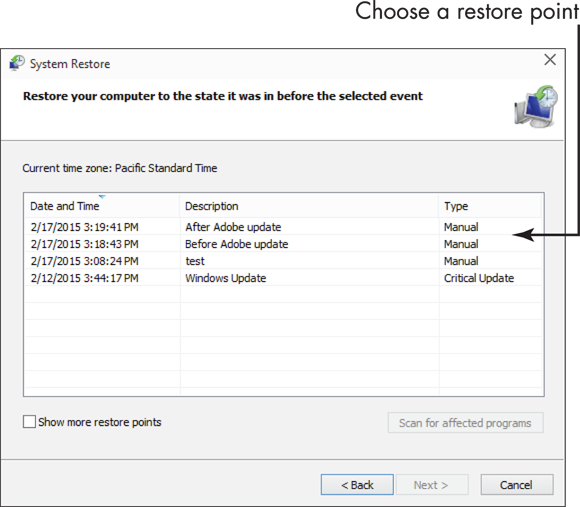
- In the System Properties dialog box that appears, click the System Protection tab and then click the System Restore button, as shown in Figure 23-4.
- In the System Restore window, click Next. In the window that appears, choose the date and time of the restore point (see Figure 23-5), and then click Next.
- Click the Finish button to start the restore.
- A dialog box confirms that you want to run System Restore and informs you that System Restore can't be interrupted — and in most cases can't be undone. Close any open files or programs, and then click Yes to proceed. The system goes through a shutdown and restart sequence.
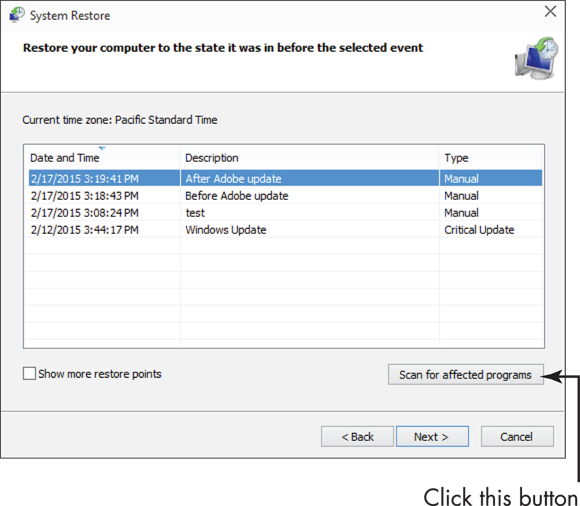
System Restore doesn’t get rid of files that you’ve saved, so you don’t lose your Ph.D. dissertation. System Restore simply reverts to Windows settings as of the restore point. This can help if you or some piece of installed software made a setting that's causing some conflict in your system, making your laptop sluggish or prone to crashes. If you’re concerned about what changes will happen, click the Scan for Affected Programs button shown in the window displayed in Figure 23-6.
Reset Your Laptop
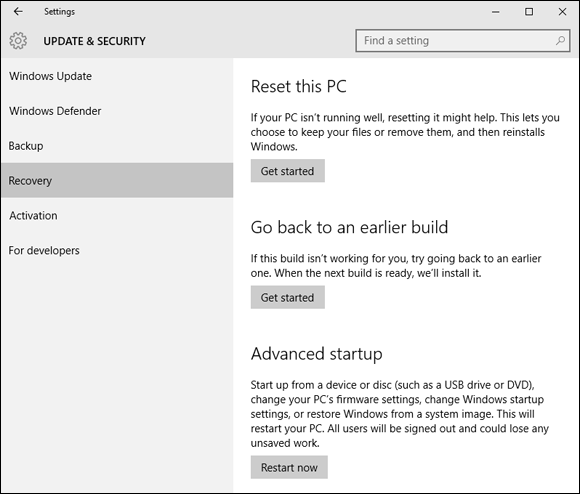
- Whereas refreshing a computer resets system files to factory defaults and retains all your files and some apps, resetting not only resets system files, it gets rid of all your personal files and apps you installed. Resetting is for those times when nothing else has gotten your laptop working again. To begin, in the Start menu, click Settings, and then click Update & Security.
- In the resulting Update & Security window, click Recovery in the left pane. Under Reset this PC in the right pane (see Figure 23-7) click Get Started.
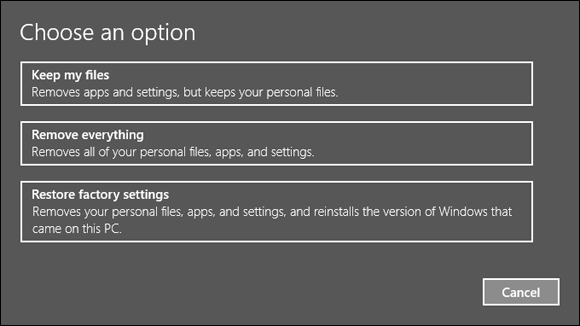
- In the following screen, shown in Figure 23-8, choose either Keep My Files, Remove Everything, or Restore Factory Settings.
- In the following screen, if you’re positive you want to proceed, click the Next button.
 The Reset procedure is a somewhat drastic step that will remove any apps you installed and files you saved. Remember, you can back out of the Reset procedure at any time up until you hit the Reset button. Just click Cancel.
Optimize a Hard Drive
- To clean up files on your hard drive, enter Optimize a Drive in Cortana’s search field and then press Enter.
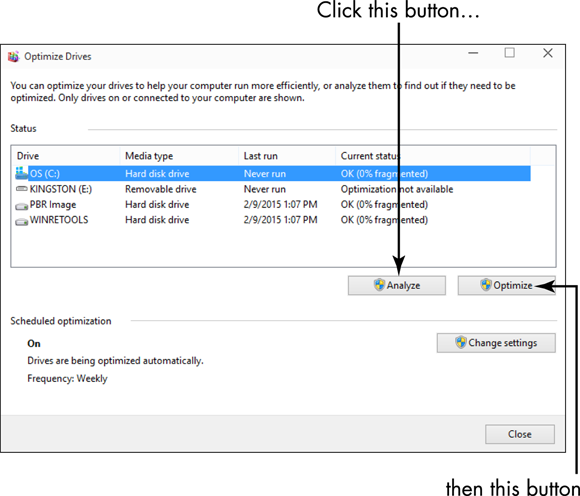
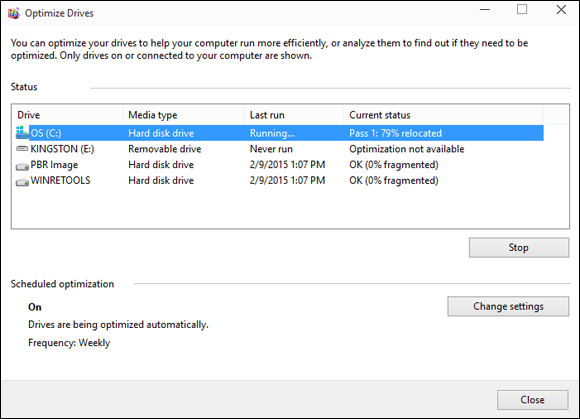
- In the resulting Optimize Drives window (see Figure 23-9), to the left of the Optimize button is the Analyze button. Choose a disk and then click the Analyze button to check whether the disk requires defragmenting. When the analysis is complete, click the Optimize button. A notation appears (see Figure 23-10) showing the progress of optimizing your drive.
- When the optimizing process is complete, the Optimize Drives window shows that your drive no longer requires optimizing. Click Close to close the window.
Disk optimizing can take a while. If you have energy-saving features active (such as a screen saver), they can cause the optimize feature to stop and start all over again. Try running your optimization overnight while you’re happily dreaming of much more interesting things. You can also set up the procedure to run automatically at a preset period of time — such as once every two weeks — by using the Change Settings button in the Optimize Drives window and choosing a frequency in the dialog box that appears.
Free Disk Space
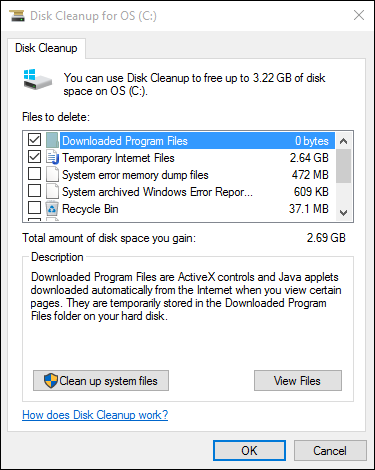
- To run a process that cleans unused files and fragments of data from your hard drive to free up space. Enter Disk Cleanup in Cortana’s search field and then press the Enter key on your keyboard.
-
In the Disk Cleanup: Drive Selection dialog box that appears choose the drive you want to clean up from the drop-down list and click OK. Disk Cleanup calculates how much space you will be able to free up.
If your laptop only has one drive, the Disk Cleanup: Drive Selection dialog box will not appear. Your computer will go straight to calculating how much space you will be able to free up.
- The resulting dialog box, shown in Figure 23-11, tells you that Disk Cleanup calculated how much space can be cleared on your hard drive and displays the suggested files to delete in a list (those to be deleted have a check mark). If you want to select additional files in the list to delete, click to place a check mark next to them.
- After you select all the file types to delete, click OK. A message appears asking if you are sure you want to permanently delete the files. Click Delete Files to proceed. The selected files are deleted.
Click the View Files button in the Disk Cleanup dialog box to see more details about the files that Windows proposes to delete, including the size of the files and when they were created or last accessed.