Now that hard light is no longer your enemy, consider how you can integrate it into your everyday use. Hard light actually plays well with others, so consider mixing it in with softer light. And I don’t just mean unmodified accent lights, either. Consider overlapping a hard, main light with soft light placed right beside it, as seen above. The hard light creates crisp shadow lines, adding clarity to the image, while the soft light fills in the shadows a bit, adding a subtle warmth, giving the photo accessibility. It brings an excitement to the image that you can’t quite put your finger on—something that couldn’t be accomplished with a single hard or soft light source.
And while we’re on the subject of overlapping light, what would happen if you not only blended hard and light sources, but also gelled them? That’s what I did in the image on the opposite page. The main light was gelled cyan and fired through a softbox, while two hard lights, gelled magenta and yellow, were placed to the model’s right. Where they overlap, you get neutral light, thanks to our friend, additive color theory. My favorite part, however, is where they don’t overlap, and pockets of color remain.
So have fun with your exploration, and share your experiments with me!
My hope is that the techniques that we’ve worked through in this book have begun to get you thinking about light in a new, well, light. With your new skills of shaping, manipulating, and all-around hacking light, I hope that you can see potential in literally any scenario you encounter. These “Making a Scene” exercises have been meant to jumpstart your new way of viewing potential shoot spots. Your new skills are not unlike those of a trained special agent, one who sizes up any room they enter, immediately recognizing all possible exits and any objects that could be used as a weapon.
Now that you’ve sized up the scenes from earlier in the book, let me show you how I decided to execute them.
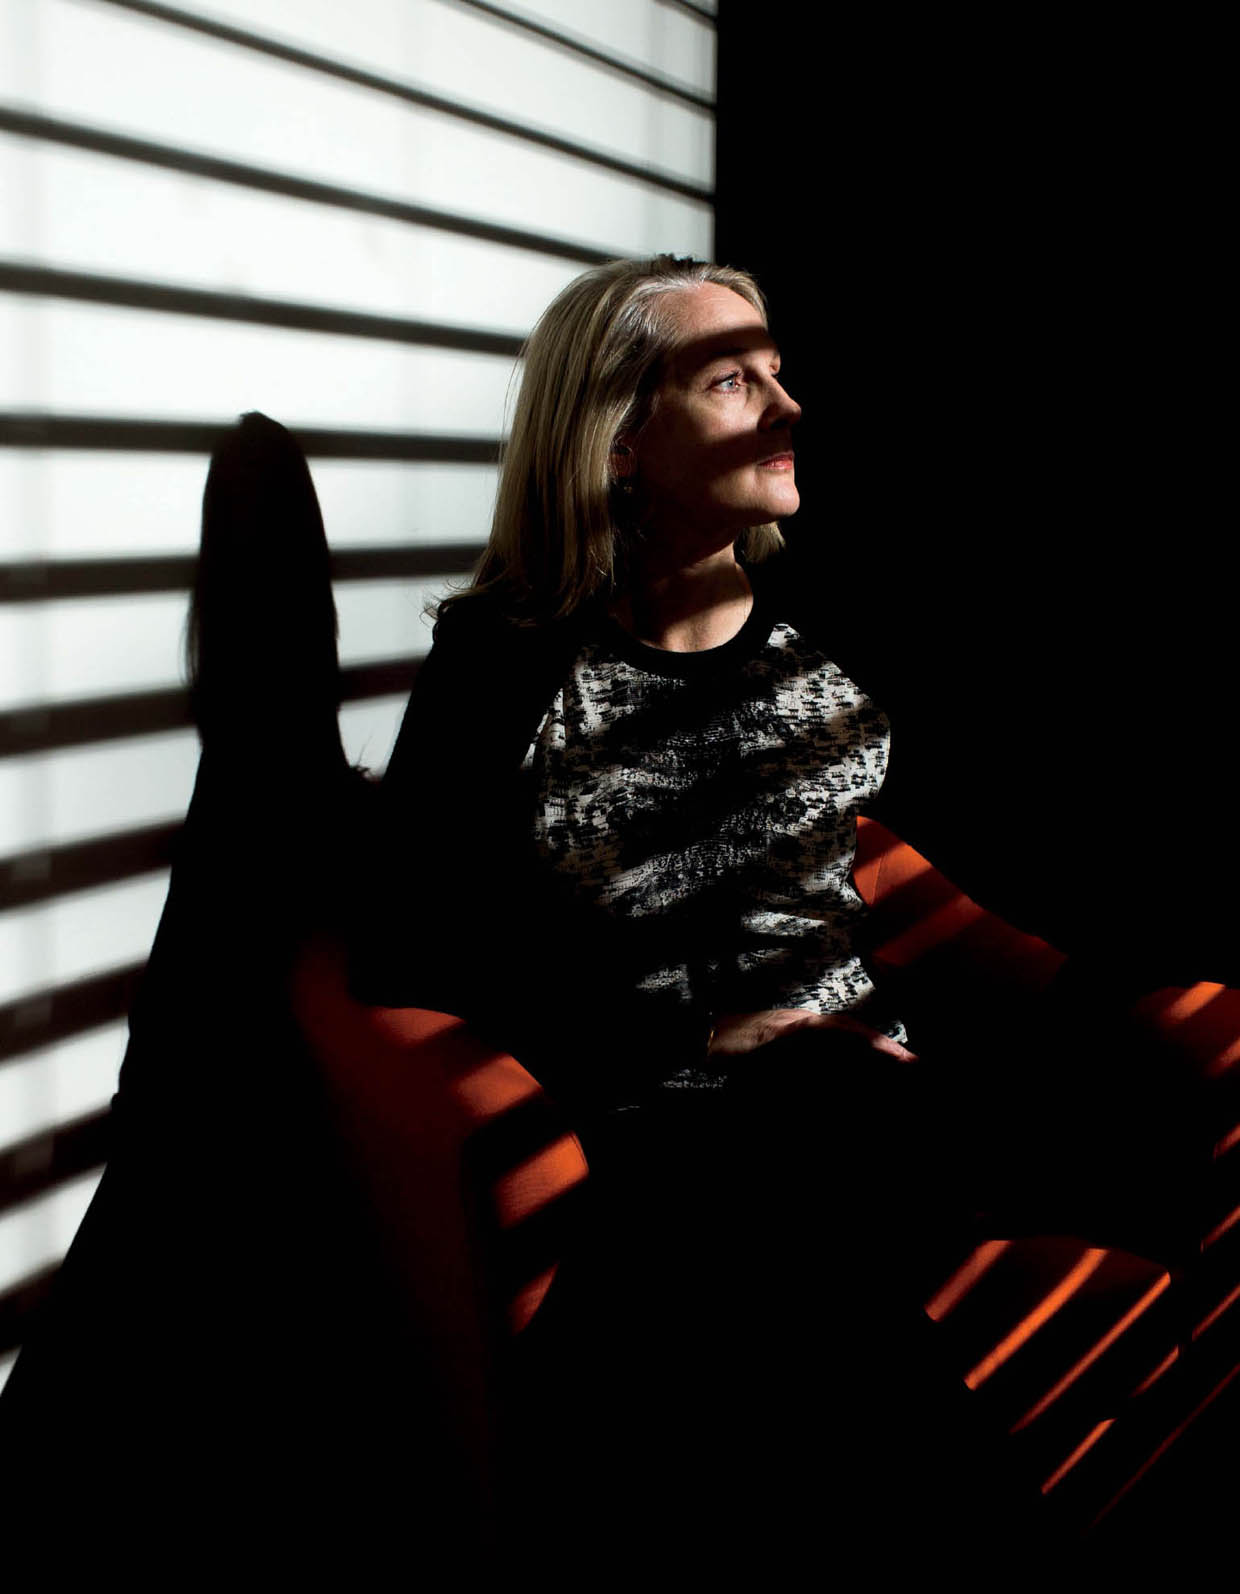
The setup for S.1
My client was 614 Magazine and my assignment was to take a portrait of Orange Is the New Black author Piper Kerman. (If you’re unfamiliar with the book, it’s Kerman’s memoir of her year in prison for money laundering.) Piper was to be photographed at the magazine’s office, which I was familiar with. I immediately knew that I wanted to use window blinds as a gobo to make dramatic shadows reminiscent of prison bars. When I arrived at the office, I set up my light several feet behind the blinds in order to have more defined shadows. I found a red chair for her to sit in, thinking that I could shift the red to orange in Lightroom, as a subtle nod to the book (and the hit TV series based on it).
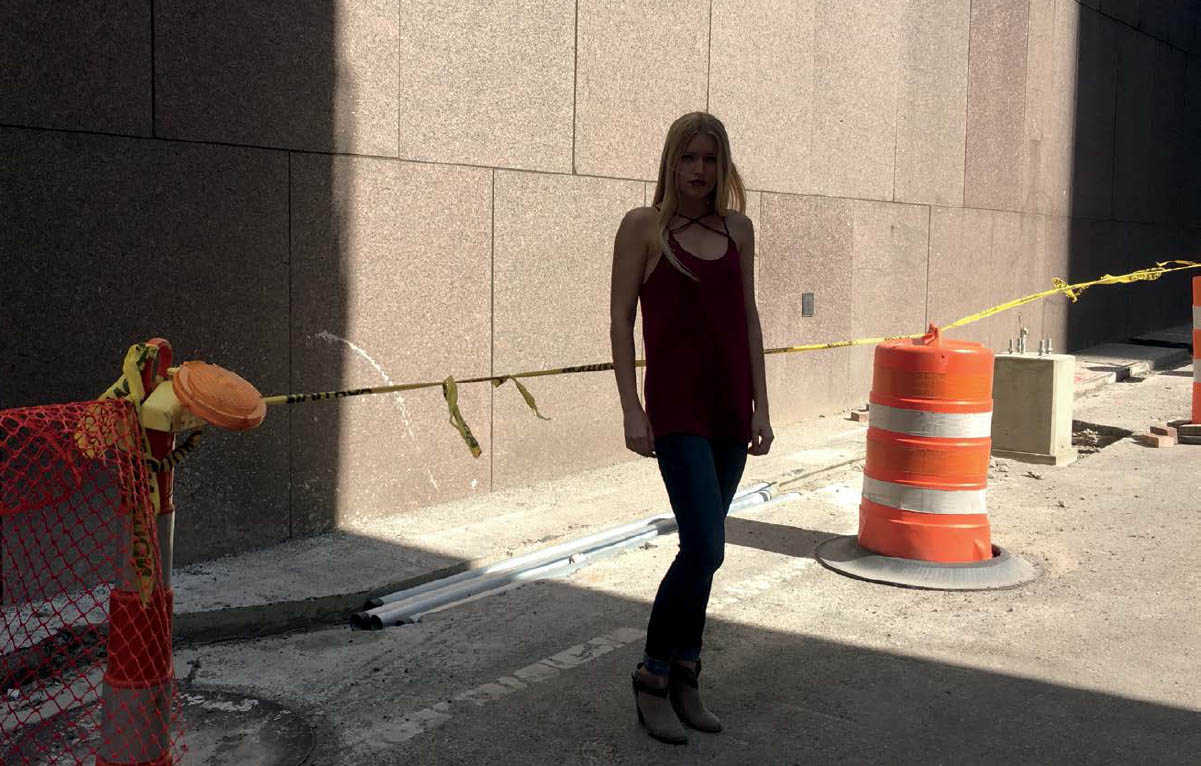
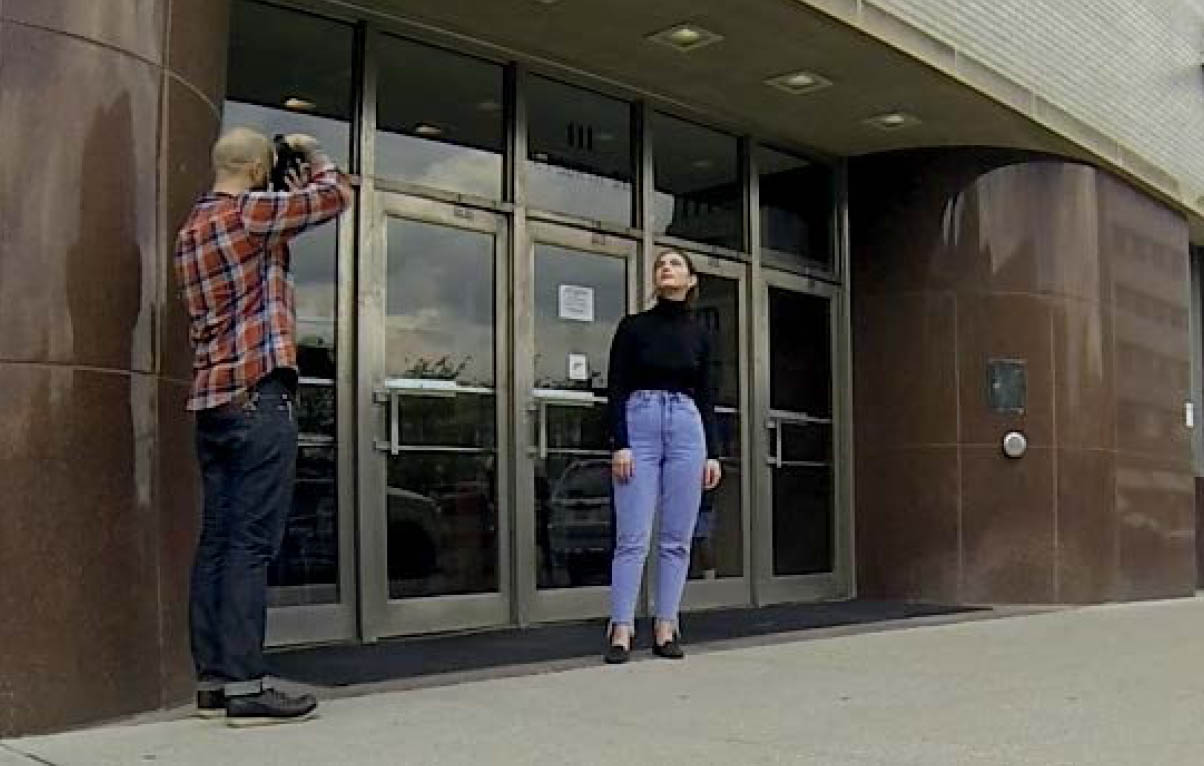
The setup for S.2
In order to get a pure white background without using a single light, you need to find a spot of shade on a bright, sunny day. If you place the subject in the shade and expose for the person’s face, the background will blow out white, as long as the background is several stops brighter than the shaded area. The one thing that you need to be aware of is the busyness of the background. I was using a plain building façade, which easily went white. Had there been trees or cars in the shot, they wouldn’t have blown out so easily.
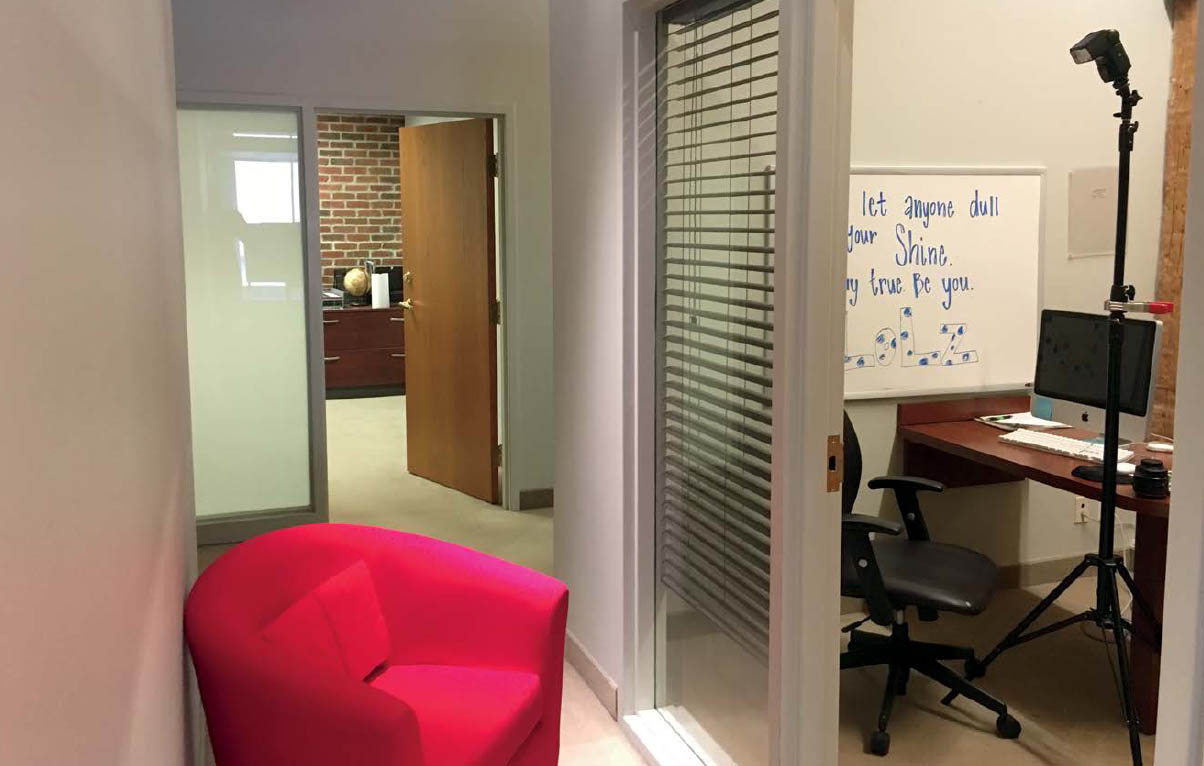
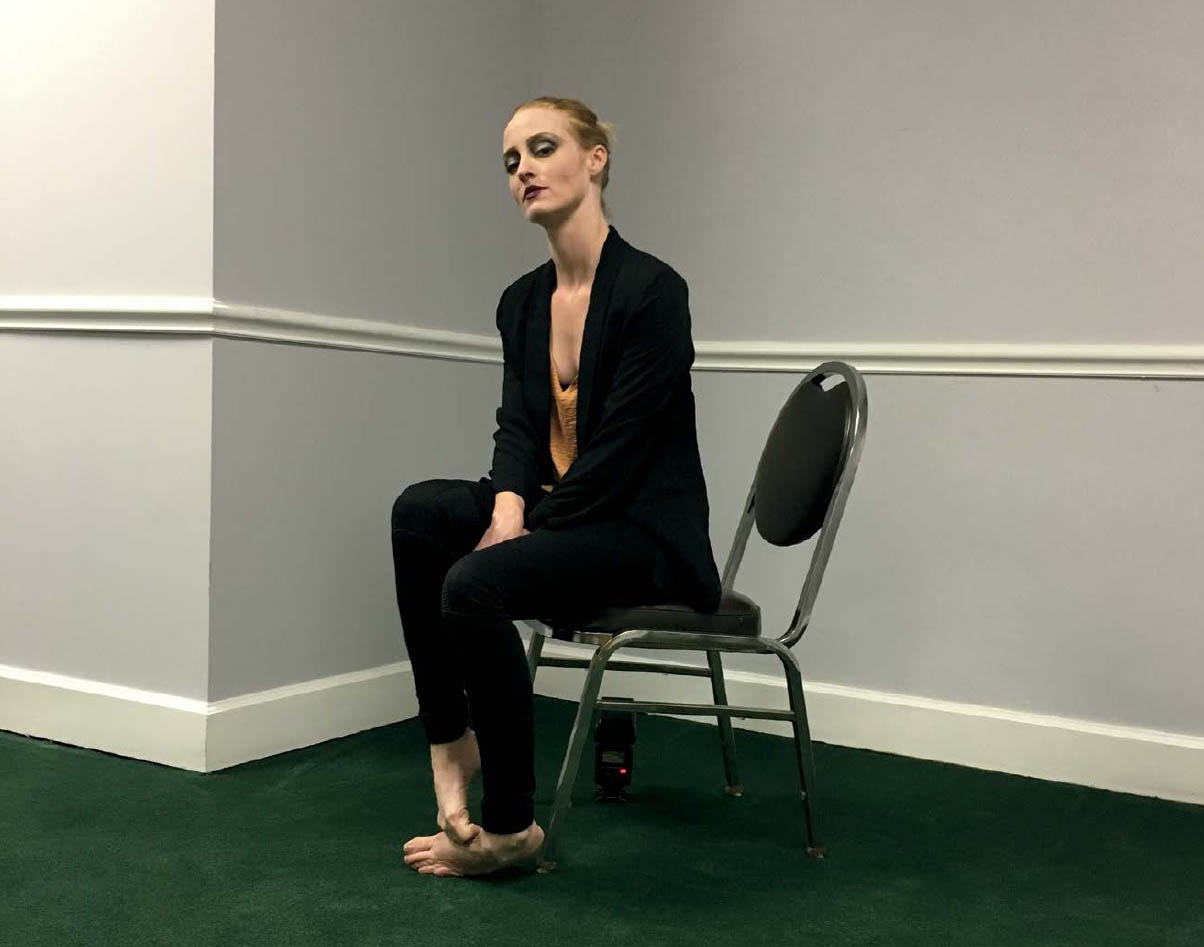
The setup for S.3
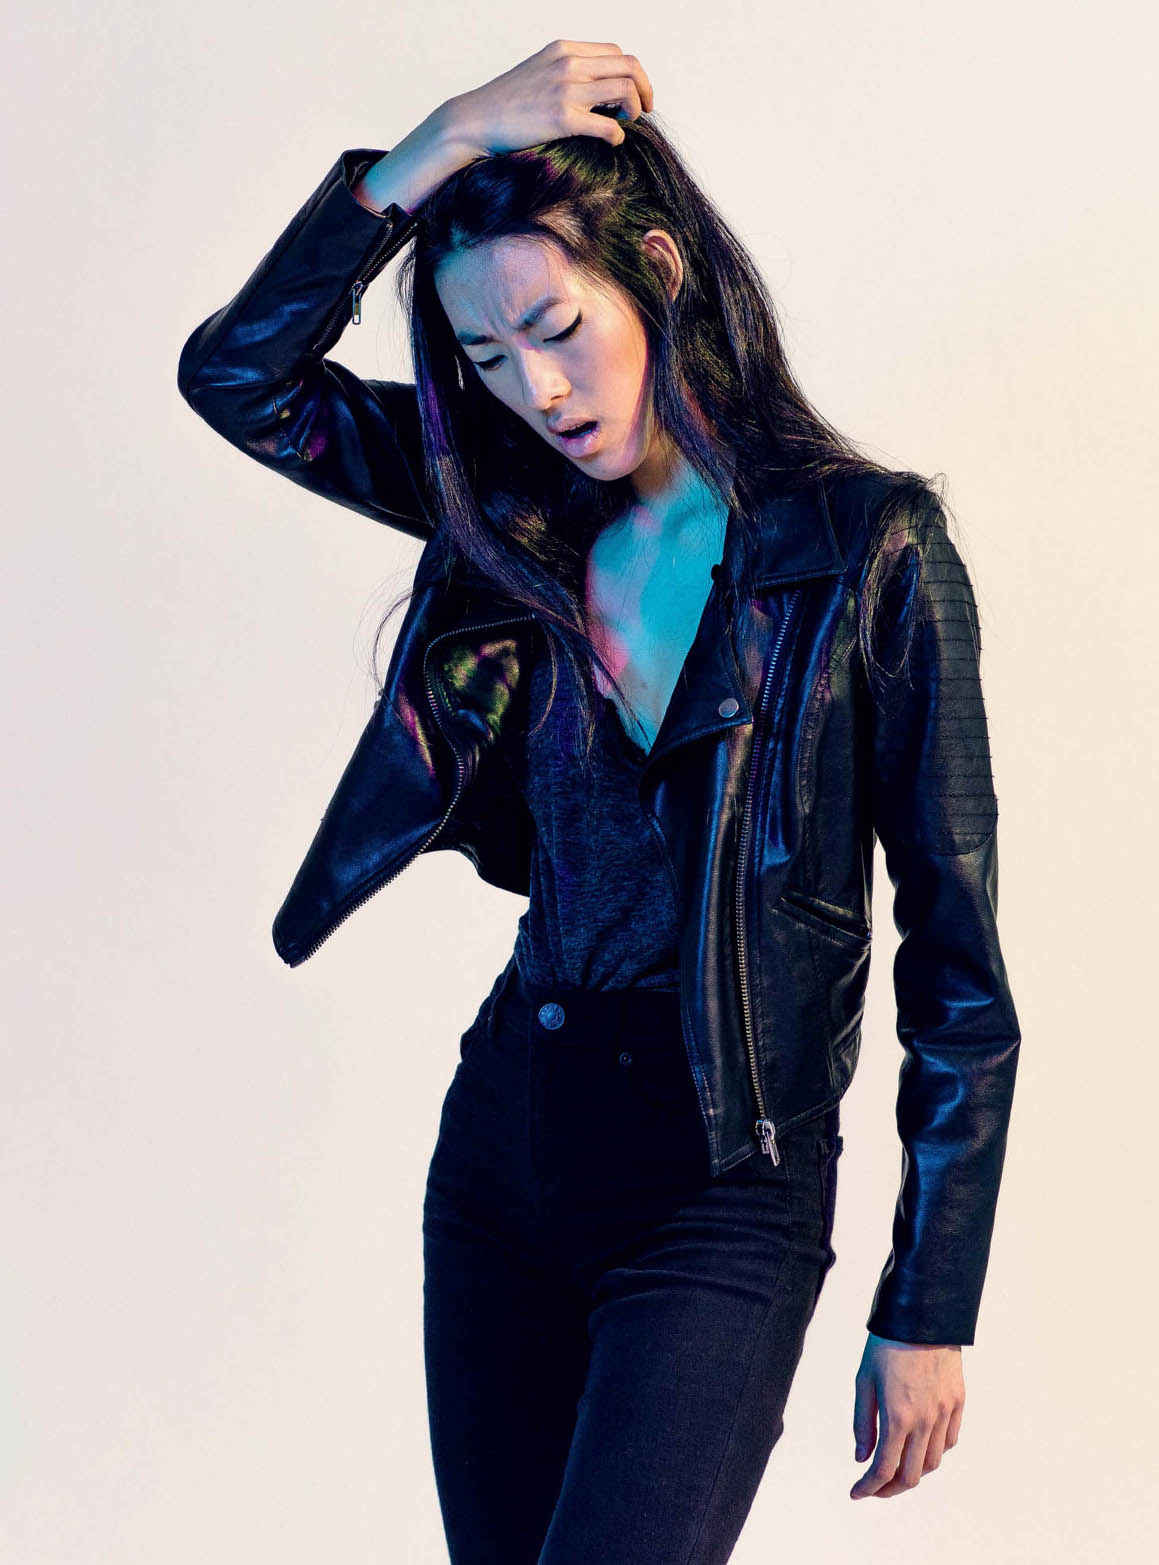
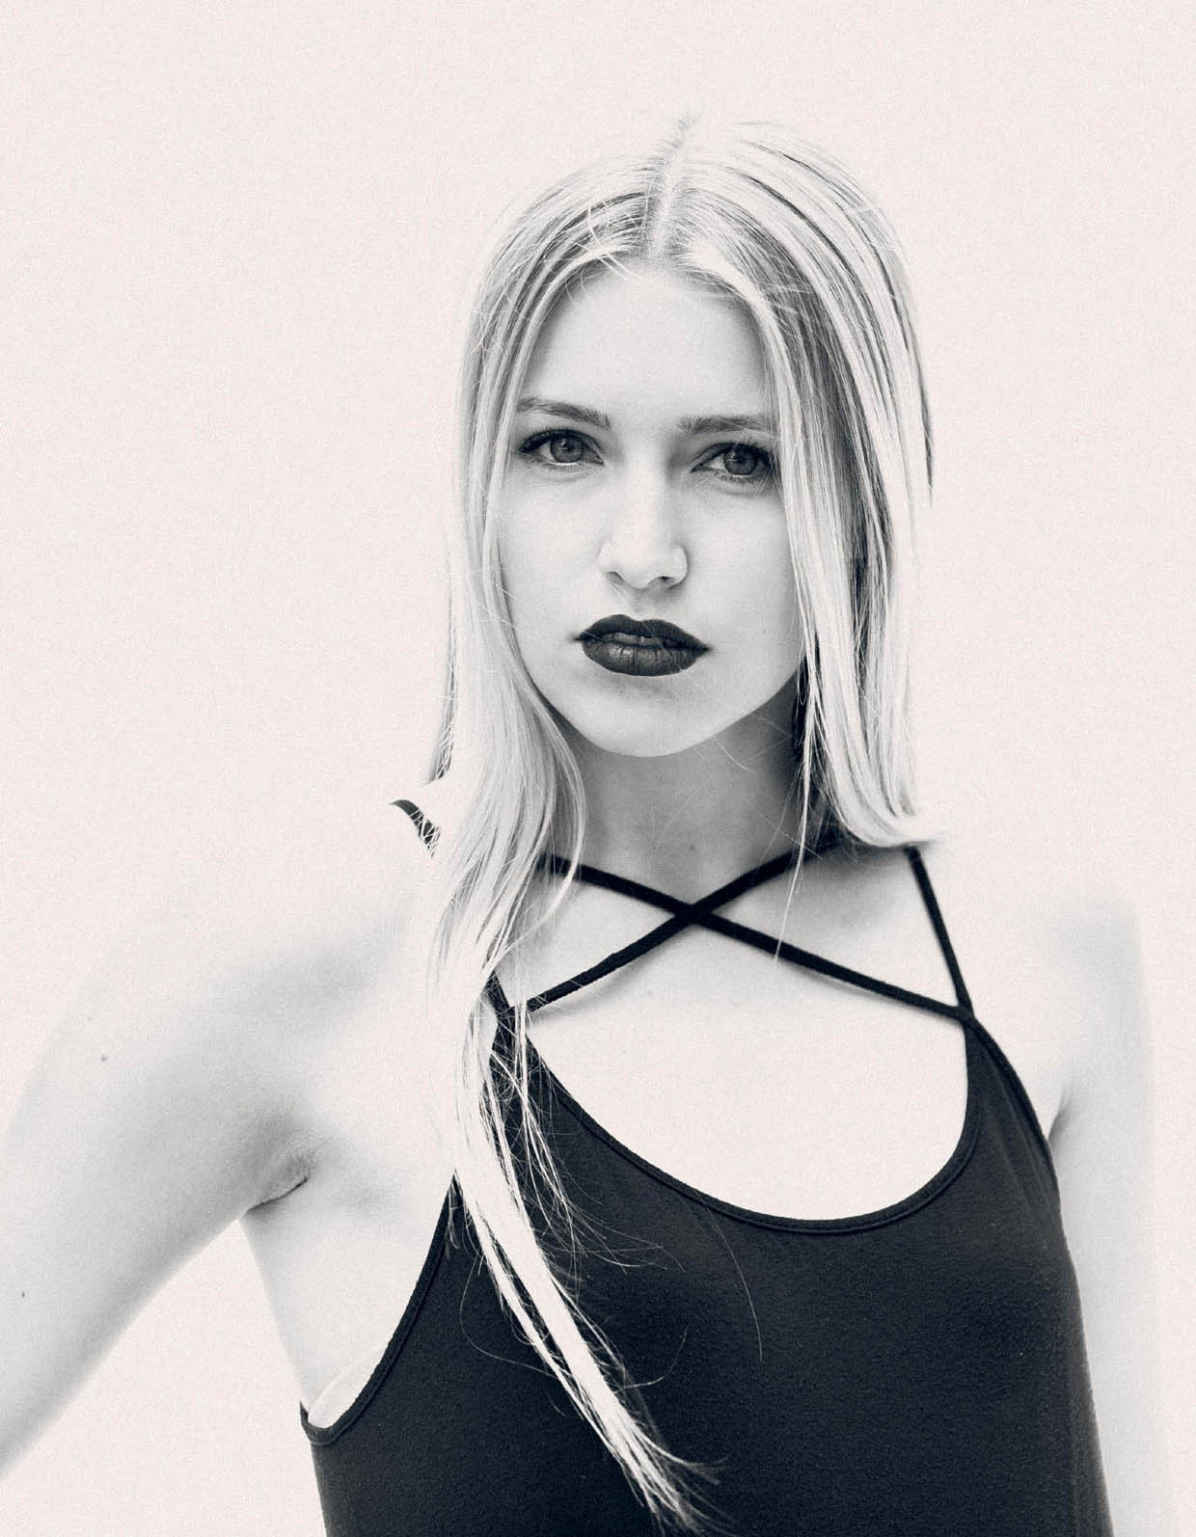
Achieving an airy portrait on a pure white background is actually easier than you may realize. As you can see in the setup shot above, I placed my subject about three feet in front of the intersection of two light grey walls. I placed my sole flash next to the back of her chair, aiming at a spot on the wall behind her shoulders. I set the output to 1/4 power and opened my aperture to f/2, at ISO 160. The light bounced off the walls and nine-foot ceiling, wrapping around her. In Lightroom, I utilized the Dehaze feature to reduce the glow on her black jacket.
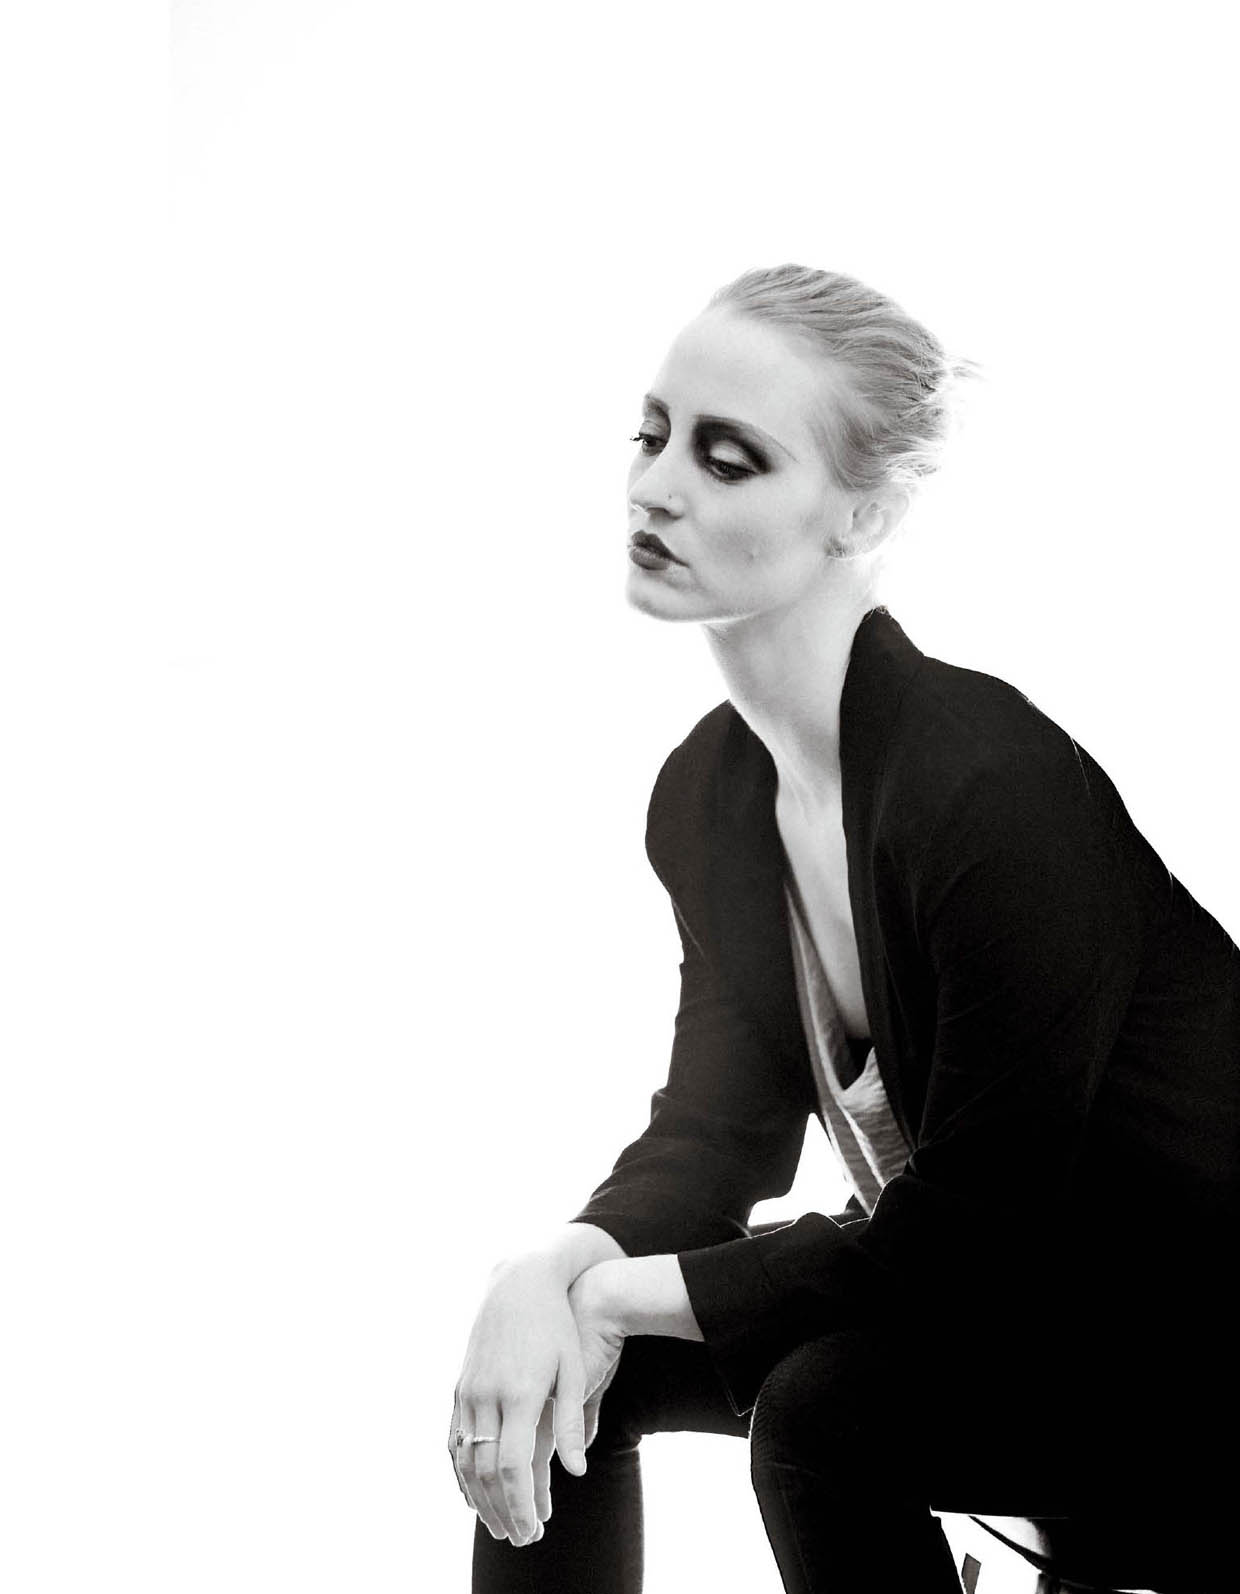
The setup for S.4
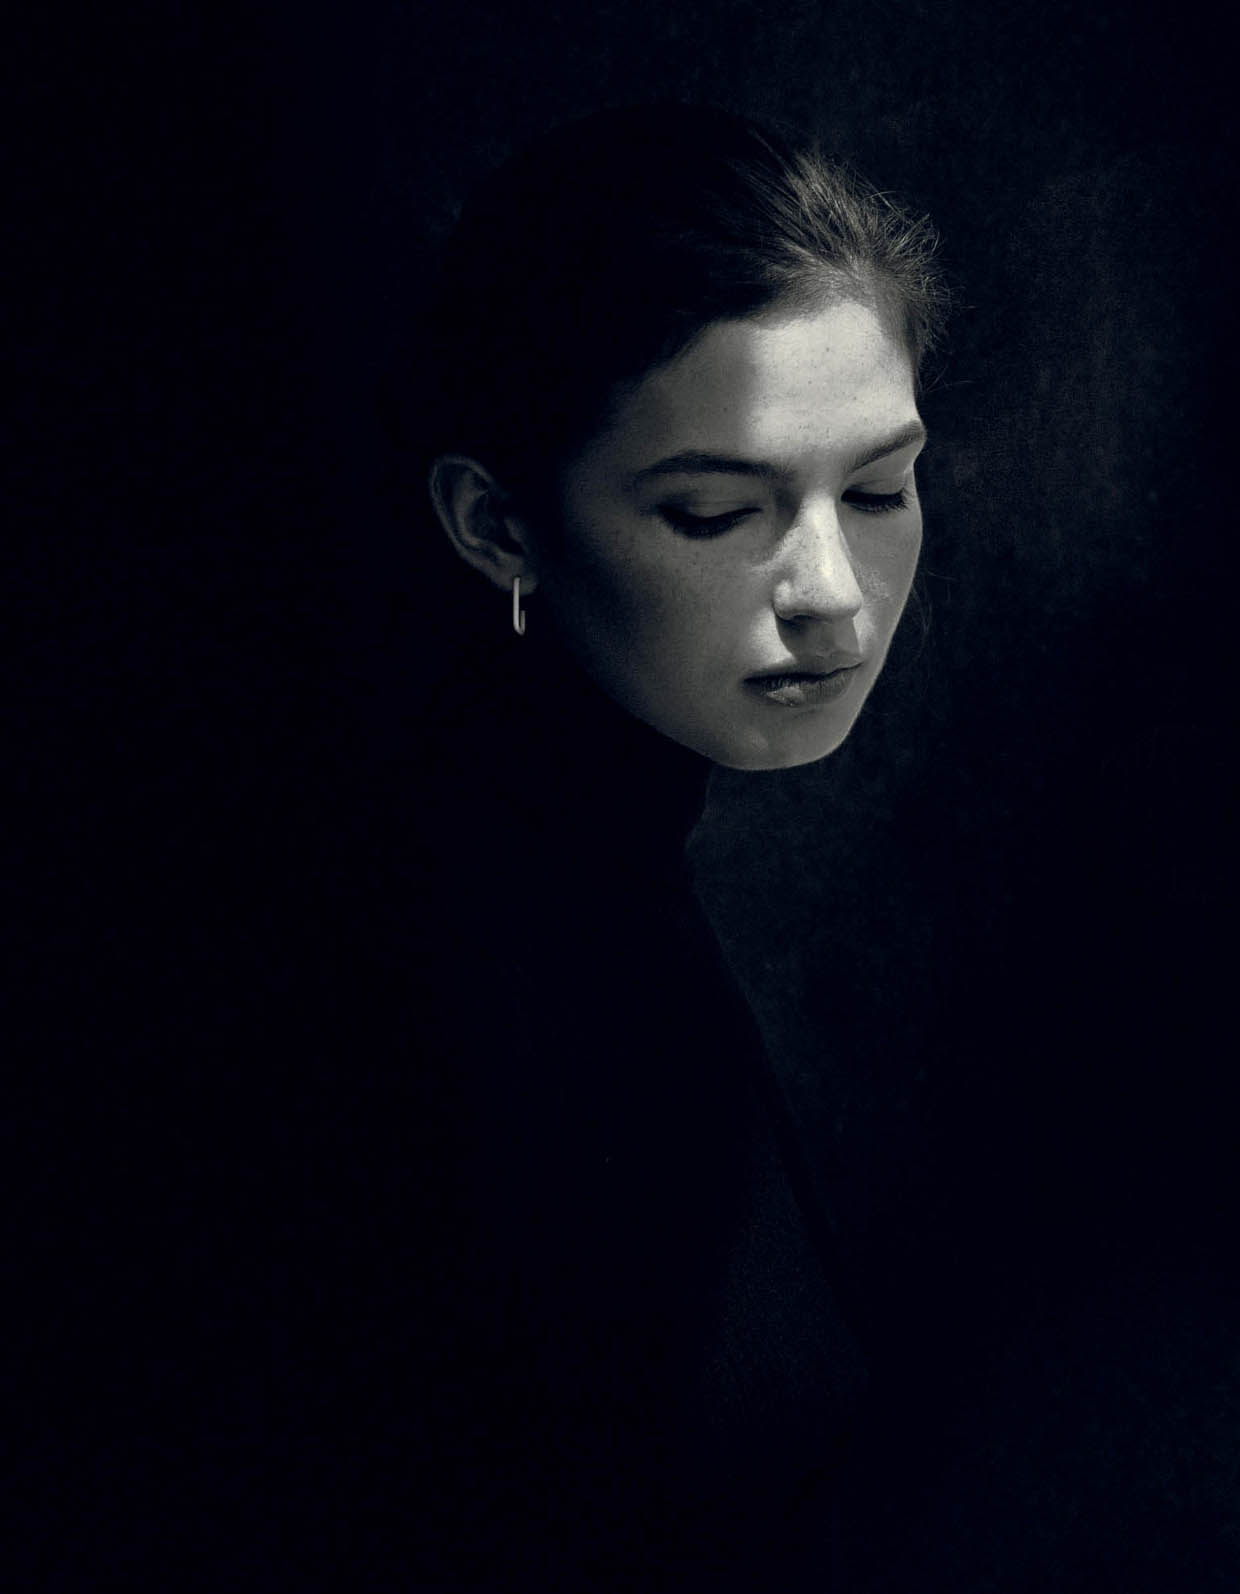
Just as you can get an available light portrait on a white background, you can also get an available light portrait on a black background fairly easily. You just need to reverse the setup from the second scenario (S.2) we discussed. Find a spot of shade on a sunny day and place your subject in the sun. As long as the sunny area is several stops brighter than the shaded area, the background should pretty easily go to black. Note that photographing a person who is lit by harsh sunlight can be unflattering if not done right. Rather than trying to eliminate shadow, try to place the shadow on your subject in a flattering way. Also, by converting your image to black and white in post, you can hide a multitude of sins.