part 2
THINGS OF LEGEND

MYTHS AND LEGENDS ARE EPIC TALES MINGLED WITH HISTORIES FULL OF EXCITING CREATURES, AND DRAWING ON THESE LEGENDS IS A GREAT WAY TO FILL OUT YOUR FANTASY UNIVERSE. YOU CAN STICK VERY CLOSELY TO A MYTH OR USE YOUR OWN INTERPRETATIONS. THE STORY OF THE MINOTAUR AND THE LABYRINTH IS A WELL-KNOWN GREEK MYTH, BUT WHAT IF YOU SET THE MINOTAUR AS A GUARD IN A PALACE? OR YOU CAN USE MODERN SETTINGS. HOW ABOUT A SIREN THAT LIVES AT SEA WORLD? CONSIDERING THESE POSSIBILITIES PUTS YOU ON THE PATH TO USING MYTHS AND LEGENDS IN YOUR OWN FANTASY WORLD!

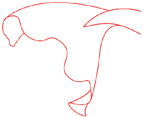
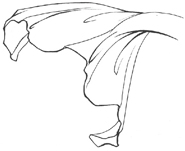
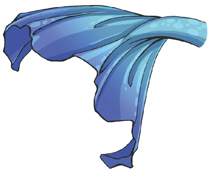
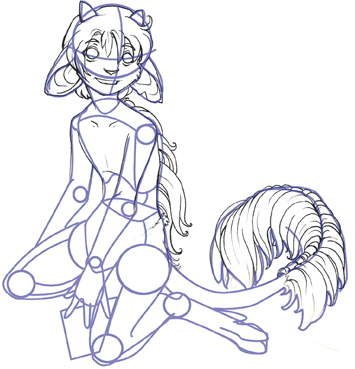
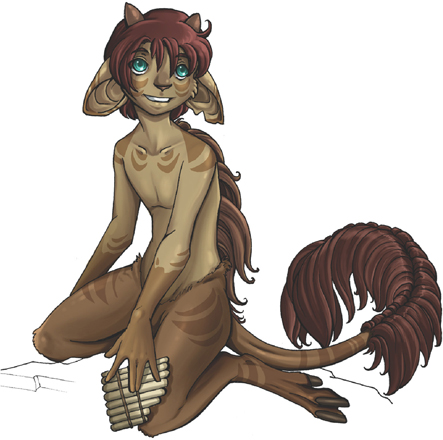
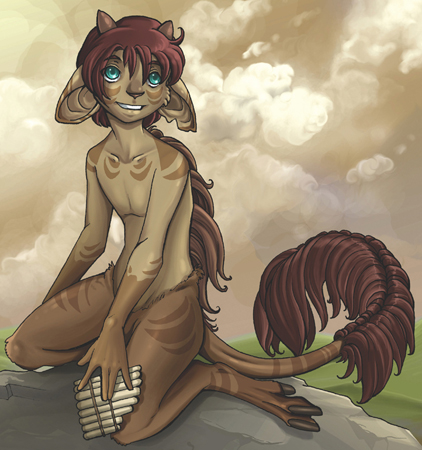
Mermaid
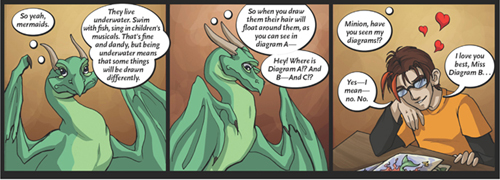
Merfolk are a sea-dwelling fantasy race. Their upper bodies closely resemble that of humans, while their lower halves are more fishlike. And, of course, they have the ability to breathe underwater. In Greek mythology, some variations of sirens were described as being very mermaidlike. (Though the majority of siren description is that of a bird, lion and woman combined.) Like the siren though, mermaids do have a beautiful song.
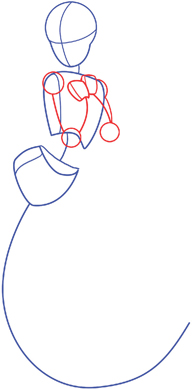
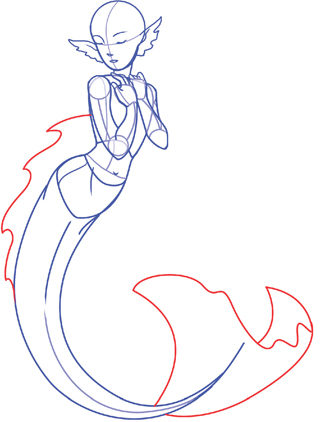
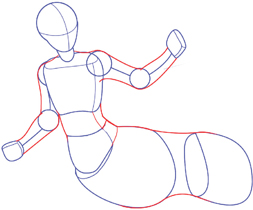
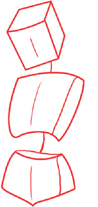
›1‹

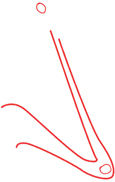
Place shapes to indicate the head, chest and hips.
Draw an extended line of motion so that you will have a guide to follow for your mermaid's tail.
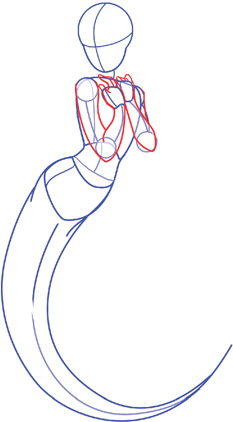
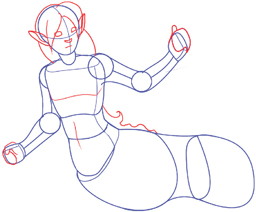
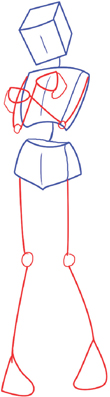
›2‹
Sketch out the general positioning for the arms. A simple line and ball joint arm is enough. If you decide that you are unhappy with the way the arms are positioned, simply erase them.
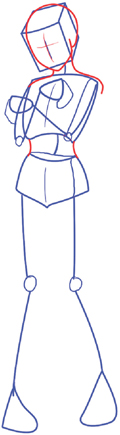
›3‹
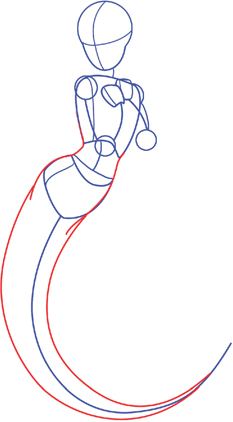
Fill out the torso.
Using the line of motion as a guide, draw a flowing tail that is the same width as her hips near the top. Taper it to a point towards the end.
›4‹
Define the hands and arms. Wherever an arm has a sharp bend in it, there will be overlap. If the arm is coming towards you, the lower arm will overlap the upper.
›5‹

Lay down the bare bones of a face within the head shape. Keep in mind the proportions discussed on page 22.
›6‹
You can simply put a fin (see page 68) at the end of the tail and call it done, or, you can go a little crazy. Perhaps a fin running down her back would be neat? How about a pair of frills running down either side of her tail? Fins on the shoulder blades?
›7‹
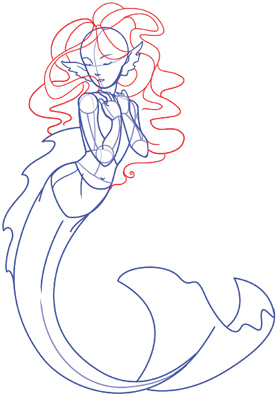
Since this mermaid is underwater, her hair will be a riot of weightless motion. A series of twisting lines will help give you this look. Each chunk of hair can follow these guides.
›8‹
Add detail to refine your piece such as strands of hair and ripples in the fin. Adorn her hair and body with pearls and seashells.
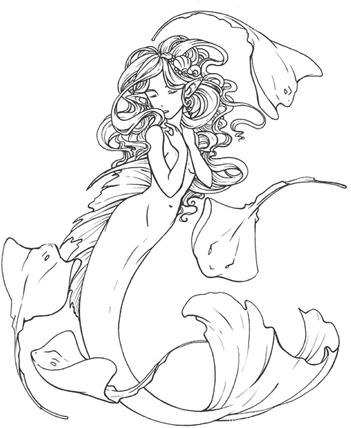
›9‹

Throw in more areas of interest that place her in a specific environment. When you're happy with your drawing, erase any stray construction lines.
›10‹
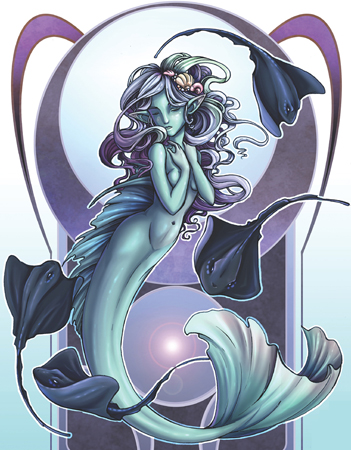
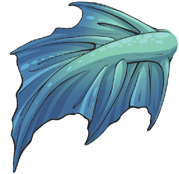
Mermaids, like fish, come in a variety of colors. Perhaps you'd like to model your mermaid's coloring after a specific fish, like a clownfish, orca or lionfish. Maybe your mermaid is one solid color. Think about if you'd like the human half to be a different color than the fish half.
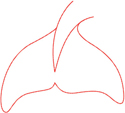
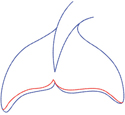
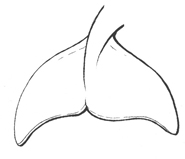
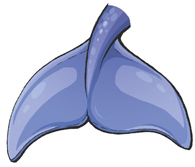
FINS
The main fin of your mermaid or sea creature is a very important feature. There are many ways to tackle this part of your character. Here are just a few ideas.
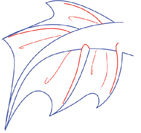
THE FRILLED FIN
This elegant fin is perfect for a wispy mermaid.
›1‹
Draw a ripply line across the bottom of the fin.
›2‹

Add connecting lines from each of the bends to the tail's main body.
›3‹
Add more lines to suggest ripples and movement.
›4‹
Color the tail adding shadows and highlights to the fin's peaks and valleys.
THE DOLPHIN FIN
The sweet and simple way to end your mermaid's tail.
›1‹
Draw two triangular shapes that face out from the taper of the tail.
›2‹
Give the tail a little bit of thickness by drawing a second line along the edge of it.
›3‹
Thicker lines along the bottom edge give the fin form. Soften the upper line on the bottom edge so it's not so harsh.
›4‹
Color the tail, adding shadows and highlights to suggest a smooth, sleek surface.
THE BRANCHED FIN
An uncommon, yet exciting, variation.
›1‹
Draw lines coming out from the tail and connect them with U-shapes.
›2‹
Give the fin a second line to add thickness. Add a hooked line in the middle of the membrane so it looks loose and flexible.
›3‹
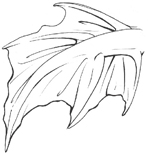
Add more lines from each of the bends to the tail's main body, suggesting movement.
›4‹
Add shadows and highlights as you color the tail to showcase its frills.
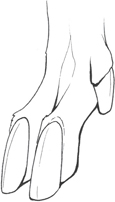
HOOVES
Many fantasy races don't have traditional feet that can be covered up in boots or shoes. Many, such as centaurs and fauns, have hooves. Here are two different types of hooves. Feel free to add your own variations.
CLOVEN HOOVES
These hooves are perfect for animals like deer and pigs (or creatures that resemble them).
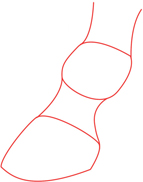
›1‹

Plot out the basic shapes of the ankle and each toe without worrying about the hoof itself.
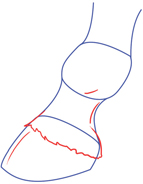
›2‹
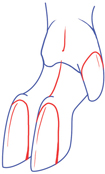
Draw a rounded shape within each toe, cutting the toe in half and separating the nail or hoof from the rest.
›3‹
Refine your linework and add details — a little more definition between the toes, a different texture from fur to hoof and darker lines to indicate the bottom of the hoof.
›4‹
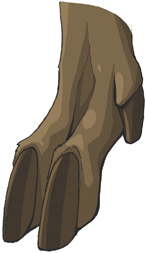
Choose colors that either blend in or contrast with the skin or coat of the leg. Remember to add highlights.
STANDARD HOOVES
The next hoof we're going to tackle is an unsplit single hoof like you would find on a horse. This is a simple hoof to make.
›1‹
Draw a ball for the ankle and hoof. Connect the two with concave lines.
›2‹
Add a line where the hoof ends and the fur begins. Add a couple of lines of definition about the ankle.
›3‹

Add lines to show the texture of the fur and hoof.
›4‹
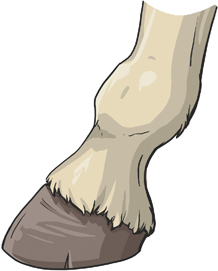
Color the hoof, adding shadows and highlights to suggest depth and texture.
Centaur
Half man, half horse, in ancient Greek mythology, centaurs were depicted as drunken and rowdy creatures. They were also known for carrying off young maidens. Recent fantasy has taken a different view of centaurs, giving them a more noble character and rational outlook.
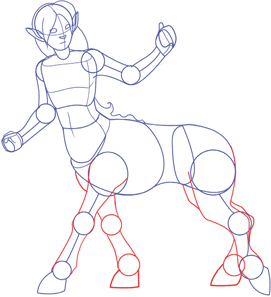
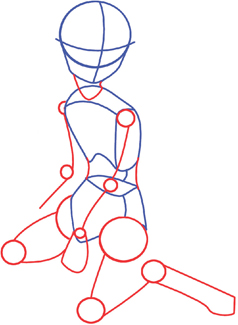
›1‹
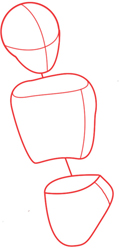
Lay in the basics of the human form. The hips will serve as the joining point to the equine body.
›2‹
Add the indications of the horse's chest and backside. The chest of the horse area will be rounder and more bulky then the back end.
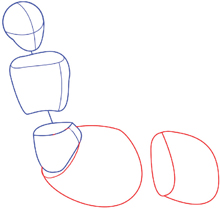
›3‹

Draw in guidelines to show where the hands will go. Keep these lines light, as you will likely erase them later.
›4‹
You want a smooth transition from human to horse. It should widen in one smooth, continuous line.
Draw connecting lines to fill out the arms and torso.
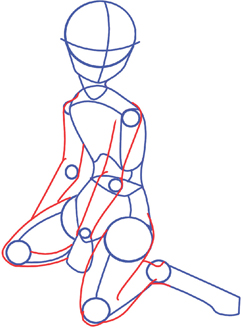
›5‹
Lay in the basic facial proportions (see page 10). Add definition to the hands. And draw the basic shape of the hair.
›6‹

Rough in where you would like the legs to go with quick, easy lines. Use circles to indicate joints or bends.
›7‹
Fill out the legs. Joints bulge out a tiny bit around the knees and ankles, so give these areas a bony look.
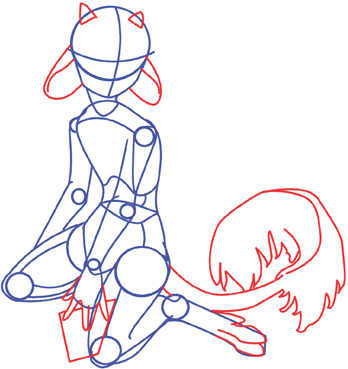
›8‹

Add the fur tufts to the bottoms of the hooves like those of a draft horse. If the feet are a bit iffy, the tufts of fur will also help hide them, but shhh, don't tell anyone your weakness! Make sure the staff follows the same angle as the hand so that it looks more like the centaur is actually grasping the thing.
Rough out the tail.
›9‹

Give your centaur some real character, a nifty hairstyle and some unique armor or articles of clothing. Do not get stuck on the face. Work all that love across the entire drawing!
›10‹
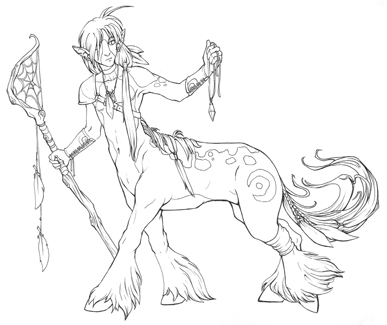
There's a lot of hair and fur on this character; be sure the lines of the hair follow the general shapes you placed down earlier. Add spots and patterns to define your centaur. Once you've finished adding detail, clean up any stray construction lines with a soft eraser.
›11‹
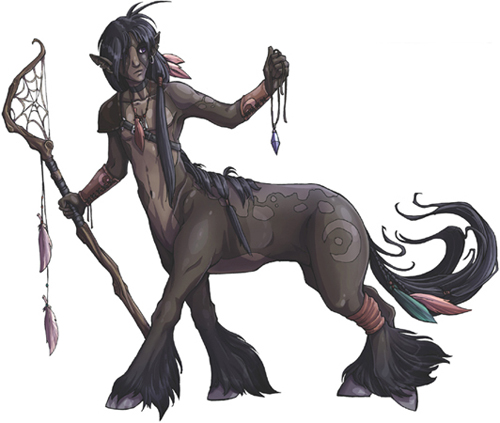
When choosing a color for your centaur, you may want to base it off a particular breed or horse, but you can, of course, make it any color you like!
Carry the “horse” color up the entire length of the creature, so that the definition of where human ends and horse begins is not quite so clear.
›12‹

When you're finished with your drawing, carefully consider what sort of setting you'd like your centaur to be in. A mysterious forest, the rolling plains, even an indoor environment could be interesting, and would provide it's own challenges. Add as simple or complex of a background as you like. Here, the dim light of the forest casts the majority of the centaurs in shadow.
Faun
The faun is a creature of Roman mythology. These woodland spirits resemble humans above the waist and goats below. They are often seen carrying a pan flute. Fauns were supposedly fun-loving creatures who enjoyed drinking, dancing and music.
›1‹

Rough in the basics of the human form. Place the shape of the head, chest and hips to give an idea of what direction the faun is facing and the positioning of the body.
›2‹
Faun legs have an extra long heel, which is equal in length to the thigh and the calf.
Here, the back leg is bent. Much of the lower leg is obscured by the upper leg and body.
›3‹
Flesh out the arms and legs. Make sure that things that are closer to us in space overlap pieces that are farther away.
›4‹
Lay in construction lines for smaller things, such as the ears, tail, hooves and hands. For more information on drawing hooves, see page 69. Draw an extra fluffy goat's tail to give some interest to the right side of the page. Add a box that will become a pan flute.
›5‹
Add detail such as individual chunks of hair, facial expression and any other unique characteristics of your faun.
›6‹

Draw a jagged edge of fur that ends at the waist where the goat area of the body meets the more human part. You could also make the transition more gradual by drawing fur into the faun's torso.
Finish up the flute and erase any stray construction lines. If you do your final drawing with a pen, you can simply rub an eraser over the whole area to remove the pencil underneath.
›7‹
It is most common to stick to shades of brown or forest colors for fauns. Consider whether the faun's hair is the same color as the fur on its legs, or whether the skin on the faun has the same colors as the fur.
›8‹
Finish off your drawing with a place for your faun to hang out. It can be as lavish as an entire enchanted wood, or as simple as a rock to sit on.
BIRD WINGS
From the sphinx to the harpy, feathered wings are an important part of many fantasy characters.
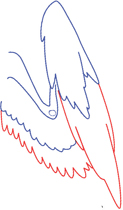
›1‹
Draw a basics arm shape.
›2‹
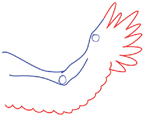
Draw a layer of small, rounded feathers.
›3‹
Add a second layer of long, large feathers.
›4‹
Add texture and erase construction lines.
›5‹
Add shadows anywhere the feathers overlap and highlights in places where the light hits.
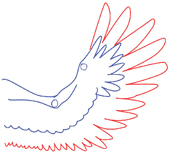
EXTENDED WING
When your winged characters are in flight or showing off, knowing how to draw fully unfurled wings can be a big help.
›1‹
Draw a basic arm shape, but this time, folded closer together.
›2‹

Add the first layer of feathers, folding the part closest to you around the forearm of the wing.
›3‹
Add the second layer of feathers, following the outline of the first layer.
›4‹
Erase construction lines and add details and texture.
›5‹
Add shadows and highlights for texture and depth.
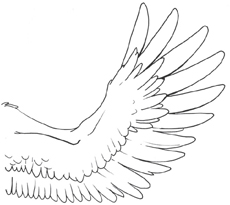
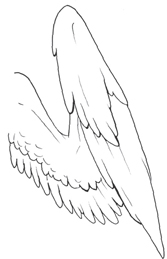
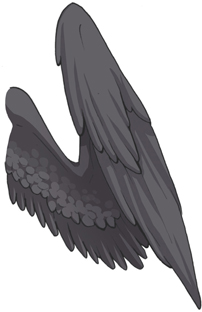
FOLDED WING
When your winged characters are at rest, have the wings tucked in next to the body or half-folded.
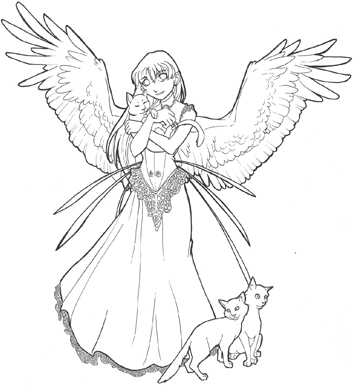
Angel
Traditionally, angels are messengers of a higher power. Throughout the course of fantasy and myth, other winged beings of a less divine nature have sprung up. Avariels, harpies and other winged people are very common, and very fun to draw!
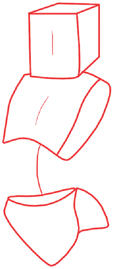
›1‹
Got your pencil? Yes, yes, good. Paper? Splendid. It's time… to draw boxes — 3 of them, in fact.
›2‹
Draw the simple sticks to lay out where you'd like your arms and legs to be. Erase and readjust them until you get a pose that you like.
›3‹
Draw the skull and jawline. Draw a neck connecting the head and shoulders.
Create a continuous torso with lines connecting the chest and hips.
›4‹
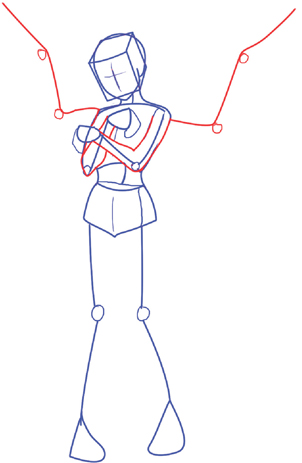
Lay in the basic joints of the wings.
Fill out the arms. Since the arms are folded, the part closest to you overlaps the part farthest away.
›5‹
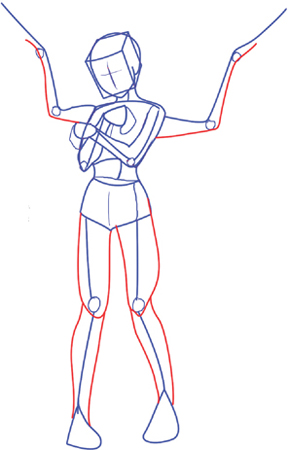
Add dimensional lines for the legs. Remember that the upper leg is thicker than the lower, and that there is a more pronounced curve for the calf.
›6‹
Give the wings their first layer of feathers (see page 77). Add lines to indicate robes, an elegant dress or even a trench coat.
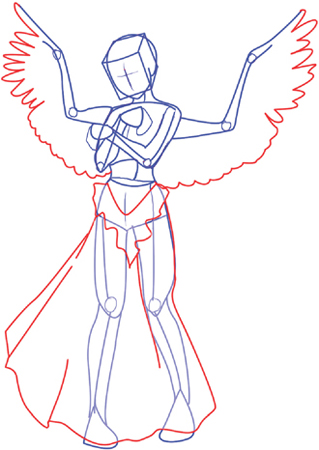
›7‹
Give your angel facial features and hair and you're good to go!
Add the larger, primary feathers. They will be longer and tapered.
›8‹
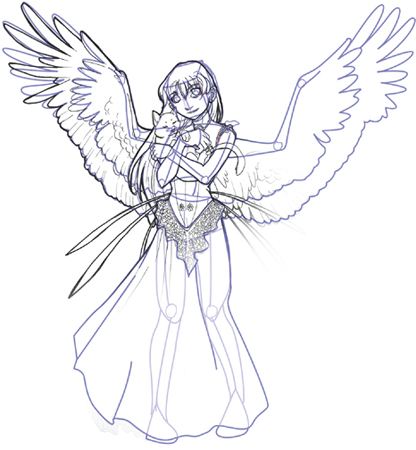
Now that you have a solid base to build on, begin adding details. Go over your drawing and add in individual feathers, fingers, lace and any props you may want to include.
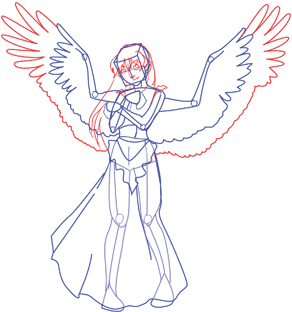
›9‹
Once you are satisfied with your drawing, erase any stray construction lines and give it the final look-over.
›10‹

Coloring your angel can be a lot of fun, especially when it comes to choosing how you will do the wings. Wings can be any color of the rainbow and can have a variety of different patterns. Model the wings after eagles, peacocks, pheasants — there is no wrong answer!
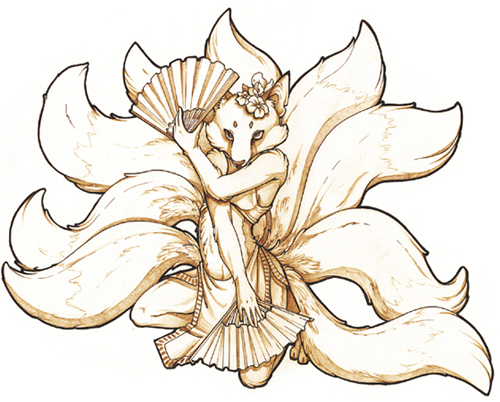
Kitsune
Kitsune are fantasy characters that originated in the East. These fox spirits possess many powers, the foremost being the ability to assume human form. As the kitsune grows in age and power, the number of tails it possesses increases, the most powerful having as many as nine.
›1‹
Draw boxes to indicate direction and position of the head, chest and hips. Here, the head is pushed down, overlapping the chest.
›2‹
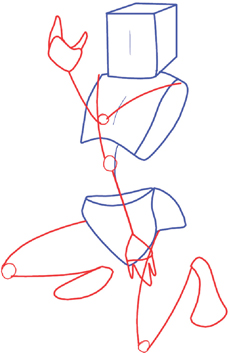
Draw jointed lines to position of the arms and legs.
For this pose, the kitsune is crouched down, with arms crossing.
›3‹
Follow the size relationship and direction you indicated with the box representing the head, draw in a snout and two large ears. The eyes will still be halfway down the head. The snout can be as short as a human nose, or longer, like a fox's.
Draw lines connecting your character's hips and chest.
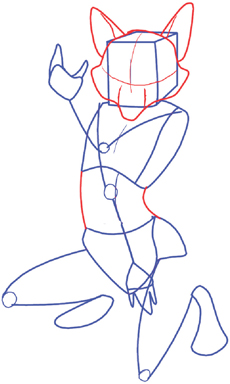
›4‹
Add dimension to the stick arms. Give your kitsune some fans or props. Flowers or even swords might be interesting, too.
›5‹
Position the eyes halfway down the head, evenly spaced on either side of the snout.
Add dimension to her legs, overlapping where appropriate.
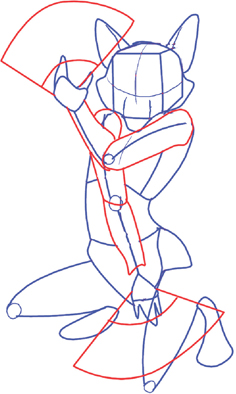
›6‹
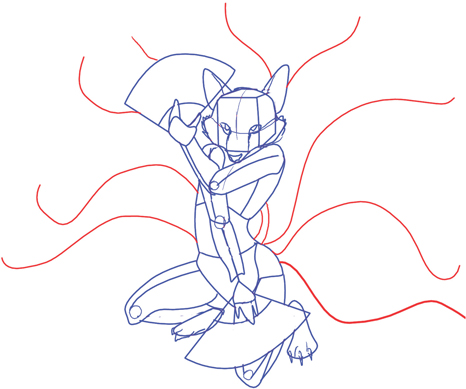
The more tails a kitsune has, the greater its power.
However, the more tails you add, the busier your drawing will become. Plan in advance how you would like to position the tails.
›7‹
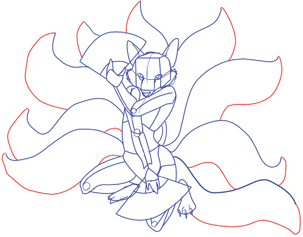
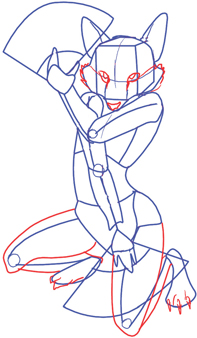
Following the curves mapped out in your original plan, build those tails up into large, fluffy objects that taper at the bases and ends.
›8‹
Add chunks of fur, costume accents such as wraps and flowers, and individual folds. Add texture to the kitsune's tails, breaking the outlines with overlapping pieces of fur.
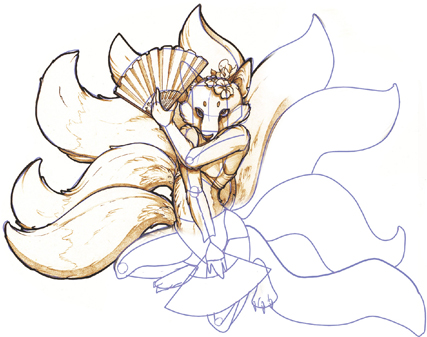
›9‹
Once you are finished adding details, go back in with your eraser and clean up any stray construction lines.
›10‹
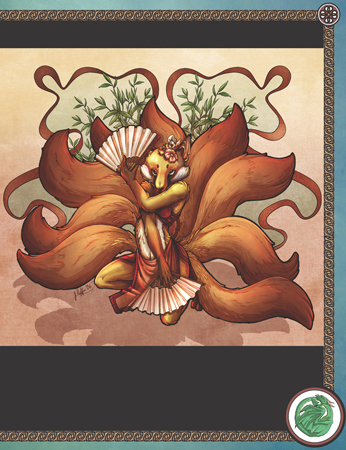
A kitsune can be white as snow or many shades of auburn, just like a fox in the wild. Maybe you don't want to go with a standard fox color and would instead like a gold, blue, or even green character!