part 3
THINGS THAT GO BUMP in the NIGHT
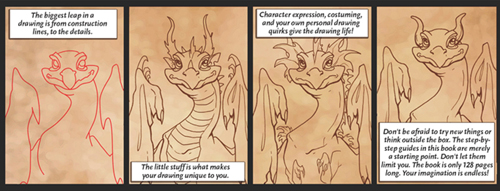
FANTASY ISN'T ALL FAIRIES AND DRAGONS. NOT ALL MYTHS AND LEGENDS HAVE HAPPY ENDINGS. SOMETIMES THERE'S SOMETHING QUIETLY LURKING IN THE CORNER. SOMETHING SINISTER. SOMETHING THAT MAKES A BUMP IN THE NIGHT, THEN DISAPPEARS JUST AS QUICKLY… YOU HOPE.
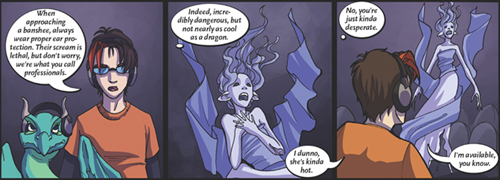
Banshee
The banshee is a female spirit of Irish mythology. This unusual fairy is said to emit a mournful wail. If heard from a distance, it portends when someone will die. To hear and see the banshee up close may foretell your own death.
›1‹
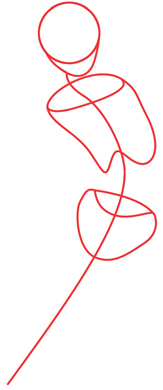
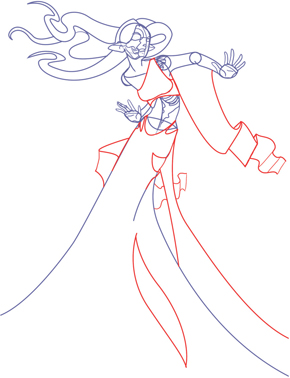
Start with a line of motion, then draw in the bare bones of the head, chest and hips.
›2‹
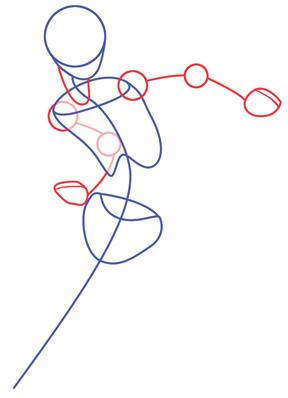
Plot out the arm positions. Even if the arm goes behind the body, still do the measurements so you know if and where it will peek out again. For this dramatic ghost, flailing arms help emphasize that she's wailing.
›3‹
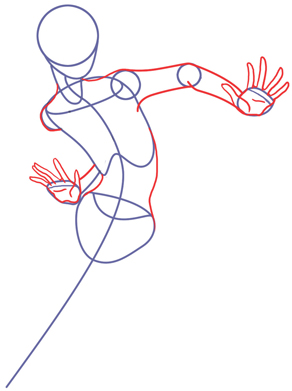
Using the guides in step 2, fill out her arms and add some fingers on the palm of each hand.
›4‹

Since banshees are the malcontent spirits of fairy women, add pointy ears. Sketch the outline of her costume's shape.
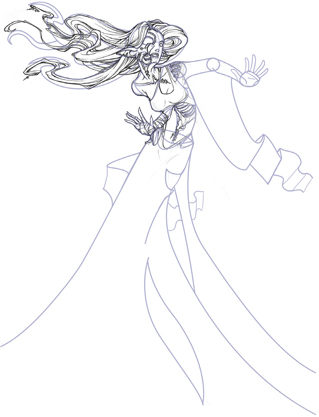
›5‹
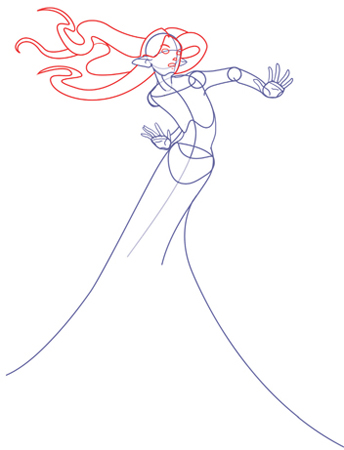
Lay in the basics of the face. Draw in very general shapes to indicate the hair.
›6‹
Since the banshee is undead, she may not be in the best of shape, so have part of her face rotting off, stitches, exposed bones or hanging skin.
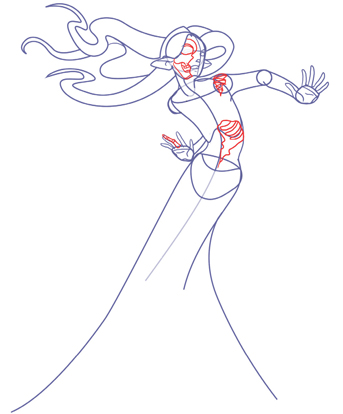
›7‹
Time to create some fashion to die for. Add some more decomposing rags (see page 92).
›8‹
Working off your construction lines, create those delicate chunks of hair, subtle folds and holes in the cloth and other gruesome details. Give careful consideration to what you would find underneath holes in the skin and clothes.
›9‹
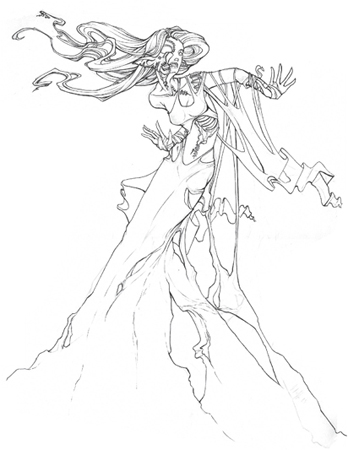
Erase any unnecessary construction lines, and sit back and admire your fantastic drawing!
›10‹
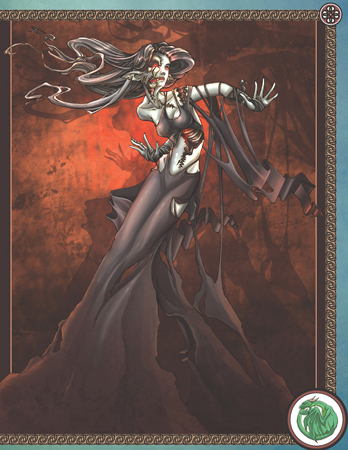
When coloring your banshee, you're left with the choice of how substantial you think the spirit should be. She could be completely solid and tangible or transparent and wispy.
TATTERED GARMENTS
Quite often, the clothes of fantasy characters will not be in 100-percent perfect shape. Here are some quick ideas for different ways to wear-and-tear and tatter your characters' garments.
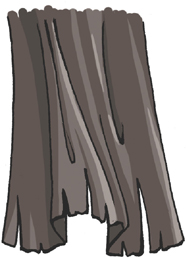
VERTICAL RIPS
Vertical rips in the edges of cloth indicate just a little wear-and-tear. The cloth still flows much the same as it would if it were whole.
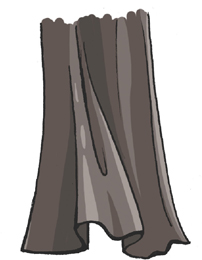
NEW CLOTH
A perfect piece of cloth. How dull!
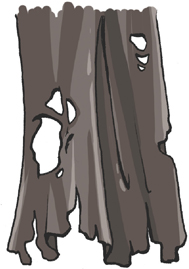
MOTH HOLES
Punch giant holes out of the cloth to make it look moth-eaten. Add more random rips around the edges, too.
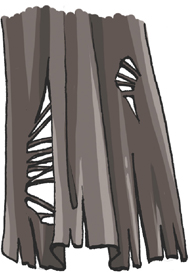
THREADBARE RAGS
Show threadbare rags by giving the holes in your garment lingering threads connecting the pieces together… barely. This is the same phenomenon that happens when you get rips in the knees of your stockings or jeans.
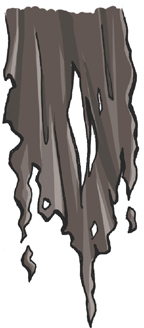
UTTER DECAY
This piece of cloth is so ripped up and tattered, it's lost much of its original shape. This scary looking blob cloth is not particularly realistic… but when you're drawing people with wings and pointy ears, does realism really matter?
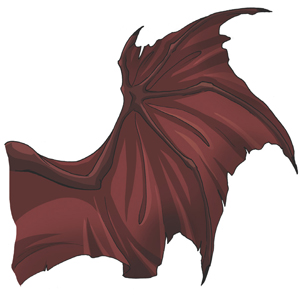
BAT WINGS
Bat wings are used as a basis for most dragon wings, as well as for your garden variety vampires and other demon-types. Bat wings are actually arms and paws with extremely long fingers and skin that grows between them.
›1‹
A folded wing has the same arm-hand setup as an unfolded wing, but the part that is folded overlaps the wing base.
›2‹
Connect each of the joints with an upside down U-shape.
›3‹
Add tatters and holes to make it look scary.
›4‹
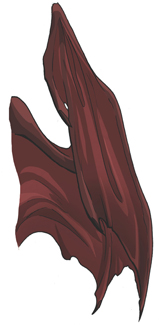
Each wrinkle should have a main highlight where the light hits and dark shadows in the creases.
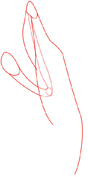
FOLDED WING
Wings are large and can get in the way. When your character is at rest or you just want to take up less room on that sheet of paper, a folded wing is a good option.
›1‹
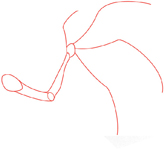
Begin your wing with a simple arm shape. At the end, draw a circular shape to represent the palm, then evenly space out 3 to 5 long fingers.
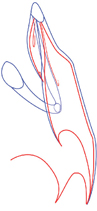
›2‹
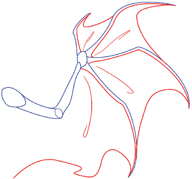
Connect each segment with upside down U-shapes.
›3‹
For a more evil, battle-worn wing, tatters and holes are nice additions.
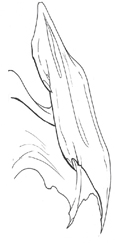
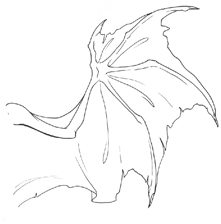
›4‹
There will be more highlights in the main portion of the webbing where the skin is more translucent.
EXTENDED WING
Use an extended wing when your winged character is flying or trying to look impressive.
Vampire
Creatures of the night, vampires are a very common element in modern fantasy and horror. These beings are often the reanimated corpses of the dead that sustain themselves on the blood of the living. Common characteristics would be a pale complexion, a set of impressive fangs, and an aversion towards sunlight.
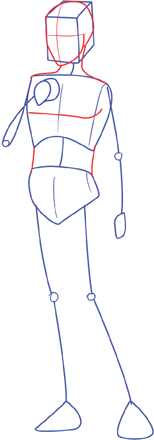
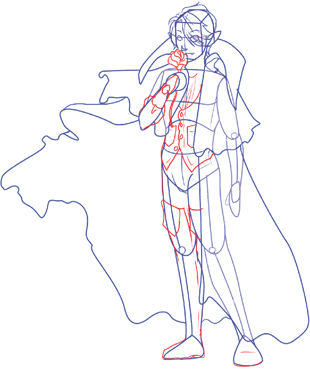
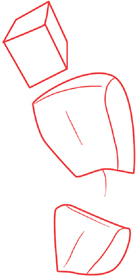
›1‹
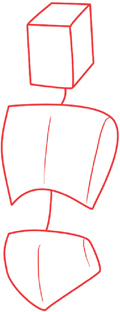
Draw 3-D boxes representing the head, chest and hips.
›2‹
Draw simple lines and circles to represent arms and legs. Plan out the basic positioning.
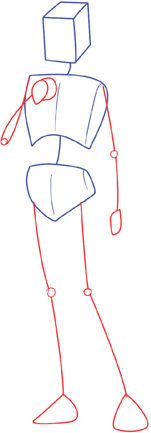
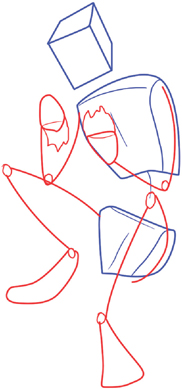
›3‹
Add a jaw line and a rounded skull. Connect the head to the body with a neck that is no wider than the head.
Draw lines connecting the chest to the hips, filling out the body.
›4‹
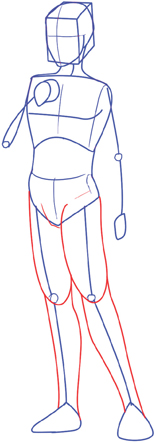
Fill out the legs. The upper leg will be thicker than the lower leg. The lower leg will gently curve, defining the calf.
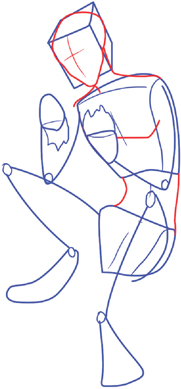
›5‹
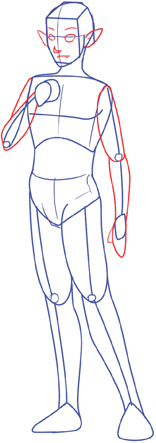
Add volume to the arms the same way you did the legs. The facial proportions are the same as a human's. The key feature of the vampire is the fangs. Ears can be pointed, slightly pointed or completely normal.
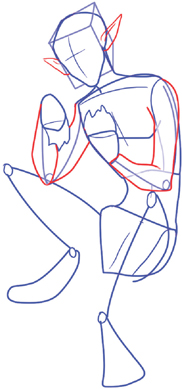
›6‹
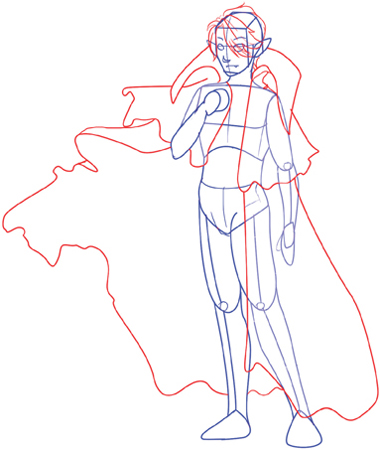
Since vampire fangs are generally small and difficult to see, add other details to make your vampire more vampirey. A big billowy cape is a good start.
›7‹
Whether you dress your vampire in Victorian clothing, a tux or a trench coat is up to you. He or she could be holding anything, from a rose to a sword.
›8‹
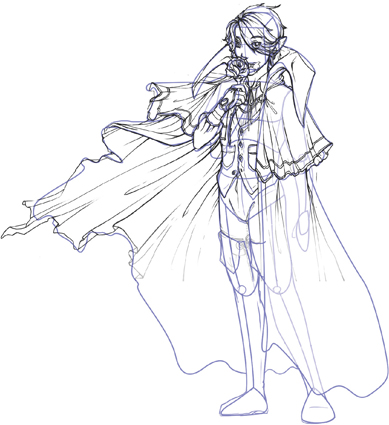
Using the loose linework as a guide, continue adding detail. Individual touches such as hairstyle, buttons, pockets and accessories will show your character's uniqueness and your own creativity!
›9‹
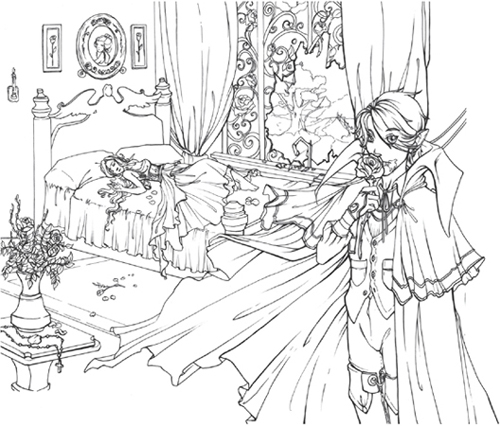
Erase any stray construction lines. You may want to take a moment to consider an appropriate background for your character. Moonlight and graveyards or estates and damsels? It's all up to you!
›10‹
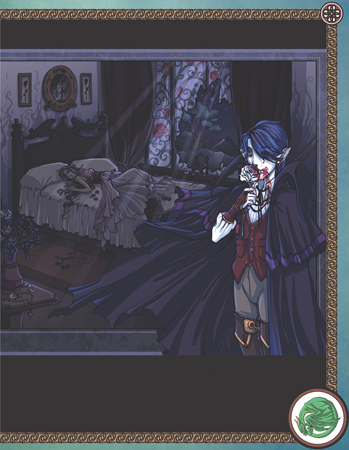
Because vampires are so similar to humans in appearance, you may need to take some steps to drive the point home about what they are, especially if the fangs are not visible. Make sure that the character is very pale. Victorian clothing, and an indication that they've been drinking blood, will further help to define him.
Werewolf
A werewolf is typically a human that is cursed to turn into a wolf or wolfman by the light of the full moon. Monstrous creatures when they transform, they can only be hurt by weapons made of silver. Werewolf characters can be very fun to draw because you get to design a human form and a wolf counterpart.
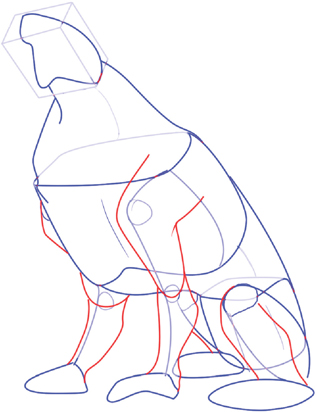
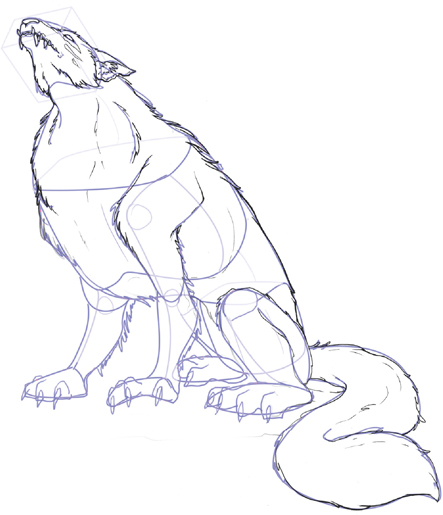
›1‹
Draw 3-D boxes to represent the head, chest and hips. This werewolf is going to be very powerful, so it will have an exaggerated chest.
›2‹
Position the arms and legs with sticks and circles. Elongate the heels like you did for the faun (see page 75).
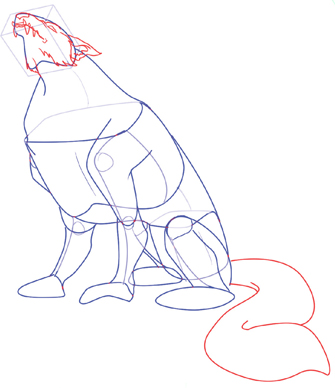
›3‹
Connect the chest to the hips.
Begin a pointed head. Connect the head to the chest with a thick, muscular neck.
›4‹
Give your werewolf's arms and legs some flesh. The folded hind legs have a significant amount of overlap, with the portion below the knee obscuring part of the thigh.
›5‹
Split the face in two with an upper and lower jaw. Draw the eyes, nose, ears and teeth.
Draw in a fluffy, scraggly or whiplike tail.
›6‹
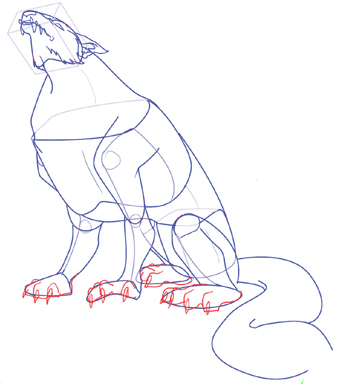
Give each amoeba at the end of your werewolf's legs 4 toes and a set of claws. Much better!
›7‹
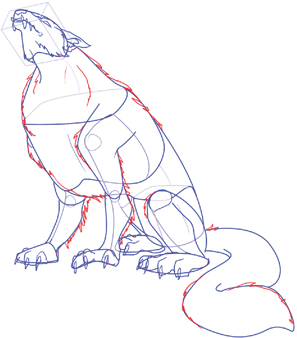
Add more fur, scars and other fine details. When two edges meet, consider which piece of fur would overlap the other.
›8‹
To help illustrate this creature's furriness, go along the contours and make them scraggly.
›9‹
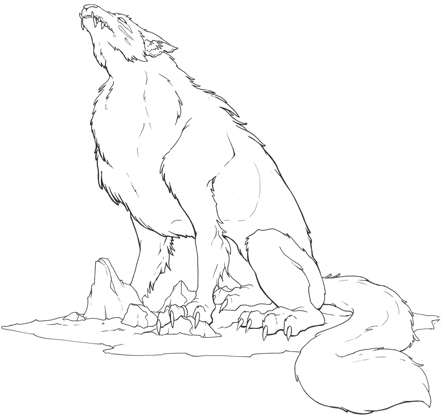
Erase any extra construction lines.
›10‹
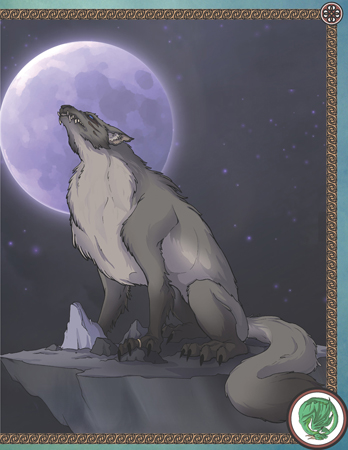
The light of a full moon is a perfect setting for such a creature. Moonlight will often cast the character and landscape in blues and grays and can be a great tool to unify your image.
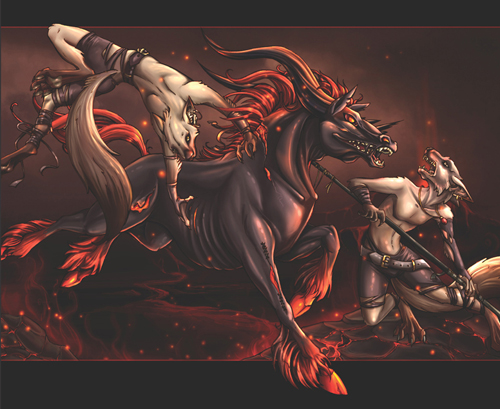
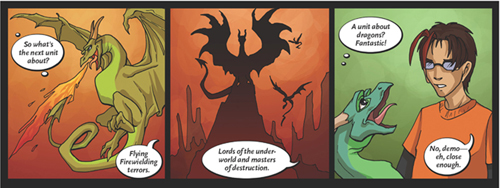
Demon
Demons and fiends often live on another plane and come to the real world to stir up mischief and cause as much trouble as they can. These creatures can have physical attributes from a variety of different animals, so designing a demon can be a lot of fun because there's so much to choose from.
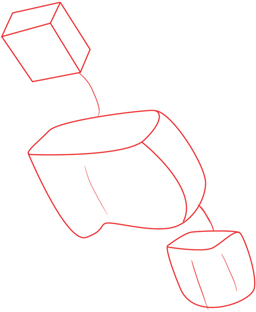
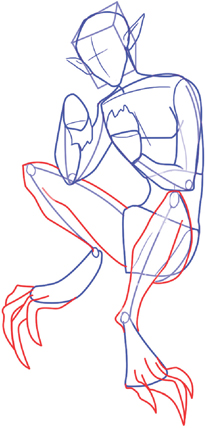
›1‹
In this drawing the demon will be slightly hunched over, so the boxes representing his head, chest and hips form a slight curve.
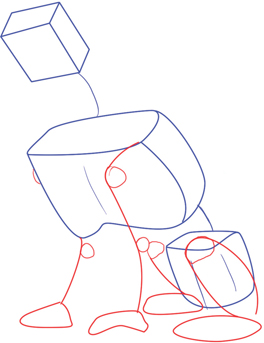
›2‹
Lightly sketch out some simple lines and circles for the arm and leg positions.
If you want your demon to have animal-like feet, add an elongated ankle.
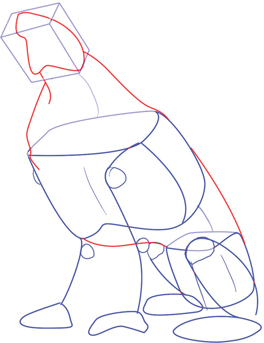
›3‹
Add a lower jaw and round out the back of the skull.
Connect the head to the chest, and the chest to the hips.
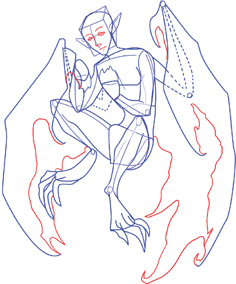
›4‹
Add a set of pointed ears that attach at the place where the end of the jawline and the beginning of the back of the skull meet.
Fill out the arms with dimensional lines, noting overlap where the arms are bent.
›5‹
Give the legs the same treatment. If you want them to be normal legs, simply end with human feet instead of talons.
›6‹

Draw in an extra set of arms with simple elbow joints and the fingers that will be that will be a pair of bat wings (see page 93).
›7‹
Draw little ragged upside down U-shapes of connecting skin between each of the fingers of the wing. Begin the basic facial features.
›8‹
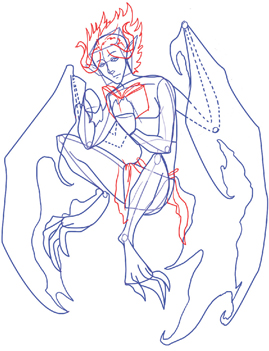
Begin adding details. Whenever your character is holding onto something, make sure that the hand is drawn around it, cupping, grasping or clenching onto it in a believable way. Objects are generally not as flexible as the hand is, so if you're having trouble, draw the object first, and the hand second.
›9‹
Once your basic drawing is down, go back and refine all the details — individual wrinkles in the wings, facial expression, claws, horns, spikes.
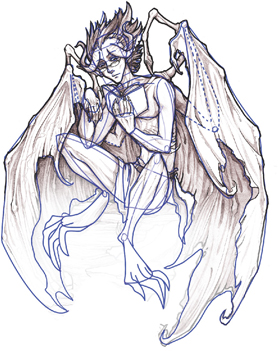
›10‹

Erase any stray construction lines. Add in an appropriate background and companion for your character.
›11‹
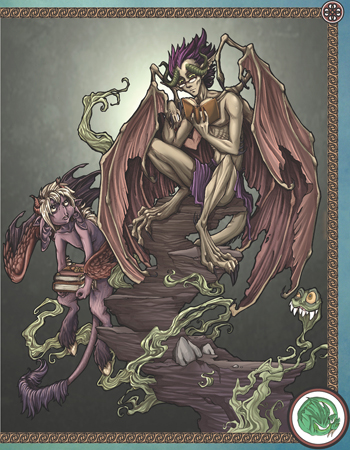
You have a huge number of choices when it comes to coloring your demon. Will he be a brightly colored whimsical thing or a creature of murky earth tones? Consider making the wings of your demon a different color than the body.