
I know it sounds obvious, but because food is stored and prepared in the kitchen, this is the most important room in the house to keep clean. Be vigilant about cleaning surfaces and floors. Any scrap of food, whether you can see it or not, will attract bugs. Be guided by your nose because it’s great at sniffing out any missed scraps—especially those dropped by children. This is the most intensive room for daily and speedcleaning.
If you think your cleaning is slow …
HOW TO FRESHEN MARBLE FROM LEE’S PRICELESS RECIPES, 1817
Mix 1 bullock’s gall with 4 ounces of soap lees and 2 ounces of turpentine. Add sufficient pipe clay to make it into a paste. Apply to the marble and leave for 24 hours and then rub it off. If it’s not clean, repeat until it is. It could take several days.

Clutter bucket—to transport displaced items; bicarb—cleaning agent and absorbent; vinegar—cleaning agent; detergent—cleaning agent; glycerine—stain softener; vanilla essence—fragrance and antiseptic; table salt—to deter cockroaches; spray bottle—to hold either vinegar or water; vacuum cleaner—to vacuum floors; damp cloth—to wipe over surfaces; methylated spirits—to clean glass; lavender oil—fragrance; old T-shirt—to use as cleaning rag; elastic band—to secure old T-shirt to broom head; broom—to clean floors and walls; sponge—to wipe over surfaces; old stockings—to wipe over surfaces and behind taps; old toothbrush—to access tight corners; paper towel—to wipe over surfaces; rags—to use as cleaning cloths; garbage bags—to hold rubbish; storage box—to hold items; dishwashing brush—for washing up.
The best time to clean the kitchen is before doing the weekly shop because there’s less food to work around. Begin the speed-clean by putting anything that doesn’t belong in the kitchen into your clutter bucket. Once you’ve done this, leave the clutter bucket outside the kitchen. Items can be returned to their proper spots later on.
What is the two-sponge technique?
The two-sponge technique is used to clean vertical surfaces. Wring one sponge out in water then dip it in a tray of bicarb. Wring another sponge in vinegar Place the bicarb sponge on the surface to be cleaned, then put the vinegar sponge over the back of it and use your hand to push the two sponges together. This allows the vinegar to mix with the bicarb and create the all-important cleaning fizz.
In Spotless, I recommend cleaning the fridge once a month, but each week, you should remove items from the fridge and wipe over the shelves and crispers using either the two-sponge technique or a sponge wrung out in white vinegar with bicarb added. To rinse clean, wipe with a cloth that’s been wrung out with water.
For the monthly clean of the fridge, have one storage box and one garbage bag with you. Put all the food that’s had it in the garbage bag and the other food in the storage box so that you have easy access to the fridge. It’s much easier to wipe over a clear shelf than crash and move your jars around as you clean! Using the two-sponge technique (see page 111), wipe all the shelves, compartments and sides of the fridge. Leave the door open for 2 minutes so the vinegar can vaporise or it will leave the fridge smelling a bit pickled. Then, if there’s any residue, wipe with a cloth wrung out in water. If you like a fragrance, I suggest using vanilla essence. Vanilla has a strong alcohol base, is an antiseptic and the smell won’t taint food. It also helps absorb odours, which is why I like to keep a two-sided container in the fridge—one side with bicarb in it, the other with vanilla essence in it. Return the items from the storage box to the fridge.
Line the base of the crispers in your fridge with a 5-millimetre thick piece of foam rubber. This stops food getting caught in the ridges and slows the rotting process because air circulates around the food. Your lettuce won’t turn to slime! Foam rubber is available from specialist kitchen stores and department stores. Wash it with detergent and water each time you clean the fridge and dry it on the clothesline.
Many freezers are auto-defrost. Those that aren’t need to be defrosted regularly because excess ice transfers flavours from one food source to another. If your ice-cream has been tasting a bit fishy lately it means there’s too much ice in the freezer! Even auto-defrost freezers have to be cleaned every now and then. Defrost when ice is greater than 5 millimetres thick. To do this, remove everything from the fridge and freezer, throw out anything past its use-by date (as marked when the item was flrst put in the freezer), store other items in an ice-filled esky turn the fridge off and allow the ice to melt. Clean thoroughly before turning the fridge back on and returning the items. To keep ice at bay dip a cloth in a solution ofl tablespoon of white sugar to 1 cup ofjust-warm water, then wipe the cloth around the freezer. Sugar slows down the production of ice.
Never put a bowl of hot water into a freezer. You could crack the coils and the steam produces more ice crystals. Instead, sprinkle some white sugar over the ice and it will melt more quickly. Sugar doesn’t freeze. Never use a hairdryer or heater inside the freezer because it could crack the coils and is very dangerous. Never use a sharp knife or you could pierce the compartment and release the gas which is also dangerous. Instead, remove the ice with a rubber spatula or with gloved hands.
Even if you haven’t used the oven you should clean it. I know this sounds odd, but because it’s a dark space, insects like to get inside. Remove the oven racks and supports. Then clean the oven with bicarb and vinegar using the two-sponge technique (see page 111). Clean the oven glass in the same way. For stubborn stains, scrub with a small nylon dishwashing brush after applying the two sponges, then rinse with water. If you’d like to see how well you’re cleaning the top of the oven without craning your neck, place a small mirror on the bottom of the oven. Clean the racks and supports with bicarb and vinegar using the two-sponge technique. If you have built-up gunk, scrub with a nylon dishwashing brush after applying the two sponges. For stubborn build-up, add bicarb directly to the nylon dishwashing brush and scrub along the rack. If the build-up on the racks is really bad, use a plastic scourer. Never use a scourer inside the oven or you’ll scratch it. Let the racks stand before rinsing in water. Allow racks to dry then replace. Clean the stovetop by sprinkling over bicarb then spraying with vinegar, wipe with a cloth, then rinse with a cloth wrung out in water. Gas jets should be removed and cleaned in water and a little detergent. Make sure all the jets are clear before putting them back. With electric stove tops, remove the elements and rings, then clean with bicarb and vinegar. Make sure you don’t allow the electric ports to get damp.
Clean the outside of the fridge, microwave, dishwasher and appliances with a sponge dampened with a little white vinegar. If you have grimy surfaces, add a little bicarb to the vinegar cloth, but vinegar should be enough to do the job. If there’s staining on plastic surfaces, wipe with glycerine first.
Wipe the front of cupboard doors, the splashback and wipe the tops of canisters. If you have glass in your cupboard doors, clean with methylated spirits and a lint-free cloth. Don’t forget to wipe the range hood and to check the filter, particularly if you’re using it a lot. If it’s looking greasy, wash the filter according to the manufacturer’s instructions.
Check the inside of the microwave. Ideally, you should clean the inside of the microwave as soon as any mess is made, but if you haven’t, do it now. If old food is caked on, mix ½ cup white vinegar, 1 cup of water and 1 tablespoon of bicarb in a large microwave-safe bowl. Put the bowl in the microwave without a lid and cook on high. The amount of time you leave it cooking will depend on the strength of your microwave. Allow the mixture to boil, but not boil over, for around 1 minute. While it’s warm and steamy, wipe the interior with a cloth.

DID YOU KNOW? To remove rust marks on plastic, use a paste of glycerine and talcum powder and polish it off.
When cooking on a gas stovetop, save energy by having the flame only touch the bottom of the pot, not curling around it. Those flames curling around the pot are simply warming the kitchen, not the pot.
Clean inside the dishwasher once a week with bicarb and vinegar using the two-sponge technique (see page 111). To stop the plumbing from becoming corroded, run the dishwasher empty once a week with bicarb in the soap compartment and white vinegar in the finish compartment. If the dishwasher is really stinky, wipe the rubbers and interiors with vanilla essence. This removes the smell and acts as an antibacterial—if the rubbers become perished, they harbour bacteria. To help prevent perishing, rub the surfaces with dry table salt and then vanilla essence. Remove and clean the filter at the bottom of the dishwasher.
If you have cockroaches, make sure they don’t get inside the front of the dishwasher and into the liquid crystal display because it can short the dishwasher. To stop them getting in, wipe around the seals of the dishwasher with a cloth wrung out in table salt and water. Keep the kitchen free of crumbs and other cockroach food supplies. Alternatively, you can spray the surrounds, but not the interior, of the dishwasher with insecticide.
How to stack and unstack the dishwasher speedily
Always rinse off any food before putting items in the dishwasher. To speed your stacking, put like items, such as plates, together. Put matching cutlery in the same compartment, so all knives, for example, sit together. It makes unstacking quicker. Heat-sensitive items, such as plastics, should sit at the top, saucepans should sit at an angle towards the bottom centre of the dishwasher—and don’t over pack because china and glass can break if they bang together. If tightly packed it doesn’t clean properly. Never put electrical parts in. Always use a good-quality soap and rinse agent. Never put fine china, good silver, crystal, items with gold edging or silver-plated, brass and gold-plated cutlery in the dishwasher.
After you’ve stacked the dishwasher, check that the propeller in the middle of the machine can spin freely so that water spreads throughout the interior. Also check that the spray jets are clear and avoid the embarrassment that a friend of mine had when she received a lecture from a repairman for allowing her jets to clog. Have the top shelf raised or lowered to suit the size of your plates. This will make using it speedier.
HINTS FOR BLOKES: If you’re going to wash the rocker cover from the car in the dishwasher, make sure you wash inside the dishwasher immediately after you’ve finished. Run it empty with bicarb in the detergent compartment and vinegar in the rinse compartment or there will be grease on the next load of dishes. Your missus won’t be happy and your dinner will taste funny.
DID YOU KNOW? To remove egg stains from a pan, place half an egg shell with a strip of aluminium foil and 1 cup of vinegar into the stained pan. Leave for half an hour and wipe off with a nylon dishwashing brush or sponge.
If there’s a smell in the sink drain, put ½ cup of bicarb down the drain, followed immediately by ½ cup of vinegar. Leave for half an hour. If it’s still smelly do it again. If you have copper or brass pipes, it will smell worse for about half an hour before it gets better. Once rinsed through with water, however, the smell will dissipate.
Quickly wipe inside cupboards every couple of weeks. Clean surfaces with a cloth that’s been wrung out in a little detergent and water.

Wipe along the pantry shelves, but don’t worry about extensive cleaning until the spring clean. The easiest way to clean inside your kitchen drawers is to vacuum them every couple of weeks, then wipe with a cloth wrung out in water. If you haven’t cleaned them in a while, use bicarb and vinegar, then wipe with a cloth which has been soaked in hot water. If you have unsealed wooden kitchen drawers, clean with a cloth that’s been tightly wrung out in hot water then dry the area before returning the utensils. These drawers should be sealed with contact or a liner of some form because raw timber attracts insects and isn’t hygienic for cutlery.
DID YOU KNOW? To ripen any soft fruits, just put them in a brown paper bag with a banana and place in a cupboard. Bananas give off ripening chemicals called ethylene. Never keep bananas in the fridge or they’ll go black.
If you have toddlers, protect the contents of cupboards by fixing an elastic band over the handles so they can’t open the doors.
If you have chairs or stools in the kitchen, wipe them with a cloth that’s been wrung out in water because they are great dust collectors. And don’t forget to clean the legs as well.
No matter how busy or tired you are, you must wipe tables and benchtops before going to bed. This is not an optional extra. If you don’t, your food preparation zone will become a feast’s paradise for nasties such as cockroaches. If you’re wavering, just picture yourself coming to the kitchen in the middle of the night to see something scary scurrying across the benchtop. It’s the last thing you need.
If timber is unsealed, clean with detergent and water and allow to dry. Wipe it with a good-quality furniture oil. For surfaces which come into contact with food, use a small quantity of warm olive oil. Some olive oils contain vegetable sediment which can attract fruit fly so make sure you spread it thinly and wipe off all the excess. Use olive oil only on timber surfaces in the kitchen. Olive oil is safe to use around food but because it attracts fruit fly, it’s not good to use outside the kitchen. Bicarb and vinegar will remove any stains, but remember to reapply the olive oil. If you prefer, keep the timber moist and splinter-free by rubbing it with the peel of a lemon.
For sealed timber, sprinkle some bicarb, then spray vinegar over the top and wipe with a cloth. Be very careful with polyurethane surfaces because if you scratch them, you’ll have to reseal them. If you do scratch the surface of polyurethane, wipe it with Brasso in the direction of the grain. The mark will become worse before it gets better. Brasso works because it partially melts the polyurethane. If the scratch has penetrated through to the timber, you’ll have to reseal the area which is a big job. If this is the case, seek the advice of a professional.
The best way to keep laminate clean is to sprinkle over bicarb then spray with white vinegar and wipe with a sponge. If you get heavy staining with tea or scorch marks, put glycerine on the stain for about 5 minutes, then use bicarb soda and vinegar.
Clean by sprinkling bicarb then spraying white vinegar and wiping with a sponge. Use detergent and water for a polyurethane finish.
Special care should be taken with marble because the surface is porous. Clean with bicarb and 1 part white vinegar to 5 parts water. Never put full-strength vinegar on marble because it could react with the lime and eat into the marble. Always rinse thoroughly afterwards with a cloth that’s been wrung out in water. If the surface isn’t sealed with polyurethane or another sealant, use a good-quality liquid wax for marble flooring to make it less porous and less likely to absorb stains. The way to tell if marble is covered in polyurethane is to put your eye level with the marble surface and shine a light along the top. If the light shines in one uninterrupted beam, it’s sealed with polyurethane. If the beam of light has lines and dots, it’s unsealed.
Clean with bicarb and white vinegar. If it has a polyurethane finish, keep the surface clean because heat, abrasives, moisture and chemicals can cause it to bubble.
The best way to clean stainless steel is with bicarb and vinegar, and then rinse off.
HINTS FOR KIDS: Children love things that fizz. Have them help you clean the benchtops by sprinkling over some bicarb, then adding vinegar They’ll love the reaction the two make when they come into contact—the fizzing also tickles their fingers!
Make sure you wipe the whole bench surface and don’t forget the area underneath the toaster and kettle. These appliances may hide crumbs to your eyes, but cockroaches will sniff them out a street away.
DID YOU KNOW? To remove plastic bread wrapping that has melted onto the toaster, turn the toaster off, allow it to cool and clean with bicarb and vinegar applied with an old rolled-up stocking. If it’s a large burn, use coarse rock salt applied with a damp toothbrush.
If you spill hot fat on a benchtop, mop it up with a paper towel quickly. Hot fat can burn straight through laminate and can also dissolve glues, so speed is important. After clearing as much fat as possible, wipe the area with bicarb and white vinegar on a sponge.

Organise takeaway menus in a folder which has several transparent plastic sheets. Put one menu in each plastic sheet.
If you keep recipe books in the kitchen, wipe them each week and spray them with insecticide spray as they attract insects.
Sweep or vacuum the floors in preparation for mopping. I like to mop floors with a dampened old T-shirt wrapped around a broom head and secured by elastic bands—brooms are much better than mops at getting into corners. The temperature of your mopping water will vary according to the surface. Use cold water on cork, timber, old lino or any absorbent surface. Other surfaces can withstand hot water, which helps break down fats. Add 1 cup of vinegar to the water to make the surface non-slip.
Walls, skirting boards, cornices and the ceiling should be dusted regularly. If they’re very dirty, dampen an old T-shirt in white vinegar and water, then wrap the T-shirt around a broom head, fix it with elastic bands and wipe it over the walls. Pay particular attention to the area above the stove.
Clean the taps on sinks, including the base, with an old stocking or toothbrush. Use the stocking in a see-saw action around the taps. Clean the sink and buff it. Gumption on a sponge is good for this.

Clean kitchen windows with methylated spirits and a lint-free cloth. If the windows are steamed up a lot, wipe them with white vinegar and a lint-free cloth first. Dust the doors with an old T-shirt, paying particular attention to the area near the door handle where hand marks often land!
The best way to speedclean is to deal with spills and stains Immediately. If you don’t, the stains set and are harder to remove.
There are many ways to make your kitchen more efficient and manageable. You may be familiar with the idea of organising the kitchen in a triangle with the sink, fridge and oven forming each corner of the triangle. The chopping board should be located between the sink and the oven. Utensils should be kept between the chopping board and the oven.
Have a tea towel under your chopping board to collect crumbs. Shake the contents straight into the bin.
The direction you wash up, either left to right or right to left, will determine where plates and cutlery go. The aim is to have the smallest distance between the washing up rack and the cupboard shelves. The pantry should be as far away from the sink and stove as possible because of heat and damp. It’s best located near the fridge so you can gather items from this area in one go. I don’t recommend keeping utensils in a canister on the benchtop because bugs can get in. Either hang utensils from a rack or store them in a drawer. Keep cling wrap and aluminium foil between the oven and the fridge.
Never operate an electric jug underneath a cupboard because it will steam the bottom of the cupboard.
HINTS FOR BLOKES: Most men like to clean from one side of the kitchen to another, rather than doing one chore at a time. If this is the case for you, start cleaning from the sink and work around. When you’re washing pots and pans, remember to wash the greasiest ones last so you don’t transfer all that grease to the rest of the washing up.
Determine the airflow in the kitchen and the likely movement of grease and dust by turning on all your appliances, such as the oven, range hood and dishwasher. Open the window as well, then light a candle and move around the kitchen making a note of how the flame bends in various spots. You’ll be able to map how air moves in the kitchen and where grease and dirt are likely to land. Work out where the congestion spots are and put some extra effort into cleaning these areas. Don’t forget that heat from the dishwasher, oven, kettle and sink will rise.

If you boil new wooden utensils for 10 minutes in a saucepan with enough cider vinegar to cover them, it seals the wood and protects against smells and splintering. This is particularly good for wooden spoons used for making curries. To remove a curry stain, soak the wooden spoon in glycerine for a couple of days, then wash.
Sweeten the smell of a room where curry has been cooked, by slicing a lemon, placing it on a saucer and pressing down on the lemon to release its juices. It gives the room a fresh rather than a stale smell.
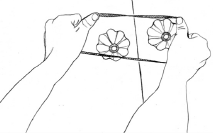
If you drop an egg on the floor, don’t use a sponge to clean it up or you’ll spread the mess. If you have a pair of squeegees (see page 14), push them together and lift the egg into a bowl. If you don’t have squeegees, get two pieces of thick cardboard, place them either side of the egg spill, and move them towards each other, collecting the egg as you go. Place the egg in a bowl then throw in out in the bin. When most of the egg has been removed, use a paper towel dampened with detergent to eradicate all traces of the mess. Always use cold water as cooked egg is harder to remove.
Detergent acts as an emulsifier for fats and oils, which means it allows grease to mix with water and helps lift it off surfaces. Oils and fats are what make most types of dirt stick to other objects. When you break them down, you make it easier to clean off the dirt. Detergents are not antibacterial, though many people assume they are. The other mistake people make is using too much detergent when washing up—more is not better. If you use too much, you’ll have to rinse items after washing up because it will leave a soap residue—and bacteria can thrive in soap residue! You simply need to balance the amount of detergent with the amount of grease you’re cleaning. With a good-quality liquid, 1 teaspoon of detergent per sink of hot water should be plenty. You can tell by the amount of bubbles in the water. You need only 2 centimetres of foam on the top of the water for a standard sink of dishes. When the bubbles disappear, it’s time for some fresh water and detergent. Once all the washing up has been done and the dish rack is stacked, tip a jug of warm water over the clean dishes to rinse away any detergent. Allow the water to drain, leaving the dishes clean and shiny. Then, if you must, dry them with a clean tea towel.
DAILY: After washing up, clean your rubber gloves by taking them off, turning them inside out and putting them back on your hands inside out. Wash your gloved hands with soap, remove the gloves and stand them on the edge of the sink to dry inside out. You could also hang them over two wooden spoons formed in an X-shape.

If the kitchen sink has overflowed, turn off the water, mop the benchtops with a sponge or mountains of paper towel, wipe the tops and fronts of cupboard doors and wipe the shelves, then mop the floor. Because moisture encourages cockroaches and mould, leave the cupboard doors open for at least 24 hours. If it’s still damp, leave the doors open until the interior is completely dry. To speed the cleaning, stand a heater in front of the cupboards but monitor it closely. When dry wipe any surfaces again with a damp cloth impregnated with a couple of drops of oil of cloves to inhibit mould growth. Mould spores grow very easily.
I suggest changing tea towels every two days but, if you use the tea towel for anything other than drying, such as an oven mitt or for catching crumbs and wiping hands, be on the safe side and put it in the wash. After using them, hang tea towels out to dry or bacteria will breed in them. To clean tea towels, wash them in the washing machine or, if they’re really soiled, first soak them in Napisan before putting them through the washing machine.
If you’re making cakes, speed your cleaning by standing the mixing bowl on a dampened tea towel. The tea towel collects any dropped ingredients, such as flour. Its contents can then be shaken into the bin.
There is an increasing range of kitchen cloths or sponges available these days. While the newer ones are much better at picking up dirt, they’re also more likely to hold bacteria because of the greater surface area. Those hairy bits simply offer more spots for bacteria to live in. My preference is to recycle rags from the rag bag. There’s no need to buy expensive cleaning cloths when an old T-shirt does the job really well. Either rip up the old T-shirt or cut it with scissors to the size you need. An important rule with kitchen cloths is not to contaminate your food preparation area. I suggest using different coloured sponges or cloths according to where they’re used. I use green sponges for the benchtops and pink sponges for the floor. I use yellow and blue sponges or cloths in the bathroom. Place sponges in a small bowl of vinegar, leave overnight then rinse in hot water.
Replace the nylon dishwashing brush when the bristles are bent out of shape, but don’t throw away the worn ones. Keep them for other uses, such as to clean outside under ledges and around pot plants in the garden and for scrubbing spot stains on the kitchen floor.
Should you store glasses facing up or down?
This is a guaranteed conversation starter and a bit like the debate over which way the toilet paper should hang. This is what I do and why I do it. Glasses stored on shelves above eye level should face upwards to remind you to rinse them out before using them. This is because you can’t see if the shelves are dusty. Glasses stored on shelves below eye level should face downwards. This is because you can see if the cupboard shelf is dirty and if the glass needs to be rinsed before using it.
DID YOU KNOW? If you drop a glass on the ground, make sure you’ve collected all the shards by lying a lit torch on the floor so the beam goes across the floor Any remaining shards will sparkle in the light. Make sure you wear shoes when clearing glass.
In terms of where plates and dishes should be stored, I apply the principle that anything you eat off should be stored above waist height because of bugs. Anything kept below waist level should be washed before being used. Make sure pots and pans are completely dry before putting them away to prevent mould and corrosion.
Don’t store china and metal on top of one another because the metal will leave a ‘tile mark’, which is like a pencil mark. To remove, use a soft pencil eraser.
I don’t know why, but everyone has the ‘third-drawer syndrome’. This is the drawer that holds all the miscellaneous items, such as spare batteries, sticky tape, string and light bulbs. It’s the drawer that tends to be a mess and takes ages to find anything in. Only kitchen paraphernalia, such as twine, thermometers and skewers should be kept in this drawer and in designated spots. You’re not allowed just to open the drawer, throw in the item and apply the ‘out of mind, out of sight’ approach. Other items, especially batteries, should be kept elsewhere, such as the office, because moisture in the kitchen can damage them.
Q: INCIDENT: “We call our 8-year-old son, ‘Mr Disaster’”, confides Ken. “Recently, he decided to clean our laminex benchtop with a scourer and has managed to take all the gloss off. The colour is fine, it’s just affected the sheen which is now a bit hazy.”
SOLUTION: There’s a spray called ceramicoat. It’s very fast drying so do a test patch first so you become familiar with how it works. Prepare the surface first by sprinkling some bicarb over the area, then sprinkle some vinegar and rub with a nylon brush. Then rinse with a cloth that’s been wrung out in water. Make sure the surface is completely dry, then apply the ceramicoat in thin, even layers. ceramicoat is available at ceramics shops.
Store kitchen twine in a plastic zip-lock bag and create a small hole in the plastic to thread the twine through. It means the twine is protected and hygienic enough to use on roasts and other cooking.
You will be speedier in the kitchen if your pantry is well organised. Keep like items together, such as tins, so you don’t waste time searching for them. Keep grain foods separately because bugs are attracted to them. As soon as you open any packet, the contents should go into a container rather than being left out to attract moths, cockroaches, weevils and other nasties. If you do get moths, use bay leaves or bay oil. Two bay leaves per shelf should do the job. Add a couple of drops of bay oil to a cloth and wipe over the shelves. If you have a serious bug problem, wipe the shelves once a month. If you don’t have a serious bug problem, wipe the shelves once every three months. Oil of pennyroyal is another option but not if anyone in the house is pregnant. If you don’t have containers or room for containers, fold over the top of a packet three times, then seal it with a bulldog clip or peg. Reorganise the pantry during the spring and autumn cleans.
Another way to save cleaning time in the kitchen is to put old newspaper on the areas on the tops of cupboards. Many kitchen cupboards now go right up to the ceiling which removes this task, but if you have exposed cupboards, you’ll be amazed at how much dust and grease gathers here. The reason it’s an issue is that dust and grease travel around the kitchen. Replace the newspaper each month. It’s much easier doing this than scrubbing later on. If you have layers of dust and grease, I’ve developed a really strong cleaner but it is very reactive and could eat into some finishes, such as gloss paints, wallpaper, printed pattern contact and unsealed timber, so don’t use it on areas that can be seen.
Shannon’s Toxic Cleaner
In a jar, mix ½ cup of grated soap, 2 tablespoons of methylated spirits, ½ cup of vinegar and 2 tablespoons of bicarb. Seal the jar and shake it until all the ingredients are dissolved. Apply with a cloth. This can also be used on the top of enamel or copper range hoods, on top of the fridge and in the garage to clean grease from tools. It’s not really toxic, but can eat through certain surfaces.
If you’ve got some greasy build-up on your cupboards, you can soften it with steam from the kettle.
The cockroach is high on most people’s list of most-hated pests. And they are really difficult to get rid of. Here are a couple of strategies. The first is a chemical option using a proprietary cockroach spray. Several are available and I recommend one with an egg-killing function. Make sure you follow the instructions on the insecticide can carefully and avoid spraying directly onto food preparation areas. Every night, just before going to bed, spray around the skirting boards of the kitchen. Also spray around the fridge, which generally provides a warm home for cockroaches. This will reduce the cockroach supply. You’ll need to be more vigilant in the summer months, but continue spraying in winter. Cockroaches are still around but don’t breed as quickly. The non-chemical option uses salt. I use swimming pool salt because it’s much cheaper, but table salt works just as well. Using a salt shaker, scatter salt along the edge of the skirting board in the kitchen, including under the fridge. Salt is absorbed through the underside carapace of the cockroach which dehydrates and kills them. One reason they’re so hard to kill is that before they die, they drop their egg case, which, in German cockroaches, contains about 40 eggs that hatch in 28–30 days. If the egg case falls on the salt, the nymphs which hatch out dehydrate and die. It is also a good idea to rinse around drains with a salt solution and use flyscreen netting underneath floor wastes and drain holes. Cockroaches don’t like salt and the netting stops larger ones from getting inside. The netting keeps spiders out as well. Cockroaches love moist, fatty, meaty, sweet, dark environments with lots of organic material. They stay away from light, dry and salty environments.
Be careful with cockroach bombs. A friend of mine was going overseas for a couple of weeks and let off a cockroach bomb. She forgot about Snowy the goldfish! When her friend came to feed him, he was floating on the surface, his water polluted by the chemicals from the cockroach bomb. They are toxic, so use them with care.
I once had a house with a serious cockroach problem, so I removed all the doors on the kitchen cupboards to let in as much light as possible. Bugs prefer dark to light, so this helped keep them at bay and allowed me to keep an eye on them.
If you’re moving house, spray cockroach spray over all the cardboard boxes before you pack, and leave them to dry. You won’t transfer your cockroach problem to your next house.
Dried snake poo placed in the corners of rooms (out of reach of little fingers) can be used to keep mice at bay. Get some from a reptile park or try your local pet shop. Access points can be blocked with a wad of steel wool. You could also use a mousetrap, but rather than cheese, use a fresh pumpkin seed as bait. Mice love pumpkin seeds.
There are two types of ant that come into homes. One type is attracted to proteins and fats. To deal with them, mix powdered borax with finely grated parmesan cheese and scatter it on one point along the ant trail. The ants carry the borax back to the nest and die. The other type of ant is attracted to sugars. Deter them by mixing ¼ teaspoon of cornflour, ¼ teaspoon of icing sugar and ½ teaspoon of borax. The cornflour makes the icing sugar stick to the ants and they take the borax back to the nest. Scatter it on one point along the ant trail as well. Be very careful using borax if you have children and animals. If you can only see part of the ant trail and need to find the rest of it so you can locate the nest, put some talcum powder on the trail and the ants will carry it and mark the rest of the trail. If you can’t use borax, find the ant nest and pour boiling water into it.
Wipe lavender oil on doorframes and window frames. You could also put 1 teaspoon of lavender oil on a small piece of sponge, add 2 tablespoons of hot water and leave this in a saucer. Top up the solution each week. Or try filling a spray bottle with lavender oil and spray trouble spots regularly.
Keep lavender oil in a spray pack of water and spray when needed.
If you think your cleaning is slow …
FLY POISON FROM LEE’S PRICELESS RECIPES, 1817
With ½ ounce of sugar and ½ ounce of finely ground black pepper, mix with a small amount of water to create a thin paste. Place it on a piece of paper where flies congregate. They eat it and die!
MOSQUITO DETERRENT
Mix 3 ounces of sweet oil and 1 ounce of carbolic acid. Thoroughly apply on hands, face and all exposed parts, avoiding the eyes. Do this once every half hour for the first 2–3 days until the skin is filled with it.
[This obviously assumes you don’t wash often!]
Throw out any fruit that’s beginning to rot because it attracts mould and bugs and will create more cleaning.